- Android user interface testing with Espresso — Tutorial
- 1. The Espresso test framework
- 2. Making Espresso available
- 2.1. Installation
- 2.2. Configuration of the Gradle build file for Espresso
- 2.3. Device settings
- 3. Exercise: A first Espresso test
- 3.1. Create project under test
- 3.2. Adjust the app build.gradle
- 3.3. Create your Espresso test
- 3.4. Run your test
- 4. More on writing Espresso unit tests
- 4.1. Location of Espresso tests and required static imports
- 4.2. Using ViewMatcher
- 4.3. Performing Actions
- 4.4. Verifying test results
- 4.5. Access to the instrumentation API
- 4.6. Configuring the start intent for the activity
- 4.7. Adapter views
- 4.8. Espresso testing with permissions
- 4.9. Espresso UI recorder
- 4.10. Configuring the activity under test
- 4.11. Running Espresso tests
- 4.11.1. Using Android Studio
- 4.11.2. Using Gradle
- 4.12. Checking for a toast
- 5. Mocking intents with Espresso Intents
- 6. Using Espresso to test asynchronous code
- 7. Exercise: Creating a custom Espresso matcher
- 8. Exercise: Write a test for an intent with Espresso
- 8.1. Create project which is tested
- 8.2. Write tests
- 8.3. Validate
- Working with Actionbar in Android
- Objective
- Step 1 Add ActionBar in Android
- 1.1 Create XML file actionmenu.xml
- 1.2 Add Items In Menu
- 1.3 Add Item Events
- Step 2 Manage Back Navigation.
- 2.1 onOptionsItemSelected() Method
- 2.2 Create locationfound.xml file
- 2.3 Enable Navigation
- 2.4 Add LocationFound activity in AndroidManifest.xml file
- Step 3 Add ActionView with Search Functionality
- 3.1 actionmenu.xml
- 3.2 search.xml
- 3.3 onCreateOptionMenu() Method
- 3.4 searchresult.xml
- 3.5 SearchResult.java
- Step 4 Adding spinner navigation
- 4.1 onCreate() method from MainActivity.java
- 4.2 override onNavigationItemSelected() method
- 4.3 MyFragment class
- 4.4 action_main.xml file
- Shraddha Gadesha
Android user interface testing with Espresso — Tutorial
This tutorial describes how to developer user interface tests for Android applications with the Espresso testing framework. This tutorial assumes that you are familiar with Android programming in general.
1. The Espresso test framework
Espresso is a testing framework for Android to make it easy to write reliable user interface tests.
Google released the Espresso framework in Oct. 2013. Since its 2.0 release Espresso is part of the Android Support Repository.
Espresso automatically synchronizes your test actions with the user interface of your application. The framework also ensures that your activity is started before the tests run. It also let the test wait until all observed background activities have finished.
It is intended to test a single application but can also be used to test across applications. If used for testing outside your application, you can only perform black box testing, as you cannot access the classes outside of your application.
Espresso has basically three components:
ViewMatchers — allows to find view in the current view hierarchy
ViewActions — allows to perform actions on the views
ViewAssertions — allows to assert state of a view
The case construct for Espresso tests is the following:
| — Finds the view |
| — Performs an action on the view |
| — Validates a assertioin |
The following code demonstrates the usage of the Espresso test framework.
If Espresso does not find a view via the ViewMatcher , it includes the whole view hierarchy into the error message. That is useful for analyzing the problem.
2. Making Espresso available
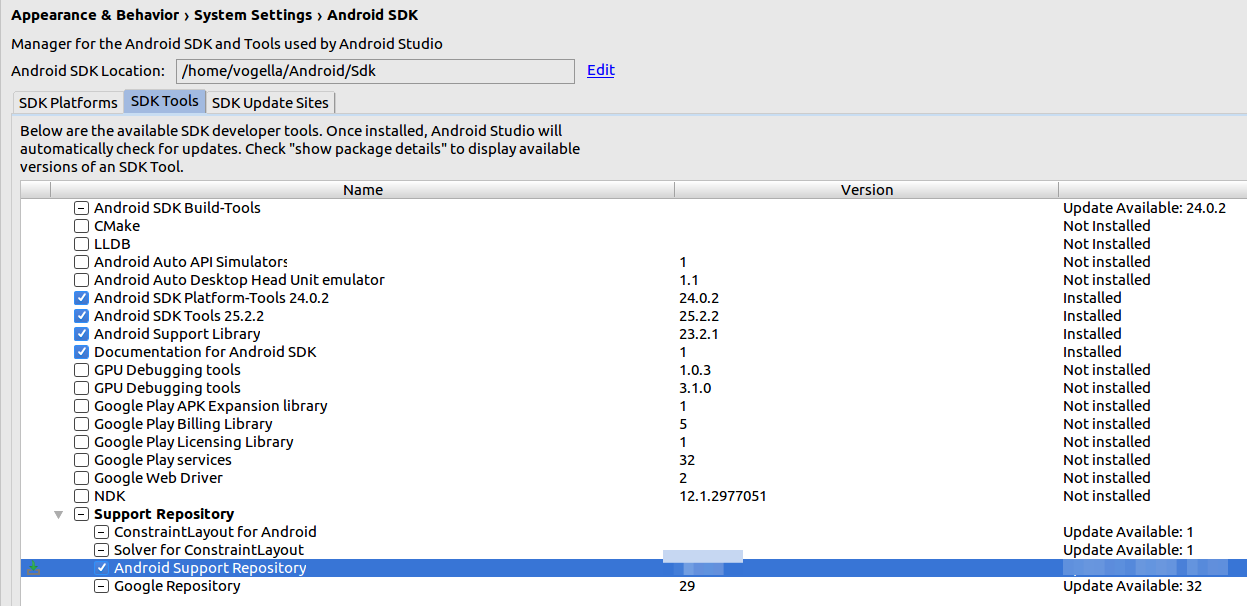
2.1. Installation
Use the Android SDK manager to install the Android Support Repository.
2.2. Configuration of the Gradle build file for Espresso
To use Espresso for your tests, add the following dependency to the Gradle build file of your app.
Ensure that the android.support.test.runner.AndroidJUnitRunner is specified as value for the testInstrumentationRunner parameter in the build file of your app. Via the packagingOptions you may have to exclude LICENSE.txt , depending on the libraries you are using. The following listing is an example for that.
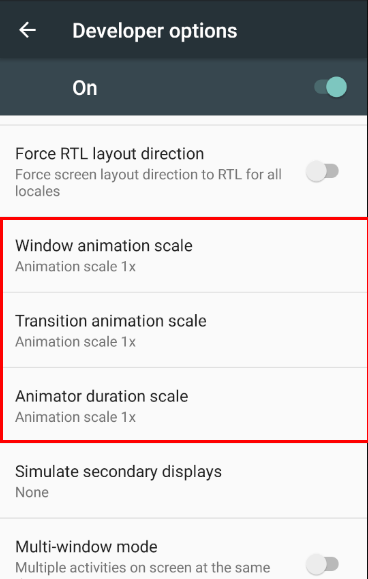
2.3. Device settings
It is recommended to turn of the animation on the Android device which is used for testing. Animations might confusing Espressos check for ideling resources.
3. Exercise: A first Espresso test
3.1. Create project under test
Create a new Android project called Espresso First with the package name com.vogella.android.espressofirst. Use the Blank Template as basis for this project.
Change the generated activity_main.xml layout file to the following.
Create a new file called activity_second.xml.
Create a new activity with the following code.
Also adjust your MainActivity class.
3.2. Adjust the app build.gradle
Perform the setting of the configuration of the Gradle build file for Espresso.
3.3. Create your Espresso test
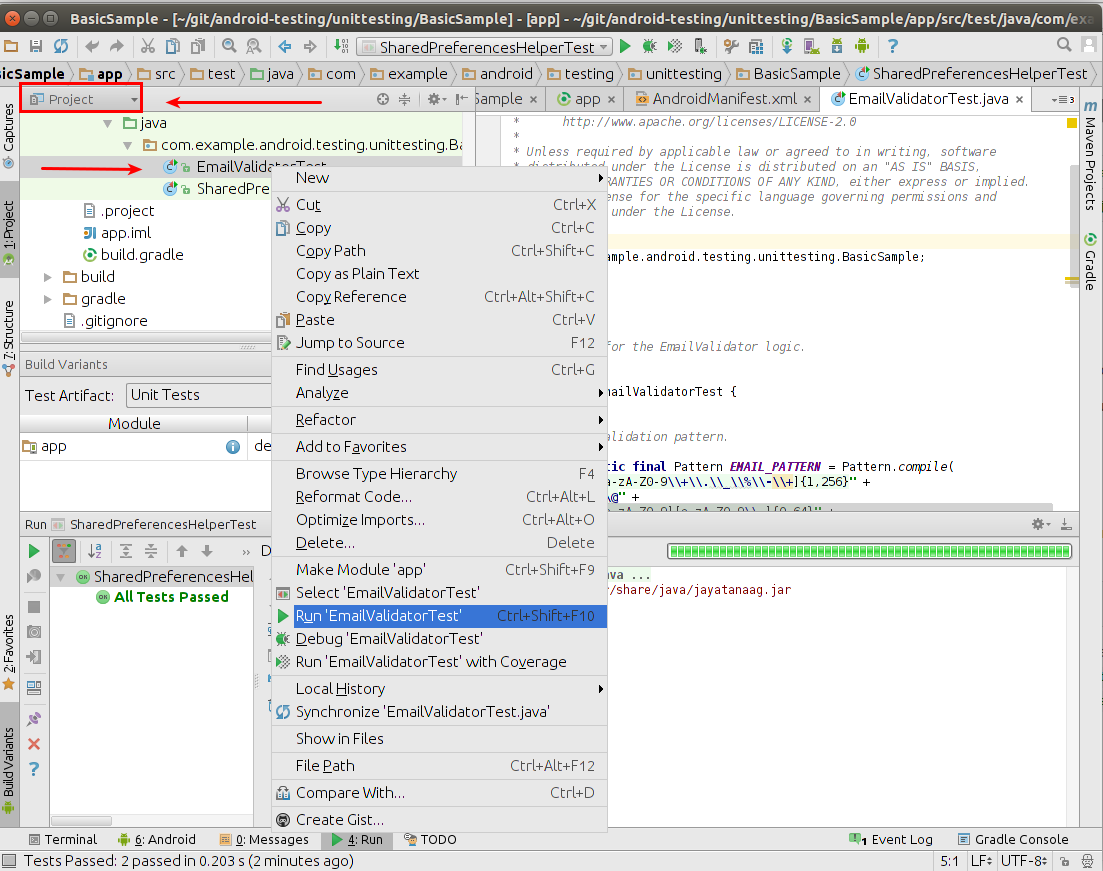
3.4. Run your test
Right-click on your test and select Run.
4. More on writing Espresso unit tests
4.1. Location of Espresso tests and required static imports
Espresso tests must be placed in the app/src/androidTest folder.
To simplify the usage of the Espresso API it is recommended to add the following static imports. This allows to access these methods without the class prefix.
4.2. Using ViewMatcher
To find a view, use the onView() method with a view matcher which selects the correct view. If you are using an AdapterView use the onData() method instead of the onView() method. The The onView() methods return an object of type ViewInteraction . The onData() method returns an object of type DataInteraction .
The following table describes the available matchers.
| ViewMatcher | Description | |||||
|---|---|---|---|---|---|---|
| Matches a view which text starts with «ABC» pattern |
| Matches a view which text ends with «YYZZ» pattern |
| Matches that the text of the view with specified R.id has content description which contains «YYZZ» string anywhere |
| Matches a view which text is equal to the specified string, ignoring case: |
| Matches a view which text is equal to the specified text when whitespace differences are (mostly) ignored |
| Matches that text of a particular view with specified R.id does not contain «YYZZ» string |
4.5. Access to the instrumentation API
Via the InstrumentationRegistry.getTargetContext() you have access to the target context of your application. For example, if you want to use the id without using R.id you can use the following helper method to determine it.
4.6. Configuring the start intent for the activity
If you specify false as third parameter in the ActivityTestRule , you can configure the intent for starting the activity. This is as demonstrated in the following code example.
4.7. Adapter views
AdapterView is a special type of widget that loads its data dynamically from an adapter. Only a subset of the data has real views in the current view hierarchy. A onView() search would not find views for them. onData can be used to interactive with adapter views, like ListView . The following gives a few examples.
4.8. Espresso testing with permissions
Via instrumentation you can grand your tests the permission to execute.
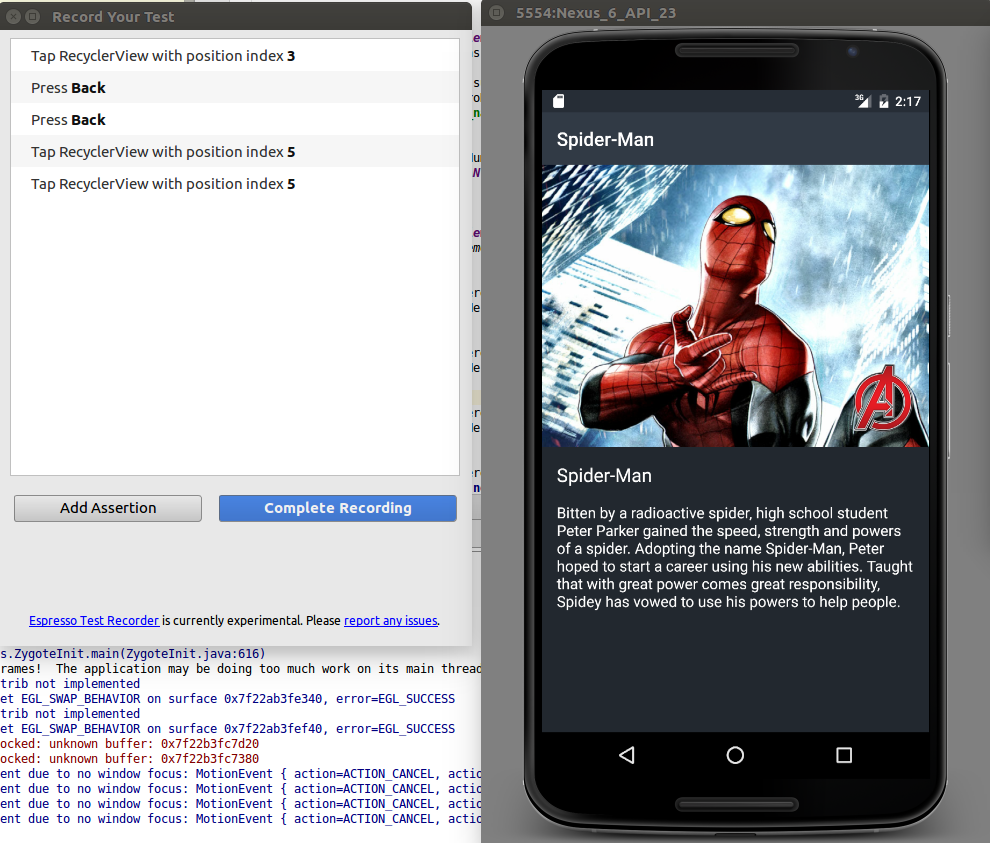
4.9. Espresso UI recorder
Android Studio provides an Run Record Espresso Test menu entry which allows you to record the interaction with your application and create a Espresso test from it.

4.10. Configuring the activity under test
You can also access the activity object which you are testing and call methods on it. For example, assume you want to call a method on your activity.
This configureMainActivity can be called in your test.
You can also override methods in ActivityTestRule , for exmaple the beforeActivityLaunched and afterActivityLaunched methods.
You can also access the current activity.
| — Allows to access the currently active activity. |
ActivityLifecycleMonitorRegistry is not API so this might change.
4.11. Running Espresso tests
4.11.1. Using Android Studio
Right-click on your test and select Run.
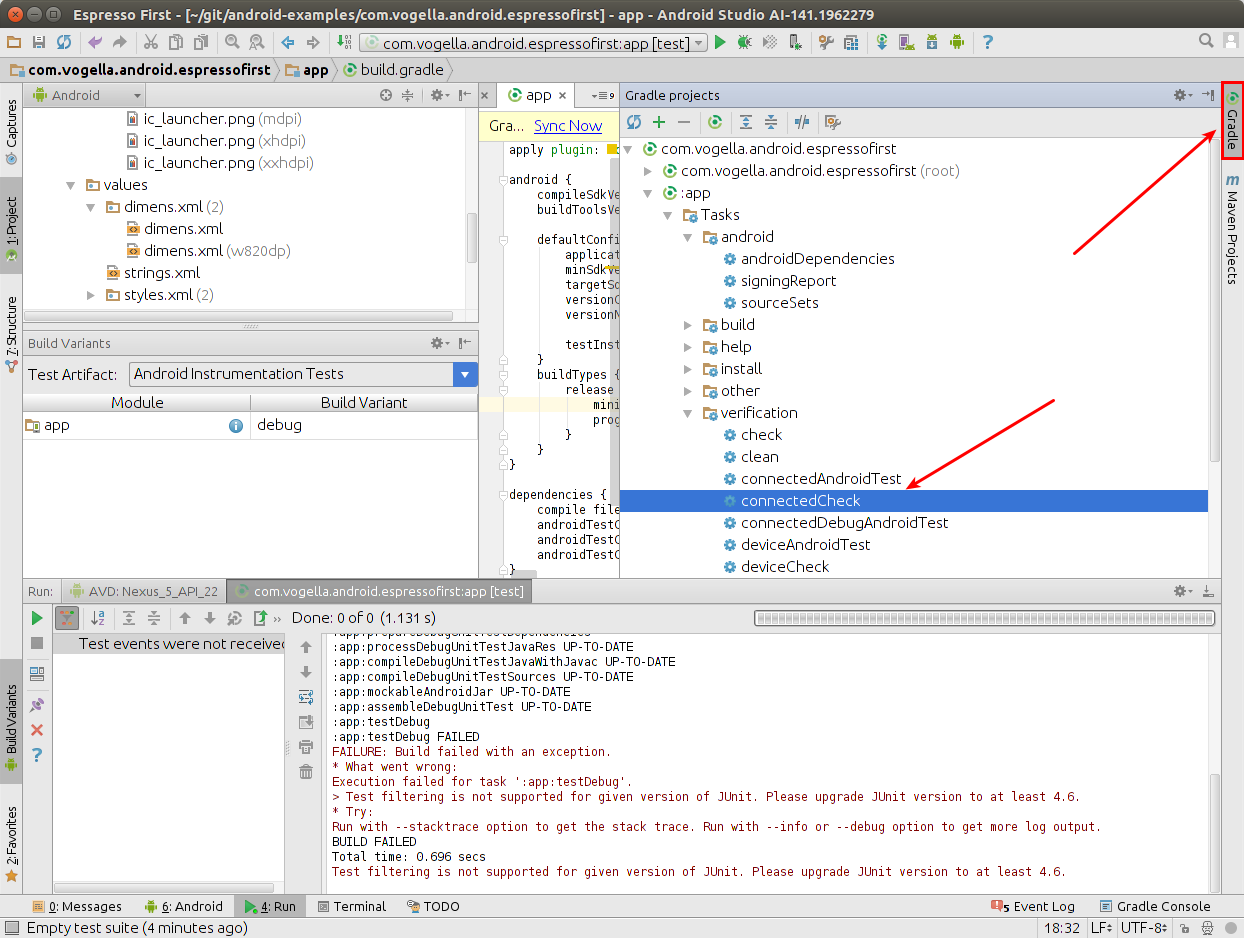
4.11.2. Using Gradle
Use the connectedCheck task in Gradle to run the test directly via Gradle.
4.12. Checking for a toast
There is an example how you can click on an list item and check for a toast to be displayed.
5. Mocking intents with Espresso Intents
Espresso provides also the option to mock intents. This allows you to check if an activity has issued the correct intents and reacts correct if it receives the correct intent results.
Espressos intents is provided by the com.android.support.test.espresso:espresso-intents library.
If you want to use Espresso intent in your Espresso tests, use the IntentsTestRule instead of ActivityTestRule .
6. Using Espresso to test asynchronous code
Testing asynchronous without framework support is challenging. The typical approach before Espresso was to wait for a predefined time. Or to use an instance of the CountDownLatch class in your test code and signal from the asynchronous processing that the processing was done. Espresso makes this much easier as it monitors automatically the thread pool behind the AsynchronousTask . It also monitors the event queue of the user interfacevand continues only with its test once no task is running.
If you use different resources, like an IntentService you need to implement an IdlingResource . This implementation must monitor this resource and register this monitor with the Espresso framework.
7. Exercise: Creating a custom Espresso matcher
Android provides the BoundedMatcher class which allows to create Espresso view matchers for specific view types.
Lets write a matcher which checks the text hints of an EditText field. See http://qathread.blogspot.de/2014/03/descovering-espresso-for-android.html
It can be used via the following code:
8. Exercise: Write a test for an intent with Espresso
8.1. Create project which is tested
Create a new Android project with the testing.android.vogella.com.simpleactivity package and the Empty Activity template.
Add a second activity called SecondActivity to your project via File New Activity Empty Activity . This activity should use a layout with at least one TextView . The id of the TextView should be «resultText» and its text should be set to «Started».
Add an EditText field to the layout of the MainActivity class.
Add a button to the layout used by MainActivity. If this button is clicked, the second activity should be started.
Put the text EditText field as extra into the intent using «text» as key. Also put the «https://www.vogella.com/» String as extra into the intent using the key «URL».
Here is some example code for the MainActivity .
8.2. Write tests
Write a Espresso test for the activity which tests the following:
Check that the layout of the MainActivity contains a button with the R.id.button ID
Ensure that the text on the button is «Start new activity»
Ensure that if the getActivity.onClick() method is called, that the correct intent is triggered. This intent should contain the String extra (hasExtra(«URL», «https://www.vogella.com/»).
8.3. Validate
Your test code should look similar to the following example code.
Источник
Working with Actionbar in Android
To download the code, login with one of the following social providers.
Login Login 
Be patient. we are fetching your source code.
Objective
Basics of Action Bar in Android:
Action Bar is located at top of the activity. It is nothing but a view that displays Activity Title, Icon, and Actions together and supports for navigation and view switching. It is dedicated space for our application and identify and indicate user’s location in the Android application.
Step 1 Add ActionBar in Android
Following are the steps to add Action Bar in your Android app:
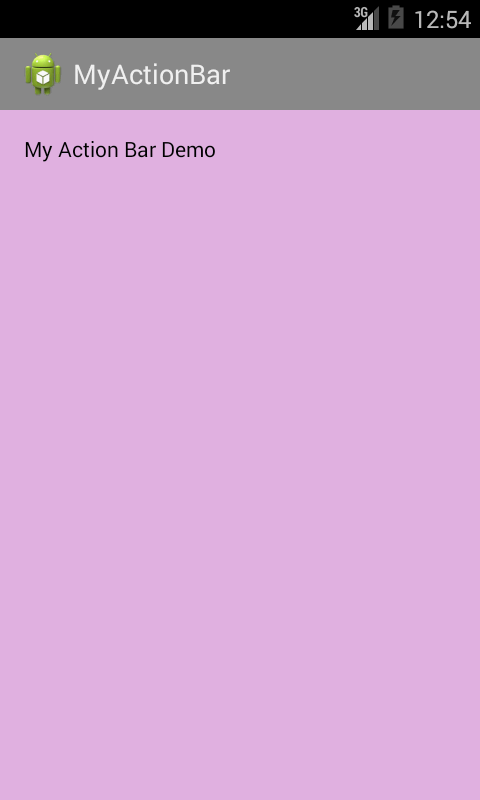
- A simple Action Bar displays activity name and activity icon on the left of the Action Bar.
- This simple form of action bar in our activity is used to inform users where they are in our application.
- To add this simple action bar in application, we need to set Activity Theme that enables action bar to our activity.
- Setting up theme to add action bar depends on which minimum version of android we are going to use in our application.
- If Support Version of android is 2.1 or above in your app, integrate Supports library in application.
- After integrating support library, edit all activities to extend ActionBarActivity.
- And set android theme of activity to @style/Theme.AppCompat.Light in Application manifest file
- If Support Version of android is 3.0 or above in your app.
- Then set android theme of activity to @style/Theme.Holo or one of its descendants in Application Manifest file.
- I have use support version 3.0 in following example.
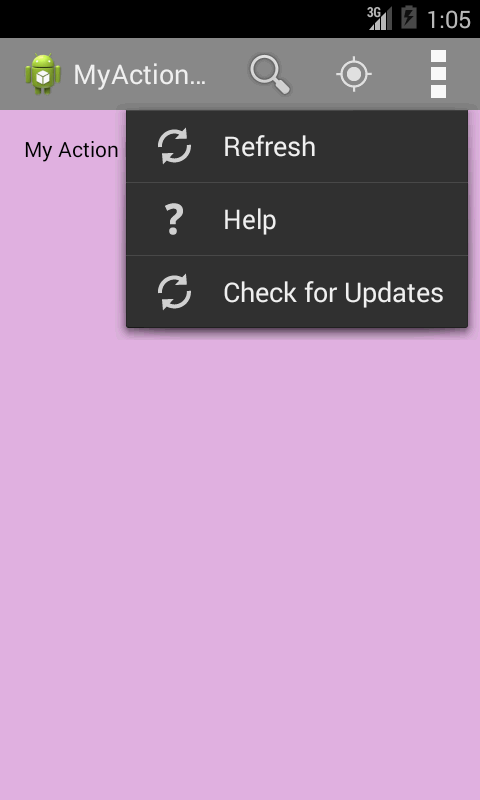
Adding Action Buttons on the Action Bar:
- The Action Bar allows you to add action buttons to perform action relating to your current app context.
- Buttons which are appeared directly in the action bar are called Action buttons.
- And actions that cannot fit to the action bar are hidden in the action overflow.
- To add items, define xml resource in menu.
Following are the steps to add Action Buttons:
1.1 Create XML file actionmenu.xml
Create XML file actionmenu.xml with following content in res >> menu for this Actionbar in Android example in your project.
1.2 Add Items In Menu
To add action items you specified in menu in activity, override onCreateOptionMenu() in your activity class in following way.
1.3 Add Item Events
Now to add Action Item Events Override onOptionsItemSelected() method as following:
getItemId() method of MenuItem is used to determine which action items is clicked.
Step 2 Manage Back Navigation.
Now in our Android Action Bar tutorial, we will add Back/ Up Navigation.
Following are the steps to enable back navigation to activity when our application involves hierarchical relationship between screens.
2.1 onOptionsItemSelected() Method
More about onOptionsItemSelected() Method please refer the following link:
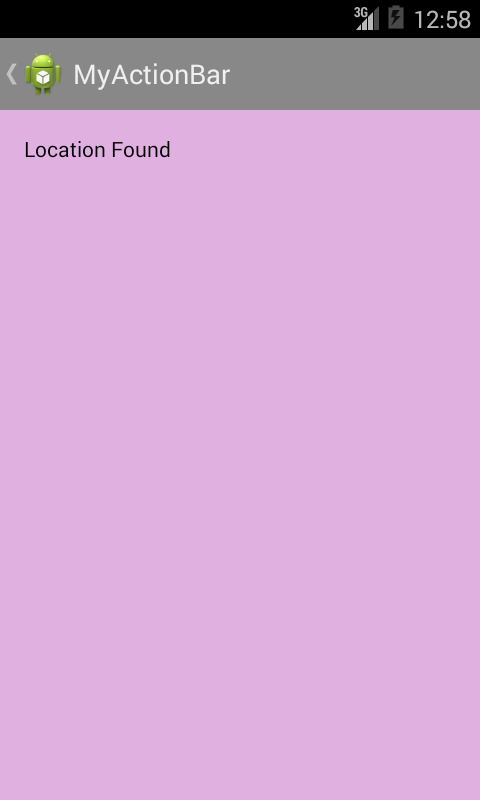
2.2 Create locationfound.xml file
Add locationfound.xml using following code in layout folder of app:
2.3 Enable Navigation
setDisplayHomeAsUpEnabled(true) Method of action bar is used enable Back/ Up navigation to activity. This function displays back arrow on Action Bar.
Add following code to enable Up Navigation:
setBackgroundDrawable() Method is used to change background of ActionBar. And setIcon() Method is used to change icon of ActionBar.
More about ActionBar please refer the following link:
2.4 Add LocationFound activity in AndroidManifest.xml file
android:parentActivityName attribute is used to specify Up/ Back activity from current activity as following:
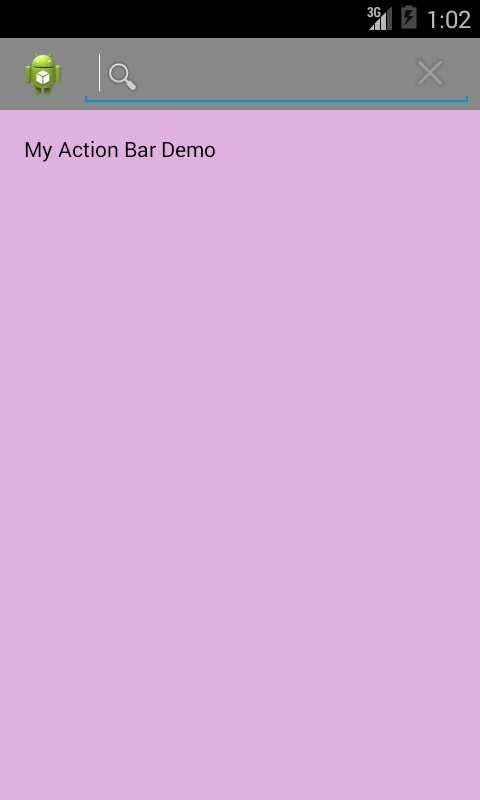
Step 3 Add ActionView with Search Functionality
An action view is a weight that appears as a substitute for an action button on ActionBar. We can perform our action without changing activity or fragment using this action view.
For Example:
- If you want to perform action for search, you can add action view to embed a searchview widget in ActionBar.
Following are the steps to add search action view on ActionBar:
3.1 actionmenu.xml
To add search view edit menu item in actionmenu.xml file as following: android:actionViewClass attribute is used to add search view on ActionBar.
3.2 search.xml
Create search.xml file in xml folder as following:
3.3 onCreateOptionMenu() Method
Also edit onCreateOptionMenu() Method as following:
More About onCreateOptionsMenu() Method please refer the following link:
3.4 searchresult.xml
Now we need Activity that handles search result to display. For that add following searchresult.xml file in res and SearchResult Activity.
SearchResult.xml:
3.5 SearchResult.java
Step 4 Adding spinner navigation
Add SearchResult activity in AndroidManifest.xml file as following:
Adding spinner drop-down navigation to switch between views within activity, action bar provides different navigation types. We can use tab or spinner drop-down navigation to navigate between views.
Following are the steps to add spinner drop-down to ActionBar:
4.1 onCreate() method from MainActivity.java
Edit MainActivity.java onCreate() Method as following:
Here dropdown is a string as defined in string resource as following:
4.2 override onNavigationItemSelected() method
Implements onNavigationListner and override onNavigationItemSelected() Method as following:
For More About onNavigationItemSelected() please refer the following link:
4.3 MyFragment class
Define MyFragment Class as following in MainActivity.java.
4.4 action_main.xml file
Edit layout activity_main.xml as following to add framelayout:
I hope you have learnt How to add Actionbar in Android. If you have any questions or concerns, please put a comment here and I will get back to you ASAP.
Got an Idea of Android App Development? What are you still waiting for? Contact us now and see the Idea live soon. Our company has been named as one of the best Android App Development Company.
Shraddha Gadesha

I am android developer, and do development not because to get paid or get adulation by the public, but because it is fun to program. I have been working in this field since one and half year.
Источник


