- How to Use an Android Smartphone With Your Mac
- Managing Files
- Pictures, Wired
- Pictures, Wireless
- iTunes, Meet Google Music
- Bon Voyage, iCloud
- Web Browsing
- The Future of Cross-Platform Bliss
- Using Android with Mac OS X: tips and recommendations
- Backing up your phone
- Transferring files
- Syncing music, photos and videos
- Syncing contacts, calendars and mail
- What do YOU use?
How to Use an Android Smartphone With Your Mac
Year upon year, Android has proven its value as an alternative to Apple’s iOS. Android’s 79-per cent marketshare worldwide means a fair number of Mac users also use Android phones. This tutorial covers what it’s like to be in that camp, and what apps and services are available to help make these obverse devices work together.
Managing Files
Early in Android’s iterations, working with files was on an Android device from a Mac was next to impossible. You’d have to hope against odds that either the phone’s manufacturer had built a specialized driver or the phone would be recognized as a storage medium by the generic driver included with Android’s developer toolset.
More recently, Android File Transfer has become a handy tool for interfacing with your phone from your Mac. It’s very basic, but it allows reliable access to the files on your Android device from your Mac and the ability to drag-and-drop files from your computer to the phone. It does require that your phone be on Android 3.0 (Honeycomb) or newer.


It’s no iTunes, but the Android File Transfer tool can provide a basic interface between your Android phone and Mac computer.
Because Android does not come with an all-in-one application to manage your media and data in the way that Apple does, Android File Transfer serves an important role. It’s a decent way to do things like add music or other media files or backup your phone’s contents by copying its files to a folder in Finder.
Once the files are on your Mac, you can use the respective format-friendly apps to modify or save them (ex. iPhoto for photos, iTunes for music, etc.) or move them to a different device.
Pictures, Wired
Understandably, dragging folders from your phone to computer, then importing them manually into iPhoto is not exactly a beautiful solution. Thankfully, if you are running Android 4.0 Ice Cream Sandwich or newer, iPhoto should automatically recognize your phone as a camera when connecting via USB; it just requires changing a USB setting on the phone.


If you are on Android 4.0+, check your settings menu for the USB protocol or USB computer connection. If you choose Camera (PTP), iPhoto should recognize it automatically.
When you connect an Android 4.0+ device (Ice Cream Sandwich) to your computer, it typically defaults to Media Transfer Protocol (MTP), the Windows equivalent of the Android Transfer Tool.
Change that USB connection to Picture Transfer Protocol (PTP)—either in the Settings > USB computer connection or by selecting it from the status bar while connected to the computer—and iPhoto should open automatically with a prompt to import the images shot from your phone as it does when recognizing a camera.
Tip: This may not work on all stock Android builds as the default camera application uses a naming convention for image files that is not recognizable by iPhoto. Most manufacturers have remedied this in their builds. Alternatively, you can use a different camera app as a workaround.
Pictures, Wireless
If you don’t have a USB cable handy, Dropbox is your best bet. The service’s Android app offers the option to automatically upload photos taken on the device to the cloud every time the phone connects to a Wi-Fi network.
Set the Dropbox app up on your Mac as well, and you have a consistent folder from which to import into iPhoto. There is even a (mostly) painless way to have Automator regularly tap into the Dropbox folder to do the importing for you.


Dropbox for Android has an option to allow automatic Camera Upload over Wi-fi. This can be useful as a wireless way to get your photos onto your Mac desktop, if you already use Dropbox for Mac.
iTunes, Meet Google Music
You can use Android Transfer Tool to drag music to your phone, but assuming you have a data plan, you’d probably be better suited using Google Music Manager. Google freely offers the ability to upload up to 20GB of music to the cloud for access anywhere via your Mac or your Android phone.
The Google Music app makes it easy to navigate your library, and songs can even be made available offline.


Google Music Manager can make moving your music to your Android phone an easy process. It allows for up to 20gb of free song storage and can even automatically upload newly added songs.
Tip: This will not work with older DRM-protected music. If that affects a lot of your library, follow this tutorial about using iTunes Match to remove the DRM.
Bon Voyage, iCloud
If you choose an Android device, you can give up on using iCloud for most-everything except Find My Mac.
You will, however, find alternative solace in Google’s ecosystem for most of iCloud’s functionality, and Apple has largely added Google services to its two core productivity apps: Apple Mail and Calendar.
You can sync each app to Google’s services—by adding Gmail and Google Calendar as new accounts within the app—and in doing so, can live in relative harmony amidst your competing platforms.
To do so, click the respective app’s menu, then click Accounts. and choose Google. After adding your account, if you add an event using Apple Calendar, it is immediately added to the calendar app on your phone and vice-versa. In mail, deleting an email from your Android device will move it to the Trash on your Apple Mail app. It’s refreshingly un-tedious.


Sync your Google Mail and Calendar with your Mac’s Apple Mail and Calendar by adding your Google credentials in the Accounts area of each app.
Web Browsing
It may seem obvious, but if you’re using an Android phone, you should use Google’s Chrome browser on both your Mac and your Android phone (the default Android browser is not Chrome). Doing so unlocks a few features that can make your life easier between ecosystems.
First, your bookmarks, browsing history, and autofill passwords will automatically sync between devices.
Second, you can use the Chrome to Mobile extension to push websites directly to your mobile device from your computer.


Chrome to Mobile is an innovative Chrome extension that can push webpages directly from your Mac desktop to your Android smartphone.
The Future of Cross-Platform Bliss
Apple has recognized the Google users among its customer base and made strides to support them. Using an Apple computer and an Android phone will likely never offer the seamless experience as using an iPhone, but it’s now easier than ever.
Moving forward, be wary of the apps where you plan to invest your time to ensure each has a cross-platform mentality. Some popular ones include Dropbox, Google Drive, Evernote, Simplenote, Wunderlist, and Google Chrome. Hopefully, the future continues toward platform-agnostic apps so users can switch their OS at will. Until then, use this guide to make your Android more collaborative with your Mac.
Источник
Using Android with Mac OS X: tips and recommendations
One of the principal reasons that many Apple Mac users opt for an iPhone over an Android smartphone is the ability to seamlessly work with their primary computer. As a Mac user who uses Android devices, I’ve often been left frustrated with the inability of my computer and smartphone to work together easily, especially as we live in a digital age and it should be relatively simple.
For iPhone users, synchronising music, data, files, contacts, calendars and more is as simple as connecting to iTunes and hitting sync but if you have an Android device and have tried to use it coherently with a Mac, you’ll know that the process is anything but simple. Luckily, there is a way to make syncing with your Mac as easy as the iPhone, so read on to find out more.
Across the team, we have some Mac users and between us, we have some recommended applications that can make using Android and Mac as easy as the iPhone. Below, we’ll look at different things you might like to sync and the applications we recommend while also mentioning any official Android apps.
Backing up your phone

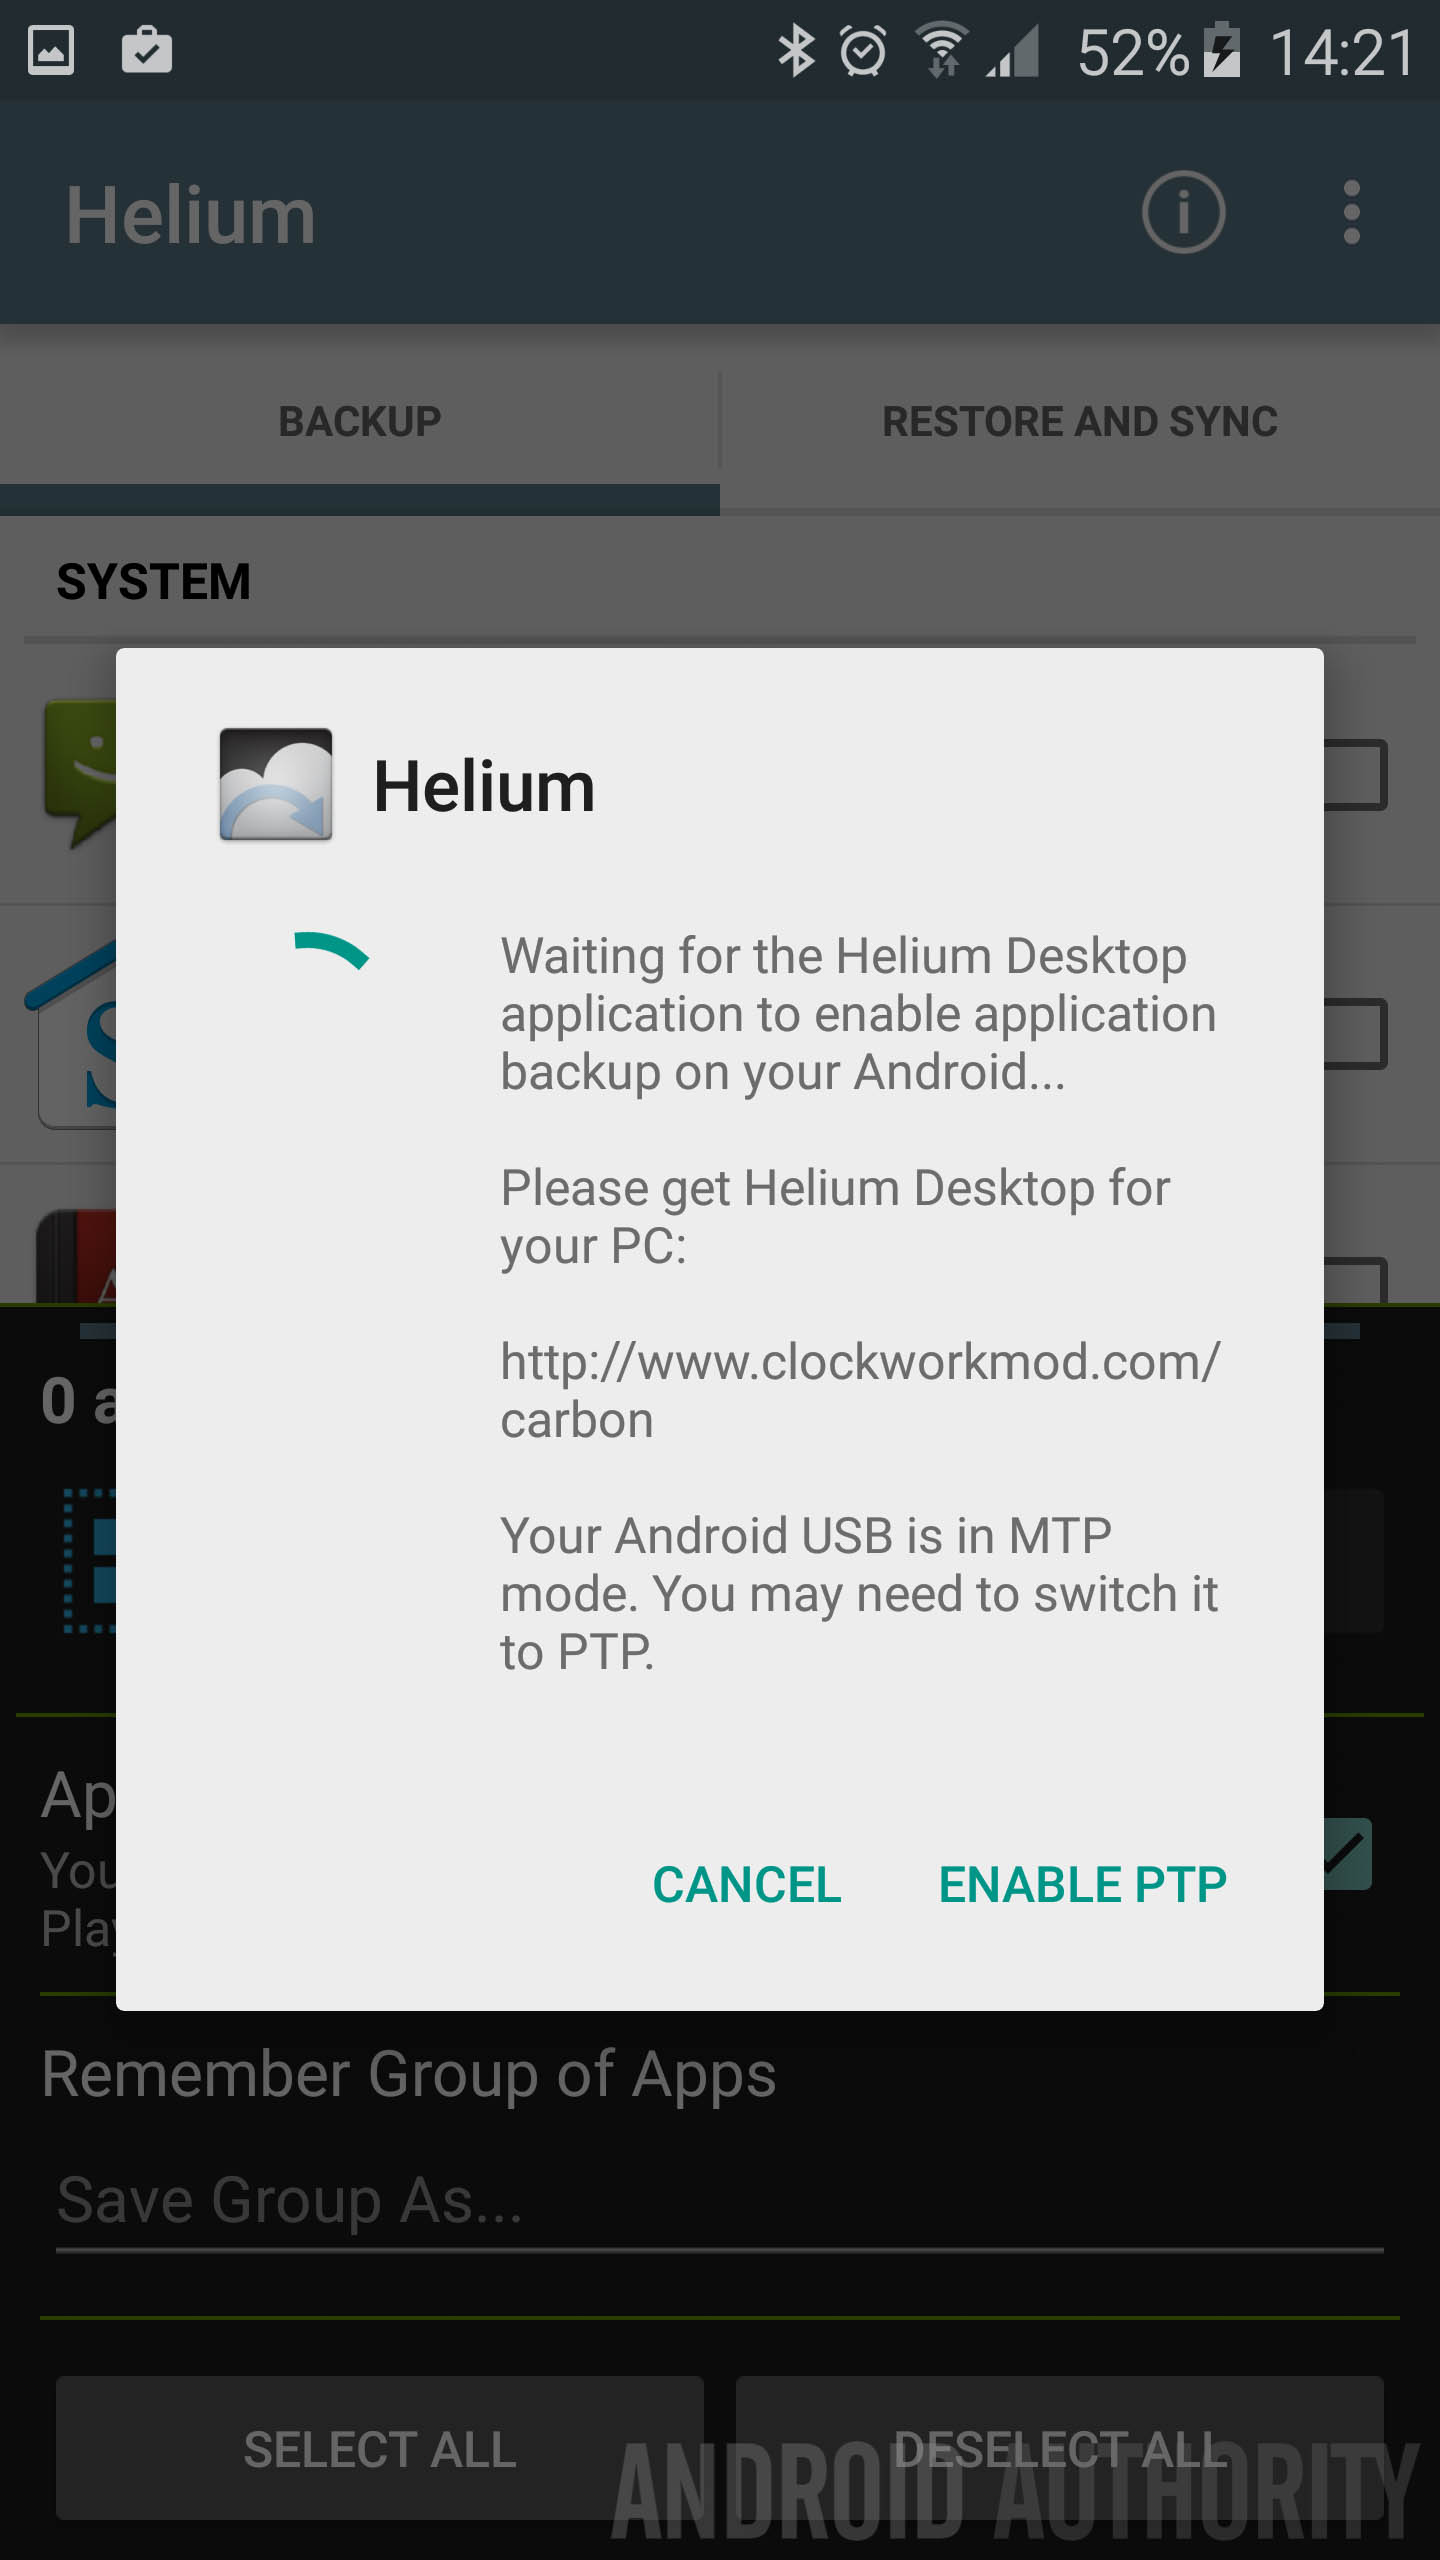
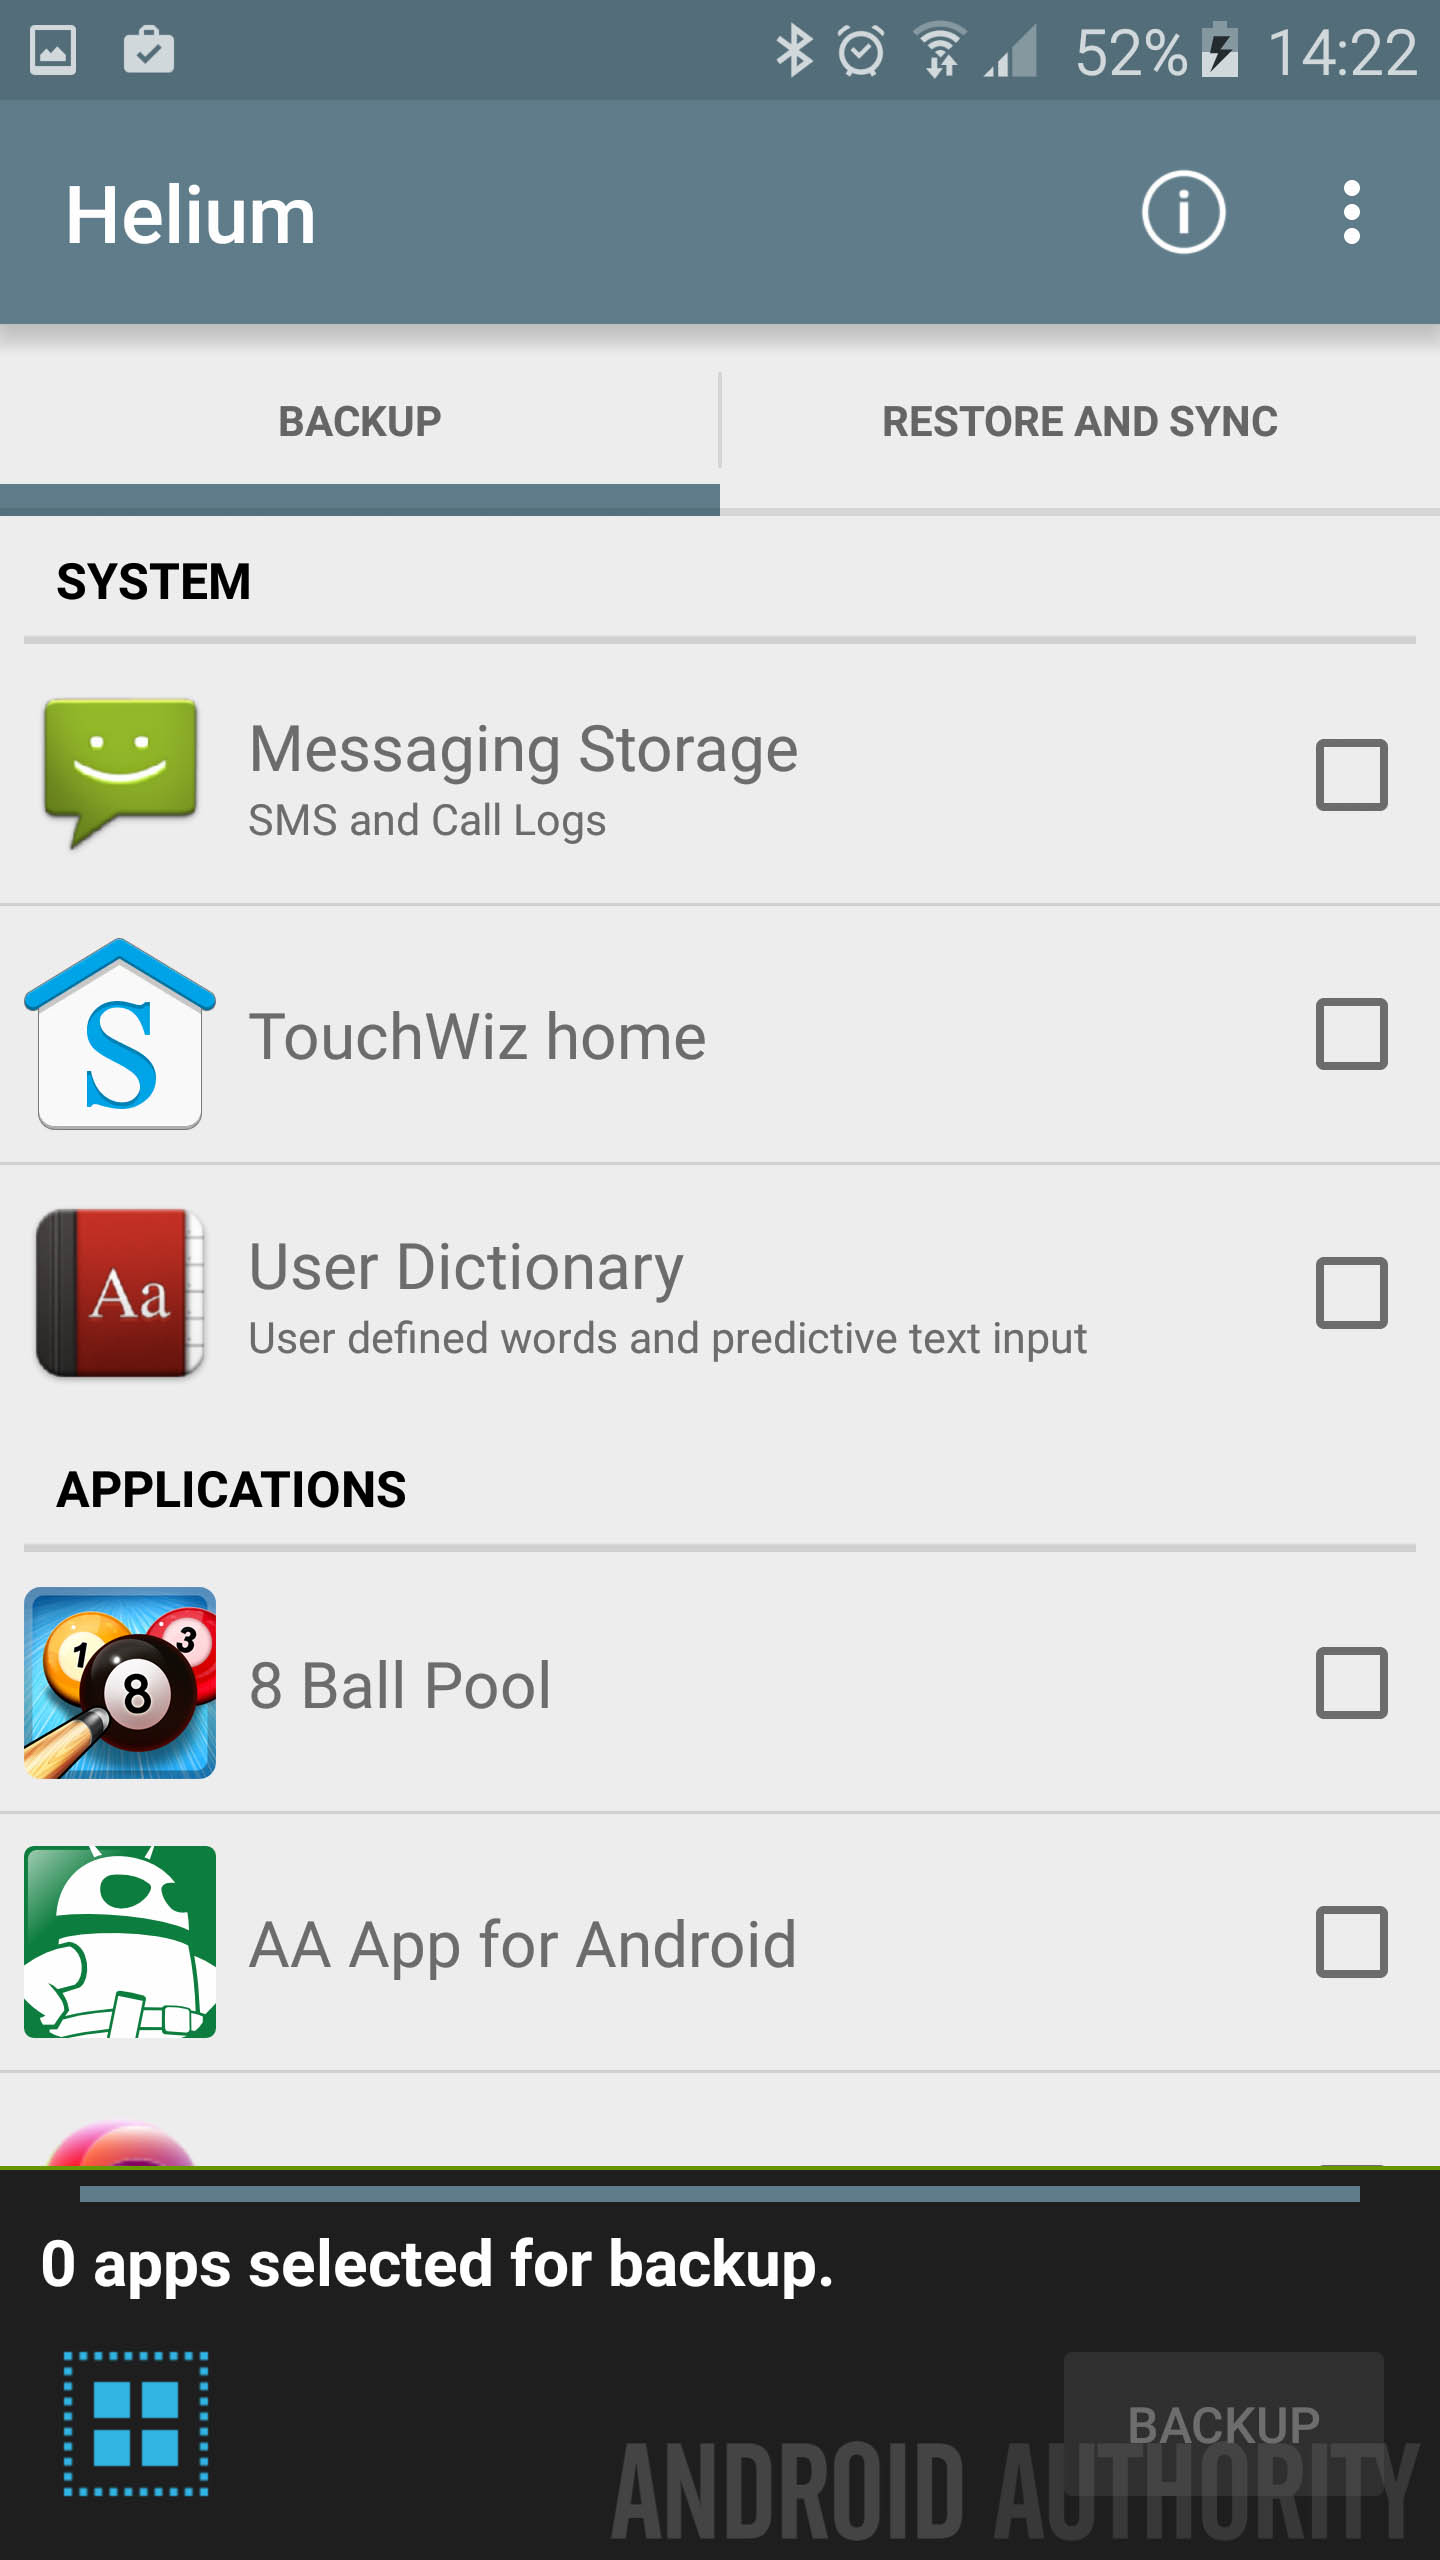


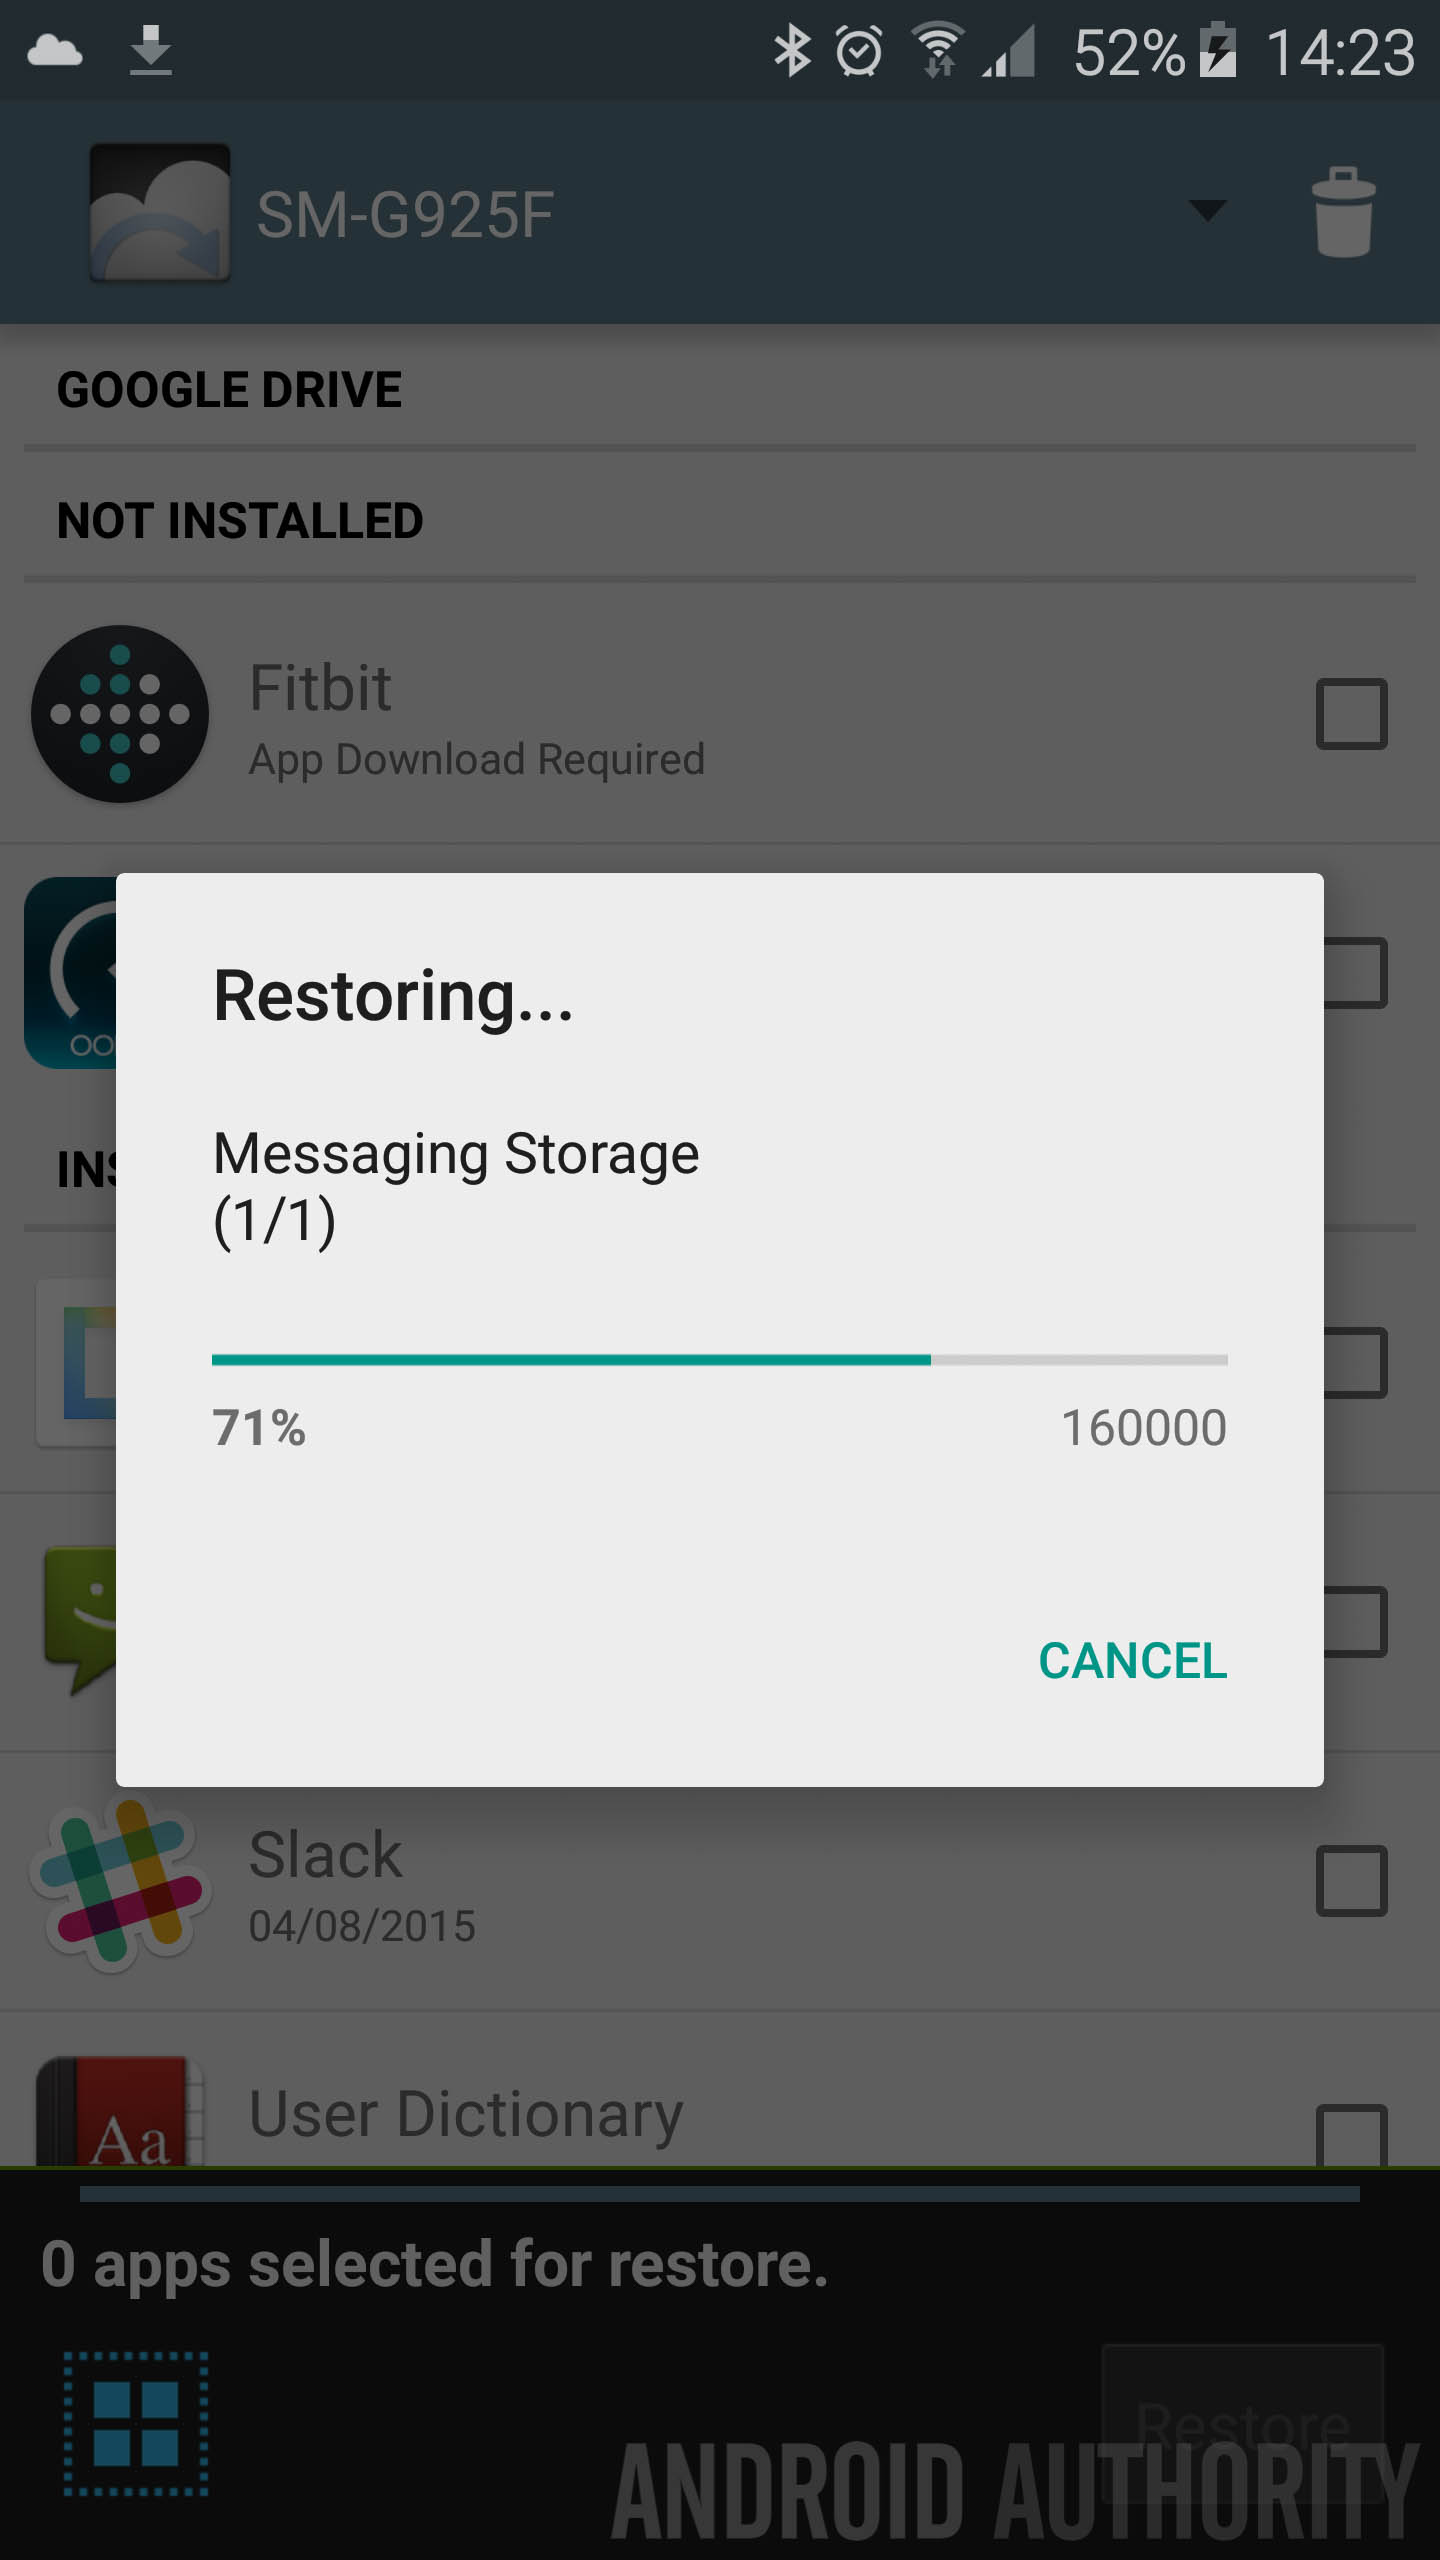
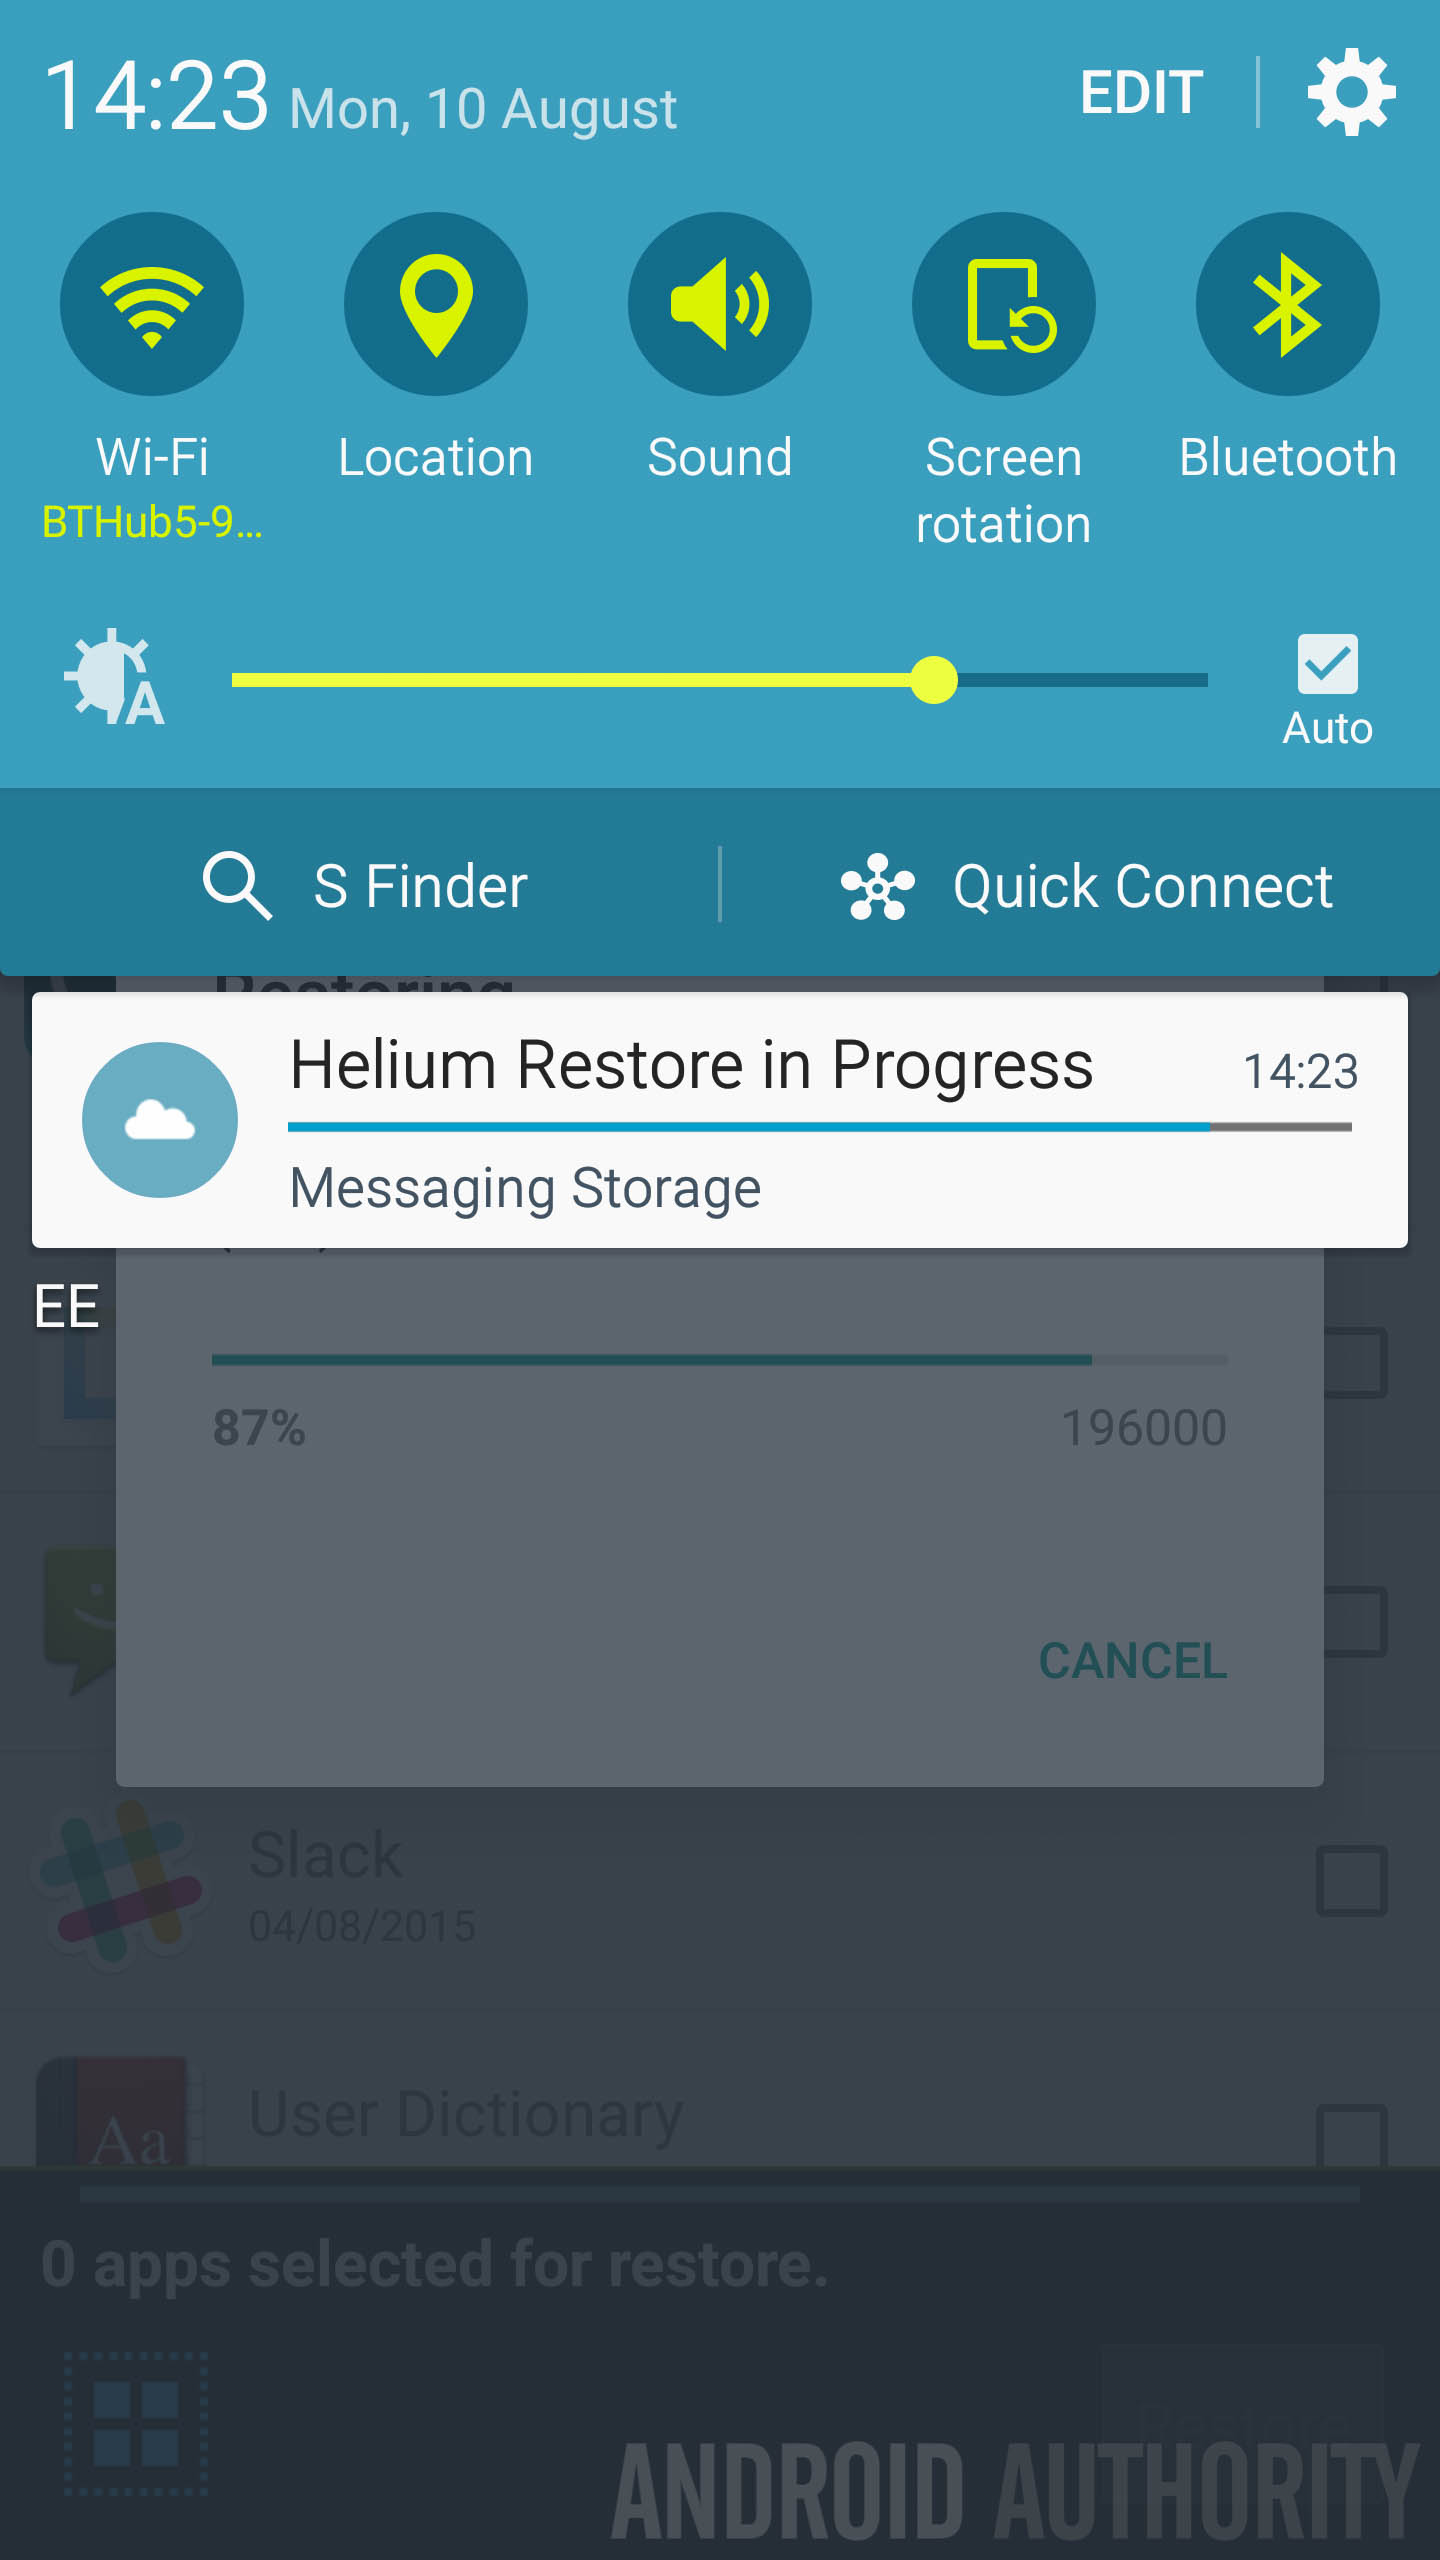
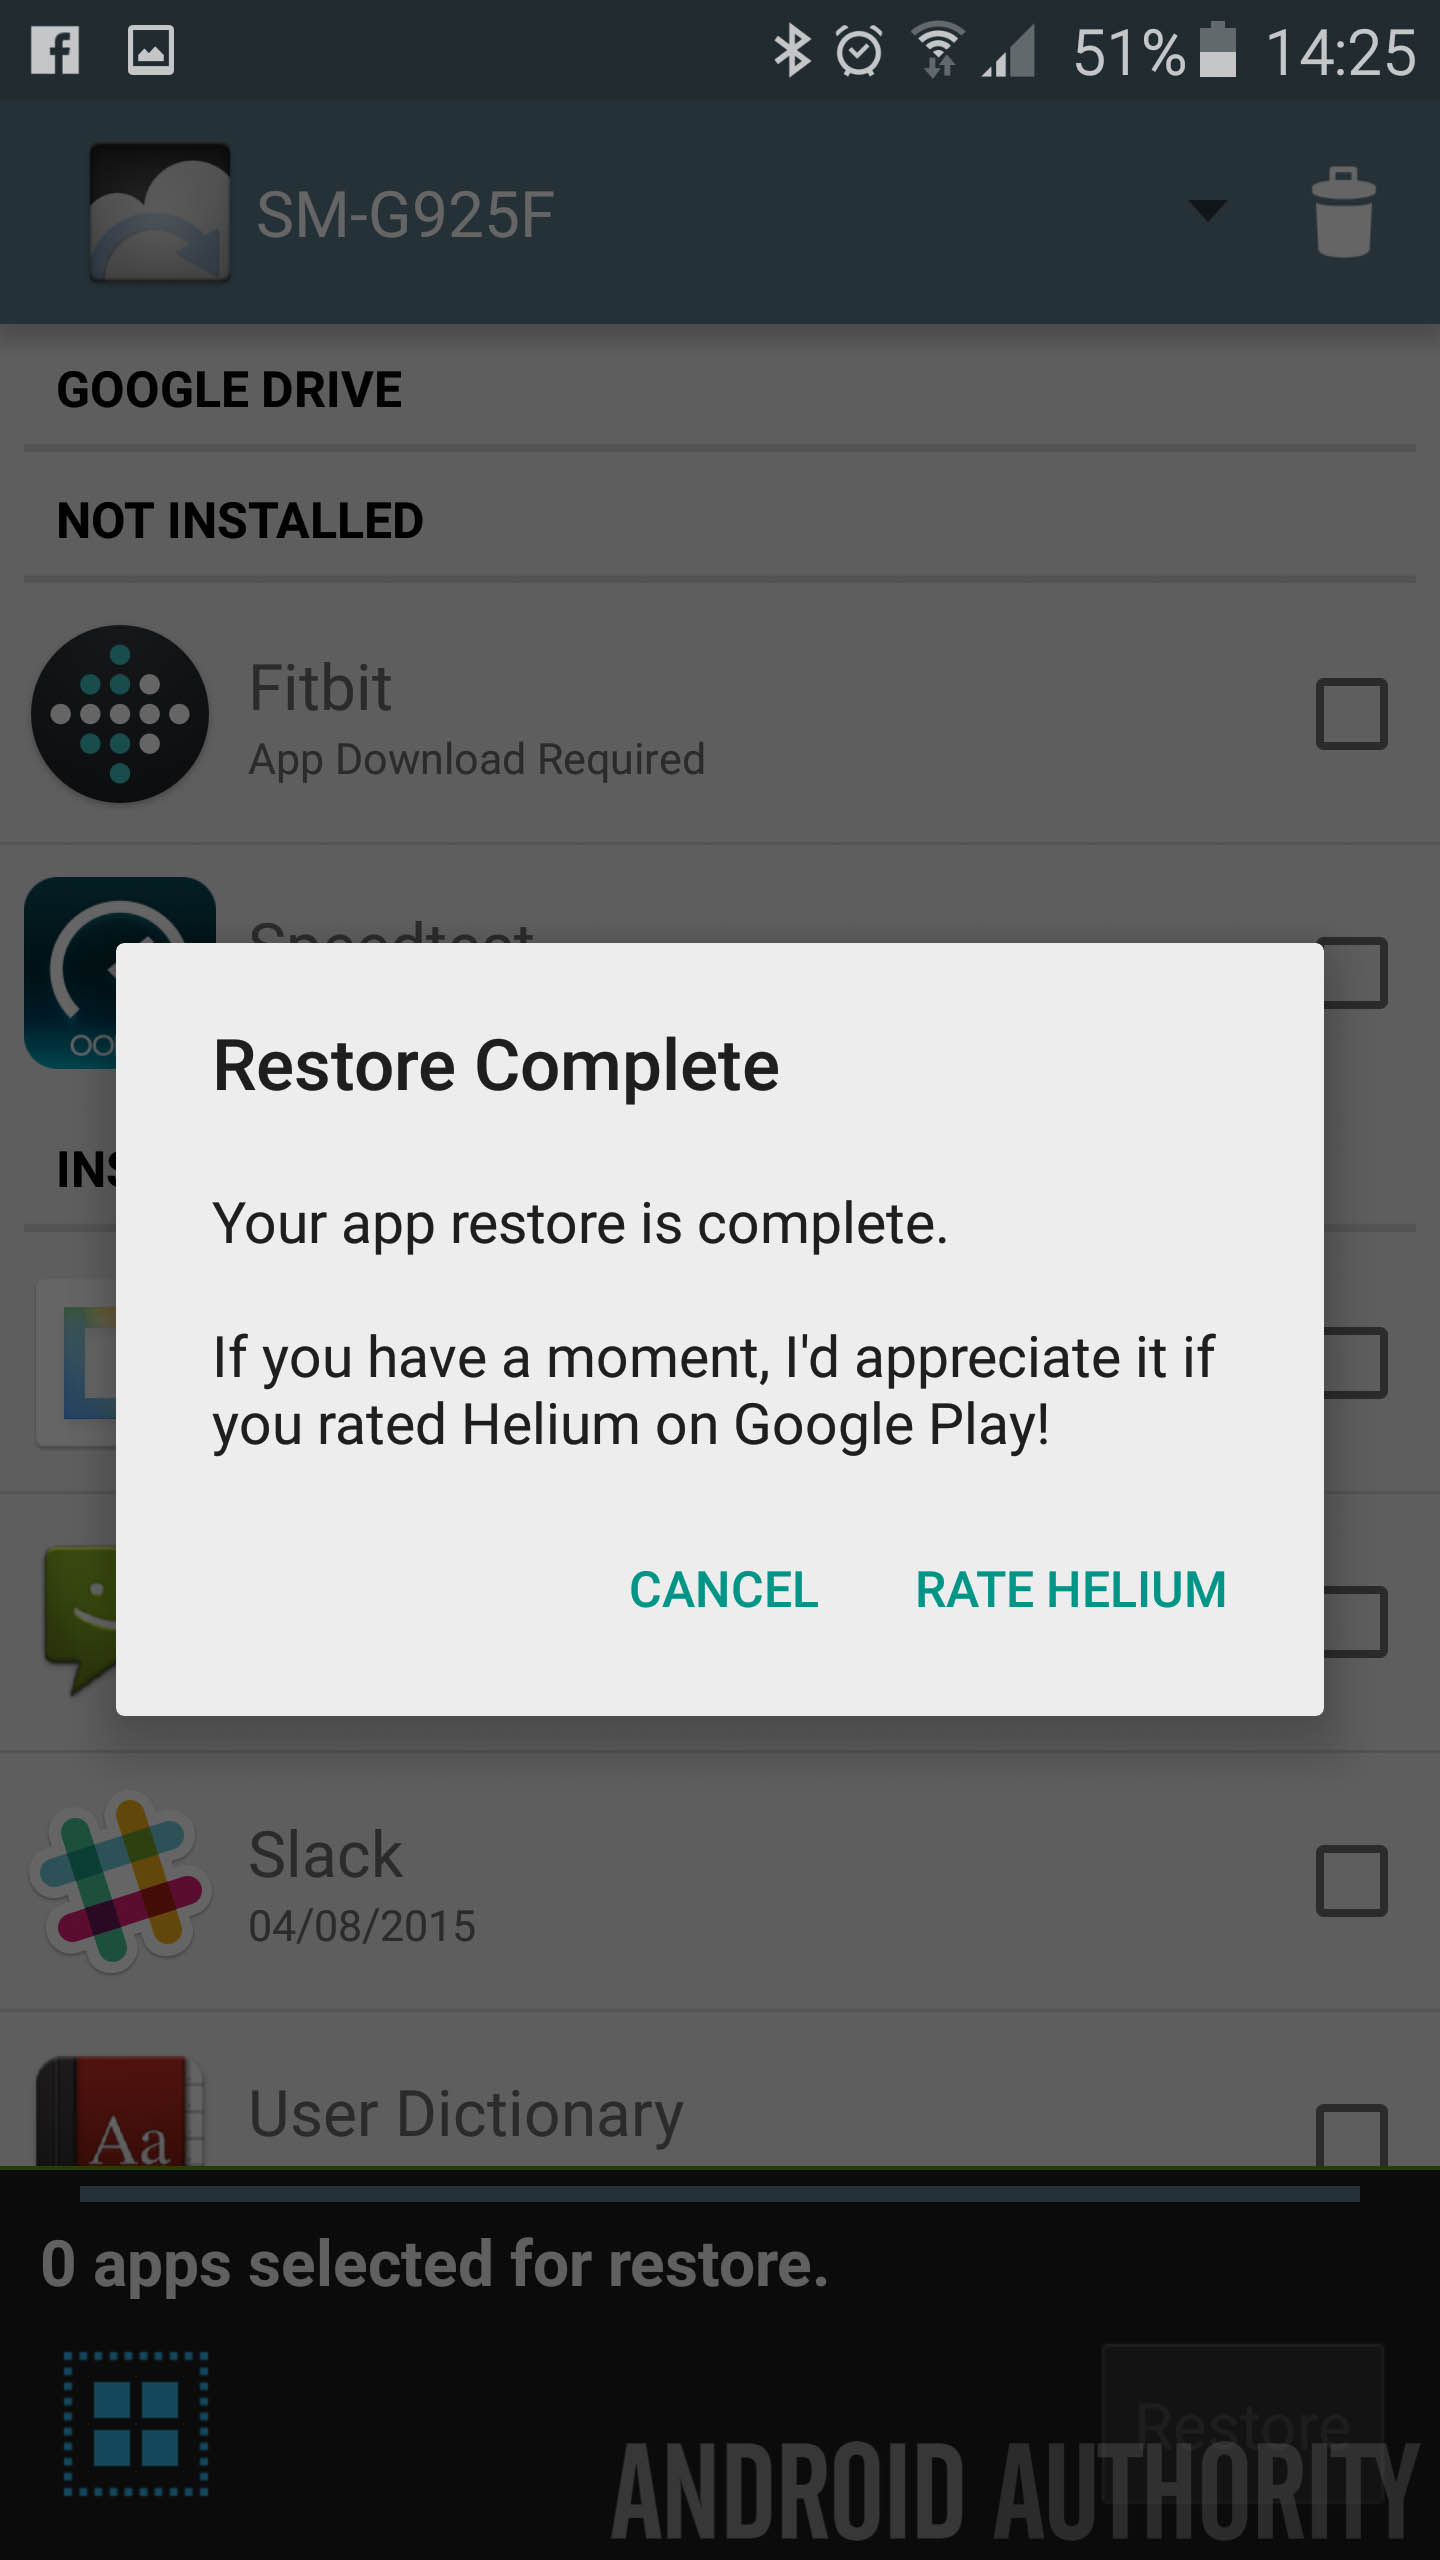
Our recommendation: Helium
If you’re interested in backing up the data on your phone, look no further than Helium Backup as the best way to backup your non-rooted smartphone.
Enabling Helium requires downloading the Helium app for Mac and connecting your phone but once enabled, you can backup entire applications or just application data either locally to your phone’s storage or wirelessly (once you buy the Premium add-on) to Google Drive, Box or Dropbox.
It’s worth noting that if you restart your phone, you’ll need to enable Helium again (unless you have root) but it’s a small inconvenience for what is a very powerful and best of all, FREE, application.
Transferring files
The biggest difference between Android and iOS is that while the latter is limited to syncing files through iTunes, you can add files to an Android phone’s storage just by dragging and dropping them. For those who want to just drag and drop files, this section has the steps to follow but if you’d rather sync your music, photos and videos into apps on your Mac, follow the steps in the section that follows.
![]()
Official solution: Android File Transfer
An application provided by Google itself, Android File Transfer (ATF) is pretty much hopeless on Mac OS X. Complete with errors when connecting to most Android devices and time outs when transferring large files, ATF has the potential to make you very frustrated. But when it does work, the app has a clean interface that is very simple to use.
Our solution: AirDroid
When you return to your home or office, you don’t want to fumble around looking for a USB cable to connect your phone to your computer and with the new Macbook only sporting one USB port, do you really want to waste it on connecting your phone?


Introducing AirDroid, which does what the name suggests: it allows you to connect your phone either over a mobile connection or via the same Wi-Fi network. The exact feature set depends on how you connect your device but includes transferring files to and from your Mac, installing of apps and tethering your phone to your computer for data.
The most compelling reason to use AirDroid however, is the notification sync, which is perfect for times when checking a notification on your phone is a no-no. AirDroid allows you to read and view your phone’s notifications on your Mac.

Whether you’re at work or in a meeting taking notes, you can now discretely view and reply to notifications without anyone knowing. The best thing about these notifications is that you can use Android’s notification responses (such as archiving an email) directly from your computer screen.
Syncing music, photos and videos

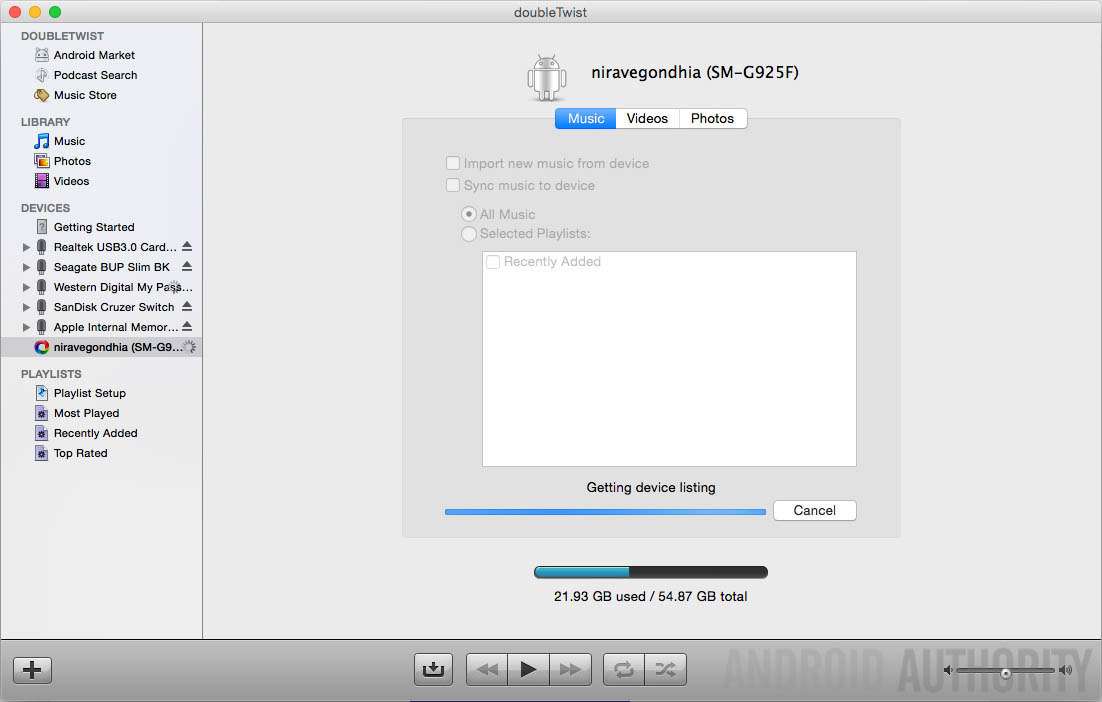
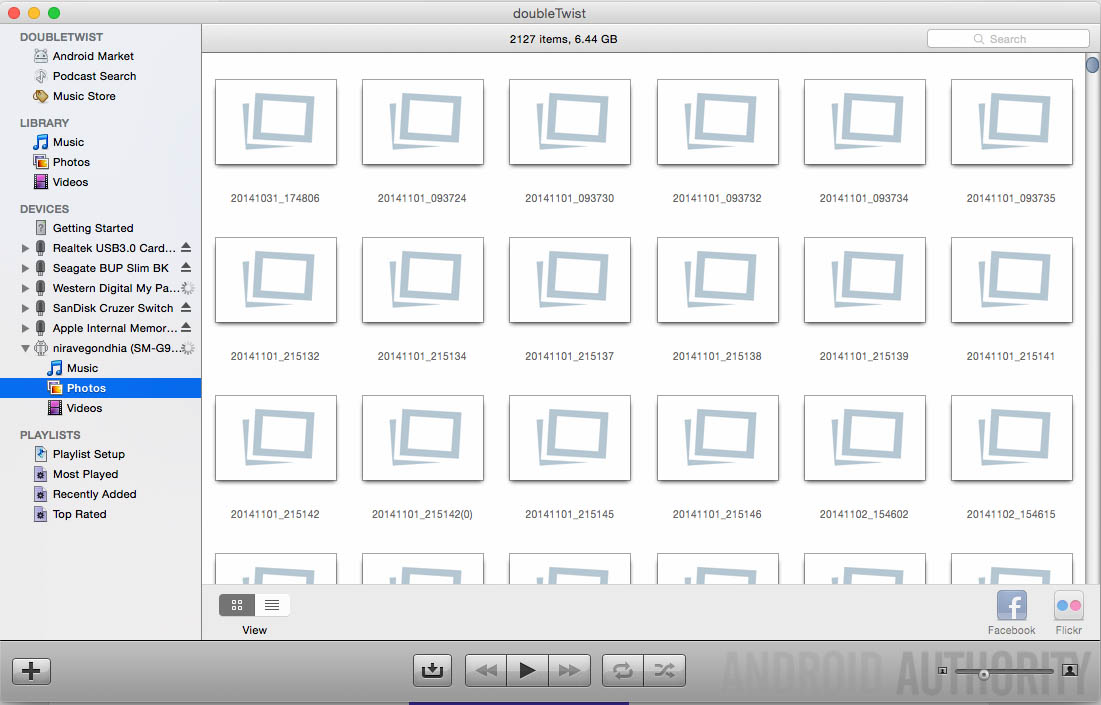
Our recommendation: doubleTwist (the iTunes of Android)
Syncing your music, photos and videos into the applications you use on your Mac used to be incredibly difficult as connecting to iTunes and extracting data with the same fluency as the iPhone was a challenge for developers. As the saying goes – if you can’t beat them, then join them – and so doubleTwist was born.

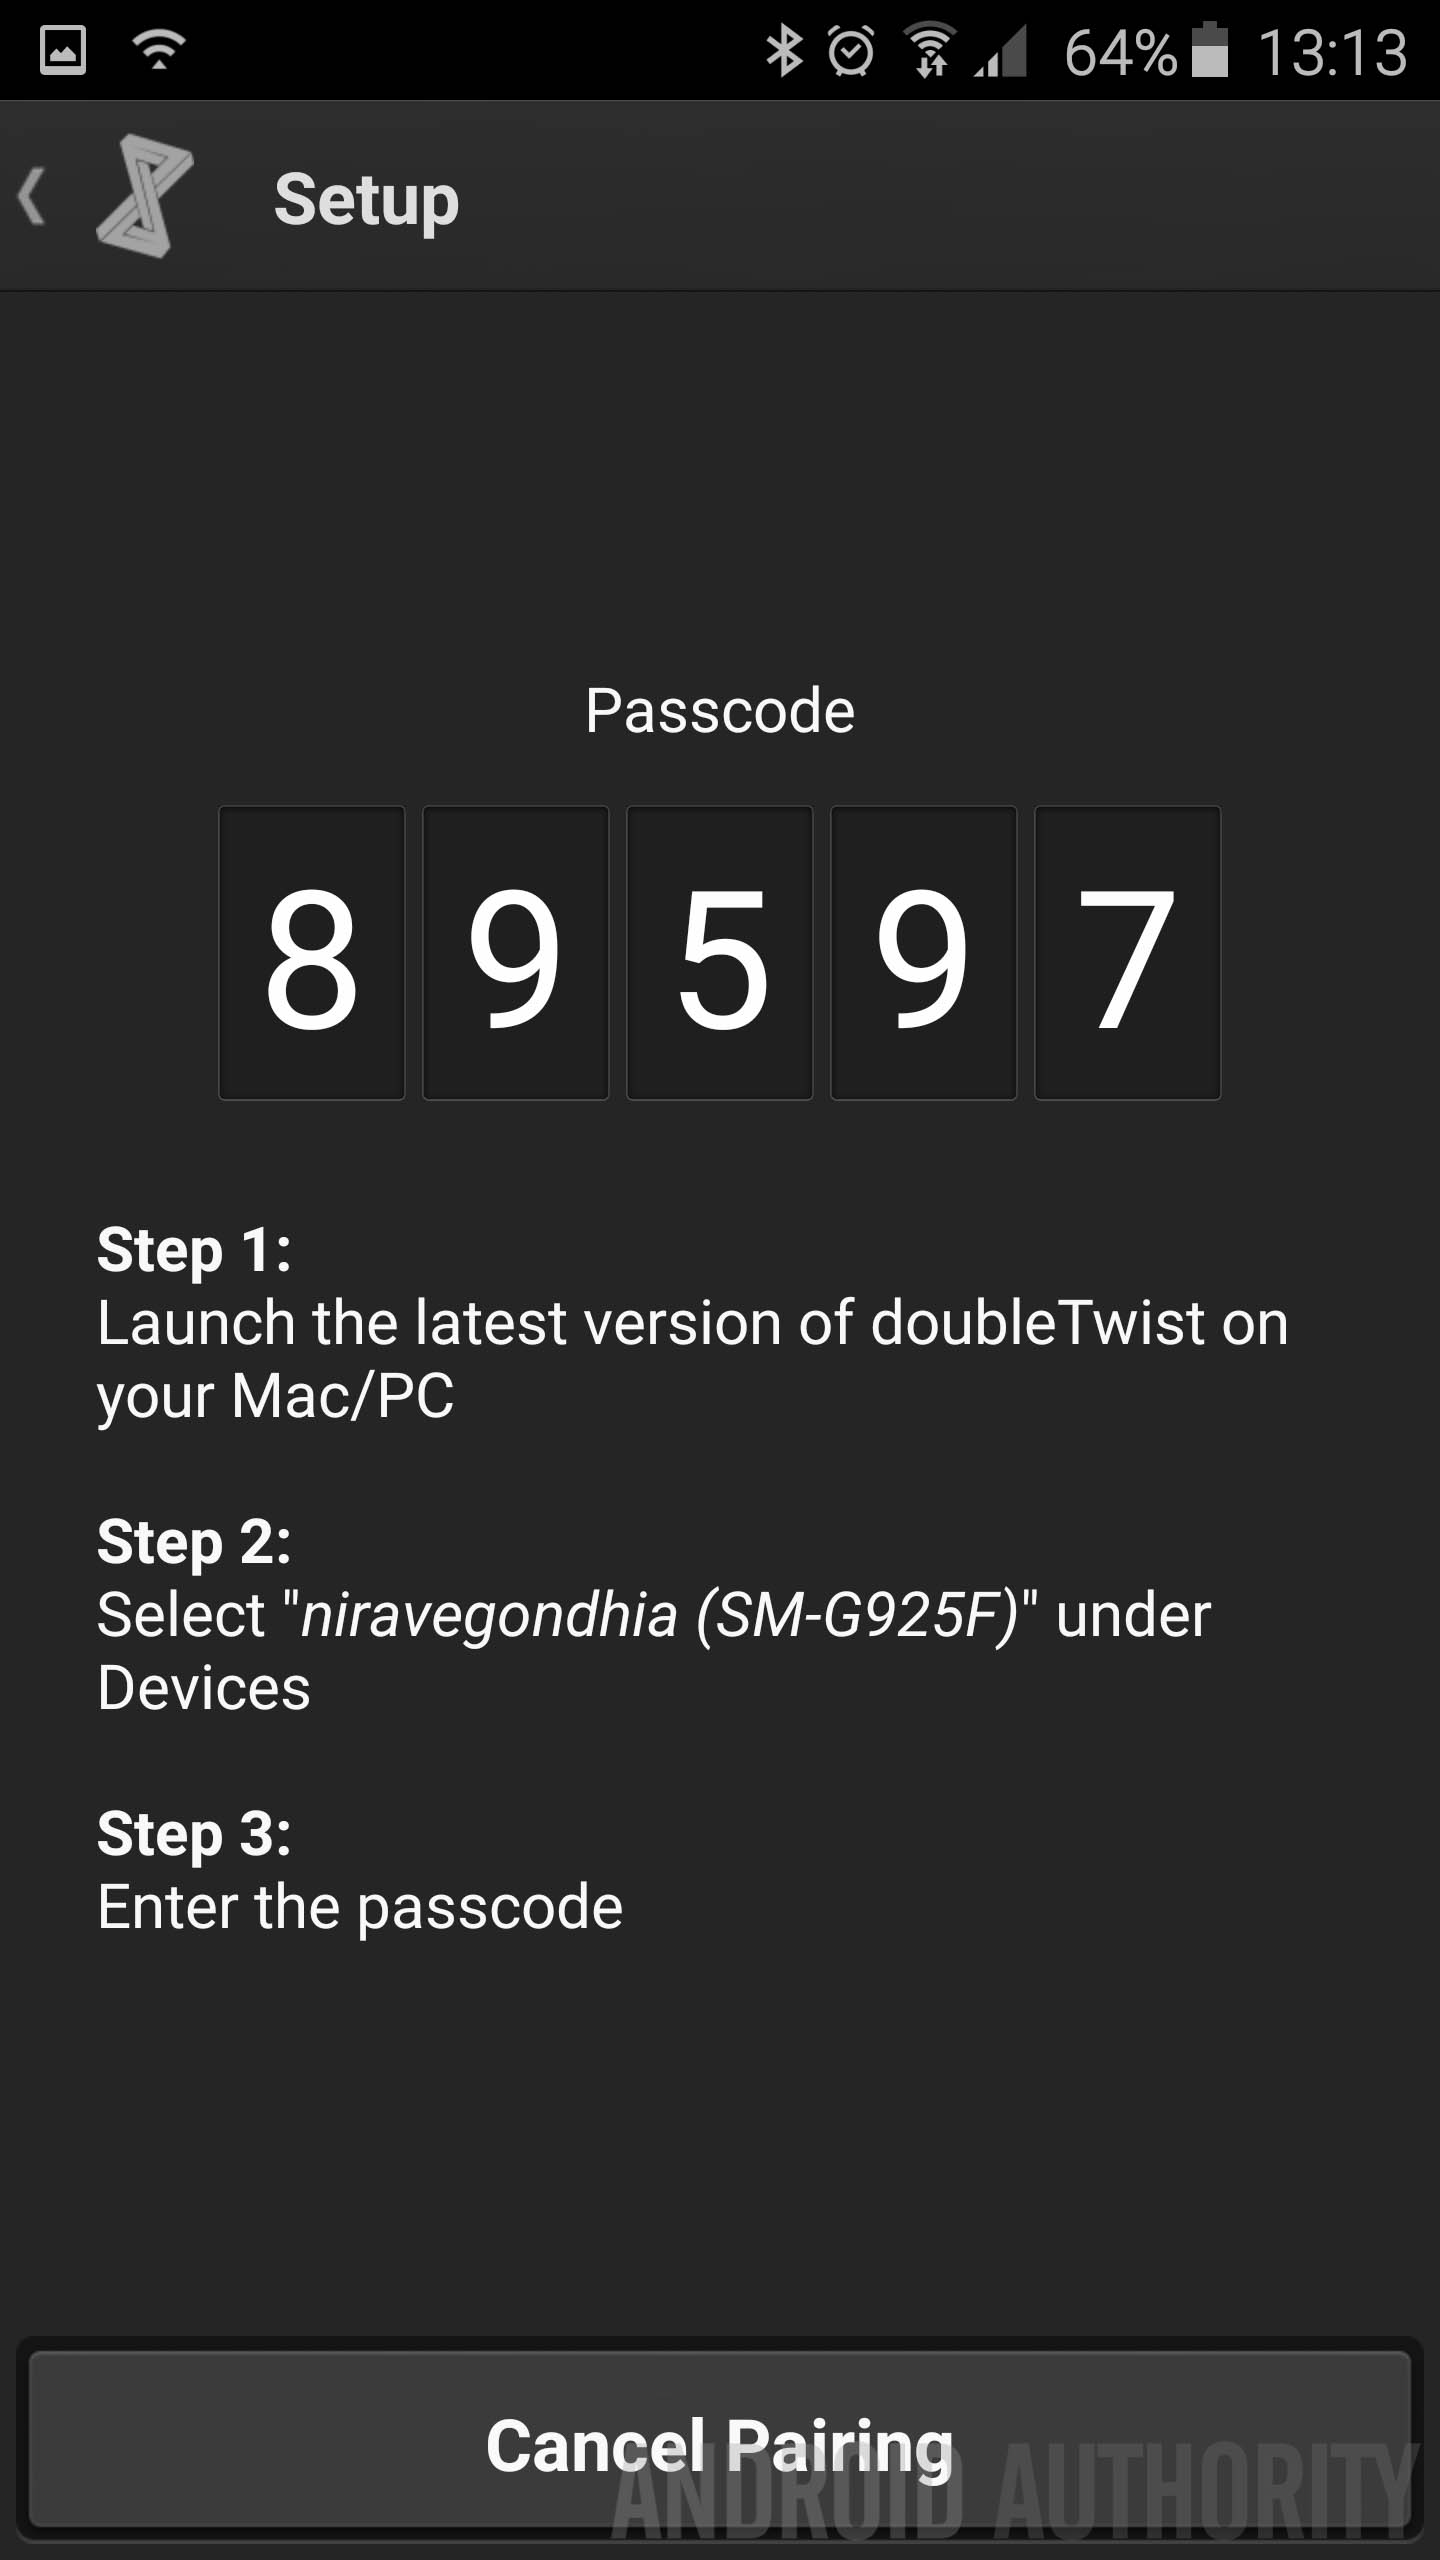
There’s a reason that doubleTwist is dubbed as the iTunes of Android and it’s simple; it looks like a mini version of Android and does everything that iTunes does with the iPhone but for Android devices. For syncing music, photos or videos, this is definitely the easiest way to sync your data into the apps you use on OS X.
Syncing media with iTunes or Apple Photos is simple enough (especially if you’ve previously used iTunes) and if you really want to make your iPhone friends jealous, you can sync wirelessly through your Wi-Fi network. It’s free to sync doubleTwist using a USB cable but the wireless sync add-on costs $4.99 (or £4.99 in the UK) and you can set it to automatically sync in the background as well.

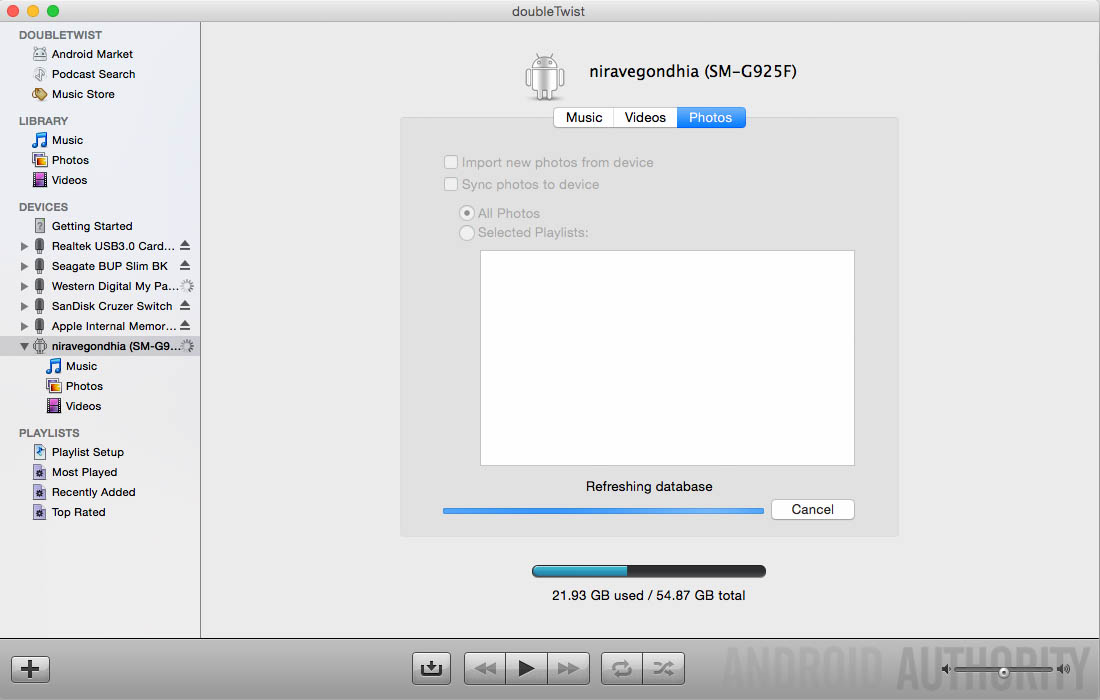
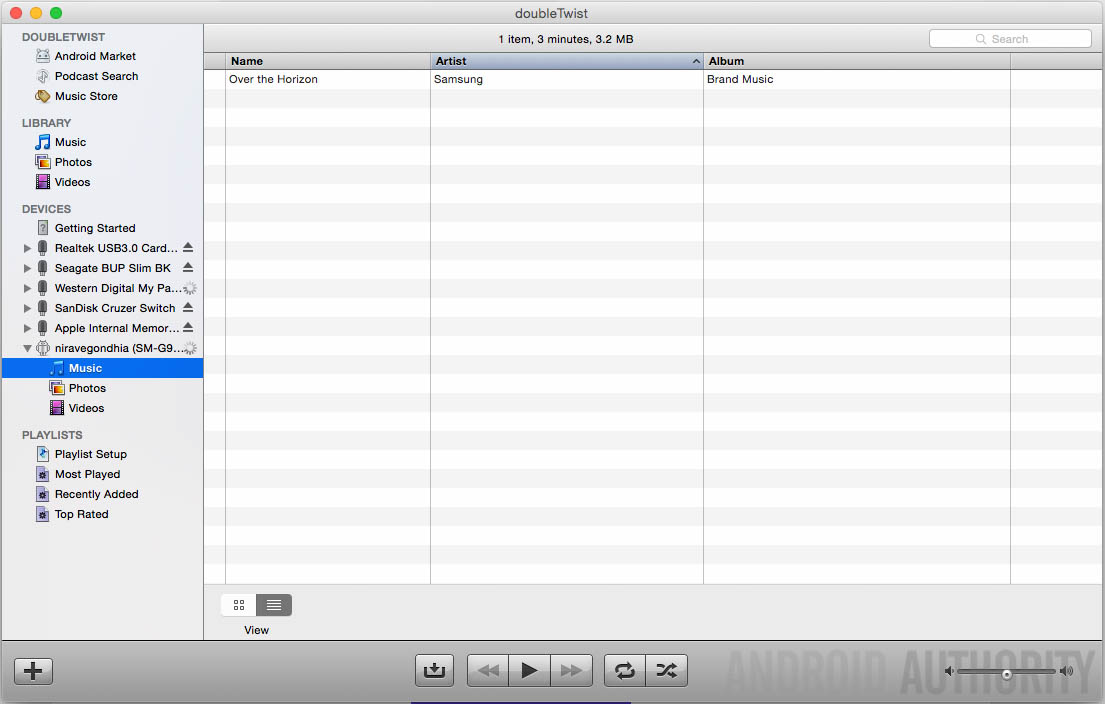
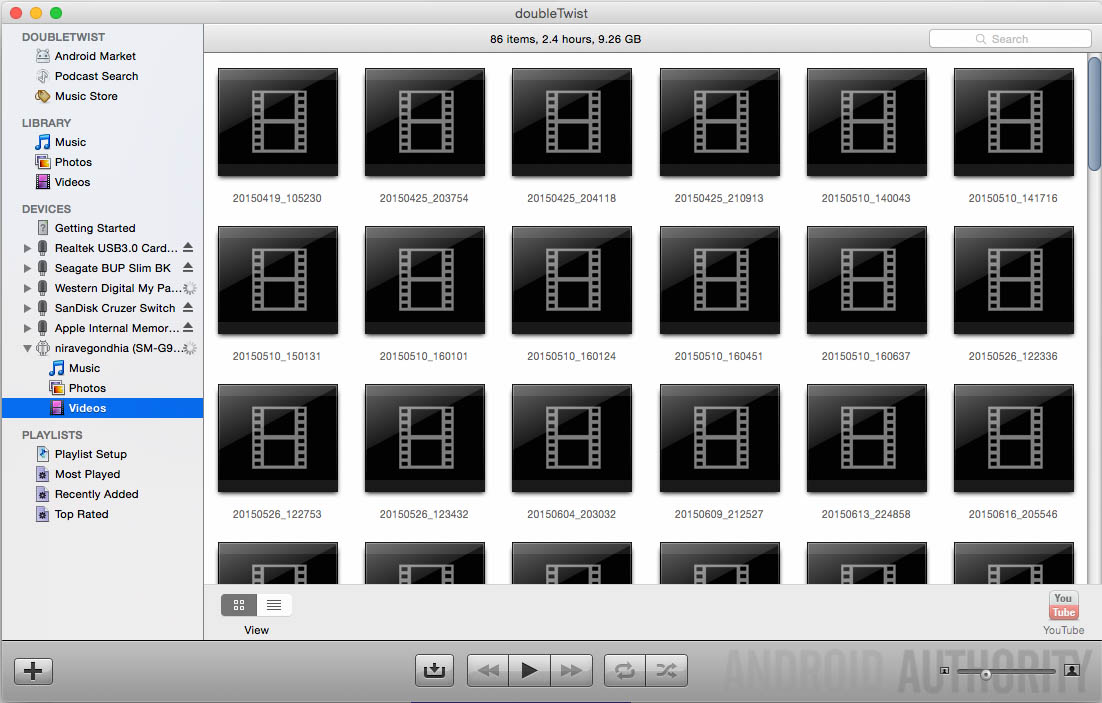
Whether you go wireless or sync using a cable, you need to look no further than doubleTwist if you want to sync media between your Android phone and your Mac.
Syncing contacts, calendars and mail

Official solution & our recommendation: Google Services
A key reason to sync your contacts, calendars and notes to your Mac is so they are all backed up but rather than manually sync, you can take advantage of Google’s own services to wirelessly keep your contacts, calendars and Mail in sync across all your devices.
[related_videos title=”Top Phones of 2015:” align=”right” type=”custom” videos=”630400,629200,629182,625832,625608,623586″]Your phone is already set to sync with Google Services and it’s baked into the core OS so why not take advantage of it? I’ve been using Google Services for both my Gmail and own domain email services for nearly a decade and I wouldn’t change it at all; rather than have to manually sync items, everything is synced in the background for you and changes appear on other devices very quickly as well!
To sync your Gmail contacts, calendar and Gmail to your Mac, exact implementation depends on which programs you decide to use. Some people will prefer to use Microsoft Office, which has its own set of instructions, while others will use Apple’s own rival suite, which you can find instructions for here.
Whatever programs you use to access your data on your Mac, we definitely recommend using Google’s own suite. You can alternatively use other mail clients but these are not as integrated into Android as Google Services, which is a key element in the seamless exchange between devices.
What do YOU use?
These are just a few of our personal recommendations but there may be others that are more suitable for your needs (although the set above should cover most use cases). As we progress towards a more cloud-based society in a wireless world, the ability to connect and sync without needing a cable may become a necessity and where possible, we’d recommend using wireless solutions over a physical cable.
Are you a Mac user? Do you use any of the applications we’ve mentioned or recommend some that we’ve not mentioned above? Let us know in the comments below!
Источник


