- SharedPreferences
- Сохранение значений параметров
- Чтение значений параметров
- Очистка значений
- Методы getStringSet() и putStringSet()
- Удаление файла
- Метод getPreferences() — Сохранение состояния активности
- Сохранение настроек на SD-карту
- Я у тебя первый?
- Запомнить пользователя
- Запомнить состояние переключателей
- getDefaultSharedPreferences()
- Удаляем файл настроек
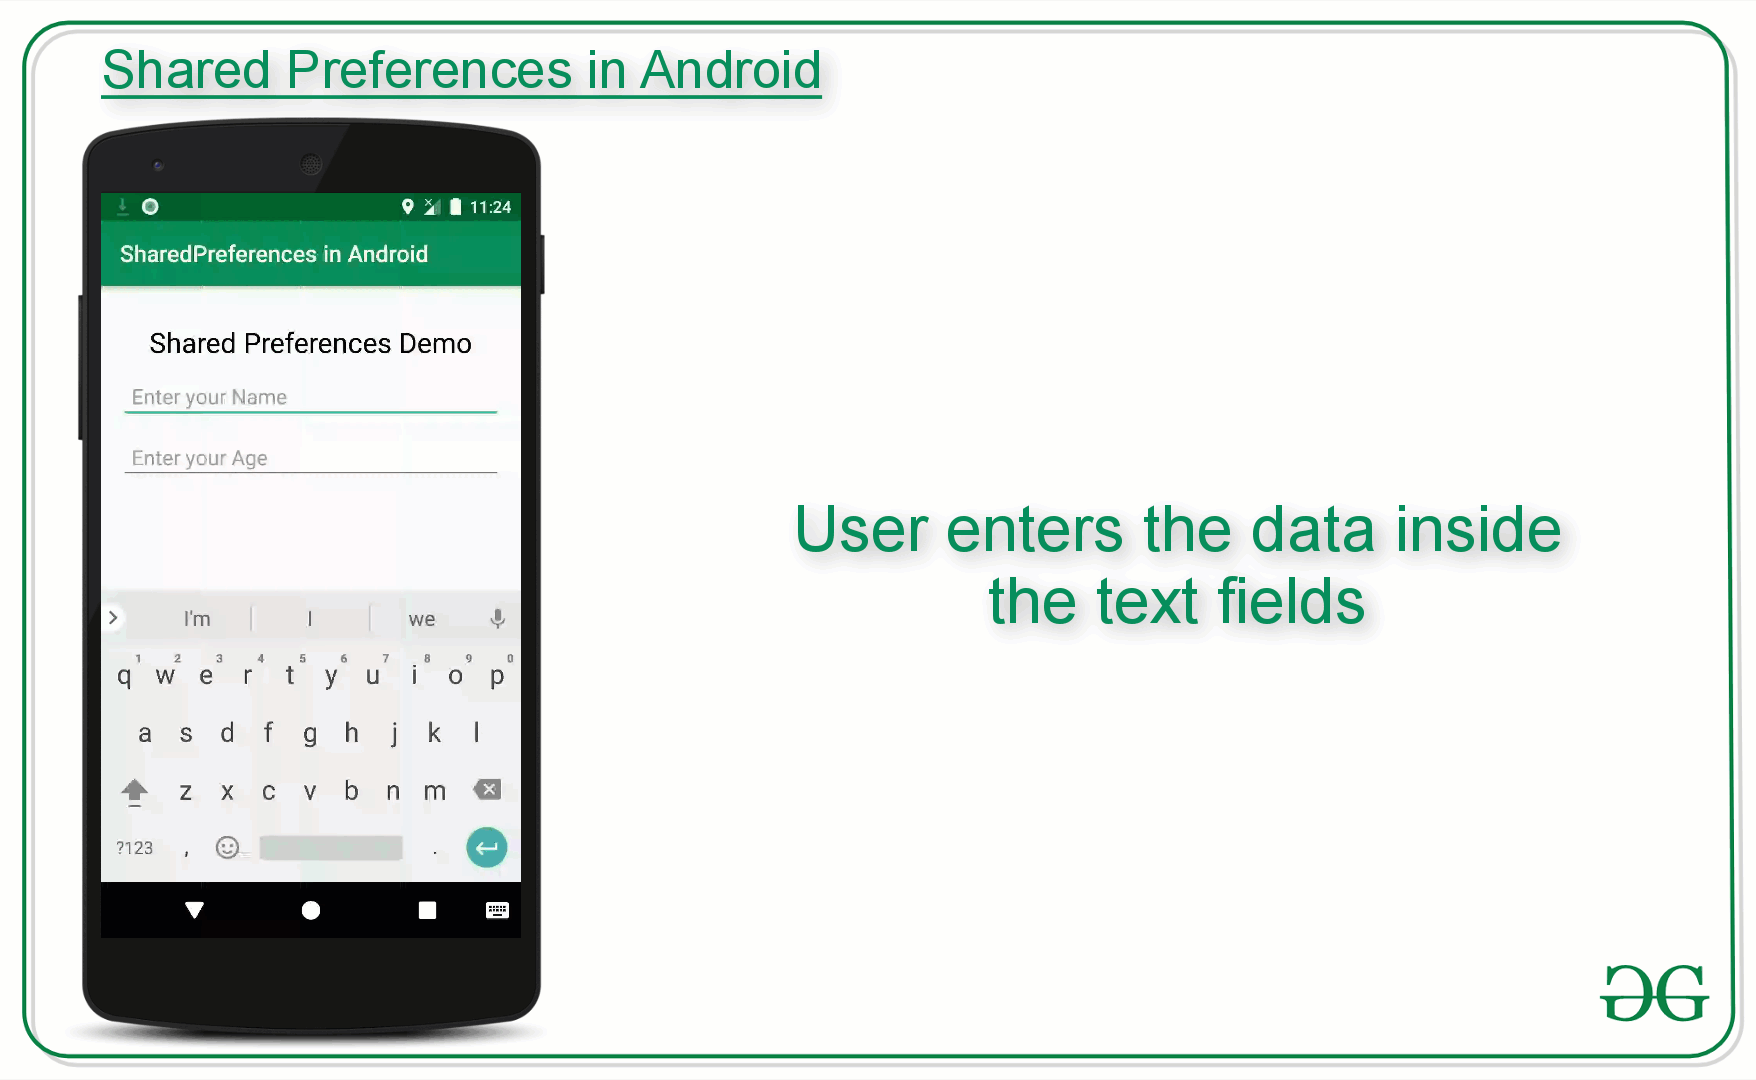
- Shared Preferences in Android with Example
- How is Shared Preferences different from Saved Instance State?
- How to Create Shared Preferences?
- Nested classes of Shared Preferences
- Following are the methods of Shared Preferences
- Android Shared Preferences with Examples
- Handle Shared Preferences
- Write to Shared Preferences
- Read from Shared Preferences
- Deleting from Shared Preferences
- Clearing from Shared Preferences
- Android Shared Preferences Example
- activity_main.xml
- details.xml
- MainActivity.java
- DetailsActivity.java
- AndroidManifest.xml
- Output of Android Shared Preferences Example
SharedPreferences
Чтобы получить экземпляр класса SharedPreferences для получения доступа к настройкам в коде приложения используются три метода:
- getPreferences() — внутри активности, чтобы обратиться к определённому для активности предпочтению;
- getSharedPreferences() — внутри активности, чтобы обратиться к предпочтению на уровне приложения;
- getDefaultSharedPreferences() — из объекта PreferencesManager, чтобы получить общедоступную настройку, предоставляемую Android.
Все эти методы возвращают экземпляр класса SharedPreferences, из которого можно получить соответствующую настройку с помощью ряда методов:
- getBoolean(String key, boolean defValue)
- getFloat(String key, float defValue)
- getInt(String key, int defValue)
- getLong(String key, long defValue)
- getString(String key, String defValue)
Обратите внимание, что тип double не поддерживается.
Чтобы создать или изменить Общие настройки, нужно вызвать метод getSharedPreferences в контексте приложения, передав имя общих настроек (имя файла):
По умолчанию используется MODE_PRIVATE — только приложение имеет доступ к настройкам. Также существуют другие режимы, с которыми практически не встречался.
- MODE_APPEND — присоединяет новые настройки к существующим
- MODE_ENABLE_WRITE_AHEAD_LOGGING
- MODE_MULTI_PROCESS
- MODE_WORLD_READABLE — позволяет другим приложениям читать настройки
- MODE_WORLD_WRITEABLE — позволяет другим приложениям записывать новые настройки
Для любознательных могу добавить, что файлы настроек хранятся в каталоге /data/data/имя_пакета/shared_prefs/имя_файла_настроек.xml. Поэтому в отладочных целях, если вам нужно сбросить настройки в эмуляторе, то при помощи перспективы DDMS, используя файловый менеджер, зайдите в нужную папку, удалите файл настроек и перезапустите эмулятор, так как эмулятор хранит данные в памяти, которые он сбрасывает в файл. На устройстве вы можете удалить программу и поставить ее заново, то же самое можно сделать и на эмуляторе, что бывает проще, чем удалять файл настроек вручную и перезапускать эмулятор.
Если открыть файл настроек текстовым редактором, то можно увидеть приблизительно такое:
В данном случае в настройках хранятся только строковые значения.
Сохранение значений параметров
Для удобства создадим константу для имени файла настроек, например:
Далее нужно создать параметры, которые вы хотите сохранять в настройках. Удобнее их сделать константами:
Когда вы определили названия параметров, то можете сохранять любые значения этих параметров. Для этого создаём переменную, представляющую экземпляр класса SharedPreferences:
Внутри метода onCreate() вы инициализируете эту переменную:
Вы передаёте в указанный метод название вашего файла (он будет создан автоматически) и стандартное разрешение, дающее доступ только компонентам приложения.
Чтобы внести изменения в настройки (редактировать), нужно использовать класс SharedPreferences.Editor. Получить объект Editor можно через вызов метода edit объекта SharedPreferences, который вы хотите изменить. После того, как вы внесли все необходимые изменения, вызовите метод commit() или apply() объекта Editor, чтобы изменения вступили в силу. Метод apply() появился в API 9 и работает в асинхронном режиме, что является более предпочтительным вариантом. Метод commit() приходится использовать для старых версий и кроме того, он возвращает значение true в успешном случае и false в случае ошибки. Если вам надо отслеживать ошибки, то используйте его.
Предположим, что у нас есть два текстовых поля, где пользователь должен ввести имя кота и его и возраст. Чтобы сохранить параметр, нужно получить текст, который ввел пользователь, через метод getText().toString():
Получив нужный текст, сохраняем его через метод putString() (есть также putLong(), putBoolean() и т.п.):
Как правило, параметры сохраняют в методах активности onPause() или onStop() в тех случаях, когда данные требуются сохранить между запусками приложения. Но могут быть и другие сценарии.
Чтение значений параметров
Для считывания данных при загрузке приложения обычно используют методы onCreate() или onResume(). Нам нужно получить доступ к настройкам программы и проверить, есть ли среди них нужный нам параметр. Нас интересует ключ Nickname. Если мы его найдём, то загрузим его значение в текстовое поле.
В этих строчках кода мы проверили существование параметра APP_PREFERENCES_NAME и получили его значение через getString(), передавая ключ и значение по умолчанию (используется в том случае, если для данного ключа пока что не сохранено никакое значение). Осталось только загрузить полученный результат в текстовое поле.
Аналогично поступаем и с другими параметрами через методы get () (getLong, getBoolean() и т.д.).
Если вам ещё не понятно, то ниже исходный код:
Показать код (щелкните мышкой)
Можно получить ассоциативный массив со всеми ключами и значениями через метод getAll(). После этого можно проверить наличие конкретного ключа с помощью метода contains().
Очистка значений
Для очистки значений используйте методы SharedPreferences.Editor.remove(String key) и SharedPreferences.Editor.clear().
Методы getStringSet() и putStringSet()
Начиная с API 11, у класса SharedPreferences появился новый метод getStringSet(), а у класса SharedPreferences.Editor родственный ему метод putStringSet(). Данные методы позволяют работать с наборами строк, что бывает удобно при большом количестве настроек, которые нужно сразу записать или считать.
Удаление файла
Как я уже сказал, файл настроек хранится в /data/data/имя_пакета/shared_prefs/имя_файла_настроек.xml. Вы можете удалить его программно, например так:
Учтите, что данные могут оставаться в памяти и временном файле *.bak. Поэтому, даже после удаления файла, он может заново воссоздаться. Вообще удалять файл не рекомендуется. Он автоматически удалится при удалении самой программы.
Метод getPreferences() — Сохранение состояния активности
Если вы хотите сохранить информацию, которая принадлежит активности и не должна быть доступна другим компонентам (например, переменным экземпляра класса), вы можете вызвать метод Activity.getPreferences() без указания названия Общих настроек. Доступ к возвращённому ассоциативному массиву Общих настроек ограничен активностью, из которой он был вызван. Каждая активность поддерживает только один безымянный объект Общих настроек.
Сохранение настроек на SD-карту
Сам файл с настройками хранится в системе и обычному пользователю он не виден. Если вам понадобится получить все значения, хранимые в настройках, то вы можете считать все данные при помощи метода getAll() и записать их в файл, который можно сохранить на SD-карте:
Я у тебя первый?
Предположим, вы хотите выводить пользователю какую-то информацию при первом запуске приложения (краткую инструкцию, заставку и т.п.).
Запомнить пользователя
Иногда требуется запомнить имя пользователя или другие данные (пин-код, номер телефона и т.д.). В этом случае вам также подойдут предпочтения, когда вы просто сохраняете нужную строку из текстового поля:
Запомнить состояние переключателей
Если нужно запомнить состояние переключателей, то код может быть таким. Создадим разметку с тремя переключателями.
Код, который отслеживает выбор переключателя и записывает состояние в настройки.
getDefaultSharedPreferences()
В используемых примерах я использовал getSharedPreferences() с придумыванием имени файла для хранения настроек. Этот способ придаёт гибкости в том случае, когда вам нужно создать несколько отдельных файлов. Но если вам нужен один файл, то можно ничего не придумывать, а использовать метод getDefaultSharedPreferences() из объекта PreferencesManager. Система сама сгенерирует имя файла из имени вашего пакета с добавлением слова _preferences. Вот как выглядит связка из трёх методов в исходниках Android (обратите внимание на выделенный текст).
Поэтому примеры можно переделать следующим образом.
Удаляем файл настроек
В API 24 появился новый метод, позволяющий удалить сам файл настроек. До этого можно было удалить своими силами, зная его местоположение. Поэтому универсальный код будет приблизительно следующим.
Источник
Shared Preferences in Android with Example
One of the most Interesting Data Storage options Android provides its users is Shared Preferences. Shared Preferences is the way in which one can store and retrieve small amounts of primitive data as key/value pairs to a file on the device storage such as String, int, float, Boolean that make up your preferences in an XML file inside the app on the device storage. Shared Preferences can be thought of as a dictionary or a key/value pair. For example, you might have a key being “username” and for the value, you might store the user’s username. And then you could retrieve that by its key (here username). You can have a simple shared preference API that you can use to store preferences and pull them back as and when needed. Shared Preferences class provides APIs for reading, writing, and managing this data. A sample GIF is given below to get an idea about what we are going to do in this article. Note that we are going to implement this project using the Java language.
Shared Preferences are suitable in different situations. For example, when the user’s settings need to be saved or to store data that can be used in different activities within the app. As you know, onPause() will always be called before your activity is placed in the background or destroyed, So for the data to be saved persistently, it’s preferred to save it in onPause(), which could be restored in onCreate() of the activity. The data stored using shared preferences are kept private within the scope of the application. However, shared preferences are different from that activity’s instance state.
How is Shared Preferences different from Saved Instance State?
Saved Instance State
How to Create Shared Preferences?
The first thing we need to do is to create one shared preferences file per app. So name it with the package name of your app- unique and easy to associate with the app. When you want to get the values, call the getSharedPreferences() method. Shared Preferences provide modes of storing the data (private mode and public mode). It is for backward compatibility- use only MODE_PRIVATE to be secure.
public abstract SharedPreferences getSharedPreferences (String name, int mode)
This method takes two arguments, the first being the name of the SharedPreference(SP) file and the other is the context mode that we want to store our file in.
MODE_PUBLIC will make the file public which could be accessible by other applications on the device
MODE_PRIVATE keeps the files private and secures the user’s data.
MODE_APPEND is used while reading the data from the SP file.
Nested classes of Shared Preferences
- SharedPreferences.Editor: Interface used to write(edit) data in the SP file. Once editing has been done, one must commit() or apply() the changes made to the file.
- SharedPreferences.OnSharedPreferenceChangeListener(): Called when a shared preference is changed, added, or removed. This may be called even if a preference is set to its existing value. This callback will be run on your main thread.
Following are the methods of Shared Preferences
- contains(String key): This method is used to check whether the preferences contain a preference.
- edit(): This method is used to create a new Editor for these preferences, through which you can make modifications to the data in the preferences and atomically commit those changes back to the SharedPreferences object.
- getAll(): This method is used to retrieve all values from the preferences.
- getBoolean(String key, boolean defValue): This method is used to retrieve a boolean value from the preferences.
- getFloat(String key, float defValue): This method is used to retrieve a float value from the preferences.
- getInt(String key, int defValue): This method is used to retrieve an int value from the preferences.
- getLong(String key, long defValue): This method is used to retrieve a long value from the preferences.
- getString(String key, String defValue): This method is used to retrieve a String value from the preferences.
- getStringSet(String key, Set defValues): This method is used to retrieve a set of String values from the preferences.
- registerOnSharedPreferencechangeListener(SharedPreferences.OnSharedPreferencechangeListener listener): This method is used to registers a callback to be invoked when a change happens to a preference.
- unregisterOnSharedPreferencechangeListener(SharedPreferences.OnSharedPreferencechangeListener listener): This method is used to unregisters a previous callback.
Following is sample byte code on how to write Data in Shared Preferences:
Источник
Android Shared Preferences with Examples
In android, Shared Preferences are used to save and retrieve the primitive data types (integer, float, boolean, string, long) data in the form of key-value pairs from a file within an apps file structure.
Generally, the Shared Preferences object will point to a file that contains key-value pairs and provides a simple read and write methods to save and retrieve the key-value pairs from a file.
The Shared Preferences file is managed by an android framework and it can be accessed anywhere within the app to read or write data into the file, but it’s not possible to access the file from any other app so it’s secured.
The Shared Preferences are useful to store the small collection of key-values such as user’s login information, app preferences related to users, etc. to maintain the state of the app, next time when they login again to the app.
Handle Shared Preferences
In android, we can save the preferences data either in single or multiple files based on our requirements.
In case if we use a single file to save the preferences, then we need to use getPreferences() method to get the values from Shared Preferences file and for multiple files, we need to call a getSharedPreferences() method and pass a file name as a parameter.
| Method | Description |
|---|---|
| getPreferences() | This method is for activity level preferences and each activity will have its own preference file and by default, this method retrieves a default shared preference file that belongs to the activity. |
| getSharedPreferences() | This method is useful to get the values from multiple shared preference files by passing the name as a parameter to identify the file. We can call this from any Context in our app. |
The following are the different ways to initialize the Shared Preferences in our application.
If we are using single shared preference file for our activity, then we need to initialize the SharedPreferences object by using getPreferences() method like as shown below.
SharedPreferences sharedPref = getPreferences(Context. MODE_PRIVATE );
In case, if we are using multiple shared preference files, then we need to initialize the SharedPreferences object by using the getSharedPreferences() method like as shown below.
Here, the name “filename1” is the preference file, which wants to read the values based on our requirements and the context mode MODE_PRIVATE, will make sure that the file can be accessed only within our application.
Write to Shared Preferences
To store data in a shared preference file, we need an editor to edit and save the changes in the SharedPreferences object. Following is the code snippet to store the data in shared preference file using an editor.
If you observe above code snippet, we created a SharedPreferences.Editor by calling the edit() method of SharedPreferences object. We added a primitive data type values such as integer, float, long, string and Boolean by passing the keys and values to the methods putInt(), putString(), etc. based on our requirements. After that, to save all the changes we are calling commit() method.
Read from Shared Preferences
To read or retrieve values from the Shared Preferences file, we need to call methods such as getInt(), getString(), etc. by providing the key for the value which we want to get like as shown below.
If you observe above code snippet, we are getting the values from shared preferences using a methods such as getInt(), getFloat(), etc. by providing the key for the value which we want to get.
Deleting from Shared Preferences
To delete values from the Shared Preferences file, we need to call remove() method by providing the key for the value which we want to delete like as shown below.
If you observe above code snippet, we are deleting the values from shared preferences using a method called remove() by providing the key for the value which we want to delete and committing the changes to shared preferences file using commit() method.
Clearing from Shared Preferences
We can clear all the data from Shared Preferences file using a clear() method like as shown below.
If you observe above code snippet, we are clearing all the values from shared preferences using a method called clear() and committing the changes to shared preferences file using commit() method.
Now we will see how to store and retrieve primitive data type key-value pairs in shared preferences file using SharedPreferences object in android application with examples.
Android Shared Preferences Example
Following is the example of storing and retrieving the primitive data type values from shared preferences file using SharedPreferences.
Create a new android application using android studio and give names as SharedPreferencesExample. In case if you are not aware of creating an app in android studio check this article Android Hello World App.
Once we create an application, open activity_main.xml file from \res\layout folder path and write the code like as shown below.
activity_main.xml
xml version= «1.0» encoding= «utf-8» ?>
LinearLayout xmlns: android = «http://schemas.android.com/apk/res/android»
android :orientation= «vertical» android :layout_width= «match_parent»
android :layout_height= «match_parent» >
TextView
android :id= «@+id/fstTxt»
android :layout_width= «wrap_content»
android :layout_height= «wrap_content»
android :layout_marginLeft= «100dp»
android :layout_marginTop= «150dp»
android :text= «UserName»/>
EditText
android :id= «@+id/txtName»
android :layout_width= «wrap_content»
android :layout_height= «wrap_content»
android :layout_marginLeft= «100dp»
android :ems= «10»/>
TextView
android :id= «@+id/secTxt»
android :layout_width= «wrap_content»
android :layout_height= «wrap_content»
android :text= «Password»
android :layout_marginLeft= «100dp»/>
EditText
android :id= «@+id/txtPwd»
android :inputType= «textPassword»
android :layout_width= «wrap_content»
android :layout_height= «wrap_content»
android :layout_marginLeft= «100dp»
android :ems= «10»/>
Button
android :id= «@+id/btnLogin»
android :layout_width= «wrap_content»
android :layout_height= «wrap_content»
android :layout_marginLeft= «100dp»
android :text= «Login»/>
LinearLayout >
Now we will create another layout resource file details.xml in \res\layout path to get the first activity (activity_main.xml) details in second activity file for that right click on your layout folder à Go to New à select Layout Resource File and give name as details.xml.
Once we create a new layout resource file details.xml, open it and write the code like as shown below
details.xml
xml version= «1.0» encoding= «utf-8» ?>
LinearLayout xmlns: android = «http://schemas.android.com/apk/res/android»
android :orientation= «vertical» android :layout_width= «match_parent»
android :layout_height= «match_parent» >
TextView
android :layout_width= «wrap_content»
android :layout_height= «wrap_content»
android :id= «@+id/resultView»
android :layout_gravity= «center»
android :layout_marginTop= «170dp»
android :textSize= «20dp»/>
Button
android :id= «@+id/btnLogOut»
android :layout_width= «wrap_content»
android :layout_height= «wrap_content»
android :layout_gravity= «center»
android :layout_marginTop= «20dp»
android :text= «Log Out»/>
LinearLayout >
Now open your main activity file MainActivity.java from \java\com.tutlane.sharedpreferencesexample path and write the code like as shown below
MainActivity.java
package com.tutlane.sharedpreferencesexample;
import android.content.Intent;
import android.content.SharedPreferences;
import android.support.v7.app.AppCompatActivity;
import android.os.Bundle;
import android.view.View;
import android.widget.Button;
import android.widget.EditText;
import android.widget.Toast;
public class MainActivity extends AppCompatActivity <
EditText uname , pwd ;
Button loginBtn ;
SharedPreferences pref ;
Intent intent ;
@Override
protected void onCreate(Bundle savedInstanceState) <
super .onCreate(savedInstanceState);
setContentView(R.layout. activity_main );
uname = (EditText)findViewById(R.id. txtName );
pwd = (EditText)findViewById(R.id. txtPwd );
loginBtn = (Button)findViewById(R.id. btnLogin );
pref = getSharedPreferences( «user_details» , MODE_PRIVATE );
intent = new Intent(MainActivity. this ,DetailsActivity. class );
if ( pref .contains( «username» ) && pref .contains( «password» )) <
startActivity( intent );
>
loginBtn .setOnClickListener( new View.OnClickListener() <
@Override
public void onClick(View v) <
String username = uname .getText().toString();
String password = pwd .getText().toString();
if (username.equals( «suresh» ) && password.equals( «dasari» )) <
SharedPreferences.Editor editor = pref .edit();
editor.putString( «username» ,username);
editor.putString( «password» ,password);
editor.commit();
Toast.makeText(getApplicationContext(), «Login Successful» ,Toast. LENGTH_SHORT ).show();
startActivity( intent );
>
else
<
Toast.makeText(getApplicationContext(), «Credentials are not valid» ,Toast. LENGTH_SHORT ).show();
>
>
>);
>
>
If you observe above code, we are checking whether the entered username and password details matching or not based on that we are saving the details in shared preferences file and redirecting the user to another activity.
Now we will create another activity file DetailsActivity.java in \java\com.tutlane.sharedpreferencesexample path to show the details from shared preference file for that right-click on your application folder à Go to New à select Java Class and give name as DetailsActivity.java.
Once we create a new activity file DetailsActivity.java, open it and write the code like as shown below
DetailsActivity.java
package com.tutlane.sharedpreferencesexample;
import android.content.Intent;
import android.content.SharedPreferences;
import android.os.Bundle;
import android.support.v7.app.AppCompatActivity;
import android.view.View;
import android.widget.Button;
import android.widget.TextView;
/**
* Created by tutlane on 03-01-2018.
*/
public class DetailsActivity extends AppCompatActivity <
SharedPreferences prf ;
Intent intent ;
@Override
protected void onCreate(Bundle savedInstanceState) <
super .onCreate(savedInstanceState);
setContentView(R.layout. details );
TextView result = (TextView)findViewById(R.id. resultView );
Button btnLogOut = (Button)findViewById(R.id. btnLogOut );
prf = getSharedPreferences( «user_details» , MODE_PRIVATE );
intent = new Intent(DetailsActivity. this ,MainActivity. class );
result.setText( «Hello, » + prf .getString( «username» , null ));
btnLogOut.setOnClickListener( new View.OnClickListener() <
@Override
public void onClick(View v) <
SharedPreferences.Editor editor = prf .edit();
editor.clear();
editor.commit();
startActivity( intent );
>
>);
>
>
Now we need to add this newly created activity in AndroidManifest.xml file in like as shown below.
AndroidManifest.xml
xml version= «1.0» encoding= «utf-8» ?>
manifest xmlns: android = «http://schemas.android.com/apk/res/android»
package= «com.tutlane.sharedpreferencesexample» >
application
android :allowBackup= «true»
android :icon= «@mipmap/ic_launcher»
android :label= «@string/app_name»
android :roundIcon= «@mipmap/ic_launcher_round»
android :supportsRtl= «true»
android :theme= «@style/AppTheme» >
activity android :name= «.MainActivity» >
intent-filter >
action android :name= «android.intent.action.MAIN»/>
category android :name= «android.intent.category.LAUNCHER»/>
intent-filter >
activity >
activity android :name= «.DetailsActivity» android :label= «Shared Preferences — Details» > activity >
application >
manifest >
If you observe above example, we are checking whether the entered user details matching or not based on that we are saving the user details in shared preferences file and redirecting the user to another activity file (DetailsActivity.java) to show the users details and added all the activities in AndroidManifest.xml file.
Output of Android Shared Preferences Example
When we run above example in android emulator we will get a result like as shown below

If you observe above result, the entered username and password matches then we are redirecting user to another activity file to show the user details from shared preferences file. After that, if we click on the Logout button, it will clear all the values in the shared preferences file and it will redirect user to login page.
This is how we can use Shared Preferences in android applications to store and retrieve key-value pair values based on our requirements.
Источник


