- Programmer Group
- Android — use of recycle view click and long press events
- 1, RecyclerView click and long press events
- 2, Simple use of RecycleView’s click and long press events
- Android RecyclerView CLick Listener Tutorial
- Let’s Get it Working
- Step 1 ) Writing the click interface
- Step 2 ) Writing the Item Touch Class
- Step 3 ) Defining click listener
- RecyclerView Item Click Listener the Right Way
- Example Scenario
- Project Creation
- Data model
- Recyclerview Adapter and view holder
- Item Click the bad way
- Let us fix it
- doodeec / RecyclerItemClickListener.java
- This comment has been minimized.
- doodeec commented Jan 24, 2015
- Ready Android
- Pursuing Perfection Passionately
- Thanks to
- Evergreen Posts & Pages
- Nice to see u 🙂
- Single item click and long press in RecyclerView/ListView: Android
- Creating Interface
- Creating InnerClass
- Adding Click Listeners to RecyclerView
- Accessing Particular View Component in the RecyclerView Item
Programmer Group
A programming skills sharing group
Android — use of recycle view click and long press events
Note: the content of this chapter is Android — RecycleView easy to use Based on the added.
1, RecyclerView click and long press events
Unlike ListView, RecyclerView provides click and long press listening events. In RecyclerView, we need to define it in adapter. The code is as follows:
RecycleAdapterDome.java
The main steps are as follows:
Step 1: define the listening interface OnItemListener class in RecycleAdapterDome class, as follows:
Step 2: write the internal class of RV ﹣ itemlistener in the RecycleAdapterDome class to implement the interface callback method to transfer the click event to the external caller
Step 3: write setOnItemListenerListener(OnItemListener listener) method in RecycleAdapterDome class, instantiate the exposed caller and define the Listener method
Step 4: in the onCreateViewHolder(ViewGroup parent, int viewType) method in the RecycleAdapterDome class, add a click event for each item in the onCreateViewHolder(ViewGroup parent, int viewType).
The main steps are basically completed. For details, please refer to the detailed code RecycleAdapterDome.java.
2, Simple use of RecycleView’s click and long press events
Next, we need to use myAdapter.setOnItemListenerListener(new RecycleAdapterDome.OnItemListener() < >) write click and long press events.
MainActivity.java
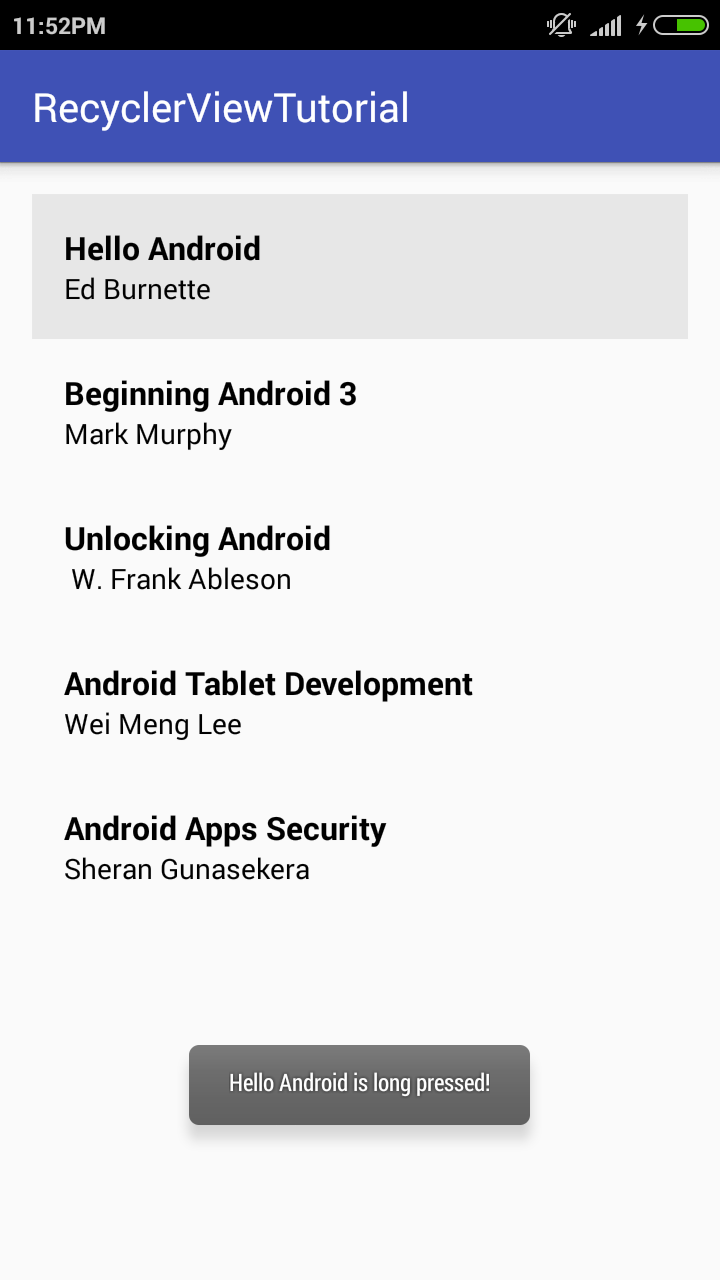
The renderings are as follows:
Источник
Android RecyclerView CLick Listener Tutorial
In Our Previous tutorial “Android RecyclerView Tutorial” . We had learned how to render a simple RecyclerView with a custom layout. We had also learn writing a adapter class and binding data the list of books displaying the title and author .
If you’ve used a RecyclerView, you may know that they don’t have a setOnItemClickListener as ListView had, so we have to create our own way to do it . There are many ways to achieve this, but I will show you the way I usually do it .
Let’s Get it Working
In this tutorial we are going to learn how to add recycler view item click listener. I assume that you have learned how to render a simple RecyclerView with a custom layout from my previous post “Android RecyclerView Tutorial” .
Step 1 ) Writing the click interface
Create an interface named RecyclerViewClickListener.java and add below code. Here we declare two methods onClick and onLongClick to identify item click and long click respectively.
Step 2 ) Writing the Item Touch Class
Create a class named RecyclerViewTouchListener.java and add below code . Here we write the logic to detect click and long press on recycler view item .
Step 3 ) Defining click listener
Open MainActivity.java and update the below changes. Here onClick() method will detect click on item and onLongClick will detect long click on item.
Run your app , click and long press the recycler view item . 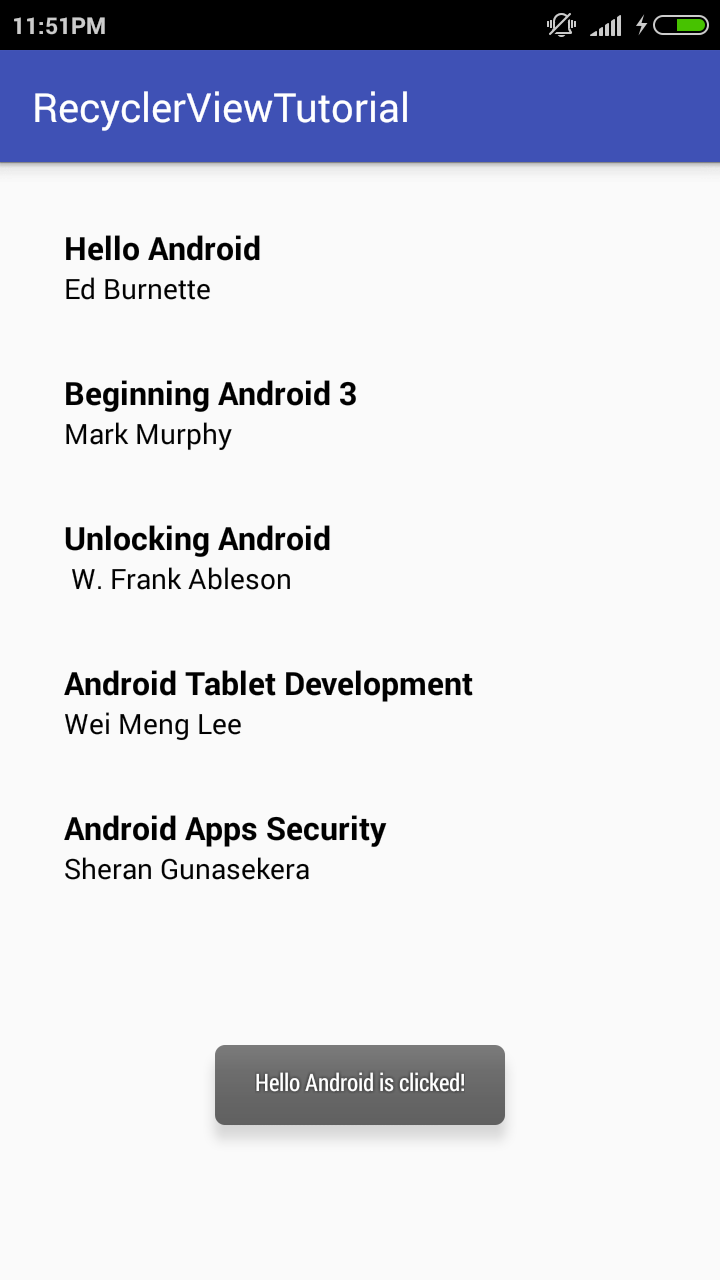


Enjoy Coding and Share Knowledge
Источник
RecyclerView Item Click Listener the Right Way


Some Android developers wonder why Google created a view like Recyclerview without a click listener(given the fact that the deprecated ListView has an item click listener).
Because there is no standard way of setting a click listener, new developers tend to confuse on the right way of doing it. In this article, I will show you how to do it in a proper way using an example scenario.
Example Scenario
- There is a Recyclerview adapter with a Recyclerview with a list of items(Users in this case).
- What we want is that when an item is clicked, we get the item’s model(User) information and may be pass it to a second activity.
Project Creation
From Android Studio, create an empty android project(Select the Kotlin support option) and name your activity, MainActivity.
- Delete the default ‘Hello World’ TextView in activity_main.xml .
- Add recyclerview and cardview dependencies in app level build.gradle file as shown below.

Add recyclerview in activity_main.xml where you removed the textview as shown below.
Ok we are good to go. The assumption is that you have worked with the recyclerview(in Java) before and know how to create a recyclerview adapter.. Next, we create the model class containing username and phone.
Data model
Sweet Kotlin. Just the above line of code gives us access to a setter and getter under the hood and other methods like toString. Check more at https://kotlinlang.org/docs/reference/data-classes.html .
Next, we create our view holder and adapter. Pay attention here because it is the most important part of what this article addresses.
Recyclerview Adapter and view holder
- Create a new Kotlin file called RecyclerAdapter.kt
- Next we create our item_user.xml layout as follows
The item_user has two textviews which holds the name and phone.
Next we create our view holder. As usual, our view holder has a constructor with an itemView as parameter and we get a reference to our views from item_user layout .
Then we create our adapter with the list of users as a parameter. An adapter contains the list of users
Item Click the bad way
Note that in onBindView, we can have access to the the current clicked item and thus open a new activity from here and pass our data..
This will work perfectly but it is a bad practice because
- It is not a good practice opening an Activity from a viewholder context
- Note that onBindViewHolder is called as your views are populated during scrolling. Thus you will have numerous calls to setOnClickListener.
Let us fix it
The way that you should do is that you create an ItemClickListener interface with one method ontemClicked with parameter User.
- We then pass modify the Adapter’s constructor to take the users list and an OnItemClickListener interface
- We also modify the the ViewHolder to have a bind function which takes a user and itemClick interface as follows.
This is all we have to do. We just have to implement the interface in our MainActivity .
Источник
doodeec / RecyclerItemClickListener.java
This file contains bidirectional Unicode text that may be interpreted or compiled differently than what appears below. To review, open the file in an editor that reveals hidden Unicode characters. Learn more about bidirectional Unicode characters
| public class RecyclerItemClickListener implements RecyclerView . OnItemTouchListener < |
| private OnItemClickListener mListener; |
| public interface OnItemClickListener < |
| /** |
| * Fires when recycler view receives a single tap event on any item |
| * |
| * @param view tapped view |
| * @param position item position in the list |
| */ |
| public void onItemClick ( View view , int position ); |
| /** |
| * Fires when recycler view receives a long tap event on item |
| * |
| * @param view long tapped view |
| * @param position item position in the list |
| */ |
| public void onItemLongClick ( View view , int position ); |
| > |
| GestureDetector mGestureDetector; |
| ExtendedGestureListener mGestureListener; |
| public RecyclerItemClickListener ( Context context , OnItemClickListener listener ) < |
| mListener = listener; |
| mGestureListener = new ExtendedGestureListener (); |
| mGestureDetector = new GestureDetector (context, mGestureListener); |
| > |
| @Override |
| public boolean onInterceptTouchEvent ( RecyclerView view , MotionEvent e ) < |
| View childView = view . findChildViewUnder(e . getX(), e . getY()); |
| if (childView != null && mListener != null ) < |
| mGestureListener . setHelpers(childView, view . getChildPosition(childView)); |
| mGestureDetector . onTouchEvent(e); |
| > |
| return false ; |
| > |
| @Override |
| public void onTouchEvent ( RecyclerView view , MotionEvent motionEvent ) < |
| > |
| @Override |
| public void onRequestDisallowInterceptTouchEvent ( boolean disallowIntercept ) < |
| > |
| /** |
| * Extended Gesture listener react for both item clicks and item long clicks |
| */ |
| private class ExtendedGestureListener extends GestureDetector . SimpleOnGestureListener < |
| private View view; |
| private int position; |
| public void setHelpers ( View view , int position ) < |
| this . view = view; |
| this . position = position; |
| > |
| @Override |
| public boolean onSingleTapUp ( MotionEvent e ) < |
| mListener . onItemClick(view, position); |
| return true ; |
| > |
| @Override |
| public void onLongPress ( MotionEvent e ) < |
| mListener . onItemLongClick(view, position); |
| > |
| > |
| > |
This comment has been minimized.
Copy link Quote reply
doodeec commented Jan 24, 2015
A simple RecyclerView item click/longTap listener.
Make sure to remove currently added touch listener before the new one is added. RecyclerView keeps a list of all listeners, so adding a new listener does not clear the previous one.
You can’t perform that action at this time.
You signed in with another tab or window. Reload to refresh your session. You signed out in another tab or window. Reload to refresh your session.
Источник
Ready Android
Pursuing Perfection Passionately
Thanks to
Evergreen Posts & Pages
Nice to see u 🙂
Single item click and long press in RecyclerView/ListView: Android
Creating Interface
I hope you have read my previous article. Let me take you from there. Under MainActivity, We need to create a simple interface for single tap and for long press events, by passing “view” and its “position” as parameters
Creating InnerClass
Under MainActivity, Let’s create an inner class implementing RecyclerView.OnItemTouchListener. We also need to make use of ClickListener interface in this inner class. GestureDetector class is used to listen for various touch events.
Adding Click Listeners to RecyclerView
Now let’s add the ItemTouchListener to the RecyclerView, where we will pass RecyclerTouchListener class. This will implement onClick and onLongClick methods.These methods will listen for the click and long press events on the particular position of the view.
So….. our Listeners are all ready.
Accessing Particular View Component in the RecyclerView Item
In order to access particular view component inside RecyclerView, for example, In order to perform some operation only on clicking the profile image in the RecyclerView row item, then here is the small hack for you.
We can define the component by findViewById via it’s respective View. Here is the code for you.
Now you can perform any operation on clicking the image. Follow the same for the other view components.
Источник


