- Как обновить данные адаптера RecyclerView?
- 12 ответов
- вставить один элемент
- вставить несколько элементов
- удалить один элемент
- удалить несколько элементов
- удалить все элементы
- заменить старый список на новый список
- обновить один элемент
- переместить один пункт
- Примечания
- дальнейшего изучения
- Android recyclerview update list
- Add, Remove and Update RecyclerView Items In Android Studio
- Features Of Application
- Demo
- Create A New Project
- Structure Of Code
- Code
- Code for build.gradle (Module: app )
- Code for AndroidManifest.xml file .
- Code for MainActivity.java file.
- Code for the activity_main.xml file.
- Code for Model.java file.
- Code for RvAdapter.java file.
- Code for the item_list.xml file.
- Smart way to update RecyclerView using DiffUtil
- Now say good bye to notifyDataSetChanged()…
- What is DiffUtil
- How to use?
- Important:
- Performance
Как обновить данные адаптера RecyclerView?
пытаюсь выяснить в чем проблема с обновлением ‘ы.
после того, как я получил новый список продуктов, я попытался:
обновить ArrayList из фрагмента, где recyclerView создается, установите новые данные в адаптер, затем вызовите adapter.notifyDataSetChanged() ; это не сработало.
создайте новый адаптер, как и другие, и он работал для них, но никаких изменений для меня: recyclerView.setAdapter(new RecyclerViewAdapter(newArrayList))
создать метод Adapter который обновляет данные следующим образом:
затем я вызываю этот метод всякий раз, когда я хочу обновить список данных, он не работал.
чтобы проверить, могу ли я каким-либо образом изменить recyclerView, и я попытался удалить хотя бы элемент:
вот мой адаптер:
и я инициирую RecyclerView as следует:
Итак, как на самом деле обновить данные адаптера для отображения новых полученных элементов?
Update: проблема заключалась в том, что макет, где GridView выглядел следующим образом:
тогда я просто удалил LinearLayout и составила FrameLayout как макет родителей.
12 ответов
Я работаю с RecyclerView, и оба удаления и обновления работают хорошо.
1) удалить: Есть 4 шага, чтобы удалить элемент из RecyclerView
эта строка кодов работает для меня.
2) ОБНОВЛЯТЬ ДАННЫЕ: Единственное, что я должен был сделать, это
вы должны были сделать все это в коде Actvity/Fragment, а не в коде адаптера RecyclerView.
это общий ответ для будущих посетителей. Объясняются различные способы обновления данных адаптера. Процесс включает в себя два основных шага каждый раз:
- обновить набор данных
- уведомить адаптер об изменении
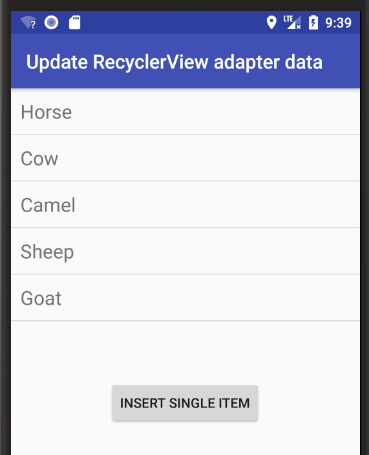
вставить один элемент
добавить «свинья» по индексу 2 .
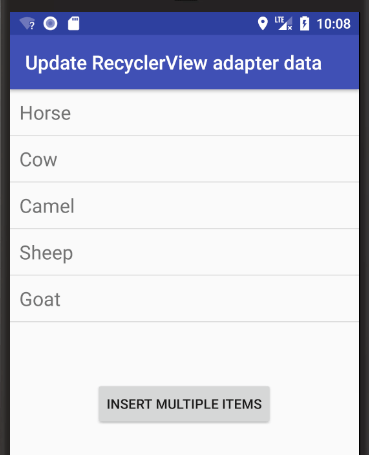
вставить несколько элементов
вставить еще три животных по индексу 2 .
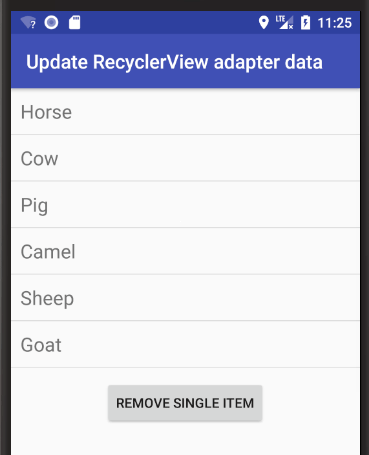
удалить один элемент
удалить «свинья» из списка.
удалить несколько элементов
удалить «верблюд» и «овцы» из списка.

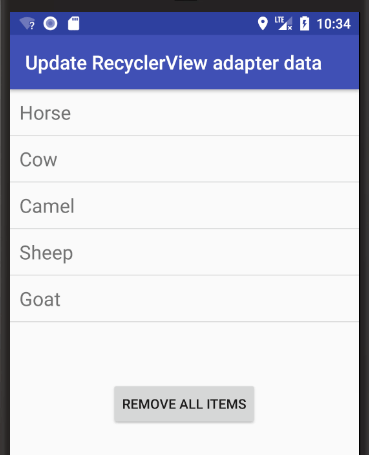
удалить все элементы
очистить весь список.
заменить старый список на новый список
очистите старый список, затем добавьте новый.
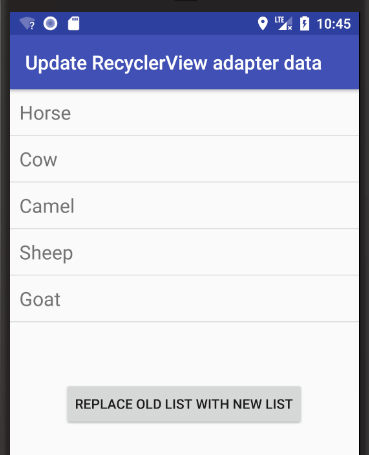
на adapter имеет ссылку на data , поэтому важно, чтобы я не установил data к новому объекту. Вместо этого я очистил старые элементы от data а затем добавил новые.
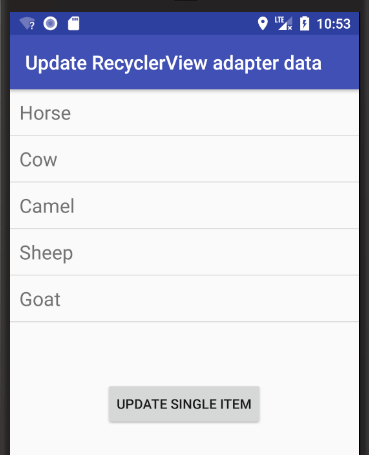
обновить один элемент
измените пункт » овцы «так, чтобы он говорил:» мне нравятся овцы.»
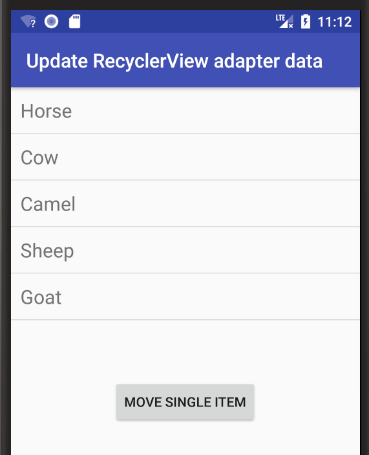
переместить один пункт
переместить «овец» из позиции 3 в положение 1 .
вот код проекта для вашей справки. Код адаптера RecyclerView можно найти по адресу ответ.
Примечания
- если вы используете notifyDataSetChanged() , тогда анимация не будет выполнена. Это также может быть дорогим операции, поэтому не рекомендуется использовать notifyDataSetChanged() если вы обновляете только один элемент или диапазон элементов.
- проверить DiffUtil если вы делаете большие или сложные изменения в список.
дальнейшего изучения
это то, что сработало для меня:
после создания нового адаптера, содержащего обновленный список (в моем случае это была база данных, преобразованная в ArrayList) и установки этого в качестве адаптера, я попытался recyclerView.invalidate() и это сработало.
у вас есть 2 варианта для этого: обновление UI от адаптера:
или обновите его из самого recyclerView:
другой вариант-использовать diffutil . Он будет сравнивать исходный список с новым списком и использовать новый список в качестве обновления, если есть изменения.
в основном, мы можем использовать DiffUtil для сравнения старых данных против новых данных и пусть он вызывает notifyItemRangeRemoved, и notifyItemRangeChanged и notifyItemRangeInserted от вашего имени.
быстрый пример использования diffUtil вместо notifyDataSetChanged:
Я делаю calclateDiff работает с основным потоком, если это большой список.
обновлять данные listview, gridview и recyclerview
Я решил ту же проблему по-другому. У меня нет данных, которые я жду от фонового потока, поэтому начните со списка emty.
лучший и самый крутой способ добавить новые данные в настоящие данные —
я узнал, что действительно простой способ перезагрузить RecyclerView-просто позвонить
это сначала удалит все содержимое RecyclerView, а затем добавит его снова с обновленными значениями.
Я получил ответ после долгого времени
Если ничего не упоминается в приведенных выше комментариях, работает для вас. Это может означать, что проблема лежит где-то в другом месте.
одно место, где я нашел решение, было в том, как я устанавливал список на адаптер. В моей деятельности список был переменной экземпляра, и я менял его непосредственно при изменении любых данных. Из-за того, что это ссылочная переменная, происходило что-то странное. Поэтому я изменил ссылочную переменную на локальную и использовал другую переменную для обновления данных, а затем перейти к упомянутые выше ответы.
эти методы эффективны и хороши для начала использования basic RecyclerView .
вы можете реализовать их внутри класса адаптера или в своем фрагменте или действии, но в этом случае вам нужно создать экземпляр адаптера для вызова методов уведомления. В моем случае я обычно реализую его в адаптере.
Источник
Android recyclerview update list

Add, Remove and Update RecyclerView Items In Android Studio
- Post author:admin
- Post published: July 7, 2019
- Post category:ANDROID / HOME
- Post comments:0 Comments
Android RecyclerView provides advanced and powerful features to display a large amount of data in your app. In this article, we learn How To Add, Remove, and Update Items In Android RecyclerView with the help of an example.
Here are resources, which help you to learn more about Android RecyclerView.
In this tutorial, we work for the following solution with the help of an example in Android Studio:
- How to Add and Remove RecyclerViewItems In Android Studio.
- How to UpdateRecyclerViewItems In Android Studio.
Features Of Application
- Display the list of items in RecyclerView.
- Add a New Item in RecyclerView on the click of a button.
- Remove an item from the RecyclerView on the click of an item button.
- Update an item of the RecyclerView on click of the update button.
Demo
Create A New Project
Before Implementing the following code first create a new project in Android Studio, go to File => then go to New => then select the New Project option. In Add an activity option select default activity(Blank Activity) and proceed.
Structure Of Code
The following image is showing the project structure. Total three java files I have created over here MainActivity, Model, and RvAdapter similarly total two XML files created one for MainActivity that is “activity_main.xml” and another for RecyclerView item that is “item_list.xml“.

Code
Code for build.gradle (Module: app )
Add the following two additional libraries in dependencies of your build.gradle (Module: app ):
- implementation ‘com.android.support:recyclerview-v7:28.0.0’
- implementation ‘com.google.code.gson:gson:2.8.2’
Code for AndroidManifest.xml file .
The following code is for the android application Manifest File which is available in your project root directory. The manifest file defines the project structure this is a very important part of the application.
Code for MainActivity.java file.
This is the main activity of the application where we implement the complete functionality like:
- Android RecyclerView implementation.
- Insert New Item in Recyclerview on click of Add button.
- Delete Item of RecyclerView on click of cancel button of the item.
- Enable the update option on click of RecyclerView item.
- Update the item of RecyclerView on click of Update button.
Code for the activity_main.xml file.
The following XML code is for the main UI of the application. In this layout add the RecyclerView widget and all the views to handle the functionality.
Code for Model.java file.
Now we create a model class to hold our new inserted data and also add the getter/setter methods for all the variables which are defined in this class.
Code for RvAdapter.java file.
This source code for the adapter class which helps in render the data.
Code for the item_list.xml file.
This is your one item layout of RecyclerView which helps to display a large number of the data list. In this item UI, I have defined a TextView with id “tv_name” to display a name and an ImageView with id “img_remove” to display a cancel icon on this icon perform an action to remove that particular item of RecyclerView.
Источник
Smart way to update RecyclerView using DiffUtil

Mar 31, 2017 · 3 min read

Now say good bye to notifyDataSetChanged()…
We generally use List in any of our day to day development. It also requires to update the list data when user scrolls the list. To achieve this, we often fetch the data from server and update the newly received items.
If there is a small delay during this process it impact on the user experience so we want this to be done as soon as possible with along with less resources.
When the content of our list gets changed, we have to call notifyDataSetChanged() to get the updates but it is very costly. There are so many iterations for getting the job done in the case of notifyDataSetChanged().
Here DiffUtil class comes into picture and Android developed this utility class to handle data updates for a RecyclerView.
What is DiffUtil
As of 24.2.0, RecyclerView support library, v7 package offers really handy utility class called DiffUtil. This class finds the difference between two lists and provides the updated list as an output. This class is used to notify updates to a RecyclerView Adapter.
It uses Eugene W. Myers’s difference algorithm to calculate the minimal number of updates.
How to use?
DiffUtil.Callback is an abstract class and used as callback class by DiffUtil while calculating the difference between two lists. It has four abstract methods and one non-abstract method. You have to extend it and override all its methods-
getOldListSize()– Return the size of the old list.
getNewListSize()– Return the size of the new list.
areItemsTheSame(int oldItemPosition, int newItemPosition)– It decides whether two objects are representing same items or not.
areContentsTheSame(int oldItemPosition, int newItemPosition)– It decides whether two items have same data or not. This method is called by DiffUtil only if areItemsTheSame() returns true.
getChangePayload(int oldItemPosition, int newItemPosition)– If areItemTheSame() returns true and areContentsTheSame() returns false than DiffUtil utility calls this method to get a payload about the change.
Below are a simple Employee class which is using in the EmployeeRecyclerViewAdapter and EmployeeDiffCallback to sort the employee list.
Here is the implementation of Diff.Callback class. You can notice that getChangePayload() is not abstract method.
Once DiffUtil.Callback implementation are done, you have to update the list change in RecyclerViewAdapter as described below-
Call dispatchUpdatesTo(RecyclerView.Adapter) to dispatch the updated list. DiffResult object that is returned from diff calculation, dispatches the changes to the Adapter, and adapter will be notified about the change.
Object returned in getChangePayload() is dispatched from DiffResult using notifyItemRangeChanged(position, count, payload), upon which is called Adapter’s onBindViewHolder(… List payloads) method.
DiffUtil also uses methods of RecyclerView.Adapter to notify the Adapter to update the data set:
- notifyItemMoved()
- notifyItemRangeChanged()
- notifyItemRangeInserted()
- notifyItemRangeRemoved()
You can read more details on RecyclerView.Adapter and its method here.
Important:
If the lists are large, this operation may take significant time so you are advised to run this on a background thread, get the DiffUtil#DiffResult then apply it on the RecyclerView on the main thread. Also max size of the list can be 2²⁶ due to implementation constraints.
Performance
DiffUtil requires O(N) space to find the minimal number of addition and removal operations between the two lists. It’s expected performance is O(N + D²) where N is the total number of added and removed items and D is the length of the edit script. You can walk through the official page of Android for more performance figures.
You can find the reference implementation of above DiffUtil example on GitHub
Thanks for reading. To help others please click ❤ to recommend this article if you found it helpful.
Check out my blogger page for more interesting topics on Software development.
Источник


