Secure Android app with SafetyNet
May 31, 2017 · 7 min read

As an Android developer , I am exploring new apps to make my apps more secure.Then i came across some alert messages like “authenticate error”, “Your phone is rooted , please unroot to use app”,etc.. in some popular apps like IRCTC, Android pay, Samsung pay getting above errors. Specially in gaming apps too like PokemonGo.. Ah.. It feels frustrated.
Why shouldn’t use these type of securitie s in our apps too. So i did some exploration on that and came to know the reason behind these messages is that, developer of these apps implemented “software-backed and hardware-based device attestation”. In simple words they have implemented “ SafetyNet API”.
Motive behind writing this blog is to provide easy way to use SafetyNet APIs in our app.
What is SafetyNet?
An API developed by Google to check health and environment where android device running. Its an API for developers to remotely evaluate whether they are communicating to a genuine Android device and to verify that a device is in a safe and recognized state.
This API has a set of tests known as CTS(Compatibility Test Suite),which verify parameters whether:
- Is the device believed to be rooted?
- Is the hardware information recognized?
- Is the software sane?
- Is the device monitored?
- Is the device infected with malicious apps?
- Is the device’s profile recognized?
Above parameters must be pass by android devices to be a CTS compatible.
‘CTS compatible’ does not mean vulnerability-free. Google does not check if a device is up to date or vulnerable to public exploits, as part of the SafetyNet service. It checks if it has been tampered compared to an expected normal and safe state. Tampered state has multiple definitions and can include ‘being rooted’, ‘being monitored’ or ‘being infected with malware’.
Why to use SafetyNet ?
As android is an open source, there can be possibility to hack the data specially in rooted devices.
To overcome this problem Google introduces SafetyNet API. Now a days many payment gateway apps are using it to secure their sensitive data.
SafetyNet examines software and hardware information on the device where your app is installed to create a profile of that device.
A service named “snet” which is a part of Google Play Services, which always runs in background. This service frequently collects various pieces of data from the android device and sends it back to Google. Google uses this information for multiple purposes, such as ecosystem analysis and threat profiling of devices etc.
As Google follows black-box approach for these CTS compatibility, means they didn’t disclose how they handles collected information from “snet” in clear way.
The service then attempts to find this same profile within a list of device models that have passed Android compatibility testing. The API also uses this software and hardware information to help us assess the basic integrity of the device, as well as the APK information of the calling app.
The result is a cryptographically signed statement, attesting basic properties of the device such as
— overall integrity and compatibility with Android (CTS)
— as well as metadata about your app (such as its package name and signature).
- SafetyNet Attestation API.
- SafetyNet Safe Browsing API.
How to implement it in our app?
Now lets move to more technical stuff, implementing it in our app.
SafetyNet Attestation API implementation is little bit tricky as explained in documentation, though if we follow steps sequentially can help us to implement it in more easy way.
Prerequisite : Setting up your google developer account is must.
Steps to be follow:
b) Create a new Project and set some name in Project Name field.

c) Choose ‘ API Manager’ option from sidebar.
d) In API manager > Dashboard > Choose ‘Enable API’

e) This will redirect to ‘ Library’ where we need to search ‘ Android Device Verification API’

f) Choose ‘Create Credentials’ inside in Android Device Verification API

g) Select ‘API Key’ link from there

h) Give some name to API key
i) Choose ‘A ndroid apps’ in key restrictions section
j) Add ‘package name’ of your app here
k) Add SHA1 fingerprint (It can be get by following key-tool command or directly in Android Studio)
l) Choose ‘Create button’ for creating ‘API key’

m) You will get ‘API key’ just copy it for further implementation

2. Add SafetyNet dependency in your project
3. Add API and permission to manifest (specially in activity)
a) Paste your API Key to res->values->strings.xml as,
b) We need to add Internet permission in our AndroidManifest.xml
c) The API Key is set as metadata for the *Activity.
* — tag must be added inside instead of
4. Set connection to Google Play Service
a) Create builder of GoogleApiClient pass activity context to it
b) implement ConnectionCallback in your activity (for getting state of connection)
c) implement OnConnectionFailedListener too in your activity (if connection failed to connect PlayServices)
d) add above method to onCreate() of your activity
e) after implementing ConnectionCallback we need to override its methods named
f) Similarly after implementing OnConnectionFailedListener we need to override
5. Set safetynet api request
a) Generate Nonce
Before proceeding to hit SafetyNet request, we need to obtain nonce (one time token). You can obtain a nonce by generating one within your app each time you make a compatibility check request. As a more secure option, you can obtain a nonce from your own server, using a secure connection.
Here in our case we are generating in our app by using SecureRandom class. Token should be of 16 bytes and above
b) Create compatibility request
c) Read compatibility response
If connection is successful then response catched to onResult method. Generally response provided by this api is in JWS (JSON Web Signature modified form of Base64 or we say it as signatured JSON object) encoded. To decode it either we need to use third party lib like JWT etc or use of some base64 decoders.
The following JSON snippet shows an example of how the API reports this information.After decoding JWS we get simple JSON Object from it,which contains following key-value:
The contents of the JWS message depend on the scenario:
— If the value of “ctsProfileMatch” is true, then the profile of the device running your app matches the profile of a device that has passed Android compatibility testing.
— If the value of “basicIntegrity” is true, then the device running your app likely wasn’t tampered with, but the device has not necessarily passed Android compatibility testing.
Following table shows how devices status affects these values:

Google also recommended that this whole verification process must be done in our own server instead of in our app.Even if we want to verify from our app, then follow below instructions:
Whatever response receive from compatibility test, is need to verify whether response actually came from the SafetyNet service and includes data that matches your request data.
a) Create JSON Object message
Here we need to pass whole JWS encoded response in the form of JSON object to server, using a secure connection. Where pass JSON Object format should be like:
b) Create an HTTPS POST request to send JSON Object message with a header Content-Type of “application/json” to the following URL
Request must verify all certificates only then we’ll be able to get valid response from it.
c) Get the response
The service validates the integrity of the message. If the message is valid, it returns a JSON message with the following contents
Though its a Google’s API and they provide continuous updates to overcome from all latest security threats.
Thanks for going through this blog which explains implementation of ‘SafetyNet Attestation API’, for ‘SafetyNet Safe Browser API’ just stay tuned for my next blog.
Источник
Is api key needed in SafetyNet attestation?
I’ve successfully created backend service and Android client for SafetyNet attestation. When I send jws token to my server and try to validate it’s certificate it turns out that there is no certificate that signed it.
Should I add api key to my Android app?
My attestation result:

3 Answers 3
You are required to use API key with the latest version of Google Play Services.
As a side note I highly recommend to set the verification quota to minimal value of 1 for a key you generate for your Android app here:
This (almost, off by 1 error ;)) stops an attacker from using a key which can be retrieved from your client code like so:
Substitute X-Android-Package , X-Android-Cert and key values to test on your API key with android app restriction.
I think you missed some details, based on the documentation — Validating the response with Google APIs:
Note: You need an API key to access the Android Device Verification API, and the API is rate-limited. For these reasons, you should use the API only for testing during the initial development stage. You shouldn’t use this verification API in a production scenario.
Try adding the API key and check if the behavior change.
Hope this helps.
You can validate the response yourself. Here’s some code that will help you interpret the JWT response:
You’ll want to validate the signing on your backend. Google does let you know what you need to check, if you’re not using their easy service:
Verify the compatibility check response
You should take steps to make sure that the compatibility check response actually came from the SafetyNet service and includes data that matches your request data.
Caution: You should send the entire JWS response to your own server, using a secure connection, for verification. We don’t recommend that you perform the verification directly in your app because, in that case, there is no guarantee that the verification logic itself hasn’t been modified.
Follow these steps to verify the origin of the JWS message:
Источник
Android SafetyNet
You can use the Android SafetyNet feature to assess the compatibility and security of Android devices that have Secure Hub installed. Android SafetyNet isn’t available for MAM deployments.
When this feature is enabled, the SafetyNet Attestation API examines software and hardware information on a device to create a profile of that device. The API then looks for the same profile within a list of device models that have passed Android compatibility testing. The API also uses this information determine whether Secure Hub has been modified by an unknown source.
When the Android SafetyNet feature is enabled, Secure Hub sends the SafetyNet Attestation API request to Google Play services and the result is reported back to Endpoint Management. Endpoint Management then updates device information with the attestation results. You can set automated actions that use the attestation results to trigger actions on the device.
For more information about how the SafetyNet Attestation API works, see the Android developers documentation.
Estimate how many SafetyNet Attestation API requests you need
SafetyNet Attestation API requests are sent:
When a device is enrolled in Endpoint Management.
When a Secure Hub online authentication occurs. Online authentication occurs when a server session expires or when a user signs off the server and then signs back on. Secure Hub prompts the user to provide credential to authenticate with the server.
When a device is rebooted.
At a recurring time interval you configure, between 24 and 1,000 hours.
If your Endpoint Management deployment will make more than 10,000 requests per day, fill out this quota request form.
Get the SafetyNet API key
To enable Android SafetyNet in Endpoint Management, you need the SafetyNet API key.
Log in to the Google API console with your Google administrator account credentials.
Go to the Library page.
Search for “Android Device Verification API”. 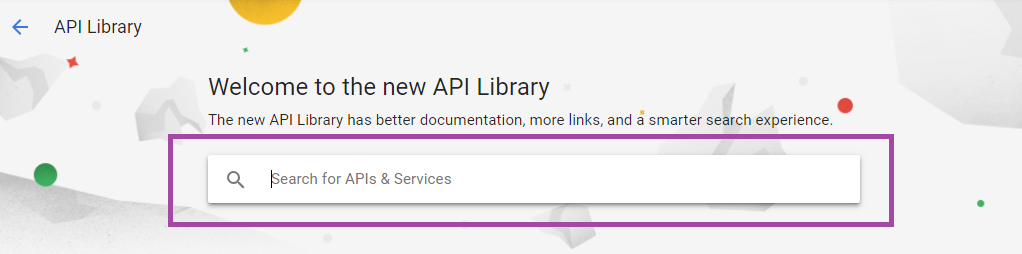
Click Android Device Verification API. 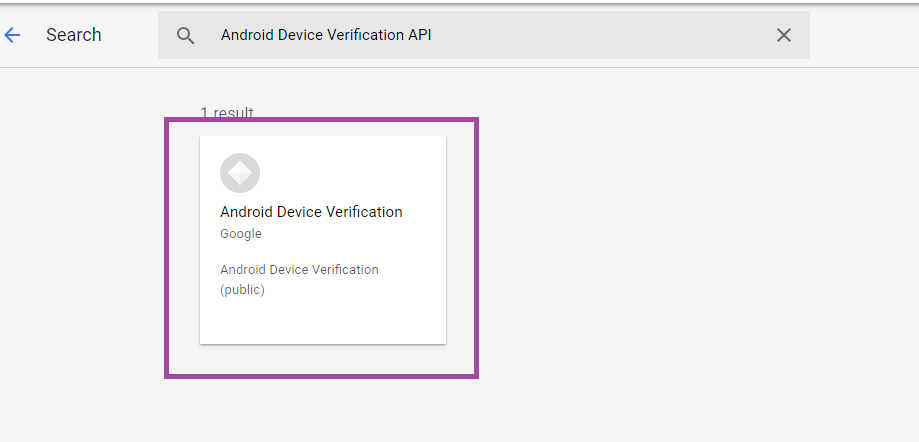
If the API isn’t already enabled, click Enable. 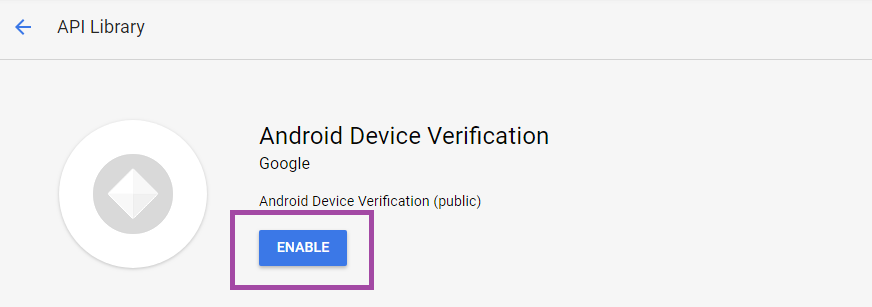
Click Manage.
Click Create Credentials to generate an API key. 
Select Android Device Verification click What credentials to I need. Then click Done.
In the Credentials page, click the copy icon next to the key to copy the key. 
Save the key so you can paste it into the Endpoint Management console when you enable the Android SafetyNet.
Enable Android SafetyNet
In the Endpoint Management console, click the gear icon in the upper-right corner. The Settings page appears.
On the Settings page, click Android SafetyNet. 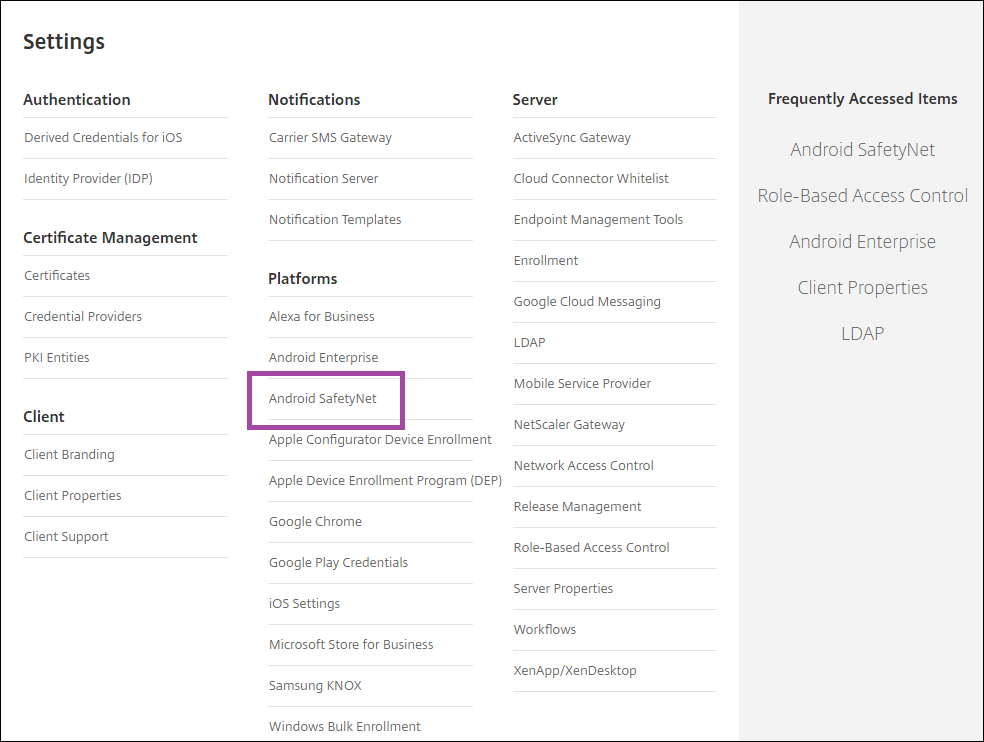
Configure these settings:
API Key. Paste in the SafetyNet API key that you got from the Google API console.
Attestation schedule in hours. Type interval at which the SafetyNet Attestation API assesses your Android devices, in hours. The minimum value is 24 hours. The maximum value is 1000 hours. The default value is 24 hours. 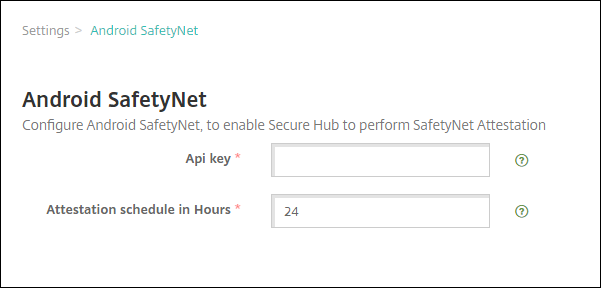
Click Save.
View Android SafetyNet results
To view the results of the SafetyNet Attestation API assessment for a device:
In the Endpoint Management console, click Manage > Devices.
Select Android devices to see the SafetyNet Attestation API results. Then click Show more.
In the Device details page, select Properties.
The results appear in the Security section. 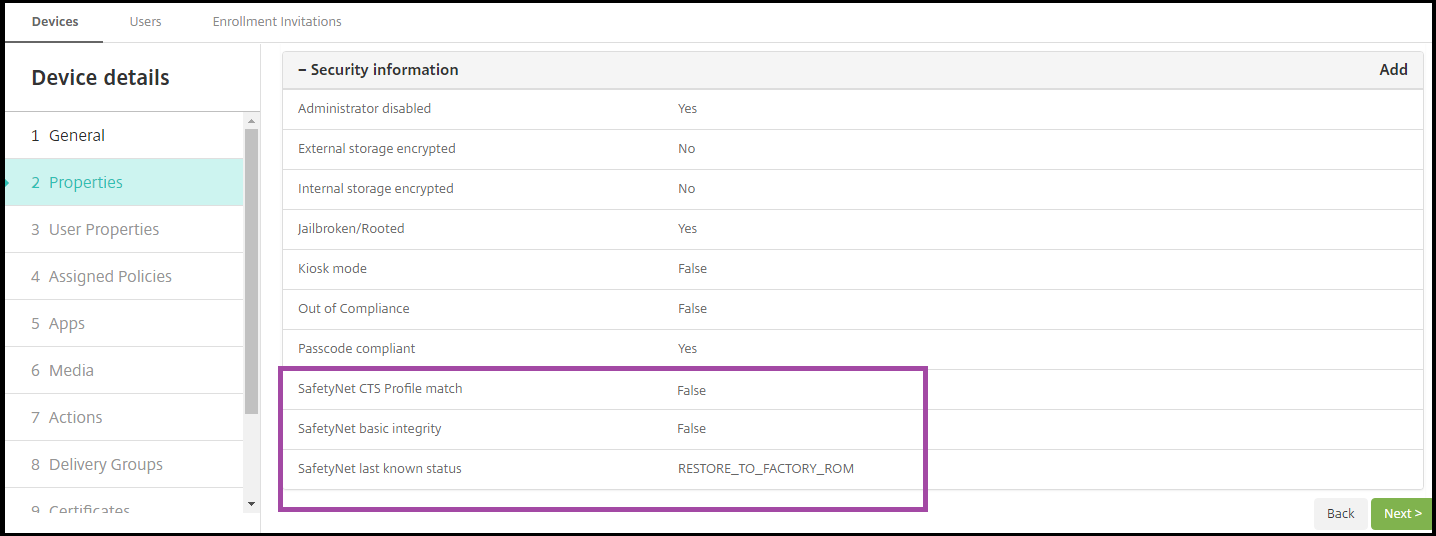
The SafetyNet Attestation API returns these statuses for each device:
SafetyNet CTS profile match: If this value is True, the device has a profile that matches one that has passed Android Compatibility Test Suite (CTS). If this value is False, the device does not have a profile that matches one that has passed Android CTS.
SafetyNet basic integrity: If this value is True, the SafetyNet Attestation API found no evidence that Secure Hub on the device has been modified by an unknown source. If this value is False, Secure Hub on the device has been modified by an unknown source.
SafetyNet last known status: This value shows the last know SafetyNet status of the device:
Success: The SafetyNet Attestation API found no evidence that Secure Hub on the device has been modified by an unknown source.
LOCK_BOOTLOADER: The user should lock the bootloader of the device. Secure Hub on the device has been modified by an unknown source.
RESTORE_TO_FACTORY_ROM: The user should restore the device to a clean factory ROM. Secure Hub on the device has been modified by an unknown source.
Источник


