- How to Root Samsung in One Click with KingoRoot Android
- Root Samsung via Kingo Root APK without connecting to PC.
- How to root Samsung in one click with KingoRoot Android?
- KingoRoot on Windows
- KingoRoot for Android
- Knox — получение РУТ права на новых смартфонах Samsung
- Что за проблемы?
- Почему возникли такие проблемы?
- Способ 1
- Способ 2
- Способ 3
- Способ 4
- Способ 5
- Способ 6
- Способ 7
- Неприятная новость по поводу гарантии
- Root Samsung Galaxy Devices Using TWRP Recovery and CF-Auto-Root
- How to Upgrade Samsung Galaxy Device to Newer Versions
- Rooting Process
- Getting started
- Step 1
- Step 2.1- If you Prefer TWRP Recovery
- Step 2.2- If you Prefer CF-Auto-Root
- Step 3- Flashing TWRP/CF-Auto-Root in your mobile
- Non-rooted Samsung Galaxy Devices (Mostly all users are in this Case)
- Rooted Samsung Galaxy Devices(Already Rooted Users- Can Install TWRP Easily)
- What more?
How to Root Samsung in One Click with KingoRoot Android
Since the first day Samsung entered the smartphone market, it entrenches on the top list of the smartphone market. It is not the first to the high-end Android handset game, but its initial effort has brought a huge hit. Samsung, now as the leader of its fellow competitors, is not just a market leader in innovation and adapting proactively to consumer needs; it is also a brand with high ambitions and considerable forward momentum to the industrial standard.
Samsung line products have occupied most of the top-sale list of Android devices. With such extensive popularity, rooting Samsung becomes the hottest concern among its users, fans, and developers.
Root Samsung via Kingo Root APK without connecting to PC.
IMPORTANT Please try KingoRoot.apk first. Your device may rooted without computer by using this app.
- Enable the unknown sources in setting menu. Settings > Security > Unknown Sources
- Download KingoRoot.apk file into your device.
- By the time download finish, install and launch Kingo Root.
- Press «One Click Root» when you see the button.
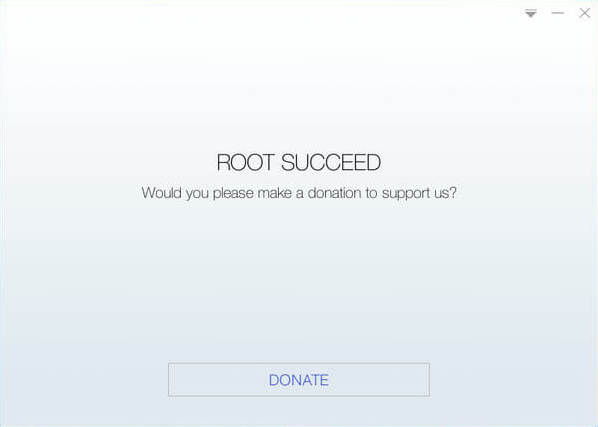
- Wait until you see the result.
- It is better try more than once if root failed for different rooting methods.
- If still failed after tried many times, refer to Kingo Root Android(PC Venison), which has a higher success rate than app.
For more detailed tutorial, please click
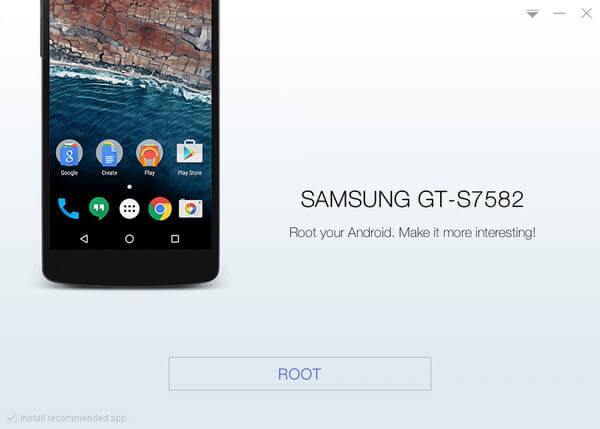
How to root Samsung in one click with KingoRoot Android?
IMPORTANT: Before you proceed, please do backup your important data first.
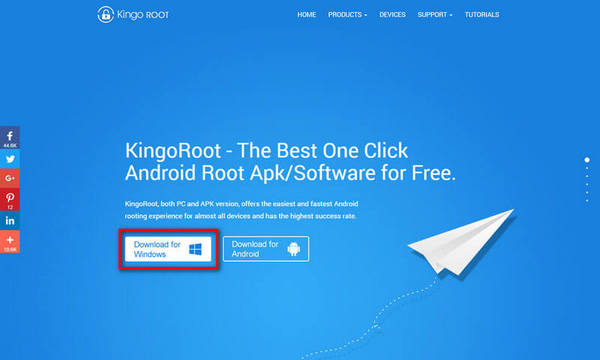
- Prepare your Samsung device, USB cable (the stock one recommended) within your reach. Internet Connection is required.
- Free download KingoRoot Android, install and launch it on your computer.

After download finished, install and launch KingoRoot Android PC Version.
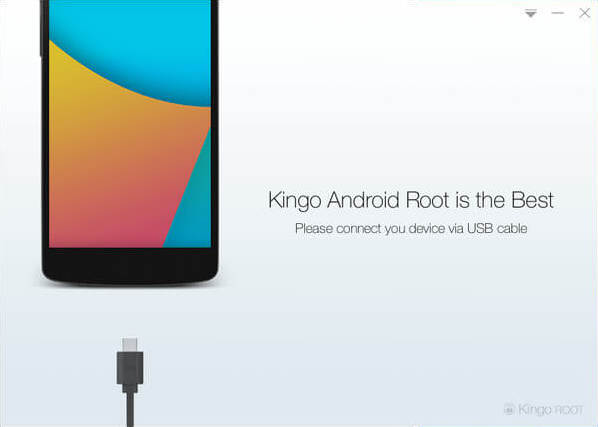
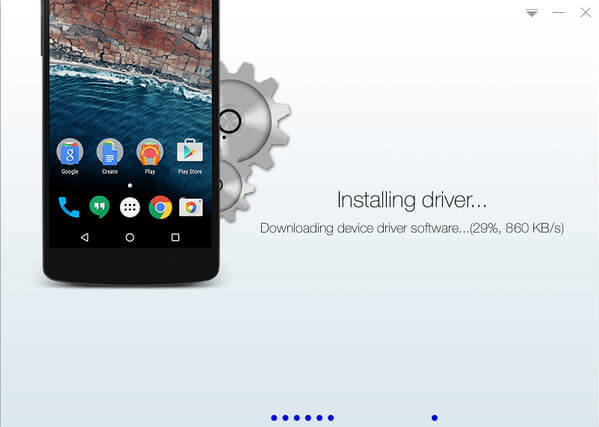
After connecting to computer, Kingo Android Root will automatically check driver for your device and if it is not installed on your PC, it will download and install for you. Once driver installation is finished, the program will establish connection with your device.
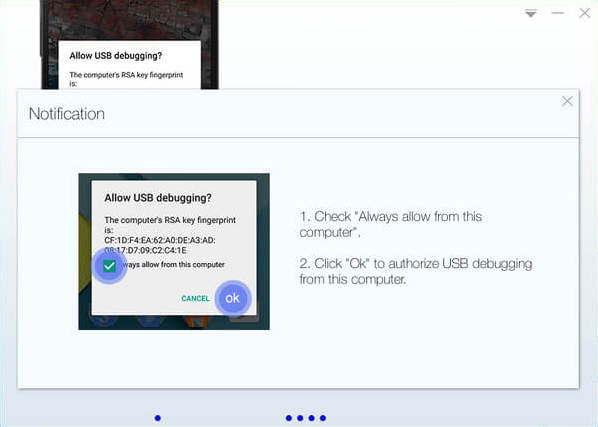
Now enable USB Debugging on your device manually by following the detailed instructions on the interface of Kingo Android Root according to your Android version respectively. Once enabled, your device model name and root status will appear on the software as long as ROOT Notifications and a ROOT button.
KingoRoot on Windows
KingoRoot Android on Windows has the highest success rate. It supports almost any Android device and version.

KingoRoot for Android
KingoRoot for Android is the most convenient and powerful apk root tool. Root any Android device and version without connecting to PC.
Источник
Knox — получение РУТ права на новых смартфонах Samsung
вкл. 04 Март 2015 . Опубликовано в Android — Общее

Knox — получение РУТ прав на новых смартфонах Samsung. С получением Root прав на новейших смартфонах Samsung после обновления на новейшие версии Android 4.3 или 4.4 не получается получить полноценных полноценных суперправ.
На данный момент при обновление на новейшие прошивки с Android 4.3 Jelly Bean или 4.4 Kit Kat, в смартфонах Samsung возникают проблемы получения Root прав, например такие модели как:
Sasmung S4 — I9190, I9192, I9500, I9505
Samsung Note3 — N900, N900*
Что за проблемы?
Компания Samusng все сильней внедряет защиту на свои Android смартфоны. Если вы получили получить Root, то у вас появиться ошибка если зайти в административное приложение SuperSU — «Приложение SuperSU попыталось получить доступ к элементу система на вашем устройстве без разрешения. Эта попытка заблокирована. Для повышения безопасности можно удалить приложения, загруженные из неавторизованных источников.»

или сообщение в информативной области Android

Полноценно Root работать не будет!
Почему возникли такие проблемы?
Компания Samsung внедрила систему безопастности Knox, со слов производителя это:
«Samsung KNOX — это исчерпывающее мобильное решение для работы предприятий. Учитывая все возрастающее использование смартфонов в бизнесе, оно адресовано на удовлетворение требований безопасности IT службам предприятий без ущерба для частной жизни рабочего персонала.» — Подробней о Knox
Другими словами это дополнительное внедрение безопасности для бизнеса.
Как получить Root права если возникает проблема с не работоспособностью SuperSU.
Способ 1
После получения root права установите приложение Root Browser или установите приложение Root Explorer
Перейдите в раздел /system/app и удалите файлы
- KLMSAgent.apk
- KNOXAgent.apk
- KnoxAttestationAgent.apk
- KNOXStore.apk
- KNOXStub.apk
- KNOXAttestationAgent.apk

После чего перезагрузите Android смартфон!
Способ 2
В терминале ввести команду (регистр букв сохранять, это важно, после каждой команды нажимать кнопку Enter)
Способ 3
Установите приложение KNOXDisablerFree_v1.0.1.apk . Зайти в приложение и нажать кнопку «Disable»

Способ 4
Вызвать с рабочего стола доп.меню нажав кнопку

Выбрать настройки Knox

В меню выбрать удалить Knox.
Способ 5
Установите приложение Titanium Backup или System app remover. Удалите с их помощью следующие приложения
- com.sec.enterprise.knox.attestation
- com.sec.knox.eventsmanager
- KLMS Agent
- KNOX
- KNOX Notification Manager
- KNOX Store

Способ 6
Для этого необходимо скачать и установить Recovery для своего смартфона или планшета Samsung. Прошить в меню рекавери прошиваемый архив обновление UPDATE-SuperSU.zip . Обновить приложение SuperSu и перезагрузить Samsung.
Способ 7
Срабатывает не на всех устройствах, но все же срабатывает. Для этого нужно получить root с помощью программы Vroot.
Неприятная новость по поводу гарантии
Еще одна не приятная новость для обладателей Samsung после получения Root прав теряете гарантию, даже после удаления root прав и перепрошивке, так как тикнет счетчик кастомных прошивок!
Источник
Root Samsung Galaxy Devices Using TWRP Recovery and CF-Auto-Root
So I’m going to root my phone? Oh no, I’ve heard a lot of people complain that rooting a device will cause it malfunction, isn’t that true? Well, rooting your Samsung smartphone won’t cause it to fail; instead, it grants you full access to every aspect of the device. There are some apps you cannot uninstall from your smartphone because they were pre-installed by the OEM (Samsung) and these apps occupy important spaces on your device. Rooting your Samsung Galaxy will cause you to enjoy the invention without restrictions or limitations. However, if not done well or by a knowledgeable mobile phone technician, your device may get damaged or malfunction due to improper rooting. Yeah, everything has its advantages and disadvantages. Nevertheless, in this case, the problem (s) of rooting your mobile can be Avoided, if you carefully read through this article.
Table of Contents
How to Upgrade Samsung Galaxy Device to Newer Versions
The Samsung Galaxy devices run on Android OS. It is an excellent Android device you can use your old devices even in 2022; the features & specs are similar to the ones on Samsung’s latest smartphones born to the Galaxy series.
Well, you can update the Android version of your Galaxy model. Primarily, it may come with Lollipop, Marshmallow, Nougat, Oreo Whatever. But, you can upgrade to the Latest Android version. This process can be done automatically via OTA or manually through rooting the device and installing a custom Firmware.
One period the device will stop receiving OTA updates. Therefore, upgrading to the Latest Android version has to be a manual process which includes rooting your Galaxy device. Just like I said earlier, rooting a smartphone is not bad/harmful. Even, it lets you free up a lot of space on the device by uninstalling all the unuseful bloatware apps which are on the device. Below are the staunch steps to successfully root your Samsung Galaxy devices.
All Unlocked Bootloader versions. Don’t try with US Carrier versions, It may lead to brick your device.
This particular app may likely work for rooting other Samsung and other Android smartphone models.
Things to note before proceeding to root your Smartphone
Lookout for your device mobile no.
Ensure your phone battery percentage above 50% (A fully charged battery recommended)
Backup everything you have on the device, just in case…
Rooting Process
There are two Steps provided in this article with which you can use to root your Galaxy smartphone. They are thus;
Using TWRP Recovery on the device or CF Auto Root Method. Choose one method. Don’t follow two methods.
Install SuperSu to manage the device root permissions
Getting started
Step 1
Download and install the Samsung USB driver to your computer system
Also, download the Odin software – Odin Download.
Step 2.1- If you Prefer TWRP Recovery
Download and save the TWRP Recovery file from Official TWRP site for Samsung Galaxy Devices.
Step 2.2- If you Prefer CF-Auto-Root
- We Recommend using the TWRP Method, But in rare cases, your device may not contain TWRP recovery. In that situations use the CF-Auto-Root Method.
- Download and save the respective file from Official site for Samsung Galaxy Devices. Just Enter your Mobile model number.
- After selecting your model number, Select your current build number. You can find your current Build number in Settings-> About -> Build Number.
- It will lead to the files page. From files page scroll down to the bottom and select CF-Root.
- After selecting CF-Auto-Root, Don’t select or change any settings Just scroll down to the bottom and select Generate CF-Auto-Root Package.
- Wait for a few minutes, you will get the file.
Step 3- Flashing TWRP/CF-Auto-Root in your mobile
Extract the Odin Files on your PC and install.
Download SuperSu.Zip and copy it into your mobile internal memory.
Non-rooted Samsung Galaxy Devices (Mostly all users are in this Case)
If your device not rooted before, follow the steps below to root your device;
Enable USB Debugging Mode. To do this; go to settings >>> about >>> Tap on the “Build Number” 7-10 times consistently to enable “Developer Options,” then go to the “Developer Options” and enable USB Debugging Mode
Switch off the device, then, enter into Download mode. To do this; press and hold down the Volume Down + Home + Power buttons at the same time. If your device contains Bixby Key then, Volume Down + Bixby + Power. If your device contains only Volume and Power Buttons then Volume Down + Volume Up + Power Key.
Press the Volume Up button to continue when you see the warning message.
Now, connect the Galaxy mobile to the computer via USB cable
Launch the Odin app on your computer. If the device detected by this app (Odin), it will show you a message that reads – added.
However, if the device is not correctly connected, you won’t see this message. So, you have to check the USB cable if it is good and reconnect the device.
After connecting the Samsung device, click on the PDA/PA button to browse/search and get the TWRP Recovery/CF-Auto-root file from where you saved it on your PC. Also, navigate to “options” and tick the Auto Reboot.
Once the TWRP/CF-Auto-root loaded into the device, reboot your device in recovery mode. To do this; Switch off your phone (Galaxy), press and hold the key combination buttons as we mentioned before and the device will go into recovery mode.
Kudos, you have just Installed the TWRP Recovery/CF-Auto-root on your Samsung Galaxy.
If you Installed TWRP Recovery
Now that you have installed TWRP Recovery, it’s time to root the device with the SuperSu App.
Still, in the TWRP recovery mode, select wipe >>> advance wipe >>> cache, system, data (Remember to make a backup first)
Return to Home in the TWRP Mode, tap “Install” and select SuperSu.Zip
Swipe to install the APP.
If you Installed CF-Auto-Root
Nothing more, reboot the device regularly, you have rooted your Samsung Galaxy device. However, the SuperSU app will appear among your installed app so you can manage Root permissions.
Rooted Samsung Galaxy Devices(Already Rooted Users- Can Install TWRP Easily)
If you have previously rooted your Galaxy follow the steps below to install the TWRP Recovery file;
- Download the Flashify App.
Launch the Flashify app, grant SuperUser permission and search for the downloaded TWRP recovery image to install it
To check if the TWRP Recovery is rightly installed, enter into recovery mode by holding down the respective buttons.
What more?
You have just learned how to root your device. This act is significant if you wish to upgrade from the original Lollipop version to Marshmallow or other newer Android OS versions.
Selva Ganesh is a Chief Editor of this Blog. He is a Computer Engineer, An experienced Android Developer, Professional Blogger & addicted Web Developer. He runs Android Infotech which offers Problem Solving Articles around the globe.
Источник


