- Kotlin Android – Get screen Width and Height Programmatically
- Android – Get Screen Width and Height
- Steps to Get Width and Height of Screen
- Code – Get Width and Height
- Example – Kotlin Android – Get Screen Dimensions Programmatically
- Conclusion
- Tek Eye
- Determining the Size of an Android View or Screen at Run Time
- Finding the Size of an Android View in Code
- Finding the Size of an Android Layout in Code
- Finding the Size of an Android View During Screen Construction
- See Also
- Archived Comments
- Do you have a question or comment about this article?
- Supporting Different Screen Sizes Andorid
- Use “wrap_content” and “match_parent”
- Use RelativeLayout
- Use Size Qualifiers
- Use the Smallest-width Qualifier
- Use Layout Aliases
- Use Orientation Qualifiers
- Use Nine-patch Bitmaps
Kotlin Android – Get screen Width and Height Programmatically
Android – Get Screen Width and Height
In Android, WindowManager is available to every Activity. Through WindowManager, we can get the metrics of default display in which the activity is being shown.
In this tutorial, we will learn how to get width and height of the screen, on which the application is running, with the help of example Android Application.

Steps to Get Width and Height of Screen
To get Android screen width and height programmatically, follow these steps.
- Create a DispalyMetrics() object.
- Pass the displayMetrics object to getMetrics() method of Display class. WindowManager.defaultDisplay() returns the Display object.
- Screen Width could be obtained using displayMetrics.widthPixels
- Screen Height could be obtained using displayMetrics.heightPixels
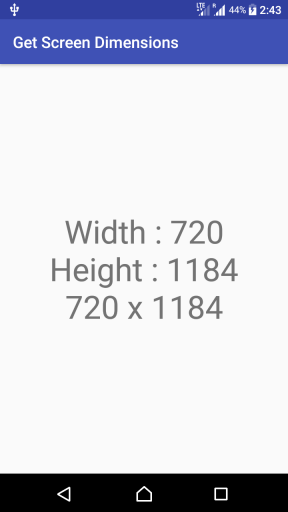
In the following screenshot, width and height of the Android device screen is obtained programmatically and displayed using TextView.
Code – Get Width and Height
A quick snippet of the code to obtain screen dimensions programmatically is provided below
Example – Kotlin Android – Get Screen Dimensions Programmatically
In the following example, we shall obtain screen width and height, display it in the Activity with the help of TextView.
activity_main.xml
MainActivity.kt
Conclusion
In this Kotlin Android Tutorial – Get Screen Dimensions Programmatically, we have learnt to get screen width and height programmatically using DisplayMetrics.
Источник
Tek Eye
For efficient bitmap handling or dynamic View creation in an app, the area that a screen item or layout is using needs to be known. If no fixed sizes are allocated at design time the size of a View may not be known until an app is executed. This is because of the wide range of display sizes that Android supports. Just look on GSMArena to see the huge range of Android devices produced over the years, and to see the wide variation in screen sizes and pixel densities. The example code in this article shows how to read the screen size and the size of Views as the app runs.
(Note: All Android screen items are derived from Views. A screen component, e.g. a TextView , is derived from the View class. Such screen components are also known as widgets. Layouts are ViewGroups and are also derived from Views.)
Determining the Size of an Android View or Screen at Run Time
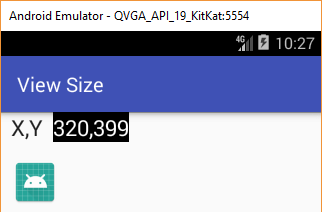
To run the example code in this article first create a new Android project. Those new to Android programming can read the article Your First Android Hello World Java Program to see how. For this article the app is called View Size.
Use a simple layout for activity_main.xml (the layout file may have another name). Add a TextView with id labXY and set the Text attribute to X,Y. Next to it add another TextView called textXY with Text set to ? (actually \? to make it valid in the XML). Here is the layout used for this example:
Add this code to the bottom of the onCreate method in MainActivity.java (or whatever the class was called). Add the required an imports for TextView and DisplayMetrics when prompted with the Alt-Enter:
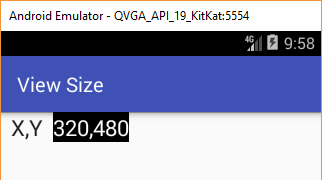
This is the code running on an Android Virtual Device (AVD) with a 320×480 screen:
Finding the Size of an Android View in Code
Drop an ImageView onto the layout, here using the ic_launcher.png icon file, or other images can be used. The size of a View can be retrieved using the getWidth and getHeight methods. Change the code in the onCreate to set the TextView to the ImageView’s width and height (an import for View is required, again usually prompted for and added with Alt-Enter):
Mmmmm! The code is showing 0,0 for the ImageView size, even though we can see that it is not 0,0:
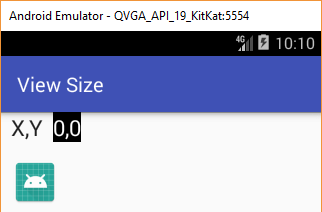
This is because in onCreate the screen has not yet been laid out so the size of the ImageView has not been determined hence the getWidth() and getHeight() methods are returning zero. In fact they will likely return zero in onStart() and onResume(). What is needed is to override onWindowFocusChanged() to get the ImageView sizes:
Finding the Size of an Android Layout in Code
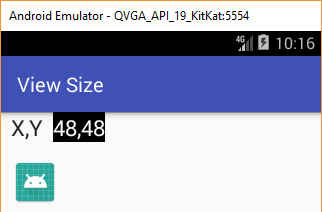
The same code can be used to get the size of the View (the layout, i.e. ViewGroup) in which the screen components sit. Notice that in the screen XML the RelativeLayout was given an id (@+id/screen), which means the base View’s width and height can be grabbed (change R.id.imageView to R.id.screen in the code):
Notice that the layout height is less than the screen height because of the notification bar.
Finding the Size of an Android View During Screen Construction
To get the the size of a View as soon as it is known (rather than waiting for the onWindowFocusChanged event) attach a listener to its ViewTreeObserver . Do this by writing a class that implements ViewTreeObserver.OnGlobalLayoutListener in the Activity’s class. This new class will have an onGlobalLayout method that gets the View dimensions that can then be stored for later use (here they are displayed as before). Here is the example source code for the entire MainActivity.java file to show this way of getting the ImageView’s width and height:
Download some example code in view-size.zip from this article, ready for importing into Android Studio. See the instructions in the zip file, alternatively the code can also be accessed via the Android Example Projects page.
See Also
- Using Immersive Full-Screen Mode on Android Developers
- See the Android Example Projects page for lots of Android sample projects with source code.
- For a full list of all the articles in Tek Eye see the full site alphabetical Index.
Archived Comments
Kestrel on December 15, 2014 at 4:20 am said: Hey fantastic article, can you also talk about the fitSystemWindows and how things are affected when its set or not set by default. Thanks in advance.
Author: Daniel S. Fowler Published: 2013-06-19 Updated: 2017-12-17


Do you have a question or comment about this article?
(Alternatively, use the email address at the bottom of the web page.)
↓markdown↓ CMS is fast and simple. Build websites quickly and publish easily. For beginner to expert.
Free Android Projects and Samples:
Источник
Supporting Different Screen Sizes Andorid


Mobile application run on different devices with different screen sizes and form factors. Android devices come in a variety of screen sizes and resolutions. That’s why handling the multiple screen size in android is most important.
Screen size : Actual physical size, measured as the screen’s diagonal.For simplicity, Android groups has four generalized sizes: small, normal, large, and extra large.
Screen density : The quantity of pixels within a physical area of the screen; usually referred to as dpi (dots per inch).For simplicity, Android groups has four generalized densities: low, medium, high, and extra high.
Orientation : The orientation of the screen from the user’s point of view.In Android, This is either landscape or portrait.
Resolution : The total number of physical pixels on a screen.In Android, we do not work directly with resolution; applications should be concerned only with screen size and density.
How To Support Different Screen’s
Use “wrap_content” and “match_parent”
To ensure that your layout is flexible and adapts to different screen sizes, you should use «wrap_content» and «match_parent» for the width and height of some view components. If you use «wrap_content» , the width or height of the view is set to the minimum size necessary to fit the content within that view, while «match_parent» makes the component expand to match the size of its parent view.
By using the «wrap_content» and «match_parent» size values instead of hard-coded sizes, your views either use only the space required for that view or expand to fill the available space, respectively. For example:
Notice how the sample uses «wrap_content» and «match_parent» for component sizes rather than specific dimensions. This allows the layout to adapt correctly to different screen sizes and orientations.
Use RelativeLayout
You can construct fairly complex layouts using nested instances of LinearLayout and combinations of «wrap_content» and «match_parent» sizes. However, LinearLayout does not allow you to precisely control the spacial relationships of child views; views in a LinearLayout simply line up side-by-side. If you need child views to be oriented in variations other than a straight line, a better solution is often to use a RelativeLayout , which allows you to specify your layout in terms of the spacial relationships between components. For instance, you can align one child view on the left side and another view on the right side of the screen.
Use Size Qualifiers
There’s only so much mileage you can get from a flexible layout or relative layout like the one in the previous sections. While those layouts adapt to different screens by stretching the space within and around components, they may not provide the best user experience for each screen size. Therefore, your application should not only implement flexible layouts, but should also provide several alternative layouts to target different screen configurations. You do so by using configuration qualifiers, which allows the runtime to automatically select the appropriate resource based on the current device’s configuration (such as a different layout design for different screen sizes).
For example, many applications implement the “two pane” pattern for large screens (the app might show a list of items on one pane and the content on another pane). Tablets and TVs are large enough for both panes to fit simultaneously on screen, but phone screens have to show them separately. So, to implement these layouts, you could have the following files:
- res/layout/main.xml , single-pane (default) layout:
- android:orientation=”vertical”
android:layout_width=”match_parent”
android:layout_height=”match_parent”> - res/layout-large/main.xml , two-pane layout:
- android:layout_width=”fill_parent”
android:layout_height=”fill_parent”
android:orientation=”horizontal”>
Notice the large qualifier in the directory name of the second layout. This layout will be selected on devices with screens classified as large (for example, 7″ tablets and above). The other layout (without qualifiers) will be selected for smaller devices.
Use the Smallest-width Qualifier
One of the difficulties developers had in pre-3.2 Android devices was the “large” screen size bin, which encompasses the Dell Streak, the original Galaxy Tab, and 7″ tablets in general. However, many applications may want to show different layouts for different devices in this category (such as for 5″ and 7″ devices), even though they are all considered to be “large” screens. That’s why Android introduced the “Smallest-width” qualifier (amongst others) in Android 3.2.
The Smallest-width qualifier allows you to target screens that have a certain minimum width given in dp. For example, the typical 7″ tablet has a minimum width of 600 dp, so if you want your UI to have two panes on those screens (but a single list on smaller screens), you can use the same two layouts from the previous section for single and two-pane layouts, but instead of the large size qualifier, use sw600dp to indicate the two-pane layout is for screens on which the smallest-width is 600 dp.
Use Layout Aliases
The smallest-width qualifier is available only on Android 3.2 and above. Therefore, you should also still use the abstract size bins (small, normal, large and xlarge) to be compatible with earlier versions. For example, if you want to design your UI so that it shows a single-pane UI on phones but a multi-pane UI on 7″ tablets, TVs and other large devices, you’d have to supply these files:
- res/layout/main.xml: single-pane layout
- res/layout-large: multi-pane layout
- res/layout-sw600dp: multi-pane layout
Use Orientation Qualifiers
Some layouts work well in both landscape and portrait orientations, but most of them can benefit from adjustments. In the News Reader sample app, here is how the layout behaves in each screen size and orientation:
- small screen, portrait: single pane, with logo
- small screen, landscape: single pane, with logo
- 7″ tablet, portrait: single pane, with action bar
- 7″ tablet, landscape: dual pane, wide, with action bar
- 10″ tablet, portrait: dual pane, narrow, with action bar
- 10″ tablet, landscape: dual pane, wide, with action bar
- TV, landscape: dual pane, wide, with action bar
Use Nine-patch Bitmaps
Supporting different screen sizes usually means that your image resources must also be capable of adapting to different sizes. For example, a button background must fit whichever button shape it is applied to.
If you use simple images on components that can change size, you will quickly notice that the results are somewhat less than impressive, since the runtime will stretch or shrink your images uniformly. The solution is using nine-patch bitmaps, which are specially formatted PNG files that indicate which areas can and cannot be stretched.
Источник


