- How to Fix “SDK location not found” in Android Studio?
- When switching from one IDE to another (Like from Eclipse to Android Studio)
- How to install Android SDK and setup AVD Emulator without Android Studio
- Understanding the Android SDK
- Installing the Android SDK
- Step 1 — Download the tools package
- Step 2— You need Java 8!
- Step 3 — Download the essential packages
- Step 4 — Set your environmental variables
- Step 5 — Download the platform specific packages you want
- Step 5 — Create a AVD device
- Step 6 — Run the Android Emulator
- VS 16.7.0 P3.1 Android SDK License Acceptance Dialog #4880
- Comments
- gmck commented Jun 28, 2020
- brendanzagaeski commented Jun 28, 2020
- How to Fix “Failed to install the following Android SDK packages as some licenses have not been accepted” Error in Android Studio?
- What are Android SDK packages?
- How To Solve Failed to install the following Android SDK packages?
- Method 1
- Method 2
- Method 3
- Method 4
- Method 5
How to Fix “SDK location not found” in Android Studio?
Google developed Android SDK which is a Software Development Kit developed by Google for the Android platform. You can create Android apps using Android SDK, and you don’t need to be an expert to use it. Android SDK and Android Studio come bundled together, with Google’s official integrated development environment (IDE) for the Android operating system.
In this article, we see how to fix an error that is related to the main Android building component of Android Studio that is the Android SDK. The most common error related to Android SDK is “SDK location not found“. This message pops up stating that the location of Android SDK was not detected when the path of SDK is assigned incorrectly. There can also be other reasons for this error message as well and we will see ways to get rid of this error.
When switching from one IDE to another (Like from Eclipse to Android Studio)
Method 1
In this case, follow the below steps:
Method 2
In case the above procedure doesn’t work then add the ANDROID_HOME variable in “Environment Variables” as C:\Users\Username\AppData\Local\Android\Sdk.
Method 3
In case it does not work even then, then you need to change the directory path on Project Structure as well.
- Close the current project and you’ll see a pop-up with a dialog which will then proceed to Configure option.
- Configure -> Project Defaults -> Project Structure -> SDKs on left column -> Android SDK Home Path -> give the exact path as you did on local.properties and select Valid Target.
Method 4
A settings.gradle file might be missing from the project. Make sure that the file exists from the project you are importing. If not add the settings.gradle file with the following:
Save the file and put it in the top-level folder in your project.
Источник
How to install Android SDK and setup AVD Emulator without Android Studio
If you are trying to develop to Android, you probably will end up installing the Android Studio to get the Android SDK and the AVD Emulator working properly.
But if you are using another code editor, like Sublime Text or VSCode, installing the Android Studio will just mess up with your setup and consume your precious RAM for no good reason.
I had a hard time figuring out how to properly do this setup due the lack of documentation about it, so i hope this article helps you. 🙂
Recommended previous knowledge:
- SDK (Standard Development Kit); Read about on Wikipedia;
- AVD (Android Virtual Device); Read about on docs;
- CLI (Command Line Interface); Read about on Wikipedia;
- Android API levels; Read about on Vanderbilt University;
- How to open, navigate and execute files in your OS terminal;
- Know what are environmental variables;
Understanding the Android SDK
Basically, the Android SDK is a bunch of packages necessary to develop for Android.
These packages stays in subfolders of a folder called “sdk” (or “android-sdk” sometimes). You do not need to know how these packages really work, just what they do.
The picture below is my Android SDK folder, these are the basic packages you will need in order to get everything working properly.
Here is a brief explanation of each package:
- tools: This package is mainly used to manage the other packages and to create AVD’s;
- emulator: As the name suggest, this is the Android emulator;
- platform-tools: Some tools to communicate with Android devices when you plug then in your computer;
- patcher: This package is automatically downloaded by the SDK. I didn’t find what exactly this is for, so just leave it as it is;
The folders bellow contain sub-folders with the packages for each Android API level.
- platforms: The platform packages are required to compile your app for the specified API level.
- system-images: These are the android images used in the emulator.
- build-tools: These are necessary to build your Android apps
Installing the Android SDK
In order to install the SDK we will use the Command Line Tools. These are some quite simple CLI’s used to manage the Android SDK. You can read the documentation here for more details.
Step 1 — Download the tools package
First, you need to download the tools package. And with this package you can download the others.
- First, go to the Android Studio download page: https://developer.android.com/studio;
- Then click in “ Download Options”;
- There you will find a table named “ Command line tools only”;
- This table contain some zip files. Download the appropriate file for your system ( Windows, Mac or Linux);
- Extract this zip and you will get a folder called tools: This is the tools package i explained earlier;
Create a folder anywhere you prefer to place your SDK. I recommend you to stick with one of these commonly used places:
- Globally: C:\Android\sdk or C:\android-sdk (this is not default, but i usually set my SDK here on Windows)
- One user only: C:\Users\ \AppData\Local\Android\sdk
- Globally: /Library/Android/sdk
- One user only: /Users/ /Library/Android/sdk
And move the tools folder to this new sdk folder. Make sure you have admin access to this folder and any sub-folders inside it, or the tools package will fail to download new packages.
Note: You can also download a pre-build package for your SO (like the one available on Ubuntu repository). But i do not recommend you do to so, because they probably will not be updated and will be harder to manage, since it was automatically installed.
Step 2— You need Java 8!
The Android SDK packages require Java 8. If you do not have it, you need to download. If you are using a newer version, you have to downgrade to Java 8 or you will eventually get some errors, because it is not compatible.
If you do not have the Java 8 SDK, here is how you can install it:
On Ubuntu run these commands:
- # sudo apt-get update
- # sudo apt-get install openjdk-8-jdk
Sorry for MacOS users, i don’t know how to install it on this OS.
Step 3 — Download the essential packages
Now, download the platform-tools and the emulator packages, because they contain some CLI binary files you will need later. I decided to download these packages first in order to set all the necessary environment variables at once and make the rest of the process easier.
Open a terminal window (you need to use a terminal, not the file explorer), go to your sdk folder and navigate to the /tools/bin directory.
This folder contain the SDKManager binary: this is a CLI used to list the available packages in the Google’s repository and download, update or remove them from your SDK folder.
The bellow command will list all packages installed (the first items on the list) and all packages available to download:
To download the packages, simply copy the package names and pass it as a parameter to the SDKManager CLI using the terminal:
# ./sdkmanager platform-tools emulator
If you open your sdk folder you should see these packages folders there.
Step 4 — Set your environmental variables
You need to set the below environmental variables containing the path to our SDK, so any running program can find it in your pc:
ANDROID_SDK_ROOT = Path to your SDK folder
ANDROID_HOME = The same as ANDROID_SDK_ROOT. This variable is now deprecated, but i recommend setting it because some programs still using it to locate your sdk.
And add these folders to the PATH variable, making their binary files accessible from everywhere:
To add the environment variables on WIndows, just follow these steps:
- Open the “Control Panel”;
- Go to “ System and Security” option in the side menu;
- In the window “ System Properties” open the tab “ Advanced”;
- Click in the button “ Environment Variables” in the bottom of the page;
- In the “ Environment Variables” window you will see two tables: “User Variables” and ” System Variables”.
- If you created your sdk folder for one user only, set the variables in the “ User Variables” table;
- But, if you create your sdk folder globally, set the variables in the “ System Variables” table instead;
On Linux, you can set your environment variables in many places. So i choose the ones I found the most appropriate:
- If you created your sdk folder for one user only, set your environment variables in the file
/.bashrc;
Here is how i set these variables in my Ubuntu, using the file /etc/environment:
And sorry again, no MacOS instructions for this task.
You can find more about these environmental variables in the oficial docs here.
Now your SDK is ready! If you do not need to run the emulator there’s no need to follow the next steps.
Step 5 — Download the platform specific packages you want
You need more three packages: The platform, the system-image and the build-tools. You can download these packages for any Android version you prefer. In this article, i will download the packages for the API Level 28.
Use the “ sdkmanager — list” command to find these packages and download them using the command “ sdkmanager
Here’s an example:
Step 5 — Create a AVD device
Creating a AVD device is a simple task: run the AVDManager command (this is a binary file located in the tools/bin folder of your sdk) with the create avd option, a name for the new AVD and the image you want to use.
Here is a example:
# avdmanager create avd — name android28 — package “system-images;android-28;default;x86”
You will be asked if you want to alter some configurations. You can also modify these configurations later in the file config.ini, located in the avd folder (this folder usually is created in your user folder, under the android directory). The currently active configurations can be find in the file hardware-qemu.ini (this file just will be created after the emulator runs for the first time).
Step 6 — Run the Android Emulator
Now you just need to run the emulator command (remember that we added this package to the environmental variables?):
The emulator take some time to init for the first time. But if you done everything correctly you should see this screen:
Источник
VS 16.7.0 P3.1 Android SDK License Acceptance Dialog #4880
Comments
gmck commented Jun 28, 2020
Nearly every compiler error triggers this dialog. When I Accept, the build window then displays the following.
The first time it happened, after updating to Preview 3.1, I then just updated the SDK manually. All is ok until the next compiler error when the dialog reappears. If I run it again — same result. Again all is ok until the next compiler error and back it comes. The cmdline-tools folder was created 24/07/2020 and contains a subfolder latest, which contains bin and lib folders both dated 24/07/2020. There are no files in cmdline-tools folder only the folder latest, so the Trying to fallback to «tools».. errors would be correct.
Manually running the Android SDK Manager within VS indicates there are no available updates.
The text was updated successfully, but these errors were encountered:
brendanzagaeski commented Jun 28, 2020
Thanks for submitting this item! This is an unfortunate known issue in Visual Studio 2019 version 16.7 Preview 3, but there are a few workaround options available:
Option A – Set the AndroidCommandLineToolsVersion MSBuild property to latest :
Open the .csproj project file for the Xamarin.Android app project in Visual Studio or another text editor.
Find an existing closing
tag in the file, and add the following additional
element after it:
This option is included in the Visual Studio release notes, but it’s a bit hard to find: https://docs.microsoft.com/visualstudio/releases/2019/release-notes-preview#xamarin
After a fix for this issue becomes available in the next Visual Studio 2019 version 16.7 Preview, be sure to remove the workaround
element to allow the project to use the default recommended value of AndroidCommandLineToolsVersion .
Option B – Temporarily disable the Auto Install Android SDKs feature and ignore the message in the Error List:
Open Tools > Options, open the Xamarin > Android Settings item, and uncheck Auto Install Android SDKs.
After a fix for this issue becomes available in the next Visual Studio 2019 version 16.7 Preview, be sure to re-enable Auto Install Android SDKs.
Option C – Click Cancel on the Android SDK — License Acceptance dialog each time it pops up and ignore the message in the Error List.
Explanation: In this particular case, the «missing Android SDKs» error does not interfere with the build process, so it is OK to ignore the error and dismiss the Android SDK — License Acceptance dialog each time it appears.
Источник
How to Fix “Failed to install the following Android SDK packages as some licenses have not been accepted” Error in Android Studio?
When you download the latest Android SDK tools version using the command line to install SDKs and you just try to build gradle then this error shows up:
You may face this error even after typing y as the answer for the question: Do you accept the license ‘android-sdk-license-c81a61d9’ [y/n]: y. So we need to look at why this error is popping up? Because of this error, we cannot compile our project. So In this article, we will talk about how to solve this error using five different methods. But before directly jumping to solutions first let’s see something about Android SDK.
What are Android SDK packages?
SDK stands for software development kit or devkit for short. The Android SDK consists of an emulator, development tools, sample projects with source code, and the required libraries to build Android applications. The Android SDK Manager, manages various Android SDK versions, tools, and various other useful packages that you can select and download, to keep your development environment up-to-date.
How To Solve Failed to install the following Android SDK packages?
Method 1
You need to accept the licenses before building. According to Android SDK docs, you can use the following command depending on the SDK manager location: Docs on –licenses option seems to be missing though. yes | sdkmanager –licenses
Windows:
Step 1: Navigate to %ANDROID_HOME%/tools/bin .
%ANDROID_HOME% is the path to SDK. By default it is located at : C:\Users\UserName\AppData\Local\android\Sdk . If you have moved SDK to another directory location then you can follow below steps :
- Search for edit the system environment variables.
- Then in the environment variables, you will see ANDROID_HOME.
- Navigate to that path in cmd
Step 2:
After successfully navigating just type below command and you are done.
GNU/Linux Distributions:
macOS:
export JAVA_HOME=/Applications/Android\ Studio.app/Contents/jre/jdk/Contents/Home
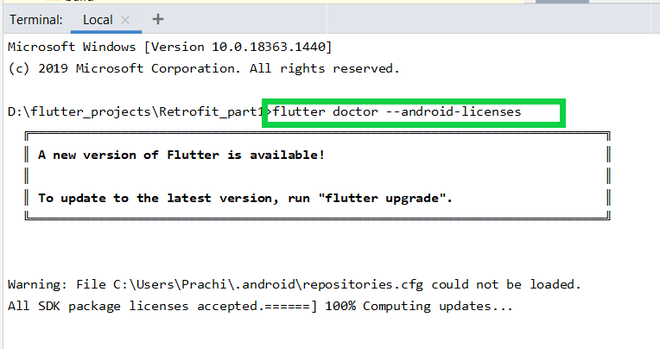
Flutter Users:
Just type flutter doctor –android-licenses in the terminal and wait for few seconds. You will see “All SDK package licenses accepted” on your screen.
Method 2
Step 1: In Android Studio go to Tools > SDK Manager.
Step 2: Go to the SDK Tools tab as shown in the below image.
Step 3: Select the Android SDK Command-line Tools (latest) and download by pressing Apply.
Method 3
in Windows OS go to your sdkmanager path then execute
You can find your sdkmanager at: \Android\tools\bin
IF you don’t know where is your SDK located, then follow these steps:
- Open Android Studio
- Navigate to Your Project > Files > Setting > Appearance and Behavior > Android SDK
Method 4
Step 1:Go to your $ANDROID_HOME/tools/bin and fire the cmd and type the below command:

Accept All licenses listed there.
Step 2:
After this just go to the licenses folder in SDK.
Check that it’s having these five files:
- android-sdk-license
- android-googletv-license
- android-sdk-preview-license
- google-gdk-license
- mips-android-sysimage-license
Step 3:
Give a retry and build again, still, Jenkins giving ‘licenses not accepted” then you have to give full permission to your ‘SDK’ directory and all its parent directories. Here is the command:
If you having sdk in /opt/ directory.
Method 5
For Windows users:
Step 1: Go to the location of your sdkmanager.bat file. By default, it is at Android\sdk\tools\bin inside the %LOCALAPPDATA% folder.
Step 2: Open a terminal window there by typing cmd into the title bar. Then go to the above path(Android\sdk\tools\bin as highlighted by the white line in the below image) and type :
Источник


