- Installation Instructions on Windows
- Использование Intel HAXM при разработке приложений для Android Wear и TV
- Предварительные сведения
- Работа с универсальным приложением-примером для Android
- Создание AVD для Android TV и Wear
- Эмуляция Android Wear
- Эмуляция Android TV
- Создание и запуск необходимого количества экземпляров эмуляторов
Installation Instructions on Windows
Clone this wiki locally
Table of Contents
This document will guide you through installing the Intel Hardware Accelerated Execution Manager (Intel HAXM), a hardware-assisted virtualization engine (hypervisor) that uses Intel Virtualization Technology (Intel VT) to speed up Android development.
Intel HAXM requires the Android SDK to be installed (version 17 or higher). For more information, refer to the Android developer website (https://developer.android.com/studio/index.html).
Hardware Requirements:
- Intel processor with support for Intel VT-x, Intel EM64T (Intel 64), and Execute Disable (XD) Bit functionality
- At least 4 GB of available RAM, 8 GB recommended
Supported Operating Systems:
- Microsoft Windows 10 64-bit
- Microsoft Windows 8 and 8.1 64-bit
- Microsoft Windows 7 64-bit*
Important: Intel HAXM cannot be used on systems without an Intel processor, or with an Intel processor that lacks the hardware features described in the «Hardware Requirements» section above.
To determine the capabilities of your Intel processor, visit http://ark.intel.com.
Additionally, Intel HAXM can be used only with Android x86 and x86_64 emulator images provided by Intel. Intel HAXM cannot be used with ARM Android emulator images or non-Intel x86 or x86_64 Android emulator images.
[*] For Windows 7 Service Pack 1, Microsoft security update KB3033929 is required when upgrading HAXM to the latest version (see Known Issues for details). Otherwise, keep using HAXM v7.3.2 instead.
Downloading Intel HAXM
Overview
Intel HAXM can be installed either through the Android SDK Manager (recommended), or manually, by downloading the installer from Intel’s website.
Note:
Intel HAXM does not currently check for updates automatically. To get the latest version, download the Intel HAXM package using the Android SDK Manager (recommended) or from the Intel Developer Zone Android developer site.
Downloading Manually
- Go to https://github.com/intel/haxm/releases.
- Choose the Intel HAXM installer package for your platform.
- Extract the installer and follow installation instructions for your platform.
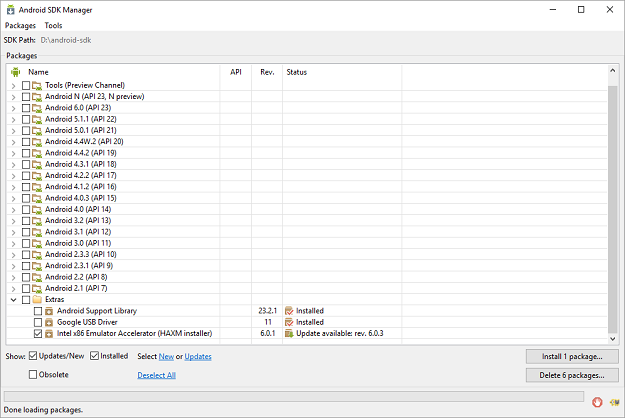
Downloading through Android SDK Manager
- Start the Android SDK Manager.
- Under Extras, check the box next to «Intel x86 Emulator Accelerator (HAXM).»

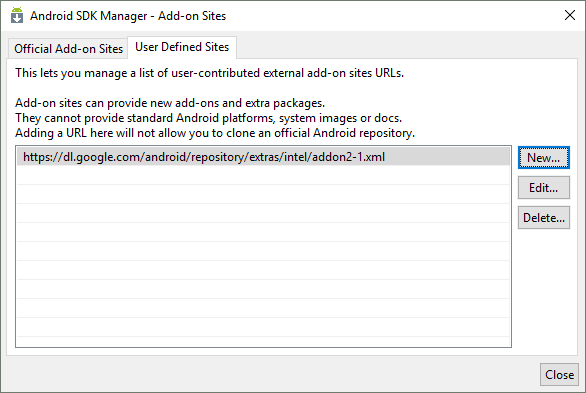
If there is no such option, manually add https://dl.google.com/android/repository/extras/intel/addon2-1.xml to the SDK Manager’s list of add-on sites via Tools > Manage Add-on Sites… > User Defined Sites > New… - Click the «Install package…» button.
- Review the Intel Corporation license agreement. If you accept the terms, select Accept and click Install.
- The SDK Manager will download the installer to the «extras» directory, under the main SDK directory. Even though the SDK manager says «Installed» it actually means that the Intel HAXM executable was downloaded. You will still need to run the installer from the «extras» directory to get it installed.
- Run the installer inside the /extras/intel/Hardware_Accelerated_Execution_Manager/ directory and follow the installation instructions for your platform.
Installing Standalone Intel HAXM on Windows
Warning: Intel HAXM installation will fail if your system does not meet the system requirements, including support for Intel processor features, such as Intel Virtualization Technology (Intel VT).
- Download the installer package from https://github.com/intel/haxm/releases or using the SDK manager.
- Run the installer (and accept the UAC prompt, if applicable).
If an older version Intel HAXM is already installed, you will see a notification dialog:Click «Yes» to upgrade Intel HAXM, or click «No» to exit the installation and keep the currently installed version of Intel HAXM. - You will see a setup wizard screen:
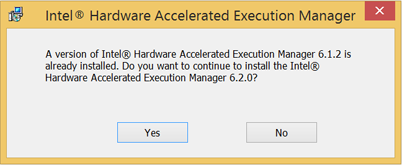 Click «Yes» to upgrade Intel HAXM, or click «No» to exit the installation and keep the currently installed version of Intel HAXM.
Click «Install»
Note: You can access the documentation by clicking Intel HAXM Documentation
When the Intel HAXM installation is finished, you will see the completion screen:
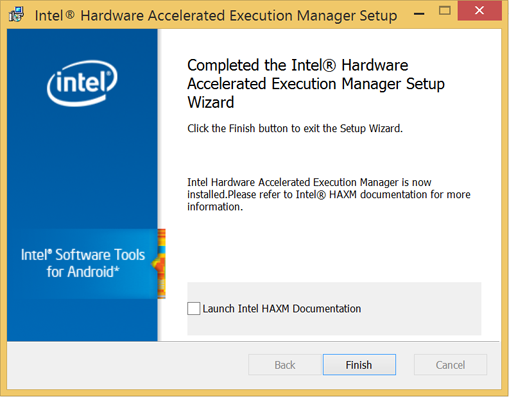 Click «Finish» to exit the installer. Intel HAXM is now installed and ready to use.
To verify that Intel HAXM is running, open a Command Prompt window with administrator privileges (Run as Administrator) and execute the following command:
sc query intelhaxm
If Intel HAXM is working, the command will show a status message indicating that the state is: «4 RUNNING».
To stop or start Intel HAXM, use these commands:
sc stop intelhaxm
sc start intelhaxm
Installing HAXM silently on Windows
- Download the installer package from https://github.com/intel/haxm/releases and extract it locally.
- Enter the extracted folder and run below command in an elevatedCommand Prompt or Windows PowerShell.
> silent_install.bat
The installer will check the system environment first. If the installation is successful, it will output as below.
Intel HAXM installed successfully!
The installer executable itself also supports to run in silent mode by passing /S on the Command Prompt or Windows PowerShell, e.g.,
Please note that the parameter /S must be in uppercase.
Installing Intel HAXM on Windows via Android Studio
- Download the Android Studio installer package from http://developer.android.com/sdk/index.html
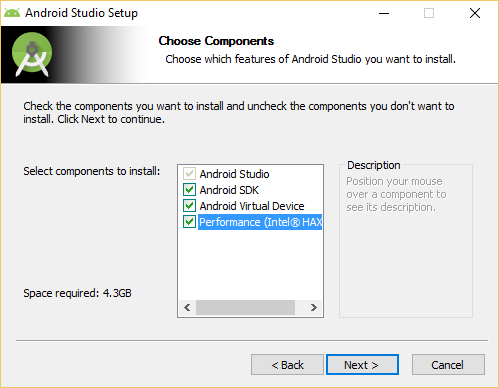
- Run the Android Studio installer
Select Performance (Intel HAXM) and click Next
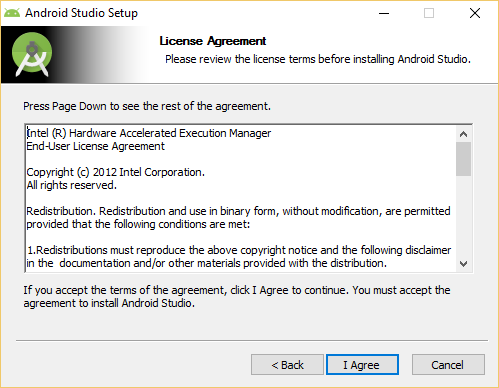
Accept the Android SDK License Agreement and the Intel HAXM License Agreement
Note: This setting is obsolete since Intel HAXM 6.2.0.
To verify that Intel HAXM is running, open a Command Prompt window with administrator privileges (Run as Administrator) and execute the following command:
sc query intelhaxm
If Intel HAXM is working, the command will show a status message indicating that the state is: «4 RUNNING».
To stop or start Intel HAXM, use these commands:
sc stop intelhaxm
sc start intelhaxm
Removing Intel HAXM
Warning: Close all instances of the Android x86 emulator before removing Intel HAXM. Intel HAXM cannot be removed while in use.
To uninstall Intel HAXM, use Uninstall a program in the Control Panel or uninstall in silent mode as below.
- Launch an elevatedCommand Prompt or Windows PowerShell.
- Enter the extracted folder of installer package, which is previously downloaded from https://github.com/intel/haxm/releases, and run below command.
> silent_install.bat -u
Important: Removing Intel HAXM will disable acceleration of all Intel x86 Android emulators. Existing x86 Android Virtual Devices will not boot.
Installing Intel HAXM again will re-enable Android emulator acceleration.
Using Intel HAXM
Intel HAXM requires an Android x86 system image provided by Intel. These images can be downloaded through the Android SDK manager or manually from the Intel Developer Zone website.
Intel x86 Android emulator images will automatically be executed using the «emulator-x86» binary, provided with the Android SDK. If Intel HAXM is installed and working, emulation will be accelerated by Intel HAXM (using Intel Virtualization Technology).
Execute Disable Bit capability error
When installing Intel HAXM, you may encounter an error regarding Execute Disable Bit support. This error message can be triggered by the following conditions:
- Execute Disable Bit is not supported by your computer’s processor.
- Execute Disable Bit is not enabled.
Execute Disable Bit is not supported
Intel HAXM requires an Intel processor with Execute Disable Bit functionality and cannot be used on systems lacking this hardware feature. To determine the capabilities of your Intel processor, visit http://ark.intel.com.
Execute Disable Bit is not enabled
In some cases, Execute Disable Bit may be disabled in the system BIOS and must be enabled within the BIOS setup utility. To access the BIOS setup utility, a setup key must be pressed during the computer’s boot sequence. This key is dependent on which BIOS is used but it is typically the F2, Delete, or Esc key. Within the BIOS setup utility, Execute Disable Bit may be identified by the terms «XD», «Execute Disable», «No Execute», or «Hardware DEP», depending on the BIOS used.
Windows hosts may need to enable DEP (Data Execution Prevention) in addition to Execute Disable Bit, as described in this Microsoft KB article: http://support.microsoft.com/kb/875352.
For specific information on entering BIOS setup and enabling Execute Disable Bit, please contact your hardware manufacturer.
Intel Virtualization Technology (Intel VT-x) capability
When installing Intel HAXM, you may encounter an error regarding Intel VT-x support. This error message can be triggered by the following conditions:
- Intel VT-x is not supported by your computer’s processor
- Intel VT-x is not enabled
Intel VT-x is not supported
Intel HAXM requires an Intel processor with Intel VT-x functionality and cannot be used on systems lacking this hardware feature. To determine the capabilities of your Intel processor, visit? http://ark.intel.com.
Intel VT-x not enabled
In some cases, Intel VT-x may be disabled in the system BIOS and must be enabled within the BIOS setup utility. To access the BIOS setup utility, a key must be pressed during the computer’s boot sequence. This key is dependent on which BIOS is used but it is typically the F2, Delete, or Esc key. Within the BIOS setup utility, Intel VT may be identified by the terms «VT», «Virtualization Technology», or «VT-d.» Make sure to enable all of the Virtualization features.
For specific information on entering BIOS setup and enabling Intel VT, please contact your hardware manufacturer.
Tips and Tricks
Below are some recommendations to get the best experience out of the Android emulator using the Intel HAXM driver.
Источник
Использование Intel HAXM при разработке приложений для Android Wear и TV
Предварительные сведения
Intel Hardware Accelerated Execution Manager (HAXM) – это Android-эмулятор, который поддерживает аппаратную виртуализацию. Он создаёт невысокую нагрузку на систему, обладает отличной производительностью и быстрым интерфейсом.
Используя Intel HAXM, можно запустить несколько экземпляров Android-эмулятора на одном компьютере, не особо беспокоясь о производительности, о нагрузке на систему или о «тормозах» интерфейса. Подобный подход может быть весьма полезным в итеративном процессе создания и тестирования приложений, он способен дать огромный прирост производительности труда разработчиков.
Образы Android-эмуляторов, рассчитанные на архитектуры, отличные от x86, могут медленно запускаться и с задержкой откликаться на команды пользователя. Кроме того, в отличие от некоторых Android-эмуляторов сторонних производителей, с помощью Intel HAXM вы получаете возможность работать с последними версиями API и платформ Android сразу же после их выпуска.
Здесь вы можете найти подробное руководство по работе с HAXM.
В этом материале мы поговорим о том, как пользоваться возможностями Intel HAXM при создании приложений, рассчитанных на всевозможные варианты платформы Android. Такие приложения могут работать на обычных смартфонах разных форм-факторов, и на устройствах, несущих на борту Android Wear и Android TV.
Работа с универсальным приложением-примером для Android
Компания Google недавно выпустила приложение, на примере которого показано, как охватить одной кодовой базой множество различных Android-устройств.
В примере продемонстрированы передовые подходы к разработке универсальных приложений. Для сборки проекта воспользуйтесь инструкциями, которые можно найти по вышеупомянутой ссылке. Мы, в данном практическом руководстве, будем испытывать пример на x86 HAXM-эмуляторах Android TV, Wear и смартфона.
Проект можно импортировать в Android Studio и воспользоваться возможностями этой среды по сборке и запуску приложения на эмуляторе. Если вы предпочитаете работать с другой IDE, то, о чём пойдёт речь дальше, так же окажется полезным.
Если вам близок интерфейс командной строки, можете просто запустить Gradle-скрипт для сборки приложения из папки с исходным кодом примера.
Результирующий APK-файл можно найти в папке «mobile/build/outputs/apk/mobile-debug.apk».
Создание AVD для Android TV и Wear
Для начала нужно удостовериться в том, что у нас имеются самые свежие образы эмуляторов для платформ Android TV, Wear, а так же – для обычных смартфонов.
Откроем Android SDK Manager. Его можно запустить из интерфейса Android Studio или из командной строки (папка /tools должна быть указана в переменных среды) с помощью такой команды:

Окно Android SDK Manager. Образы систем, которые нужно загрузить, выделены
После того, как необходимые пакеты загружены, нужно, для использования соответствующих образов систем, настроить конфигурации эмуляторов (то есть, создать набор AVD). Для этого нам понадобится Android Virtual Device Manager. Запустим его из командной строки:
Окно Android Virtual Device Manager, здесь можно создавать новые AVD и настраивать существующие
Эмуляция Android Wear
Создадим конфигурацию виртуального устройства для Android Wear так, как показано на рисунке ниже.
Настройка конфигурации эмулятора для Android Wear
После того, как настройки выполнены, нажмём кнопку OK, после чего – запустим эмулятор. Для этого его нужно выделить в окне AVD Manager и нажать на кнопку Start. Вот как выглядит окно эмулятора.
Окно эмулятора Android Wear
Для того чтобы смартфон мог взаимодействовать с устройством, работающим под управлением Android Wear (или с соответствующим эмулятором), нужно дополнительное приложение. Единственный способ установить это приложение на устройство – загрузка из Магазина Google Play. Соответственно, нам понадобится Android-смартфон, который имеет доступ к Магазину.
Устройство должно быть доступно для ADB. Для того чтобы оно смогло подключиться к эмулятору, нужно, чтобы и смартфон, и эмулятор, присутствовали в списке устройств, который можно получить следующей командой:
Список подключенных устройств
Теперь перенаправим TCP-порты такой командой:
Теперь всё готово для сопряжения эмулятора Android Wear и аппаратного устройства. Осталось лишь запустить на смартфоне приложение Android Wear, и, из его меню, выполнить команду подключения к эмулятору. Если подключение удалось, экран эмулятора будет выглядеть так, как показано в левой части рисунка. В правой части показан экран эмулятора, не подключенного к смартфону.
Экраны эмулятора Android Wear в подключенном (слева) и неподключенном (справа) состоянии
Подробные сведения о создании приложений для Android Wear можно найти здесь. APK-файл тестового приложения ничем не отличается от других APK, его можно установить на эмулятор Android Wear с использованием ADB.
Проверить, установлено ли приложение на эмуляторе, можно с помощью такой команды:
Установка приложения на эмулятор и проверка установки
Имя пакета приложения-примера (com.example.android.uamp) присутствует в списке. Из командной строки можно и запустить приложение:
Теперь приложение запущено на эмуляторе Android Wear
Эмуляция Android TV
Создадим конфигурацию виртуального устройства для Android TV так, как показано на рисунке ниже.
Настройка конфигурации эмулятора для Android TV
После настройки нажмём на кнопку OK и запустим эмулятор кнопкой Start в окне ADV Manager.
Проверить доступность эмулятора для ADB можно такой командой:
Запишите или запомните идентификатор эмулятора (что-то вроде emulator-55xx). Он понадобится для указания целевого устройства при работе с эмулятором с помощью ADB. Для установки приложения на эмулятор можно воспользоваться такой командой:
Запустить приложение на эмуляторе Android TV можно так:
Вот как приложение выглядит на экране эмулятора.
Приложение, запущенное на эмуляторе Android TV
Создание и запуск необходимого количества экземпляров эмуляторов
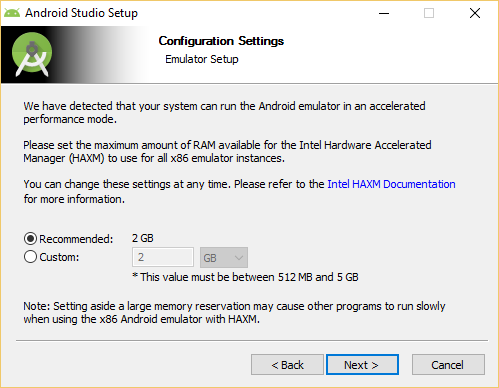
Если в ходе разработки и тестирования приложения возникает необходимость создания и запуска нескольких экземпляров эмуляторов – всё это достижимо с использованием Intel HAXM. При установке HAXM можно настроить размер оперативной памяти, который отводится для его работы. Вот набор конфигураций AVD для Android Wear, TV и смартфона.
Список виртуальных устройств Android
Ниже вы можете видеть приложение-пример, запущенное одновременно на трёх виртуальных устройствах (Android TV, Wear и эмулятор смартфона). Здесь же показаны сведения об использовании CPU. Как видно, все эти экземпляры эмулятора не создают чрезмерной нагрузки на систему.
Три одновременно запущенных эмулятора и сведения о нагрузке на систему, которую они создают
В ходе работы можно настраивать выделение памяти для эмуляторов, оптимизируя потребление ими системных ресурсов. Для того, чтобы перенастроить параметры выделения памяти, заданные при установке HAXM, нужно повторно запустить его установку и указать нужные параметры.
Источник


