- How to install Android SDK and setup AVD Emulator without Android Studio
- Understanding the Android SDK
- Installing the Android SDK
- Step 1 — Download the tools package
- Step 2— You need Java 8!
- Step 3 — Download the essential packages
- Step 4 — Set your environmental variables
- Step 5 — Download the platform specific packages you want
- Step 5 — Create a AVD device
- Step 6 — Run the Android Emulator
- How to Fix “SDK location not found” in Android Studio?
- When switching from one IDE to another (Like from Eclipse to Android Studio)
- Ошибка Android Studio «Установленные средства сборки версии 31.0.0 повреждены»
- 17 ответов
- Методы лечения различных ошибок в Android Studio при разработке проекта
How to install Android SDK and setup AVD Emulator without Android Studio
If you are trying to develop to Android, you probably will end up installing the Android Studio to get the Android SDK and the AVD Emulator working properly.
But if you are using another code editor, like Sublime Text or VSCode, installing the Android Studio will just mess up with your setup and consume your precious RAM for no good reason.
I had a hard time figuring out how to properly do this setup due the lack of documentation about it, so i hope this article helps you. 🙂
Recommended previous knowledge:
- SDK (Standard Development Kit); Read about on Wikipedia;
- AVD (Android Virtual Device); Read about on docs;
- CLI (Command Line Interface); Read about on Wikipedia;
- Android API levels; Read about on Vanderbilt University;
- How to open, navigate and execute files in your OS terminal;
- Know what are environmental variables;
Understanding the Android SDK
Basically, the Android SDK is a bunch of packages necessary to develop for Android.
These packages stays in subfolders of a folder called “sdk” (or “android-sdk” sometimes). You do not need to know how these packages really work, just what they do.
The picture below is my Android SDK folder, these are the basic packages you will need in order to get everything working properly.
Here is a brief explanation of each package:
- tools: This package is mainly used to manage the other packages and to create AVD’s;
- emulator: As the name suggest, this is the Android emulator;
- platform-tools: Some tools to communicate with Android devices when you plug then in your computer;
- patcher: This package is automatically downloaded by the SDK. I didn’t find what exactly this is for, so just leave it as it is;
The folders bellow contain sub-folders with the packages for each Android API level.
- platforms: The platform packages are required to compile your app for the specified API level.
- system-images: These are the android images used in the emulator.
- build-tools: These are necessary to build your Android apps
Installing the Android SDK
In order to install the SDK we will use the Command Line Tools. These are some quite simple CLI’s used to manage the Android SDK. You can read the documentation here for more details.
Step 1 — Download the tools package
First, you need to download the tools package. And with this package you can download the others.
- First, go to the Android Studio download page: https://developer.android.com/studio;
- Then click in “ Download Options”;
- There you will find a table named “ Command line tools only”;
- This table contain some zip files. Download the appropriate file for your system ( Windows, Mac or Linux);
- Extract this zip and you will get a folder called tools: This is the tools package i explained earlier;
Create a folder anywhere you prefer to place your SDK. I recommend you to stick with one of these commonly used places:
- Globally: C:\Android\sdk or C:\android-sdk (this is not default, but i usually set my SDK here on Windows)
- One user only: C:\Users\ \AppData\Local\Android\sdk
- Globally: /Library/Android/sdk
- One user only: /Users/ /Library/Android/sdk
And move the tools folder to this new sdk folder. Make sure you have admin access to this folder and any sub-folders inside it, or the tools package will fail to download new packages.
Note: You can also download a pre-build package for your SO (like the one available on Ubuntu repository). But i do not recommend you do to so, because they probably will not be updated and will be harder to manage, since it was automatically installed.
Step 2— You need Java 8!
The Android SDK packages require Java 8. If you do not have it, you need to download. If you are using a newer version, you have to downgrade to Java 8 or you will eventually get some errors, because it is not compatible.
If you do not have the Java 8 SDK, here is how you can install it:
On Ubuntu run these commands:
- # sudo apt-get update
- # sudo apt-get install openjdk-8-jdk
Sorry for MacOS users, i don’t know how to install it on this OS.
Step 3 — Download the essential packages
Now, download the platform-tools and the emulator packages, because they contain some CLI binary files you will need later. I decided to download these packages first in order to set all the necessary environment variables at once and make the rest of the process easier.
Open a terminal window (you need to use a terminal, not the file explorer), go to your sdk folder and navigate to the /tools/bin directory.
This folder contain the SDKManager binary: this is a CLI used to list the available packages in the Google’s repository and download, update or remove them from your SDK folder.
The bellow command will list all packages installed (the first items on the list) and all packages available to download:
To download the packages, simply copy the package names and pass it as a parameter to the SDKManager CLI using the terminal:
# ./sdkmanager platform-tools emulator
If you open your sdk folder you should see these packages folders there.
Step 4 — Set your environmental variables
You need to set the below environmental variables containing the path to our SDK, so any running program can find it in your pc:
ANDROID_SDK_ROOT = Path to your SDK folder
ANDROID_HOME = The same as ANDROID_SDK_ROOT. This variable is now deprecated, but i recommend setting it because some programs still using it to locate your sdk.
And add these folders to the PATH variable, making their binary files accessible from everywhere:
To add the environment variables on WIndows, just follow these steps:
- Open the “Control Panel”;
- Go to “ System and Security” option in the side menu;
- In the window “ System Properties” open the tab “ Advanced”;
- Click in the button “ Environment Variables” in the bottom of the page;
- In the “ Environment Variables” window you will see two tables: “User Variables” and ” System Variables”.
- If you created your sdk folder for one user only, set the variables in the “ User Variables” table;
- But, if you create your sdk folder globally, set the variables in the “ System Variables” table instead;
On Linux, you can set your environment variables in many places. So i choose the ones I found the most appropriate:
- If you created your sdk folder for one user only, set your environment variables in the file
/.bashrc;
Here is how i set these variables in my Ubuntu, using the file /etc/environment:
And sorry again, no MacOS instructions for this task.
You can find more about these environmental variables in the oficial docs here.
Now your SDK is ready! If you do not need to run the emulator there’s no need to follow the next steps.
Step 5 — Download the platform specific packages you want
You need more three packages: The platform, the system-image and the build-tools. You can download these packages for any Android version you prefer. In this article, i will download the packages for the API Level 28.
Use the “ sdkmanager — list” command to find these packages and download them using the command “ sdkmanager
Here’s an example:
Step 5 — Create a AVD device
Creating a AVD device is a simple task: run the AVDManager command (this is a binary file located in the tools/bin folder of your sdk) with the create avd option, a name for the new AVD and the image you want to use.
Here is a example:
# avdmanager create avd — name android28 — package “system-images;android-28;default;x86”
You will be asked if you want to alter some configurations. You can also modify these configurations later in the file config.ini, located in the avd folder (this folder usually is created in your user folder, under the android directory). The currently active configurations can be find in the file hardware-qemu.ini (this file just will be created after the emulator runs for the first time).
Step 6 — Run the Android Emulator
Now you just need to run the emulator command (remember that we added this package to the environmental variables?):
The emulator take some time to init for the first time. But if you done everything correctly you should see this screen:
Источник
How to Fix “SDK location not found” in Android Studio?
Google developed Android SDK which is a Software Development Kit developed by Google for the Android platform. You can create Android apps using Android SDK, and you don’t need to be an expert to use it. Android SDK and Android Studio come bundled together, with Google’s official integrated development environment (IDE) for the Android operating system.
In this article, we see how to fix an error that is related to the main Android building component of Android Studio that is the Android SDK. The most common error related to Android SDK is “SDK location not found“. This message pops up stating that the location of Android SDK was not detected when the path of SDK is assigned incorrectly. There can also be other reasons for this error message as well and we will see ways to get rid of this error.
When switching from one IDE to another (Like from Eclipse to Android Studio)
Method 1
In this case, follow the below steps:
Method 2
In case the above procedure doesn’t work then add the ANDROID_HOME variable in “Environment Variables” as C:\Users\Username\AppData\Local\Android\Sdk.
Method 3
In case it does not work even then, then you need to change the directory path on Project Structure as well.
- Close the current project and you’ll see a pop-up with a dialog which will then proceed to Configure option.
- Configure -> Project Defaults -> Project Structure -> SDKs on left column -> Android SDK Home Path -> give the exact path as you did on local.properties and select Valid Target.
Method 4
A settings.gradle file might be missing from the project. Make sure that the file exists from the project you are importing. If not add the settings.gradle file with the following:
Save the file and put it in the top-level folder in your project.
Источник
Ошибка Android Studio «Установленные средства сборки версии 31.0.0 повреждены»
Я использую Android Studio 4.2.2. Я создал новый проект и ничего не добавил в стартовый код, и всякий раз, когда я нажимаю кнопку build или run, я получаю эту ошибку:
Я просмотрел предложения других сообщений, но ни одно из этих решений не помогло. Вот что я пробовал:
- Диспетчер SDK> Инструменты SDK> Установите флажок «Показать сведения о пакете», снимите флажок 31.0.0 и нажмите «Применить»> Удалить 31.0.0> Отметьте 31.0.0 и переустановите его.
- В SDK Manager снимите флажок 31.0.0 и попробуйте установить более старую версию (например, я пробовал 30.0.3) и обновите buildToolsVersion в build.gradle до установленной версии.
- Перешел в «Структура проекта»> «Свойства» и убедился, что 31.0.0 выбрано для «Версия инструментов сборки» и «Скомпилированная версия SDK».
- Вручную удалите файлы из папки build-tools; то есть rm -rf /path/to/android/sdk/build-tools/31.0.0 (он не заканчивается на «-rc», как описано в некоторых других сообщениях)
- Перезагрузите Android Studio
- Переустановите Android Studio
Я новичок в Android, просто пытаюсь создать проект hello world, это действительно не должно быть так сложно. Я схожу с ума, кто-нибудь, пожалуйста, помогите. Спасибо за ваше время
17 ответов
Возникла та же проблема, и она была решена с помощью нескольких изменений строк.
Проверьте панель кода проекта и перейдите в Gradle Scripts -> build.gradle file,
- Измените 3 места: compileSdkVersion, buildToolsVersion, targetSdkVersion с 31 на 30
- Вы заметите, что на измененных строках появляется лампочка, щелкните и выберите синхронизацию [с версией 30]. Android Studio автоматически загрузит BuildTool V30 и изменит настройки проекта.
Теперь запустите приложение. Меня устраивает
После изменения версии buid на 30.0.3 кажется, что она работает, пока не появится сообщение об ошибке:
Приложения, ориентированные на Android 12 и выше, должны указывать явное значение для android:exported , если для соответствующего компонента определен фильтр намерений.
Не знаю, как это исправить.
Посмотрите это видео на UTube .. Проблема решена
Источник
Методы лечения различных ошибок в Android Studio при разработке проекта
Сегодня хотел бы поделиться своим анализом и способами лечением разных ошибок при разработке своего продукта в Android Studio. Лично я, не раз сталкивался с различными проблемами и ошибками при компиляции и/или тестировании мобильного приложения. Данный процесс, всегда однообразный и в 99% случаев и всегда нужно тратить n-колличество времени на его устранение. Даже, когда ты уже сталкивался с данной проблемой, ты все равно идешь в поисковик и вспоминаешь, как же решить ту или иную ситуацию.
Я для себя завел файлик, в котором отметил самые частые ошибки — потратив на это несколько часов и перечислил самые популярные ошибки (в дальнейшем планирую просто их запомнить), чтоб сократить свое время в дальнейшем.
Итак, начну по порядку с самой распространенной проблемы и дальше буду перечислять их по мере появления:
1) Если подчеркивает красным код, где используются ресурсы: R. — попробовать (но вероятно не поможет): Build -> Clean Project.
В принципе на Build -> Clean Project можно не терять времени, а лучше всего — слева переключиться на Project, открыть каталог .idea, затем каталог libraries и из него удалить все содержимое. Затем нажать кнопку Sync Project. А затем (если все еще красное, но скорее всего уже будет все ок ) Build -> Clean Project.
2) После внезапного выключения компьютера, после перезапуска может быть во всех проектах весь код красным. Перед этим может быть ошибка: Unable to create Debug Bridge: Unable to start adb server: Unable to obtain result of ‘adb version’. Есть три решения — первое помогло, второе нет (но может быть для другого случая), а третье — не пробовал:
а) File — Invalidate Caches/Restart — Invalidate and Restart
б) Закрыть студию. В корне папки проекта удалить файл(ы) .iml и папку .idea. Вновь запустить студию и импортировать проект.
в) Нажать Ctrl-Alt-O и запустить оптимизацию импорта.
Кстати, adb сервер можно проверить на версию (и работоспособность) и затем перезапустить:
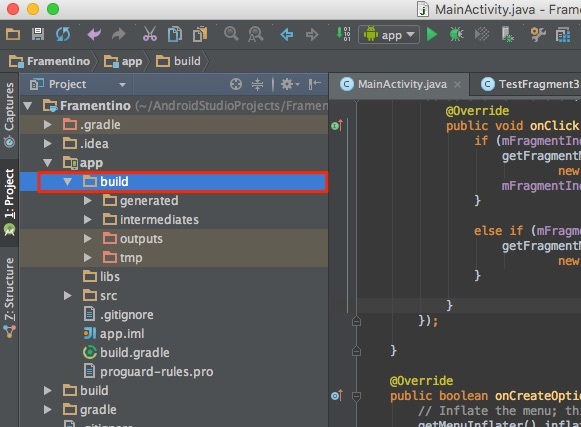
3) Если Android Studio выдает приблизительно такую ошибку: Error:Execution failed for task ‘:app:dexDebug’.
Надо слева переключиться на опцию Project, найти и удалить папку build которая лежит в папке app, т.е. по пути app/build. Затем перестроить весь проект заново: Build -> Rebuild Project.
Такое же решение если ошибка типа: «не могу удалить (создать) папку или файл» и указан путь, который в ведет в app/build. Тоже удаляем папку build и ребилдим проект.
4) В сообщении об ошибке упоминается heap — виртуальная память. А ошибка обычно вызвана ее нехваткой, т.е. невозможностью получить запрашиваемый объем. Поэтому этот запрашиваемый объем надо уменьшить, т.е. переписать дефолтное значение (обычно 2048 MB которое можно изменить в настройках), на меньшее 1024 MB.
В файле проекта gradle.properties пишем:

5) Android Studio пришет примерно такую ошибку: Plugin is too old, please update to a more recent version, or set ANDROID_DAILY_OVERRIDE environment variable to «83648b99316049d63656d7276cb19cc7e95d70a5»
Возможные причины (кроме необходимости регулярного обновления SDK):
а) Загруженный проект был скомпилирован с помощью уже несовместимого старого gradle плагина. В этом случае надо найти и подключить в своем build.gradle проекта этот более старый плагин. т.е. попробовать более старые версии, например: 1.1.3 (часто именно 1.1.x и подходит).
Найти все версии можно здесь.
б) Если в build.gradle проекта используется beta-версия плагина — это означает, что срок ее истек. Посмотреть последние релизы (продакшн и бета) можно также здесь:
6) Иногда при подключении сторонних библиотек могут дублироваться некоторые файлы (обычно связанные с лицензированием). В сообщении будет что-то содержащее слова: duplicate files. Решение — надо посмотреть в сообщении об ошибке или в документации подключенной сторонней библиотеки — какие именно файлы стали избыточными, и перечислить их в build.gradle модуля для исключения (exclude) из билда.
Это делается в директиве packagingOptions (которая, в свою очередь, находится в директиве android).
Источник


