Android — Services
A service is a component that runs in the background to perform long-running operations without needing to interact with the user and it works even if application is destroyed. A service can essentially take two states −
A service is started when an application component, such as an activity, starts it by calling startService(). Once started, a service can run in the background indefinitely, even if the component that started it is destroyed.
A service is bound when an application component binds to it by calling bindService(). A bound service offers a client-server interface that allows components to interact with the service, send requests, get results, and even do so across processes with interprocess communication (IPC).
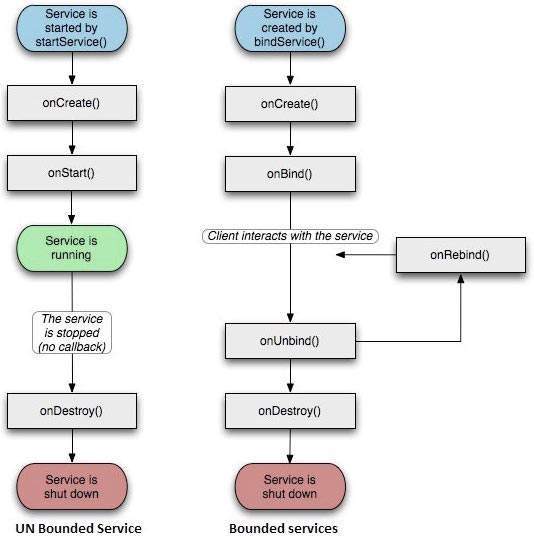
A service has life cycle callback methods that you can implement to monitor changes in the service’s state and you can perform work at the appropriate stage. The following diagram on the left shows the life cycle when the service is created with startService() and the diagram on the right shows the life cycle when the service is created with bindService(): (image courtesy : android.com )
To create an service, you create a Java class that extends the Service base class or one of its existing subclasses. The Service base class defines various callback methods and the most important are given below. You don’t need to implement all the callbacks methods. However, it’s important that you understand each one and implement those that ensure your app behaves the way users expect.
| Sr.No. | Callback & Description | |||||||||||||||
|---|---|---|---|---|---|---|---|---|---|---|---|---|---|---|---|---|
| 1 |
| Step | Description |
|---|---|
| 1 | You will use Android StudioIDE to create an Android application and name it as My Application under a package com.example.tutorialspoint7.myapplication as explained in the Hello World Example chapter. |
| 2 | Modify main activity file MainActivity.java to add startService() and stopService() methods. |
| 3 | Create a new java file MyService.java under the package com.example.My Application. This file will have implementation of Android service related methods. |
| 4 | Define your service in AndroidManifest.xml file using tag. An application can have one or more services without any restrictions. |
| 5 | Modify the default content of res/layout/activity_main.xml file to include two buttons in linear layout. |
| 6 | No need to change any constants in res/values/strings.xml file. Android studio take care of string values |
| 7 | Run the application to launch Android emulator and verify the result of the changes done in the application. |
Following is the content of the modified main activity file MainActivity.java. This file can include each of the fundamental life cycle methods. We have added startService() and stopService() methods to start and stop the service.
Following is the content of MyService.java. This file can have implementation of one or more methods associated with Service based on requirements. For now we are going to implement only two methods onStartCommand() and onDestroy() −
Following will the modified content of AndroidManifest.xml file. Here we have added tag to include our service −
Following will be the content of res/layout/activity_main.xml file to include two buttons −
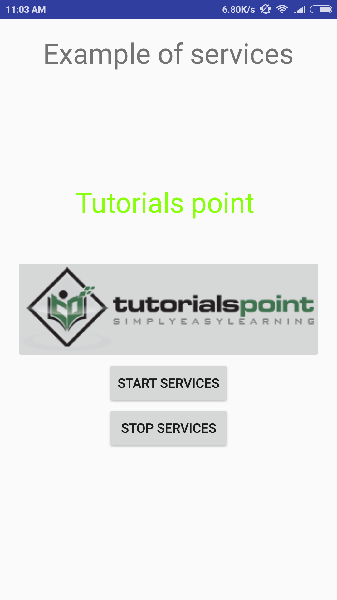
Let’s try to run our modified Hello World! application we just modified. I assume you had created your AVD while doing environment setup. To run the app from Android studio, open one of your project’s activity files and click Run  icon from the tool bar. Android Studio installs the app on your AVD and starts it and if everything is fine with your set-up and application, it will display following Emulator window −
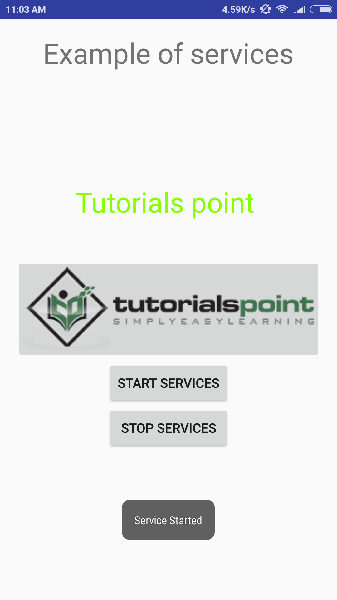
Now to start your service, let’s click on Start Service button, this will start the service and as per our programming in onStartCommand() method, a message Service Started will appear on the bottom of the the simulator as follows −
To stop the service, you can click the Stop Service button.
Источник
Bound Service Example in Android
What is a bound service?
A bound service is like a server in a client-server interface. A bound server allows components, such as activities, to bind to the service, send requests, receive responses and even perform IPC or Inter-Process Communication.
There are three ways of creating bound services:
- First is by extending the binder class
- Second is by using a messenger
- Third, is by using AIDL or Android Interface Definition Language.
In this tutorial, we are going to create bind service or a bound service by extending a binder class.
Please follow the steps below for creating a bound service by extending the binder class:
Step 1) First of all in a blank bare born project we will create a service as we always do for creating a service.
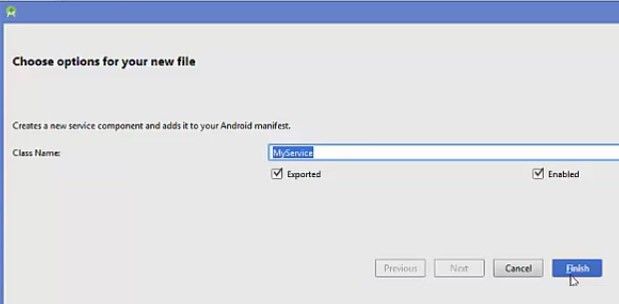
So right click your package->create new->go to services->click service.
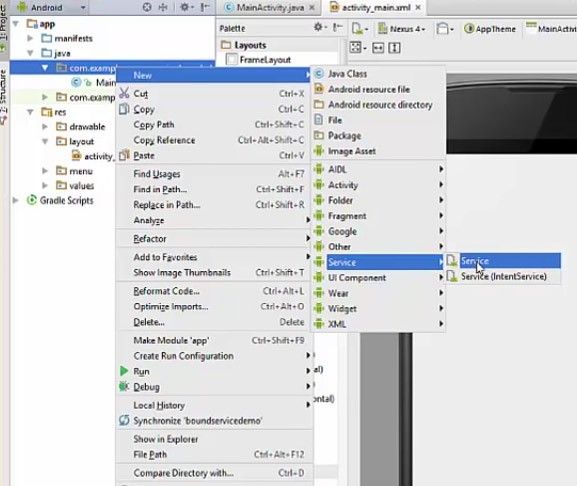
Now please name the service class finish it.
Step 2) Now it will create a class which extends from service class. As we know if you want to create a service we need to extend from service class.
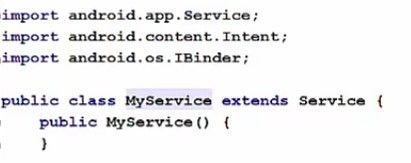
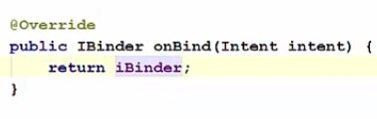
And this is the onBind method which we implement when we create our bound service.

Now in which scenarios we want to create a bound service by extending the Binder class. And why or how we can do it lets see.
So if your service is private to your own application and runs in the same process as the client (which is the most common case) then should create your interface by extending the Binder class and returning an instance of it from ‘onBind‘ method which will be automatically generated for us.
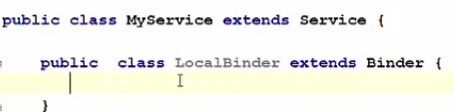
Step 3) Now let’s create the bound service by extending the binder class.
So, first of all, we will create a class inside our my service class which will be a public class and I will name it as LocalBinder. And this class will extend from the binder class.
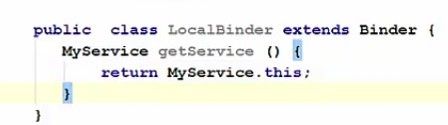
Step 4) Now inside the ‘LocalBinder‘class which we created what we want to do is to create a method which returns MyService and the method name is GetService. And what this is going to do is it is going to return an instance of MyService.this.
Step 5) Now as the definition says that «We need to create our interface by extending from the binder class and returning an instance of it from onBind method». So we are going to do the same.
Therefore, first of all, we are going to create our binder interface, give any name to your binder class for example ‘IBinder’ and initialize this using our local binder class.

And as it says that we need to return this instance from onBind method. So just take this instance of interface and just return it from here.
Step 6) Now, for example, we want to create a random number generator for our bound service.
So what we can do is we can create a variable called ‘mGenerator’ and which uses the class called ‘Random’ which is used to generate the random numbers and we are going to initialize it by new Random.

Step 7) Now we have to create a method which is going to return an integer value. And in here we want to return the generated random number. So just write ‘mGenerator .nextInt’ and in the argument of nextInt just give the range in which you want to create the random number. For example, under 200 you want to create this random number then you just need to give 200.
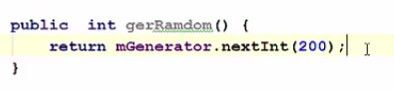
So it’s going to create the random number between 0 to 200.
This is how we can create a bound service using the extension or which extends from the binder class.
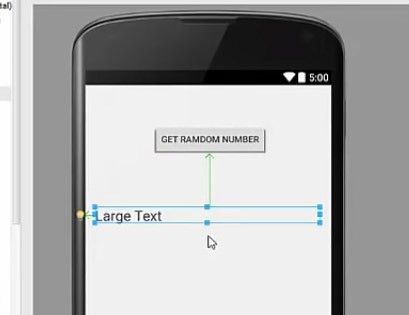
Step 8) Now in our interface or in our activity what we are going to do is we are going to take a button and a large text on which we are going to display the number.
Now go to your activity and go to your text and in the button here add an element called ‘onClick‘ and we can give any method name. for example GetRandomNumber and this is the method which we are going to implement

Step 9) Now go to your main activity.java file and in here, first of all create this method, and inside this we are going through return this random number.

Now at the top we are going to define two variables. One is the object or instance of my service class, so MyService object and second is a variable for checking our services bound or not. So this will be our Boolean variable and we are going to name it as isBound. And we are going to initialize it as false.

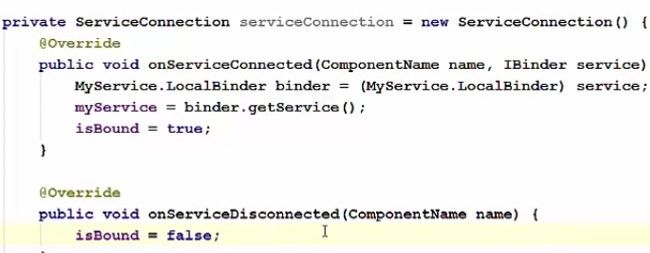
Step 10) Now we need to create an object of a class called service connection at the bottom. So inside the class go at the bottom and in here create an instance of a class called service connection and we will name it as service connection and we will press alt+enter to import service connection class and when you press enter for the first method here it will create two methods automatically.
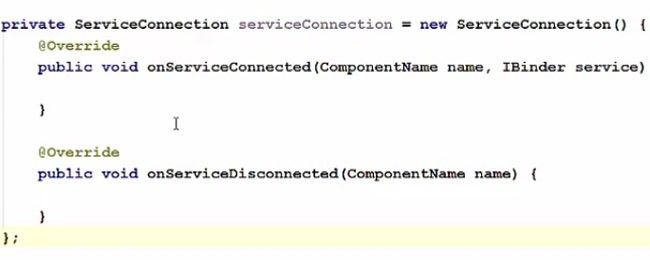
Now in these methods you need to write some code and in the first line you need to create our lower binder object and cast it lower binder with the service instance. And in the ‘onservice disconnected’ method we want to make our isbounder variable as false.
Step 11) Now as we always do we need to create intent for creating our service. So go to on create method here and create an intent oject.
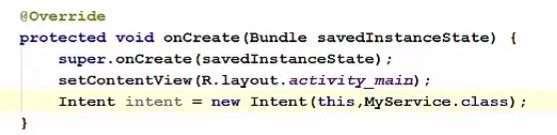
And now we are going to create a bound service and the first argument of it will be your intent, second will your instance of your service connection instance and the third argument will be context.BIND_AUTO_CREATE.

Step 12) Now one thing, which is remaining now, is to display our random number in our added text view. So we will create an object of a text view and we are going to cast it with (textview)findViewById(R.Id.textView).

And then you just need to take your textView.setText and inside this use object of my service class and using this we can call our getRandom function here.
.jpg)
This will not work as this to returning an integer because we need to pass the ‘setText’ to string variable. So what we can do is we can cast this cast this integer to string.

Now everything is done. So let’s run our program.
Now our app is running now and when we click this get random number button it gives me a random number which is 142.So in this way you can create a bound service in Android.
Источник


