- Русские Блоги
- Простое использование Android Tint
- Простое использование Android Tint
- How to set Tint for ImageView in Kotlin Android?
- Kotlin Android – Set Tint Color & Tint Mode for ImageView
- Example Android Application
- Set Tint Color
- Run the Android Application
- Conclusion
- Manipulating images and Drawables with Android’s ColorFilter
- Tinting, custom effects and reusability for visual Android app resources
- Where can this be used? 🤔
- Canvas
- Drawable
- ImageView
- Introducing our sample image 🖼️
- PorterDuffColorFilter 1️⃣
- LightingColorFilter 2️⃣
- ColorMatrixColorFilter 3️⃣
- Limitations and other options 🛠️
- [MaterialButton] Programmatically setting background tint having alpha blends with existing tint rather than replacing #1033
- Comments
- damianw commented Feb 18, 2020
Русские Блоги
Простое использование Android Tint
Простое использование Android Tint
Если вы хотите добиться эффекта изображения ниже, первое, что приходит на ум, — это позволить пользовательскому интерфейсу вырезать изображение, во второй раз вы будете убиты пользовательским интерфейсом, а в третий раз, как вы думаете, вы будете измучены именованием.
! [Снимок экрана 13.10.2016, 21:58:26] (http://odsdowehg.bkt.clouddn.com/Снимок экрана 13.10.2016 9.58.26.png)
Итак, как этого добиться быстро и эффективно? Фактически, Android уже подумал об этом за нас, и это Android Tint. Оттенок означает шейдер, то есть раскрашивание картинки. Преимущество этого заключается в том, что вам не нужно создавать еще одно изображение. Изображение является самым большим в пакете APK. Использование Tint может значительно уменьшить размер пакета.
Изображение выше предназначено только для отображения ImageView в GridView, случайным образом генерируя цвета для исходного изображения. ic_android_black_24dp Только раскраска, картинки ресурсов скачиваются сAndroid Meterial Icons。
Здесь мы используем support-v4 В пакете DrawableCompat Для достижения раскраски основной код выглядит следующим образом:
Примечание 1: Если вы используете встроенный проект ic_launcher.png Использование шейдеров приведет к исчезновению некоторых деталей, конкретная причина неизвестна и оставлена для исследования.
Заметка 2: Необходимо изучить сценарии применения свойства adjustBounds ImageView.
Если вы хотите нажать на изображение или выбрать эффект, вы также можете использовать оттенок для достижения. Нужно только определить selector.xml
Конкретный эффект щелчка здесь не показан, вы можете попробовать.
Источник
How to set Tint for ImageView in Kotlin Android?
Kotlin Android – Set Tint Color & Tint Mode for ImageView
To set tint color and tint mode for ImageView in Kotlin Android, set app:tint and android:tintMode attributes of ImageView in layout file with required color and tint mode respectively.
The following code snippet demonstrates to set specific tint color and tint mode for ImageView.

Example Android Application
Let us create an Android Application with ImageView.
Refer Kotlin Android – ImageView Example to create an Android Application with just an ImageView in LinearLayout.
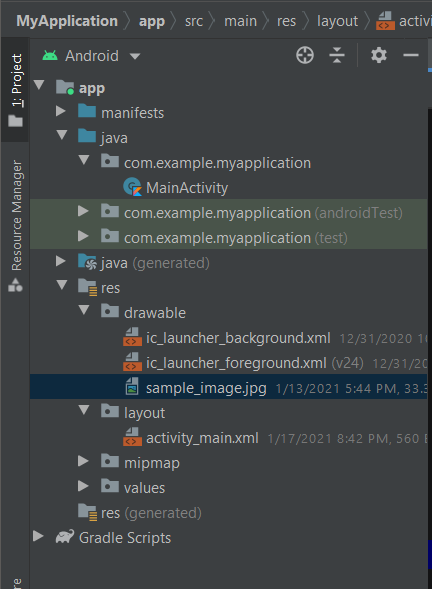
The project structure in Android mode is
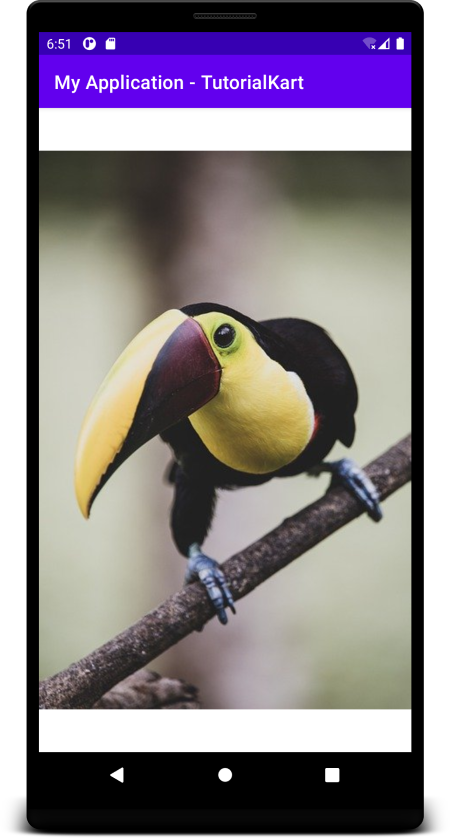
Without any tint applied, the image appears as shown in the following screenshot.
Set Tint Color
Open activity_main.xml file and set the attribute app:tint for ImageView with the a specific color as shown in the following.
activity_main.xml
Run the Android Application
Now, let us run the Android Application, and see how the tint color affected the ImageView.
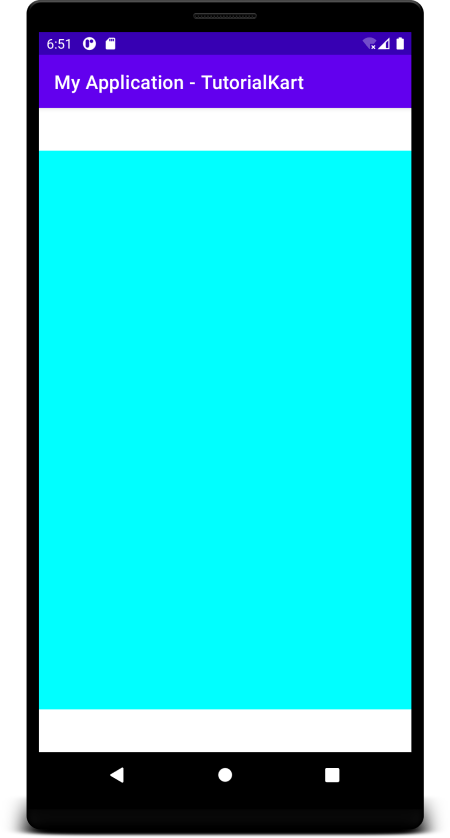
The tint color is shown for ImageView but not the image. The reason is, the default value of tint mode is src_atop. Let us specify another value for tint mode using android:tintMode attribute.
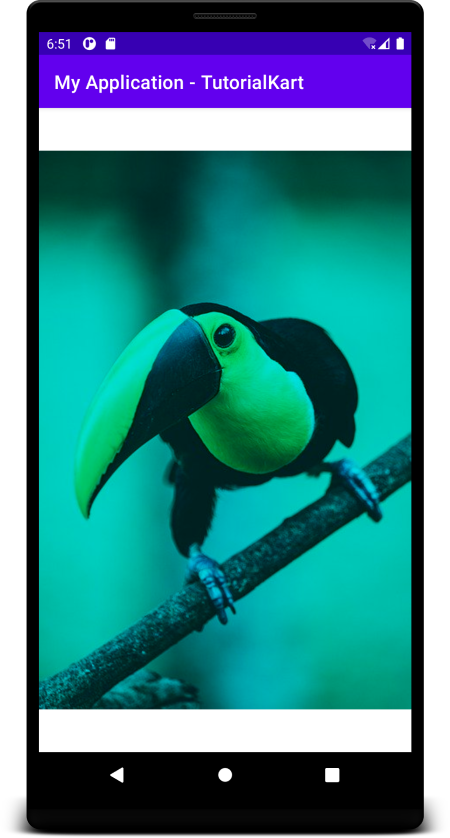
In the following activity_main.xml file, we have set the tint mode to multiply.
activity_main.xml
Now, run the application. The tint will be applied based on the tint mode multiply.
The following list specifies the possible values for tint mode.
Change the values for tint and tint mode and observe the output.
Conclusion
In this Kotlin Android Tutorial, we learned how to set specific tint color and tint mode for ImageView in Android Application.
Источник
Manipulating images and Drawables with Android’s ColorFilter
Tinting, custom effects and reusability for visual Android app resources

Image and Drawable resources are an integral part of any Android app. Since day (i.e. API level) 1, the Android framework has provided a means of manipulating the colors of these assets on a per-pixel level, as they are drawn to screen, with the ColorFilter class.
The documentation for the base abstract class stipulates that “a color filter can be used with a Paint to modify the color of each pixel drawn with that paint”. This is a powerful tool that can be used for:
- Applying effects and adjustments to images
- Tinting of icons and logos
Ultimately this encourages the good practice of reusing resources for scenarios that require different color variations, resulting in reduced app size.
Note: ColorFilter is an abstract class that should never be used directly, and the constructor was deprecated in API level 26. Only the subclasses should be used, which we will discuss further down.
Where can this be used? 🤔
Before we explore the existing subclasses and their capabilities, we need to discuss where we can actually use ColorFilter .
Canvas
As hinted at in the documentation description, we can use ColorFilter when drawing to Canvas in a custom View . Specifically, a ColorFilter is set on a Paint which then affects everything that is drawn with it:
Drawable
A ColorFilter can be applied to a Drawable , which will affect how it is rendered in View s and layouts:
In addition to this, there exists a Drawable convenience function to apply a PorterDuffColorFilter (more on that later):
Lastly, it is important to note that a tint can be applied to a Drawable . This is separate and will be overridden if a ColorFilter is set via either one of the above functions.
ImageView
A ColorFilter can be applied to an ImageView , which will affect how its current image will be rendered:
As with Drawable , convenience functions exist for applying a PorterDuffColorFilter :
Introducing our sample image 🖼️
We are now going to dive into the three subclasses of ColorFilter ( PorterDuffColorFilter , LightingColorFilter and ColorMatrixColorFilter ). In order to demonstrate this, we will make use of a visual aid in the form of a sample image:

It has photographic detail while also having “shape” as a result of the transparent areas. This will allow all of the subclasses to be demonstrated.
PorterDuffColorFilter 1️⃣
We have already touched on this briefly. This is a color filter that accepts a single color that is applied to all source pixels along with a Porter-Duff composite mode. There are many modes that are suitable to different scenarios. Typically, this is used to apply a “blanket” color (eg. To tint an icon).

LightingColorFilter 2️⃣
This color filter can be used to simulate lighting effects on an image. The constructor accepts two parameters, the first to multiply the source color ( colorMultiply ) and the second to add to the source color ( colorAdd ).
While the source color alpha channel is not affected, the R, G and B channels are computed like so:
Note: The above is using Android KTX Color extension functions for accessing the red, blue and green channels (alpha is also available).

ColorMatrixColorFilter 3️⃣
This is arguably the most flexible (but also the most complex) color filter.
It is quite similar to LightingColorFilter , in that we can tweak each pixel’s color channels using values that are multiplicative and additive. However, a ColorMatrixColorFilter is constructed with a ColorMatrix , which is essentially a wrapper class for a 4×5 matrix. This gives us 20 values, used in a certain way, that allow us to transform colors using all of the existing channels, including alpha.
Before we dive into using matrices, let’s first take a look at some of the convenience functions offered by ColorMatrix :

Fear not if some of these color concepts do not make sense! The point here is that ColorMatrix offers a lot of flexibility, and these convenience functions are simply matrix operations under the hood.
We know that ColorMatrix wraps a 4×5 matrix. Given this matrix, how do we arrive at our resultant color channels? They are computed like so:
The 4 rows in fact represent the resultant R, G, B and A channels. For each channel, the 5 columns allow you to combine the existing R, G, B, and A channels and a wildcard value in a plethora of ways.
This provides us with a lot of possibilities. We can adjust the brightness/contrast of images, ignore some channels, invert an image or even create basic filters and effects.

Limitations and other options 🛠️
While ColorFilter is powerful and flexible, image manipulation is a vast field and it simply cannot cover everything.
For example, the current pixel value that is being passed through the filter would be handy to know, but is not available. Additionally, you are limited to the three subclasses that ColorFilter currently provides. It appears as if you cannot create a custom subclass, due to native code restrictions.
In instances like this, what other options do we have?
The graphics framework has other useful classes such as Shader and MaskFilter . We could turn to RenderScript , which offers Bitmap utilities that still keep us mostly within traditional Android graphics territory. There is also OpenGL, which is perhaps the most extreme power vs. complexity tradeoff, but opens up all of the possibilities of custom GLSL shaders.
Overall, ColorFilter is still a fantastic tool for working with app resources.
I hope this post has provided some insight into ColorFilter and the flexibility it provides when working with images and Drawable s. If you have any questions, thoughts or suggestions then I’d love to hear from you!
Источник
[MaterialButton] Programmatically setting background tint having alpha blends with existing tint rather than replacing #1033
Comments
damianw commented Feb 18, 2020
Description:
Setting a non-opaque background tint (via setBackgroundTintList ) on a MaterialButton causes the new background tint to blend with the previous background tint, rather than replace it. This is especially noticeable when trying to set a transparent background tint, which has no effect.
Source code: A sample app that reproduces the problem can be found here: https://github.com/damianw/MaterialButtonTransparentTint
Expected behavior:
In the following demo (MainActivity, activity_main.xml), we define a MaterialButton like so:
and change the background tint whenever the button is pressed:
As seen in the demonstration below, clicking the button has no effect:
The issue appears to be that the new color is actually blended with the previous color — an effect that can be confirmed by changing altColor to 0x660000FF (translucent blue). In this demonstration, the new color is purple:
This issue is not present when with either android.widget.Button or androidx.appcompat.widget.AppCompatButton .
Using an altColor of 0x00000000 on an androidx.appcompat.widget.AppCompatButton :
Using an altColor of 0x660000FF (translucent blue) on an androidx.appcompat.widget.AppCompatButton :
Android API version: 29
Material Library version: com.google.android.material:material:1.2.0-alpha04
Device: API 29 Emulator
The text was updated successfully, but these errors were encountered:
Источник


