- Meet the Jetpack Splashscreen API: a definitive guide for splash screens in Android
- Simple things first
- Showing a splash screen (Old way)
- Fading out the logo
- Showing the splash screen using Core SplashScreen API
- Core SplashScreen API + Animations
- Showing the splash screen using Core SplashScreen API with Jetpack Compose
- Final thoughts
- Implementing the Perfect Splash Screen in Android
- Splash Screen is the first screen visible to the user when the application’s launched. It’s a vital screen that will allow the users to have first impressions of the application.
- There are 2 common methods of implementing splash screens and will find the right way:
- Step 1
- Step 2
- Step 3
- Step 4
- Step 5
- Now that our splash is working, what size of the image should I put into a drawable folder?
- Splash screen best practices
- Полное руководство по Splash Screen на Android
- Два вида Splash Screen
- Placeholder не работает даже у приложений от Google
- Как работать с Branded launch screen
- Используя Launcher Theme
- Splash Screen в отдельной Activity c использованием Launcher Theme
- Используя таймеры
- Используя умные таймеры.
Meet the Jetpack Splashscreen API: a definitive guide for splash screens in Android
Splash screens, also called launch screens, are the screens shown by the app as it loads, during the app’s startup. They exist to provide a momentary brand exposure or improve the user experience by showing a preview of the app as it starts, which can reduce the user’s perceived load time.

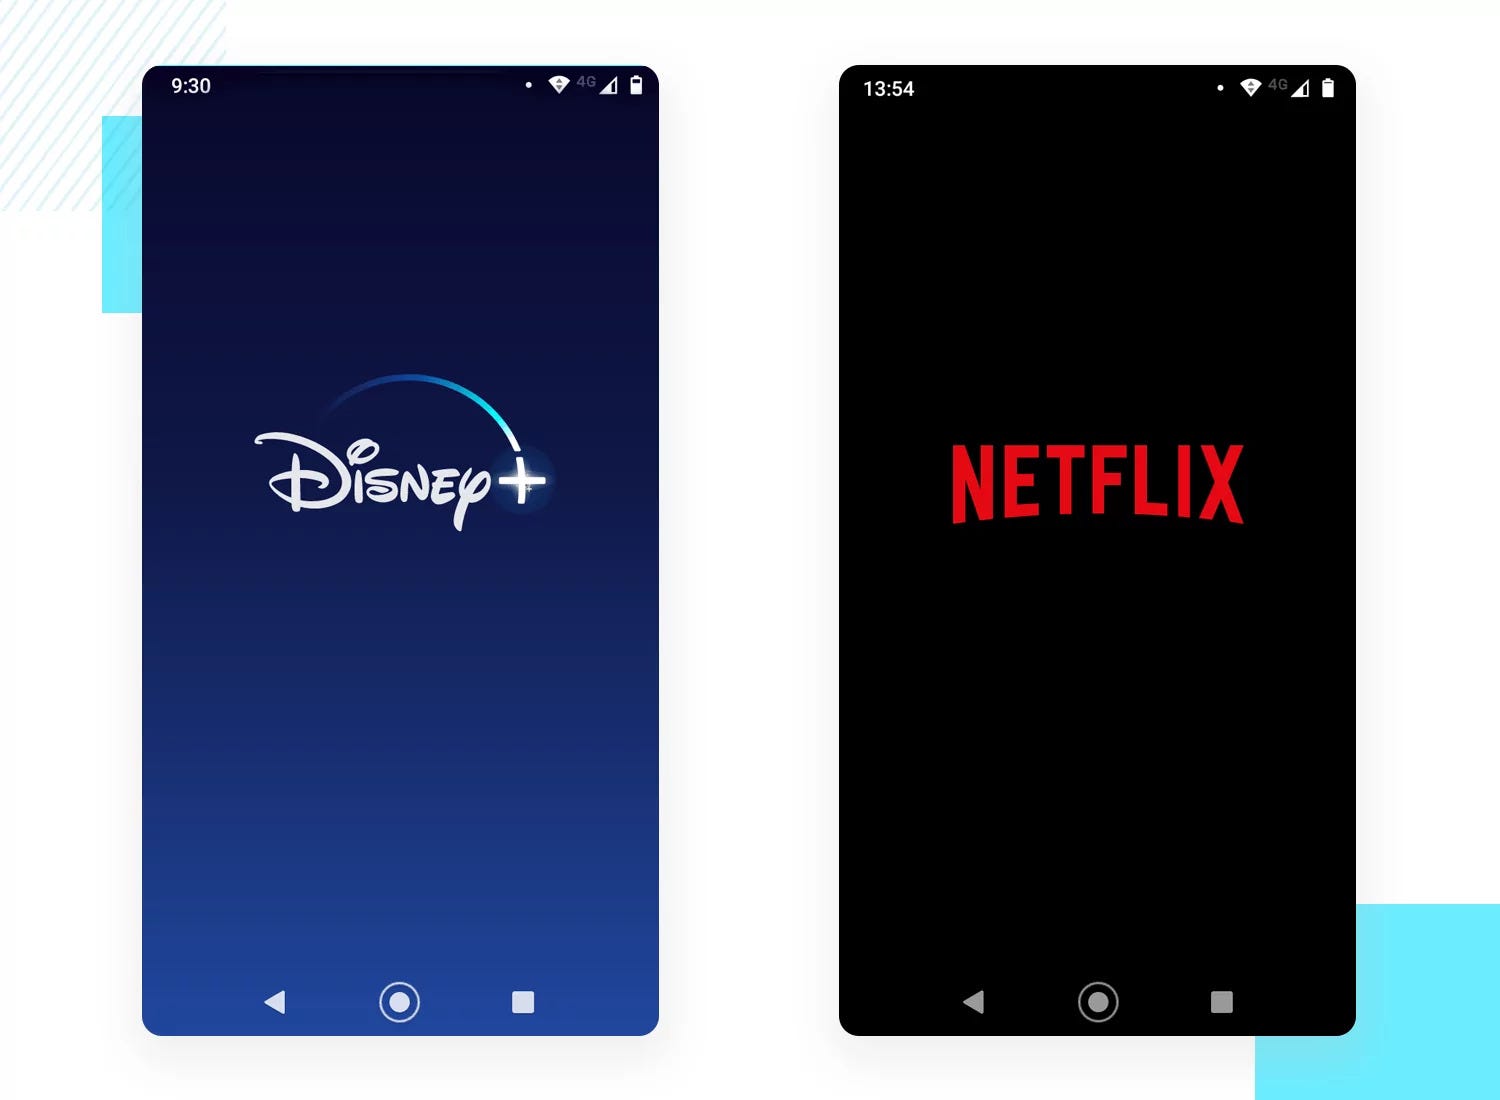
Branded and preview splash screens as in Material Design docs
On many projects I’ve worked on, in addition to showing the splash screen, we had to animate the transition between splash and first app screen. Depending on the animation type and how we’re showing the first app views, we can have jank or a perceivable delay between the animations. So, we have to choose the right approach accordingly to the use case.
In this article you’ll see how animated splash screens are created in Android and how this should be done now that we have Jetpack’s Core SplashScreen, which backports Android 12 SplashScreen API back to Android Marshmallow (API 23).
Suppose we have to implement the following branded splash screen for an Android app:
Note that we start with a brand image, fade it out and then begin a slide down transition in the start screen. This use case will let us exercise multiple techniques in splash screen display, despite having simple transitions in the design. The animations must run sequentially and a long delay or jank between them is not acceptable.
Simple things first
Let’s start simple: showing what happens in Android when you don’t set up a splash screen. After creating an ‘Empty Activity Project’ in Android Studio, the main activity layout was adjusted to have the same design as the start screen reference. Nothing was made regarding the splash screen.
This is how it’s displayed up to API level 30:
As we didn’t add nothing to set up a splash screen yet, a black screen is shown while the main activity is loading.
Important: On an Android 12, a static branded splash screen was automatically displayed, using a centered app icon without any effort at all. Nice improvement!
 Automatic static splash screen on Android 12
To repeat this step, clone the following branch in Github’s repo: github.com/tgloureiro/animated_splashscreen_android/tree/step1_no_splash
Showing a splash screen (Old way)
The traditional way of defining a splash screen in Android, is setting a window background to the the activity being launched. As the content is not attached to it yet, the window background is fully visible while the activity is loading. After it loads, content view is set inside the onCreate() method and it’s views starts being rendered.
Therefore, to show the splash screen we have to set up the window background in the theme being used by the activity:
Exit fullscreen mode
If we need the splash screen to have a logo centered over some background drawable, we can use a LayerDrawable , that allows us to specify a list of drawables that is drawn in the order they’re declared. In this example, we have a flat colored background with the logo centered in the screen. The use of android:gravity informs the platform to center the second drawable in the middle of the screen.
Exit fullscreen mode
For the splash background, we can use any type of drawable. For this example, we’ll use a solid color. The color can be specified directly in the layer list, instead of pointing to another Drawable as we did here
Exit fullscreen mode
This is the old way of doing a splash screen and it’s recommended up to API Level 22, the ones not covered by the new Core Splash Screen API.
Fading out the logo
There’s an easy way of implementing the splash screen’s fade out after activity loading: we can have the illusion of a logo fade out making a cross-fade between the splash screen and the screen background without the logo. We can do it using a TransitionDrawable . A transition drawable allows us to define two drawable layers and easily cross-fade between them using the startTransition(int) method.
Exit fullscreen mode
We have to perform the following tasks:
- Check if the splash screen was not displayed, otherwise we just set content view
- Get a reference to the window background and start the crossfade transition
- Launch a coroutine and after waiting for the animation duration, set the content view
Exit fullscreen mode
Check how it is rendered in a phone:
To repeat this step, clone the following branch in Github’s repo: github.com/tgloureiro/animated_splashscreen_android/tree/step2_fade_out_splash
Showing the splash screen using Core SplashScreen API
The Core Splash Screen API provides a way of defining the elements we have in the Splash Screen. To setup a splash screen, you have to do the following steps:
1- Setup a style with Theme.SplashScreen as a parent, in themes.xml
Exit fullscreen mode
2- Setup windowSplashScreenBackground, windowSplashScreenAnimatedIcon as the background and the centered logo in the screen
Exit fullscreen mode
3- Setup the theme to be displayed in activity after the splash screen
Exit fullscreen mode
4- In build.gradle, change your compileSdkVersion to «android-S» (to be changed to apiLevel 31 with the release of Android 12) and include the library in dependencies.
Exit fullscreen mode
5- Finally, in the MainActivity (or the entry point for your app) you just have to call installSplashScreen() before setContentView()
Exit fullscreen mode
Very straightforward, huh? With these simple steps you’ll be showing your splash screen from API23 to Android12.
Core SplashScreen API + Animations
In Android 12, the logo itself can be animated using AnimationDrawable or AnimatedVector . The AnimationDrawable works similar to a classical animation which you have to represent
frame by frame and duration for each one. AnimatedVectorDrawable let’s you describe your animation that will be interpolated by the framework.
The backported version of the Core Splash Screen API doesn’t support animations on the logo yet. But we can implement a fadeout animation after splash’s exhibition and I’ll show how to implement it using this API.
We have to perform the following tasks:
- Check if the splash screen was not displayed, otherwise we manually set the theme and the content view
- Install the splash screen and listen for the ExitAnimation event
- Get a reference to the the logo, fade it out, remove the splash and set content view after it finishes
Exit fullscreen mode
Check how it is rendered in a phone:
To repeat this step, clone the following branch in Github’s repo: github.com/tgloureiro/animated_splashscreen_android/tree/step3_core_splash_api_fade_out
Showing the splash screen using Core SplashScreen API with Jetpack Compose
The splash steps are pretty much the same, except we use Compose’s setContent<> instead of setContentView(int) . That’s it.
The challenge here is to replace the start screen animation, originally made using MotionLayout, with one made using Compose. We can use an initially invisible AnimatedVisibility Composable and make it visible in the first pass using a LaunchedEffect. Making it visible will start the animation as described in the widget.
Exit fullscreen mode
Check how it is rendered in a phone:
To repeat this step, clone the following branch in Github’s repo: github.com/tgloureiro/animated_splashscreen_android/tree/step4_core_splash_jetpack
Final thoughts
The new Jetpack Core Splashscreen API provides a default way to create splash screens back to API23, with useful mechanisms we can use to know whether the loading ended and a way to continue showing the splash if we want to do additional work after starting the activity. The results are similar to what we had before, with the benefit of reduced boilerplate and compatibility with new Android versions.
Источник
Implementing the Perfect Splash Screen in Android
Splash Screen is the first screen visible to the user when the application’s launched. It’s a vital screen that will allow the users to have first impressions of the application.

A Splash Screen is a screen that appears when you open an app on your mobile device. Sometimes it’s referred to as a launch screen or startup screen and shows up when your app is loading after you’ve just opened it.
When the loading is finished, you’ll be taken to a more functional screen where you can complete actions.
Splash screens appear on your screen for a fleeting moment — look away and you might miss them. The splash screen is one of the most vital screens in the application since it’s the user’s first experience with the application.
There are 2 common methods of implementing splash screens and will find the right way:
- Using Timers (the bad)
- Using a Launcher Theme (The Right way)
Using timer (Our 1st Method) into your activity to display splash, we create a splash activity and create a thread in onCreate() for shows up for 2/3 seconds, then go to our desired activity. Here, see the implementation of this easy method:
The above approach isn’t the correct approach. It’ll give rise to cold starts.
The purpose of a Splash Screen is to quickly display a beautiful screen while the application fetches the relevant content if any (from network calls/database). With the above approach, there’s an additional overhead that the SplashActivity uses to create its layout.
It’ll give rise to slow starts to the application which is bad for the user experience (wherein a blank black/white screen appears).
The cold start appears since the application takes time to load the layout file of the Splash Activity. So instead of creating the layout, we’ll use the power of the application theme to create our initial layout (Our 2nd Method).
Application theme is instantiated before the layout is created. We’ll set a drawable inside the theme that’ll comprise the Activity’s background and an icon using layer-list as shown below.
Do you know when an activity is called Android OS first see in the manifest is there any theme for that activity and load the theme from manifest?
So, we will set a custom theme in Manifest for our splash activity. To create the theme for the splash screen, follow the below process.
Step 1
Create Background for Splash Screen in drawable/splash_background.xml, the bitmap is the image we want to show.
Step 2
Create the gradient onto which your app logo will be placed in drawable/bg_gradient.xml, background can be a gradient or any colour depending on your app.
Step 3
Create Style for Splash Screen in res/values/themes.xml
Step 4
Create an empty Activity named SplashScreenActivity and set the style as the theme for it in AndroidManifest.xml
Step 5
Setting the Intent to your MainActivity.java from SplashScreenActivity.java
As we are loading the splash screen them from manifest, there is no need to setContentView() with any xml layout. If you want to show your splash screen for some amount of time (like five secs) you can create a Handler , also using a timer can help you fetch data from the cloud on your MainActivity which could be a better approach than to show a dialog on home screen.
Using the theme and removing the layout from the SplashScreenActivity is the correct way to create a splash screen 🙌.
Now that our splash is working, what size of the image should I put into a drawable folder?
Always put your app_logo.png into drawable-xxhdpi folder so that your logo automatically scales for all types of phone screens in most cases.
Also, make sure that image resolution is not more than 1000×1000 pixels . It can have less resolution depending on how you want it. Now there are diverse types of splash screen which has multiple logos on various parts of the screen. How that could be done?

From the above example, we implemented our method to create a splash like Twitter, and now to create one like Facebook we just make a slight change to our drawable/splash_background.xml.
Just add as many item to your layer-list you want to place in your splash screen.
Splash screen best practices
Splash screens are simple. They’re used to enhance a brand and give users something nice to look at as they wait. In this regard, here are some best practices for when you design your own splash screen:
- Keep it free from unnecessary distraction
- Don’t use multiple colours or logos
- Use animation sparingly
Hope it helped. Happy Coding 😀
BTW, I solve real-world problems by building useful apps. Have a look at my portfolio .
Источник
Полное руководство по Splash Screen на Android
Перевод статьи Elvis Chidera «The (Complete) Android Splash Screen Guide». Но для начала немного истории о проблеме Splash Screen на Android.
Два вида Splash Screen
Google в гайдлайнах Material Design представляет две концепции Splash Screen (или Launch Screen):
- Placeholder UI
- Branded launch screen
Placeholder UI — концепция для приложений, которые загружаются довольно быстро и не требуют показа перед запуском логотипов, красивых анимаций и прочих украшений. Суть в том, что во время холодного старта основной фон приложения, строка состояния, фон для панели инструментов уже раскрашиваются в цвета приложения, но до полной загрузки без контента. Такой подход, по мнению дизайнеров Google, позволяет более плавно с точки зрения пользователя переходить от момента запуска приложения к работе с ним.

Branded launch screen — собственно и есть то, что большинство разработчиков (по крайней мере Android-разработчиков), именуют Splash Screen. Это некоторый логотип, изображение, реже анимация, которые пользователь на короткое время видит во время старта приложения.
Теперь, прежде чем перейдем к переводу статьи Элвиса, которая рассказывает о Branded launch screen, немного о грустном в лагере поклонников Placeholder UI.
Placeholder не работает даже у приложений от Google
Не смотря на собственные гайдлайны, Google не смог реализовать подход Placeholder UI в собственных приложениях. Я навскидку выбрал три популярных приложения от Google, где по логике должен быть Placeholder UI, но он не работает. Показан переход от холодного старта к рабочему состоянию приложения:
Как видим, во время холодного старта загружается только фон приложения, панель инструментов и строка состояния — либо под цвет фона, либо случайного цвета (как в примере с Play Market).
Причины этому следующие:
- Сегодня хорошим тоном считается использовать Toolbar , как часть макета панели инструментов. Это дает много плюшек: реакция на прокрутку, анимации и т.д. Но вместе с тем, необходимо использовать тему NoActionBar . Это влияет на то, что цвета главной темы приложения не подгружаются при холодном старте.
- Проблема в библиотеке AppCompat. Даже если использовать обычный ActionBar для панели инструментов, мы будем наблюдать аналогичный эффект. Переход от @style/Theme.AppCompat.Light.DarkActionBar к @android:style/Theme.Material.Light.DarkActionBar лечит эту проблему, но, вероятно, приложения все еще рассчитаны на поддержку версий до Lollipop.
О подходе Placeholder UI все. Переходим к переводу статьи Элвиса.
Как работать с Branded launch screen
В прошлом в Android не рекомендовалось делать Splash Screen в приложениях. Не было смысла заставлять пользователя ждать n секунд, чтобы показать заставку. И несомненно, что никто не запускает приложение ради заставки (об этом ниже).
Предоставление пользователю контента должно быть вашим приоритетом №1
Когда в Material Design появился раздел под названием Launch Screen (Splash Screen), кто-то из команды Android опубликовал пост о том, как сделать Splash Screen правильно.
В этом посте я рассмотрю четыре основных способа реализации Splash Screen на Android:
- Используя Launcher Theme (Хорошо)
- Используя Launcher Theme с предопределенной для Splash Screen Activity (Сойдет)
- Используя таймеры (Timers) (Плохо)
- Используя умные таймеры (Smart Timers) (Ужасно)
Используя Launcher Theme
Когда ваше приложение запускается и оно еще не в памяти, может иметь место задержка между тем, когда пользователь нажал на запуск, и тем, когда у Activity вызвано onCreate() . Этот, так называемый «холодный старт» — лучшее время, чтобы показать ваш Splash Screen.
Во время «холодного старта» оконный менеджер пытается отрисовать placeholder UI, используя элементы из темы приложения (app theme), такие как windowBackground . И то, что показывает windowBackground по-умолчанию (обычно белый или черный фон), вы можете поменять на какой угодно drawable, создав тем самым свой Splash Screen. Этот способ показывает Splash Screen только там, где необходимо, и не замедляет пользователя.
Итак, вам необходимо создать кастомную тему, переопределив android:windowBackground , заменив использование стандартной темы на вашу перед вызовом super.onCreate в вашей Activity.
В этом примере, я предполагаю, что главная тема вашего приложения называется AppTheme, но если это не так, просто во всех местах замените AppTheme на имя главной темы вашего приложения.
Вы должны создать новую тему AppTheme.Launcher . Единственный элемент, который необходимо переопределить — это windowBackground . В файл styles.xml добавим:
При этом мы наследуем все остальные атрибуты главной темы AppTheme, используя ее название, как префикс для названия нашей темы Launcher.
Определяем drawable launch_screen . Хотя вы могли бы использовать простую картинку, но она будет растянута на весь экран. Вместо этого используем XML-файл:
Пропишите тему для Splash Screen в файле манифеста в вашей стартовой Activity:
Теперь нужно вернуть главную тему в стартовую Activity (если, конечно, мы не хотим, чтобы Splash Screen радовал нас и во время работы приложения)
Самый простой способ сделать это — это вызвать setTheme(R.style.AppTheme) до super.onCreate() и setContentView() :
Все. Вы можете узнать подробнее об этом подходе здесь.
Плюсы:
- Нет никакой специальной Activity для Splash Screen. Нет задержки времени как в том случае, если бы вы вызывали рабочую Activity из Activity для Splash Screen.
- Нет искусственных задержек — Splash Screen показывается только тогда, когда приложение загружается.
Минусы:
Я встречал три довольно распространенные жалобы на этот подход:
- Splash Screen показывается снова если Activity была убита системой и снова восстановлена. В большинстве случаев, этот совсем не проблема, но при желании, если использовать второй способ, этого можно избежать.
- Некоторым разработчикам необходимо, чтобы после запуска Splash Screen, пользователь попадал на разные Activity, в зависимости от каких-либо параметров. Опять же, для таких задач можно использовать второй способ, но иногда реализация такой промежуточной Activity довольно неряшлива.
- Невозможно загрузить тяжелые данные/компоненты, когда показывается Splash Screen. Хотя это плохая идея: загружать тяжелые данные или компоненты, пока стартует приложение (есть некоторые исключения, как, например, инициализация некоторых библиотек). Можно попробовать один из следующих подходов.
- Постарайтесь использовать метод ленивой загрузки, для своих компонентов/модулей/библиотек. За исключением компонентов, которые кровно необходимы для работы приложения, старайтесь ничего не загружать во время запуска приложения, а загружать, когда вам понадобится компонент, или грузите в фоновом потоке сразу после старта приложения. Сохраняйте onCreate() вашего приложения легким насколько это возможно.
- Используйте кэширование. За исключением той информации, которая быстро меняется, остальное лучше кэшировать. Когда пользователь снова обращается к вашему приложению, вы можете показать закэшированный контент, пока более свежий контент загружается.
Я думаю, что следует избегать таких вещей, как долгий Splash Screen, как ProgressDialog, которые заставляют пользователя просто смотреть на экран и не дают ему выполнить никакое действие.
Если ваше приложение подключается к сети, предположите, что все, что должно пойти не так, пойдет не так. Таким образом вы сможете создавать приложения для миллионов людей, которые все еще используют нестабильные соединения 2G и 3G
Splash Screen в отдельной Activity c использованием Launcher Theme
Этот способ базируется на первом способе. Он требует отдельной Activity для Splash Screen. Первые два шага пропускаем, они аналогичны первому способу.
Осталось создать Activity для Splash Screen и указать в манифесте для нее тему AppTheme.Launcher . Теперь отредактируем Activity так, чтобы она перенаправляла на другие страницы. Смотрим пример ниже:
Плюсы:
- Решает первые две проблемы у первого способа.
Минусы:
- Я видел, как подобная маршрутизация легко становится уродливой.
- Небольшая задержка между двумя Activity.
- Опасность забыть и начать делать длительные операции здесь.
Используя таймеры
Это старый добрый подход. Надо просто создать отдельную для Splash Screen Activity, которая будет показываться x секунд. Затем открыть подходящую Activity. Используя такой подход, вы получаете больше гибкости, потому что можете добавить анимацию, кастомные view или любые другие элементы, которые вы можете поместить в макет Activity. Вот минимальная реализация такого подхода:
Плюсы:
- Появляется возможность показать вашу супер-анимацию, или любой другой кастомный дизайн, который вы хотите. Это имеет смысл для игровых приложений или приложений для детей.
- Большая гибкость того, что вы можете показать на Splash Screen.
Минусы:
- Двойной удар — ваша Activity не стартовая Activity не появляется немедленно, после того, как приложение запущено, особенно во время холодного старта. Пользователь ждет во время холодного старта, наблюдая только windowBackground и, затем, просматривая еще Splash Screen до того, как запустится рабочая Activity.
- Ваша супер-анимация или дизайн обычно восхищает пользователя только первые пару раз. Потом, большинство пользователей находит его скучным, и они хотят получить только контент. Я думаю, что четвертый способ способен исправить это.
- В большинстве случаев дополнительная задержка неоправданна.
Используя умные таймеры.
Этот подход базируется на третьем способе. Но вместо постоянной задержки, вы запускаете Splash Screen или нет, основываясь на том, первый это запуск или нет. Вот пример, который использует SharedPreferences :
Плюсы:
- Это возможное решение проблемы, когда пользователь устает наблюдать ваш Splash Screen в течении долгого времени.
Минусы:
- Двойной удар — проблемы третьего способа все еще не здесь
- В большинстве случаев дополнительная задержка неоправданна.
- Я не использовал этот метод, но, думаю, может быть некоторая задержка при чтении из SharedPreferences .
Это все о Splash Screen. Если я что-то упустил, напишите в комментариях.
Следует заметить, что на Хабре уже была статья (перевод), где речь шла о Splash Screen. Однако затронутый там подход (соответствует второму способу в этой статье), как мы могли убедиться, не самый оптимальный для большинства случаев. Ну и последнее, в Android Oreo якобы добавлено Splash Screen API, что позволит разработчикам легко добавлять Splash Screen в свои приложения, но на данный момент в официальной документации по этому поводу никакой информации нет.
Источник


