- Android — SQLite Database
- Database — Package
- Database — Creation
- Database — Insertion
- Database — Fetching
- Database — Helper class
- Example
- Применение SQLiteOpenHelper и Database Inspector в Android-разработке
- Что такое SQLite?
- Класс SQLiteOpenHelper
- ▍Метод onCreate()
- ▍Метод onUpgrade()
- ▍Пример
- Database Inspector в Android Studio
- Transactions and threads in SQLite on Android
- Solving transaction isolation issues with WAL — Write Ahead Logging
- File lock exceptions
- Difference between getReadableDatabase() and getWritableDatabase()
- Problems with multiple DB connections on the same database
- Avoiding most DB multi-thread related issues
Android — SQLite Database
SQLite is a opensource SQL database that stores data to a text file on a device. Android comes in with built in SQLite database implementation.
SQLite supports all the relational database features. In order to access this database, you don’t need to establish any kind of connections for it like JDBC,ODBC e.t.c
Database — Package
The main package is android.database.sqlite that contains the classes to manage your own databases
Database — Creation
In order to create a database you just need to call this method openOrCreateDatabase with your database name and mode as a parameter. It returns an instance of SQLite database which you have to receive in your own object.Its syntax is given below
Apart from this , there are other functions available in the database package , that does this job. They are listed below
| Sr.No | Method & Description | |||||||||||||||||||||||||||
|---|---|---|---|---|---|---|---|---|---|---|---|---|---|---|---|---|---|---|---|---|---|---|---|---|---|---|---|---|
| 1 |
| Sr.No | Method & Description | ||||||||||||||||||||||||
|---|---|---|---|---|---|---|---|---|---|---|---|---|---|---|---|---|---|---|---|---|---|---|---|---|---|
| 1 |
| Sr.No | Method & Description | |||||||||||||||||||||
|---|---|---|---|---|---|---|---|---|---|---|---|---|---|---|---|---|---|---|---|---|---|---|
| 1 |
| Steps | Description |
|---|---|
| 1 | You will use Android studio to create an Android application under a package com.example.sairamkrishna.myapplication. |
| 2 | Modify src/MainActivity.java file to get references of all the XML components and populate the contacts on listView. |
| 3 | Create new src/DBHelper.java that will manage the database work |
| 4 | Create a new Activity as DisplayContact.java that will display the contact on the screen |
| 5 | Modify the res/layout/activity_main to add respective XML components |
| 6 | Modify the res/layout/activity_display_contact.xml to add respective XML components |
| 7 | Modify the res/values/string.xml to add necessary string components |
| 8 | Modify the res/menu/display_contact.xml to add necessary menu components |
| 9 | Create a new menu as res/menu/mainmenu.xml to add the insert contact option |
| 10 | Run the application and choose a running android device and install the application on it and verify the results. |
Following is the content of the modified MainActivity.java.
Following is the modified content of display contact activity DisplayContact.java
Following is the content of Database class DBHelper.java
Following is the content of the res/layout/activity_main.xml
Following is the content of the res/layout/activity_display_contact.xml
Following is the content of the res/value/string.xml
Following is the content of the res/menu/main_menu.xml
Following is the content of the res/menu/display_contact.xml
This is the defualt AndroidManifest.xml of this project
Let’s try to run your application. I assume you have connected your actual Android Mobile device with your computer. To run the app from Android studio , open one of your project’s activity files and click Run  icon from the tool bar. Before starting your application,Android studio will display following window to select an option where you want to run your Android application.

Select your mobile device as an option and then check your mobile device which will display following screen −
Now open your optional menu, it will show as below image: Optional menu appears different places on different versions
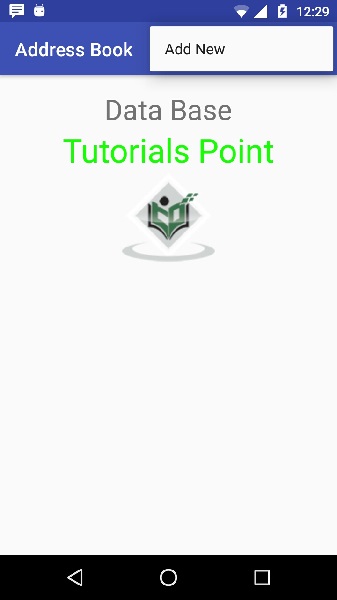
Click on the add button of the menu screen to add a new contact. It will display the following screen −
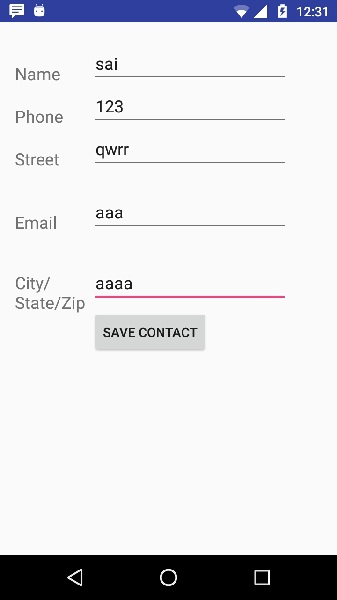
It will display the following fields. Please enter the required information and click on save contact. It will bring you back to main screen.
Источник
Применение SQLiteOpenHelper и Database Inspector в Android-разработке
Автор статьи, перевод которой мы публикуем сегодня, хочет рассказать об использовании баз данных SQLite в Android-разработке. В частности — он коснётся тут двух вопросов. Во-первых — речь пойдёт о классе SQLiteOpenHelper , который применяется для работы с базами данных в коде приложений. Во-вторых — он уделит определённое внимание инструменту Database Inspector, инспектору баз данных, встроенному в Android Studio.

Что такое SQLite?
SQLite — это опенсорсная реляционная СУБД, похожая на MySQL. SQLite входит в состав стандартной библиотеки Android, где реализован движок базы данных, не нуждающийся в применении клиент-серверной архитектуры, не требующий особой настройки, поддерживающий транзакции. Для работы SQLite не нужен сервер баз данных. Всё, что нужно, хранится в обычных файлах. Полноценная БД SQLite, в которой имеется множество таблиц, триггеров, индексов и представлений, содержится в единственном, самом обыкновенном файле. Стандартная поддержка СУБД SQLite имеется во всех мобильных телефонах и в большинстве компьютеров. При этом работа с SQLite не требует решения задач по администрированию или настройке баз данных.
Android-разработчик, для выполнения CRUD-операций из своего приложения, может пользоваться пакетом android.database.sqlite.SQLiteDatabase , в котором реализованы все необходимые API.
Класс SQLiteOpenHelper
SQLiteOpenHelper — это класс, встроенный в пакет android.database.sqlite.SQLiteDatabase . Это — вспомогательный класс, который отвечает за создание баз данных SQLite и за управление их версиями. Для того чтобы воспользоваться возможностями этого класса, нужно создать его подкласс, в котором надо переопределить два метода — onCreate() и onUpgrade() . Этот класс позволяет открывать существующие базы данных, создавать новые базы данных и обновлять версии баз данных.
▍Метод onCreate()
Метод onCreate() вызывается при создании базы данных. Он, в процессе жизненного цикла приложения, вызывается лишь один раз. А именно, его вызов производится при первом обращении к методу getReadableDatabase() или getWritableDatabase() . Эти методы принадлежат классу SQLiteOpenHelper .
В следующем примере показано создание экземпляра класса DatabaseHelper , являющегося наследником SQLiteOpenHelper :
Вот код конструктора DatabaseHelper :
Класс SQLiteOpenHelper вызывает метод onCreate() после создания базы данных и создания экземпляра класса SQLiteDatabase . Этот метод, напомним, вызывается лишь один раз, при создании базы данных:
▍Метод onUpgrade()
Метод onUpgrade() вызывается в тех случаях, когда нужно обновить версию существующей базы данных:
▍Пример
Создадим простое Android-приложение и разберём практический пример работы с классом SQLiteOpenHelper . Это приложение, применяя данный класс, позволит нам добавлять записи о работниках некоей компании в таблицу Empdata базы данных Company.db .
Приложение имеет весьма простой интерфейс, описанный в файле activity_main.xml .

Вот содержимое файла MainActivity.java :
Вот содержимое Employee.java :
Вот файл DatabaseHelper.java :
В коде DatabaseHelper.java видно, что класс DatabaseHelper является наследником класса SQLiteOpenHelper .
После того, как база данных создана, можно приступать к работе с ней. В частности — создавать и обновлять поля её таблиц. При решении этих задач можно пользоваться объектом типа ContentValues , который позволяет хранить пары ключ-значение. Именно такие объекты используются для добавления новых записей в таблицы базы данных (с помощью метода insert() объекта SQLiteDatabase ) и для обновления существующих записей (с помощью метода update() ).
Database Inspector в Android Studio
Инструмент Database Inspector позволяет исследовать базы данных, используемые в приложениях, выполнять запросы к ним, модифицировать их, делая всё это во время работы приложений. Database Inspector имеется в Android Studio начиная с версии 4.1. Этот инструмент особенно полезен при отладке механизмов программ, ответственных за работу с базами данных. Database Inspector работает и с обычной реализацией SQLite, и с библиотеками, построенными на её основе, вроде Room. Database Inspector работает лишь с библиотекой SQLite, входящей в состав операционных систем Android, уровень API которых не ниже 26.
Для того чтобы открыть базу данных в Database Inspector нужно выполнить следующие действия:
- Запустите приложение в эмуляторе или на устройстве, подключённом к компьютеру. На эмуляторе или на устройстве должно присутствовать API не ниже 26 уровня.
- Выполните команду меню View > Tool Windows > Database Inspector .
- Выберите процесс выполняющегося приложения из выпадающего меню.
- В панели Databases появятся записи о базах данных, которые имеются в выбранном приложении. Теперь можно работать с этими базами данных.

Исследование базы данных с помощью Database Inspector
Обратите внимание на то, что есть одна проблема, связанная с аварийным завершением работы программ на эмуляторе Android 11 при подключении к Database Inspector. Если вы с этой проблемой столкнётесь — здесь вы можете найти сведения о том, как с ней справиться.
Применяете ли вы SQLite в Android-разработке?
Источник
Transactions and threads in SQLite on Android
So you have a long running service (a separate thread) that is synchronising your database with a server or doing some periodic work on it. This task can potentially take a few minutes. To prevent the rest of the application seeing incomplete data you will execute everything in one transaction and then commit it after the work is done. You also have one singleton SQLiteOpenHelper class which opens and maintains the DB connection. Everything sounds good… Except, this is wrong and can lead to various hidden problems.
By default — changes that are being done in a transaction on a single SQLite database connection can be visible to other transactions on that connection immediately — even before calling SQLiteDatabase.endTransaction() .
The changes your “SyncService” is doing in a long running transaction are immediately visible to the rest of the application. This is a fatal issue.
1) Transactions in SQLite are SERIALIZABLE.
2) Changes made in one database connection are invisible to all other database connections prior to commit.
3) A query sees all changes that are completed on the same database connection prior to the start of the query, regardless of whether or not those changes have been committed.
4) If changes occur on the same database connection after a query starts running but before the query completes, then it is undefined whether or not the query will see those changes.
5) If changes occur on the same database connection after a query starts running but before the query completes, then the query might return a changed row more than once, or it might return a row that was previously deleted.
In SQLite there can be only one writer and this is guarded by the SQLiteOpenHelper. But a transaction can have several writes to the database spanned over a longer time (e.g. waiting for all the API calls to finish) — in that case simple synchronisation will not work. You would block other queries in the rest of the application.
Calling getWritableDatabase() in each call in your SQLiteOpenHelper will not solve this (the database connection is cached within the SQLiteOpenHelper instance). You will need to have a complete separate DB connection for your “SyncService” — which means having multiple SQLiteOpenHelpers, one for the background service and one for the rest and properly synchronise access. Or you need to start using WAL mode (mentioned in this article).
Even if you don’t have long running transactions — it’s good to limit only one thread to be doing changes on your DB connection. This will prevent cases where several threads write on a same connection — potentially leading to inconsistent data. Simple thread synchronisation can solve this. Execute whole database statements (whole transactions) synchronised on one common object.
Solving transaction isolation issues with WAL — Write Ahead Logging
SQLite version 3.7.0 (2010–07–21) introduced WAL mode. This version is present on Android 3.0 and newer. In WAL mode, changes are not written to the original database file. Instead, changes go into a separate “write-ahead log” or “WAL” file. Later, after the transaction commits, those changes will be moved from the WAL file back into the original database in an operation called “checkpoint”.
WAL mode can be enabled on Android by calling SQLiteDatabase.enableWriteAheadLogging(), and is disabled by default. This has to be called right after opening a database connection.
It is a good idea to enable write-ahead logging whenever a database will be concurrently accessed and modified by multiple threads at the same time. However, write-ahead logging uses significantly more memory than ordinary journaling because there are multiple connections to the same database. So if a database will only be used by a single thread, or if optimizing concurrency is not very important, then write-ahead logging should be disabled.
Using WAL mode allows transaction separation without the need to manually open new connections. This is a good way to solve problems where you have several threads accessing the database and you want to ensure that the changes are not visible until committed.
In WAL — While a write is in progress, other readers can access the database and perceive the state of the database as it was before the write began. You can only have one (!) running transactions, the other transactions will be blocked and wait until it’s finished. You are only able to execute read queries while the transaction is in progress.
File lock exceptions
Generally most people open a new SQLite connection by calling SQLiteOpenHelper.getWritableDatabase() and then either never close it during application life-time (which is generally not a bad approach — Android will close the connection once the application process is killed) or they close it explicitly.
Calling SQLiteOpenHelper.close() and SQLiteOpenHelper.getWritableDatabase() from multiple threads at the same time can result in the following exception:
java.lang.IllegalStateException: Cannot perform this operation because the connection pool has been closed.
The close() method itself is synchronised, but this will not prevent a case where one thread closes the DB and a second thread has a reference to that database you just closed in the mean time.
In my opinion — it’s totally OK to not close the DB connection explicitly in your code and you will not need to handle this case. Otherwise you will need to make sure that only one DB “operation” is running at a time (no other operation can happen between getWritableDatabase() and close() ).
Difference between getReadableDatabase() and getWritableDatabase()
I think not many people are aware that there usually is no difference between these two methods.
Create and/or open a database. This will be the same object returned by getWritableDatabase() unless some problem, such as a full disk, requires the database to be opened read-only. In that case, a read-only database object will be returned. If the problem is fixed, a future call to getWritableDatabase() may succeed, in which case the read-only database object will be closed and the read/write object will be returned in the future.
The database connection is cached so repeated calls to getWritableDatabase() or getReadableDatabase() will return the same DB connection instance. Unless you close the connection explicitly between the calls.
Problems with multiple DB connections on the same database
There are some cases where multiple connections to the same database are unavoidable. This can be because you need to isolate the transactions (as mentioned) and don’t want use WAL or for some reason you need access your DB from multiple threads.
Opening a new DB connection from a different thread or process will likely (depending on timing) result in the following exception:
android.database.sqlite.SQLiteDatabaseLockedException: database is locked (code 5)
Again — the solution here is to synchronise any operations on the database. Only one SqliteOpenHelper instance should access/modify the DB.
Avoiding most DB multi-thread related issues
Источник


