- UI-пасьянс: делаем свой StackView в Android
- Механика списка
- Состояния списка
- Tutorialwing
- Output
- Getting Started
- Attributes of Android StackView Widget
- Example of Android StackView Widget
- 1. Creating New Project
- 2. Modify Values folder
- 3. Create View for Single Item View
- 4. Create Adapter for StackView
- 5. Use StackView Widget in xml file
- 6. Access StackView Widget in java file
- AndroidManifest.xml
- Android StackView Example
- 1. Create a New Android Studio Project
- 2. Create the layout of the AndroidStackViewActivity
- 3. Create the layout of the StackView items
- 4. Create the source code of the StackItems
- 5. Create the source code of the StackAdapter
- 6. Create the source code of the AndroidStackViewActivity
- 7. AndroidManifest.xml
- 8. build.gradle
- 9. Build, compile and run
- UIStackView Tutorial for iOS: Introducing Stack Views
- Version
- Getting Started
- Exploring Vacation Spots
- Your First Stack View
- Stack View Constraints
- Stack View Appearance
- Without a Stack View
- Converting the Sections
- Converting the Rating Section
- Un-embedding a Stack View
- Creating a Vertical Stack View
- Alignment Property
- Converting the What to See Section
- Converting the Weather Section
- Top-level Stack View
- Repositioning Views
- Size Class Configurations
- Animation
- Where to Go From Here?
UI-пасьянс: делаем свой StackView в Android
В этой статье мы хотим поделиться опытом создания кастомного ViewGroup в Android, который мы разработали в рамках одного из проектов Программы «Единая фронтальная система». Перед нами стояла задача создать красивую галерею банковских карт. При этом обычный список, который предоставляет RecyclerView и LinearLayoutManager, не подходил. Была задумка показать нестандартную механику скролла карт, чтобы при переходе карты не уходили полностью за пределы экрана, а собирались в стопку. О том, как мы это сделали, читайте под катом.
В предыстории скажем, что наш первый вариант был тривиальным – использовать готовое решение. Например в Android уже давно есть похожий контрол StackView. Код приводить не будем, он достаточно простой, ищем в Activity StackView, сетим в него адаптер, который отдает View наших карт. Смотрим, что получается. Карты расположены по диагонали, плюс анимация какая-то странная. Совсем не то, что хотелось бы. В кастомизации этого класса разбираться долго, так что попробуем сами.
Механика списка
Методом проб и ошибок мы пришли к механике, где карты отображаются в похожем на список виде. При этом карты, которые не видны в обычном списке, когда уходят за его пределы, у нас складываются в стопку. Здесь важно ограничить использование памяти, точнее, держать в памяти не все дочерние View, а минимальное, желательно, постоянное количество.
Для простоты опишем механику стопки сверху при скролле вверх. Стопка снизу будет работать примерно так же — только карты будут подсовываться под нее, а не наезжать. Красная линия на рисунке показывает, где проходит граница начала стопки.
Для последующей работы введем обозначения:
- foldHeight — высота области для стопки;
- maxCardCountInFold — максимальное возможное количество карт в стопке, в нашем примере оно равно трем;
- cardFoldHeight = foldHeight / maxCardCountInFold — высота карты в стопке.
Состояния списка
- На экране целые карты. Одна за другой. Все как в обычном списке.
- Начинаем скроллить вверх. Синяя карта начинает наезжать на зеленую карту. Останавливается в положении, когда видимая часть зеленой карты становится равной cardFoldHeight. Сейчас есть одна карта в стопке.
- Продолжаем скроллить вверх. Первые две карты не двигаются. Розовая карта надвигается на синюю. Останавливается в положении, когда видимая часть синей карты, лежащей под ней, становится равна cardFoldHeight. Теперь в стопке две карты.
- Скроллим дальше. Только теперь видимая часть розовой карты становится равна cardFoldHeight. В этом состоянии в стопке три карты — максимально допустимое количество карт. Чтобы добавить в стопку новую карту, нужно вывести из нее первую добавленную карту. Строго говоря, стопка работает по принципу FIFO: первый вошел — первый пошел.
В какой момент начинать двигать всю стопку, чтобы выкинуть за борт первую карту? Рассмотрим возможные варианты:
а) начинаем двигать стопку в момент, когда бирюзовая карта соприкоснулась с желтой картой;
б) начинаем двигать стопку в момент, когда бирюзовая карта уже наехала на желтую, а желтая имеет размер cardFoldHeight, точка A.
В обоих случаях стопка двигается при перемещении желтой карты от точки A до точки B. Когда бирюзовая карта попадает в положение B, синяя карта становится полностью не видна. В этом состоянии наш StackView освобождает память, занятую синей картой.
В нашей реализации мы выбрали второй вариант, так как визуально перемещение карт в этом случае выглядит более плавным.
Источник
Tutorialwing
Hello Readers! In this post, we are going to learn about how to use android StackView widget in any android application. We will also go through different attributes of stackView widget that can be used to customise it.
Output
Tutorialwing Android StackView Output
Tutorialwing Android StackView Output
Getting Started
StackView widget can be defined as below –
StackView is a widget that are used to created views like stacked Cards. You can flip the front item to give space for item view just after it. Whenever you flip current item, item just behind it comes forward.
Attributes of Android StackView Widget
Some of the popular attributes of android stackView inherited from AdapterViewAnimator are –
| Sr. | XML Attributes | Description |
|---|---|---|
| 1 | android:animateFirstView | Defines whether to animate the current View when the ViewAnimation is first displayed |
| 2 | android:inAnimation | Identifier for the animation to use when a view is shown |
| 3 | android:loopViews | Defines whether the animator loops to the first view once it has reached the end of the list |
| 4 | android:outAnimation | Identifier for the animation to use when a view is hidden |
Some of the popular attributes of android stackView inherited from ViewGroup are –
| Sr. | XML Attributes | Description |
|---|---|---|
| 1 | android:animateLayoutChanges | Specifies whether to run layout transition when there is any change in layout |
| 2 | android:animationCache | Specifies whether to create drawing cache for children by layout animation |
| 3 | android:clipToPadding | Defines whether the ViewGroup will clip its children and resize (but not clip) any EdgeEffect to its padding, if padding is not zero |
| 4 | android:layoutAnimation | Specifies the layout animation to be used when the viewGroup is laid out for the first time |
| 5 | android:layoutMode | Defines the layout mode of the viewGroup |
Some of the popular attributes of android stackView inherited from View are –
| Sr. | XML Attributes | Description |
|---|---|---|
| 1 | android:alpha | Sets alpha to the view |
| 2 | android:background | Sets drawable to the background |
| 3 | android:backgroundTint | Sets tint to apply to the background |
| 4 | android:clickable | Specifies whether the view is clickable or not |
| 5 | android:elevation | Sets elevation of the view |
| 6 | android:focusable | Specifies whether this view can take focus or not |
| 7 | android:id | Specifies id of the view |
| 8 | android:visibility | Specifies the visibility(VISIBLE, INVISIBLE, GONE) of the view |
Example of Android StackView Widget
At first, we will create android application. Then, we will use stackView widget in this application.
1. Creating New Project
Follow steps below to create new project. Please ignore the steps if you have already created a new application.
| Step | Description |
|---|---|
| 1. | Open Android Studio. |
| 2. | Go to File => New => New Project. Write application name as StackView. Then, click next button. |
| 3. | Select minimum SDK you need. However, we have selected 17 as minimum SDK. Then, click next button |
| 4. | Then, select Empty Activity => click next => click finish. |
| 5. | If you have followed above process correctly, you will get a newly created project successfully. However, you can also visit post to create a new project to know steps in detail. |
Now, we will modify xml and java file to use StackView widget in the application.
2. Modify Values folder
Open res/values/strings.xml file. Then, add below code into it.
3. Create View for Single Item View
Now, we will create view for single item to be used in stackView. This will be used in stackView adapter to create view for single item. So, you need to create an xml file, item.xml, in res/layout folder. Then, add below code into it.
Now, we will create adapter for stackView. So, create a java file (i.e. StackAdapter.java file) in res/main/java/com.tutorialwing.stackview folder.
4. Create Adapter for StackView
Code inside res/main/java/com.tutorialwing.stackview/StackAdapter.java file is as below –
In StackAdapter class, we have done following things –
a. We have defined constructor that accepts context and nameList.
b. getCount() method returns number of items in the nameList array. According number of views will be created in the stackView.
c. getItem() method returns items at that position.
d. getItemId() method returns id of the view at index position.
e. Note that we have used viewHolder pattern to create view, in getView() method, for each position in the adapter.
Since we have created view for single item and an adapter for stackView, we will use stackView in the application now.
5. Use StackView Widget in xml file
Open res/layout/activity_main.xml file. Then, add below code into it.
In activity_main.xml file, we have defined stackView widget. Now, we will access this in java file to perform some operations in it.
6. Access StackView Widget in java file
Open src/main/java/com.tutorialwing.stackview/MainActivity.java file. Then, add below code into it.
We need some images in res/drawable folder to create views stackView. So, You can click here to download images to be used in the application.
In MainActivity.java file, we have accessed stackView widget. Then, we have defined and assigned the adapter in it.
Since AndroidManifest.xml file is very important in any android application, we are also going to see the content inside this file.
AndroidManifest.xml
Code inside src/main/AndroidManifest.xml file is as below –
When we run the program, we will get output as shown above.
That’s end of tutorial on Android StackView widget.
Источник
Android StackView Example
Posted by: Chryssa Aliferi in StackView July 11th, 2016 1 Comment Views
The Honeycomb Android version, introduced some interesting widgets with collections. One of them is the Android StackView, a stacked card view where the front view-item can be flipped to give room for the item after it. The StackView collection may be found in several widgets, because of its view behaviour.
Generally, StackView is an AdapterView thus working with StackView is not significantly different than is working with any other AdapterView. You create an Adapter defining the contents (in this case, defining the cards), you attach the Adapter to the StackView, and put the StackView somewhere on the screen. However StackView seems to work best with children that have explicit sizes.
In this example we are going to see how to design and implement a simple Android StackView. For this example we are using the following tools in a Windows 64-bit or an OS X platform:
- JDK 1.7
- Android Studio 2.1.2
- Android SDK 6.0
Let’s take a closer look:
1. Create a New Android Studio Project
Open Android Studio and choose “Start a new Android Studio Project” in the welcome screen.
“Welcome to Android Studio” screen. Choose “Start a new Android Studio Project”.
Specify the name of the application, the project and the package.
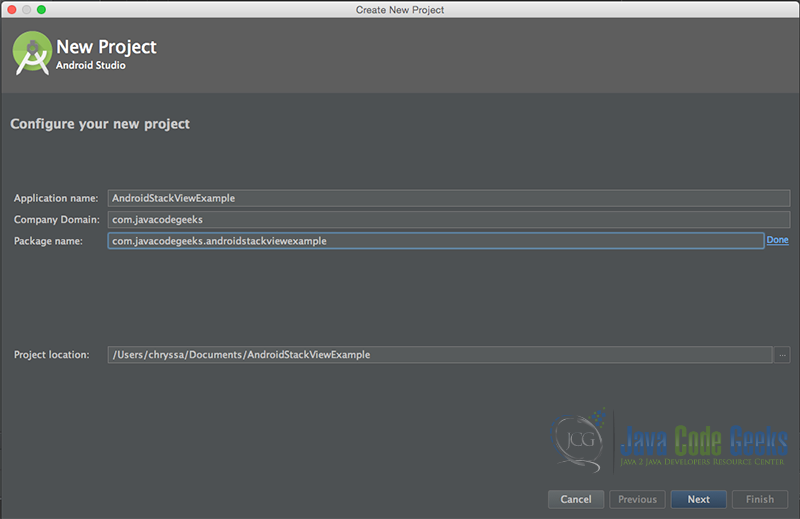
“Configure your new project” screen. Add your application name and the projects package name.
In the next window, select the form factors your app will run on.
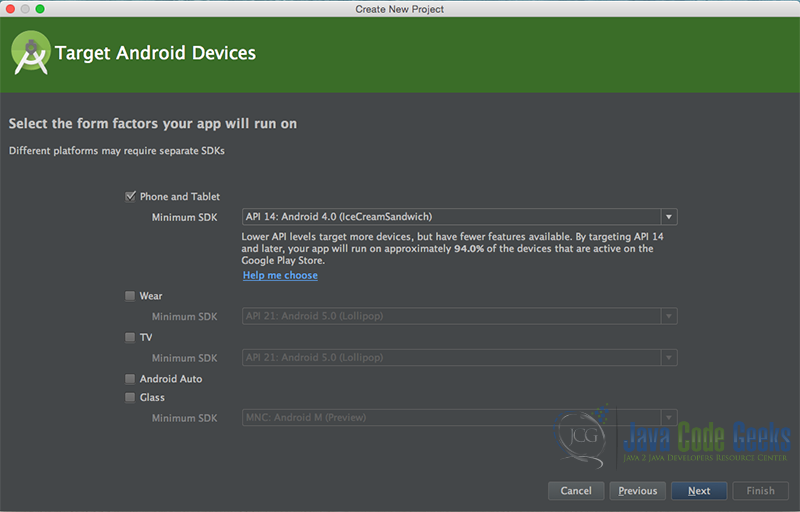
“Target Android Devices” screen.
In the next window you should choose to “Add an activity to Mobile”. In our example, we will choose to create a project with no activity, so choose: “Add no activity”.
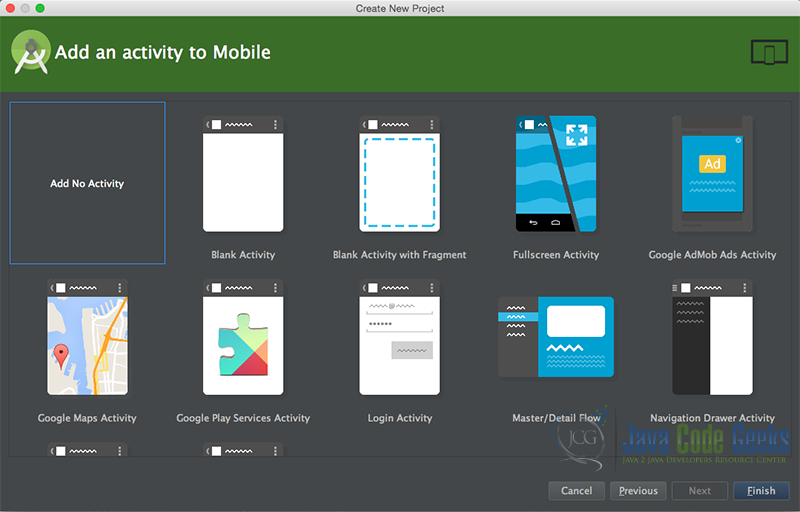
“Add an activity to Mobile”. Choose: “Add no activity”.
Now press finish, and our project has just been created!
2. Create the layout of the AndroidStackViewActivity
Add a new xml file inside /res/layout folder, with name activity_main.xml . We should have /layout/activity_main.xml file and paste the code below.
3. Create the layout of the StackView items
Add a new xml file inside /res/layout folder, with name item.xml . We should have /layout/item.xml file and paste the code below.
4. Create the source code of the StackItems
Add a new Java class inside src/com.javacodegeeks.AndroidStackViewExample/ so that we are going to have the src/com.javacodegeeks.AndroidStackViewExample/StackItems.java file and paste the code below.
5. Create the source code of the StackAdapter
Add a new Java class inside src/com.javacodegeeks.AndroidStackViewExample/ so that we are going to have the src/com.javacodegeeks.AndroidStackViewExample/StackItems.java file and paste the code below.
6. Create the source code of the AndroidStackViewActivity
Add a new Java class inside src/com.javacodegeeks.AndroidStackViewExample/ so that we are going to have the src/com.javacodegeeks.AndroidStackViewExample/AndroidStackViewActivity.java file and paste the code below.
7. AndroidManifest.xml
The AndroidManifest.xml of our project has no special permissions.
8. build.gradle
The build.gradle of our project is simple.
9. Build, compile and run
When we build, compile and run our project, the main AndroidStackViewActivity should look like this:
Источник
UIStackView Tutorial for iOS: Introducing Stack Views
Learn how to simplify your iOS layouts with UIStackView. Layout a series of views horizontally or vertically, using alignment, distribution and spacing.

Version

Have you ever needed to add or remove views from a view during runtime and adjust the layout of views beside it? Maybe you adjusted some constraints or used a third-party library to do that work. Perhaps it wasn’t something at run time but one new view you wanted to jam between other views in your storyboard.
In these cases, you need to alter several constraints. You may find yourself removing all constraints in the area and adding them all over again.
UIStackView has simplified such tasks. You can easily lay out a series of views horizontally or vertically within a stack view and set it up in a way that the views are automatically adjusted to the available space using properties such as alignment, distribution and spacing. Enjoy! :]
Getting Started
Start by downloading the project materials using the Download Materials button at the top or bottom of this tutorial. Build and run the starter project in Xcode using the iPhone 8 Simulator. You’ll see the following:

This is the Vacation Spots app. It suggests a list of places to get away from it all. Before going anywhere, you’re going to solve a few problems with the app using Stack Views.
Exploring Vacation Spots
Go to the info view for London by tapping on London. At first glance, the view may look okay, but it has a few issues:
- Look at the row of buttons at the bottom of the view. Because of the fixed spacing between them, they don’t adapt to the screen width. To get a better look at the problem, rotate the simulator to landscape orientation by pressing Command-left arrow.

- Tap Hide next to WEATHER. This hides the text, but it doesn’t reposition the section below it, leaving a block of blank space.

- The section ordering needs improvement. It would be more logical if WHAT TO SEE appeared after WHY VISIT instead of positioning the weather section between them.
- The bottom row of buttons is too close to the bottom edge of the view in landscape mode. It’ll look better if you decrease the spacing between the sections — but only in landscape mode.
Now that you have an idea of the improvements you’ll be making, it’s time to dive into the project. Open Main.storyboard. It will open with an initial device view. Make sure it shows iPhone 8 as the selected device.

This has no effect at runtime but will help you see how the screens should look on that device. You can change the selected device any time by clicking another icon. Hovering the mouse over an icon reveals its corresponding devices.


which, when pressed, reveals the list of available devices, laid out vertically:

Now, take a close look at Spot Info View Controller:

You’re probably wondering What’s with the colors?
These labels and buttons have background colors that won’t show at runtime. In the storyboard, they’re visual aids to help show how changing various properties of a stack view affects the frames of its embedded views.
If at any point you’d like to see the background colors while running the app, you can temporarily comment out the following lines in viewDidLoad() inside SpotInfoViewController .
Any outlet-connected label has a placeholder text that matches the outlet variable name. This makes it easier to tell which labels will have their text updated at runtime. For example, the label with text is connected to:
Time to get started!
Your First Stack View
First, you’ll fix the spacing between the buttons on the bottom row. A stack view can distribute its subviews along its axis in various ways. One way is by setting equal spacing between each view.

Fortunately, embedding existing views into a new stack view is a piece of cake. First, select all the buttons at the bottom of the Spot Info View Controller scene by clicking on one, then command-clicking on the other two. Open the outline view by using the Show Document Outline button at the bottom-left of the storyboard canvas.

Verify that you have selected all three buttons.

They appear highlighted in the outline view. You can also command-click on each button in the outline view to select them.
Once selected, click the Embed In button in the Auto Layout toolbar at the bottom-right of the storyboard canvas. A menu with available embed options will appear. Choose Stack View:

Xcode will embed the buttons in a new stack view for you.

Stack View Constraints
While the stack view takes care of positioning the buttons, you still need to add Auto Layout constraints to position the stack view itself.
When you embed a view in a stack view, it loses the constraints it had to other views. For example, prior to embedding the buttons in the stack view, the top of the Submit Rating button had a vertical spacing constraint to the bottom of the RATING label:

Select the Submit Rating button and verify that it no longer has any constraints attached to it:

You can also look at the Size inspector (Option-Command-5) to verify that there are no constraints:

Sometimes it’s hard to select a specific element in a crowded storyboard’s view controller. You can select the element from the outline view, or use Shift and right-click or Control-Shift-click on the view you want to select. This gives you a context menu that shows the view hierarchy at the location you clicked. Select the stack view by clicking on it in the menu.

Now that you have the Stack View selected, you can add constraints to it.

Click the Add New Constraints button in the Auto Layout toolbar to show the Add New Constraints pop-up.

First, add a checkmark to Constrain to margins. Then, add the following constraints to the edges of your stack view:
Double-check the numbers for the top, leading, trailing, and bottom constraints. Make sure you have turned on the four red I-beams and Constrain to margins. Then, click Add 4 Constraints.

Now the stack view is the correct size, but it has stretched the first button to fill in any extra space.

Stack View Appearance
The property that determines how a stack view lays out its subviews along its axis is distribution . Currently, it’s set to Fill , which means the subviews will completely fill the stack view along its axis. To accomplish this, the stack view will only expand one of its subviews to fill that extra space. Specifically, it expands the view with the lowest horizontal content hugging priority, or if all of the priorities are equal, it expands the first view.
However, you don’t want the buttons to fill the stack view completely — you want them to be equally spaced.
Make sure the stack view is still selected and go to the Attributes inspector. Change the Distribution from Fill to Equal Spacing:

Now build and run, tap on any cell, and rotate the simulator. You’ll see that the bottom buttons now space themselves equally!


When implementing a UI, always ask yourself whether the elements fit the available space.
Here’s an example of how your content can affect the user’s experience: Change the title of the Wikipedia button to Wikipedia website and run the app. Rotate the simulator from portrait to landscape to see the difference.


In the portrait orientation where the space is tighter, the text in the last button is clipped, while in the landscape everything fits well.
This is something that you’ll come across frequently, especially with narrower screen sizes like the iPhone SE.
Fortunately, it’s an easy fix. With the stack view still selected, go back to Attributes inspector. Change Distribution from Equal Spacing to Fill Proportionally and change the spacing value to 10:

Now, build and run and check both orientations. You’ll find everything in order.

Change the name of the button back to Wikipedia.
Congratulations, you’ve built your first stack view!
Without a Stack View
In order to solve this spacing problem without a stack view, you would have to use one spacer view between each pair of buttons, adding equal width constraints to all of the spacer views, as well as several additional constraints to position the spacer views correctly.
This would look something like the following. For visibility in the screenshot, the spacer views display a light gray background:

It isn’t too problematic if you have to do this once in the storyboard, but many views are dynamic. It’s not a straightforward task to add a new button or to hide or remove an existing button at runtime because of the adjacent spacer views and constraints.
In order to hide a view within a stack view, set the contained view’s hidden property to true , and the stack view handles the rest. This is how you’ll fix the spacing under the WEATHER label when the user hides the text below it. You’ll do that in this tutorial once you’ve added the weather section labels into a stack view.
Converting the Sections
Next, you’ll convert all of the other sections in SpotInfoViewController to use stack views as well. This enables you to complete the remaining tasks. Begin with the rating section.
Converting the Rating Section
Above the stack view you created, select the RATING label and the stars label next to it.
Then, click Editor ▸ Embed in ▸ Stack View.
Now, select the newly created stack view and click the Add New Constraints button again. Place a checkmark in Constrain to margins and add the following three constraints:

Now go to the Attributes inspector and set the spacing to 8.
Build and run to verify that everything looks the same as before.
Un-embedding a Stack View
Before you go too far, it’s good to have some first aid training for when things go wrong. For example, you may find yourself with an extra stack view, perhaps because of experimentation, refactoring or by accident.
Fortunately, there’s an easy way to unembed views from a stack view.
First, select the stack view you want to remove. Click the Embed In button. Next, select Unembed on the context menu that appears:

Another way to do this is to select the stack view and choose Editor ▸ Unembed from the menu.
Creating a Vertical Stack View
Now, create your first vertical stack view. Select the WHY VISIT label and below it, and then select Embed in ▸ Stack View.
When you embed the labels in a stack view, Xcode infers that it should be a vertical stack based on the position of the labels.
The lower label previously had a constraint pinning it to the right margin, but embedding the label in the stack view removed that constraint. Currently, the stack view has no constraints, so it adopts the intrinsic width of its largest view.
With the stack view selected, click the Add New Constraints button. Set the Top, Leading and Trailing constraints to 0. Again, make sure to check Constrain to margins.
Then, click the dropdown to the right of the bottom constraint and select WEATHER (current distance = 20):

By default, Interface Builder shows you the constraints to the nearest neighbor, which for the bottom constraint is the Hide button at a distance of 15. You need the constraint to be to the WEATHER label below it.
Finally, click Add 4 Constraints. You should now see the following:

Now you have an expanded stack view with right edges pinned to the right margin of the view. However, the bottom label is still the same width. You’ll fix this by updating the stack view’s alignment property.
Alignment Property
The alignment property determines how a stack view lays out its views perpendicular to its axis. For a vertical stack view, the possible values are Fill , Leading , Center , and Trailing .
The possible alignment values for a horizontal stack view differ slightly:

The horizontal stack view has .top instead of .leading and has .bottom instead of .trailing . There are also two more properties that are valid only in the horizontal direction, .firstBaseline and .lastBaseline .
Select each value to see how it affects label placement in the vertical stack view:


Center: 

When you’re done testing each value, set the Alignment to Fill:

Build and run to verify that everything looks good and that there are no regressions.
Specifying Fill means you want all the views to fill the stack view perpendicular to its axis. This causes the WHY VISIT label to expand to the right edge as well.
What if you only wanted the bottom label to expand to the edge?
For now, it doesn’t matter since both labels will have a clear background at runtime, but it will matter when you’re converting the weather section.
You’ll learn how to accomplish that with the use of an additional stack view.
Converting the What to See Section
Converting this section is similar to what you’ve already done.
- First, select the WHAT TO SEE label and below it.
- Click the Embed In button and choose Stack View.
- Click the Pin button.
- Check Constrain to margins and add the following four constraints:
- Set the stack view’s Alignment to Fill.
Your storyboard should now look like this:

This leaves you with just the weather section left.
Converting the Weather Section
The weather section is more complex than the others because of the Hide button.
To convert the weather section, you could create a nested stack view by embedding the WEATHER label and the Hide button into a horizontal stack view. Then, embed that horizontal stack view and the into a vertical stack view.
It would look something like this:

Notice that the WEATHER label has expanded to equal the height of the Hide button. This will result in extra space between the baseline of the WEATHER label and the text below it.
Remember that alignment specifies positioning perpendicular to the stack view. So, you could set the alignment to Bottom:

However, you don’t want the height of the Hide button to dictate the height of the stack view.
Instead, you’ll eliminate the Hide button from all stack views.
The Hide button will remain a subview of the top-level view, and you’ll add a constraint from it to the WEATHER label — which will be in a stack view. That’s right, you’ll add a constraint from a button outside of a stack view to a label within a stack view!
Select the WEATHER label and below it, and then stack them in a Stack View.
Click the Add New Constraints button, checkmark Constrain to margins and add the following four constraints:
Set the stack view’s Alignment to Fill:

You need a constraint between the Hide button’s left edge and the WEATHER label’s right edge, so having the WEATHER label fill the stack view won’t work.
However, you do want the bottom to fill the stack view.
You can accomplish this by embedding just the WEATHER label into a vertical stack view. Remember that the alignment of a vertical stack view can be set to .leading , and if you stretch the stack view beyond its intrinsic width, its subviews will remain aligned to the leading side.
Select the WEATHER label using the document outline, or by using the Control-Shift-click method. Then, embed it in a new stack view.
Set Alignment to Leading, and make sure the Axis is set to Vertical:

Perfect! The outer stack view is stretching the inner stack view to fill the width, but the inner stack view allows the label to keep its original width!
Build and run. Uh-oh. Why is the Hide button hanging out in the middle of the text?

When you embedded the WEATHER label in a stack view, any constraints between it and the Hide button were removed.
To add new constraints, Control-drag the Hide button to the WEATHER label.
Hold down Shift to select multiple options, and select Horizontal Spacing and First Baseline. Then press Enter, or click anywhere outside the pop-up view:

Build and run. The Hide button should now be positioned correctly. Since the label set to hidden is embedded in a stack view, pressing Hide hides the label and adjusts the views below it — all without having to manually adjust any constraints.


Now that all the sections are in unique stack views, you’re set to embed them into an outer stack view, which will make the final two tasks trivial.
Top-level Stack View
Command-click to select all five top-level stack views in the outline view.
Then embed them all in one Stack View:

Click the Add New Constraints button, check Constrain to margins and add constraints of 0 to all edges. Then set Spacing to 20 and Alignment to Fill. Your storyboard scene should now look like this:


Whoops! Looks like the hide button lost its constraints again when the WEATHER stack view was embedded in the outer stack view. No problem, just add constraints to it again in the same way you did before:
- Control-drag from the Hide button to the WEATHER label.
- Hold down Shift.
- Select both Horizontal Spacing and Baseline.
- Press Enter, or click anywhere outside the pop-up view.
Build and run. The Hide button is now in the right position.
Repositioning Views
Now that all the sections are in a top-level stack view, you’ll modify the position of the WHAT TO SEE section so that it’s above the WEATHER section.
Select the middle stack view from the outline view and drag it between the first and second view.

Size Class Configurations
Finally, turn your attention to the one remaining task on your list. In landscape mode, vertical space is at a premium, so you want to bring the sections of the stack view closer together. To do this, you’ll use size classes to set the spacing of the top-level stack view to 10 instead of 20 when the vertical size class is compact.
Select the top-level stack view and in the Attributes inspector, click the + button next to Spacing:

Choose Any Width and Compact Height, then select Add Variation.

Set the Spacing to 10 in the new hC field:

Build and run. The spacing in portrait mode should remain unchanged. Rotate the simulator and note that the spacing between the sections has decreased and the buttons now have ample space from the bottom of the view:

If you didn’t add a top-level stack view, you still could have used size classes to set the vertical spacing to 10 on each of the four constraints that separate the five sections, but isn’t it so much better to set it in a single place?
You have better things to do with your time, like animation!
Animation
Currently, the app is very jumpy when hiding and showing the weather details. You’ll add some animation to smooth the transition.
Stack views are compatible with the UIView animation engine. This means that animating the appearance or disappearance of an arranged subview is as simple as toggling its isHidden property inside an animation block.
Changing the isHidden property of an arranged subview updates the layout of its parent Stack View. If that update is in an animation block, it would be just the same if you changed the layout yourself in the animation block.
It’s time to write some code! Open SpotInfoViewController.swift and take a look at updateWeatherInfoViews(hideWeatherInfo:animated:) .
You’ll see these lines at the end of the method:
Replace them with the following:
Build and run, and tap the Hide or Show button. Doesn’t the animated version feel much nicer?
In addition to animating the hidden property on views contained within the stack view, you can also animate properties on the stack view itself, such as alignment , distribution , spacing and even the axis .
Where to Go From Here?
You can download the completed version of the project using the Download Materials button at the top or bottom of this tutorial. Here are some resources for further study:
- There are several WWDC videos on the topic of Auto Layout and using UIStackViews . Auto Layout Techniques in Interface Builder from WWDC 2017 is a good one to start with.
- You can also read more about UIStackView from Apple Documentation.
If you have any questions or comments, please don’t hesitate to join the forum discussion below.
Источник


