- Урок 4. Android Material Design. Установка теней и обрезка View
- Настройте тени и контуры
- Обрежьте view
- Android CardView 101: Everything you should know
- From card background to compat padding, namespaces to methods
- 0. Adding CardView to Project
- 1. Why is there a RelativeLayout inside our CardView?
- 2. Card Background Color
- 3. Card Corner Radius
- 4. Card Elevation
- 5. Card Content Padding
- 6. Card Use Compat Padding
- 7. Card Prevent Corner Overlap
- Android studio cardview тень
- About
- Cardview with Recyclerview Android Example [beginners]
- Cardview XML attribute
- Cardview android example with Recyclerview
- Step 1 — Adding dependencies
Урок 4. Android Material Design. Установка теней и обрезка View
Перевод документации официального сайта developer.android.com
 Рисунок 1. Тени для различных высот view.
Чтобы установить высоту view в макете используйте атрибут android:elevation. Чтобы установить высоту в коде activity, используйте метод View.setElevation().
Чтобы установить смещение, используйте метод View.setTranslationZ().
Новые методы ViewPropertyAnimator.z() и ViewPropertyAnimator.translationZ() позволяют легко анимировать высоту view. Для получения дополнительной информации, смотрите справку по ViewPropertyAnimator и руководство разработчика о свойствах анимации.
Вы так же можете использовать StateListAnimator чтобы установить анимации декларативно. Это особенно полезно в тех случаях, когда изменяется состояние триггера анимации, например, когда пользователь нажимает на кнопку. Для получения дополнительной информации, смотрите Изменение состояния анимации view.
Значение Z измеряется в dp (density-independent pixels).
Настройте тени и контуры
Границы фона drawable view определяют форму его тени. Контуры представляют собой внешнюю форму графического объекта и определяют область для сенсорного отклика.
Рассмотрим view, определенное с помощью фона dravable:
Фон drawable определен как прямоугольник с закругленными углами:
View отбрасывает тень с закругленными углами, после того как фон drawable установил границы view. Создание пользовательского контура переопределяет форму тени view по умолчанию.
Чтобы установить пользовательский контур для view в коде:
1. Унаследуйтесь от класса ViewOutlineProvider.
2. Переопределите метод getOutline().
3. Назначьте нового поставщика контура для вашего view с помощью метода View.setOutlineProvider() .
Вы можете создать овальные и прямоугольные очертания с закругленными углами используя методы класса Outlines. Поставщик контура для view по умолчанию получает контур из фона view. Чтобы view не отбрасывала тень, установите значение поставщика контура в null.
Обрежьте view
Обрезание позволяет вам легко изменить форму view. Вы можете обрезать view для совместимости с другими элементами дизайна или изменить форму view в ответ на действия пользователя. Вы можете обрезать view к его области контура с помощью метода View.setClipToOutline() или используя атрибут android:clipToOutline. Только прямоугольник, круг и скругленный прямоугольник поддерживают обрезание, как определено в методе Outline.canClip().
Чтобы обрезать view в форме drawable, установите drawable в качестве фона view (как показано выше), и вызовите метод View.setClipToOutline().
Обрезание view это дорогостоящая операция, поэтому не анимируйте форму, которую вы используете чтобы обрезать view. Для достижения этого эффекта используйте Reveal эффект анимации.
Источник
Android CardView 101: Everything you should know
From card background to compat padding, namespaces to methods

Dec 18, 2017 · 6 min read
If you have been doing layouts for a while now, you must be familiar with the uneasiness that comes with creating layouts, more specifically creating the same layout over and over again for different application components. The general idea for eliminating such a situation is to create a layout template that could be used for multiple components with smaller modifications, which in most of the cases, is the data.
In this post, we will cover a s i milar situation — “How to make cards for different components”. However, instead of discussing the problem, we will be focusing on its solution — CardView. We will assume you have at least basic knowledge of the how-tos of Android development.
CardView was announced by Google during its yearly I/O conference in 2014 as a part of Material Design components. The main purpose CardView serves in the Material Design universe is to provide a unified look to all of the card based UIs making it easier for developers to create seamless interfaces.
In this post, we will see what opportunities CardView provides on Android platform and how to use it properly in our application.

If you look closely to the image on the left, you will notice a white card like view container holding an ImageView, a TextView and an ImageButton. This is our CardView. As I already mentioned, a CardView is a view container or ViewGroup that inherits its nature from FrameLayout which further inherits from ViewGroup itself. The only thing that separates a CardView from any other ViewGroups is its nature to behave like a card, more specifically the shadow and rounded corners. One could argue that such properties can be added to other viewgroups as well, but you will be surprised to know how well CardView behaves on Android versions before Lollipop, something difficult to pull off with custom VGs.
The basic customization that a CardView provides includes CornerRadius, Elevation, MaxElevation, ContentPadding, CompatPadding, PreventCornerOverlap, and a dedicated CardBackgroundColor. The CardView in the image above with all of its customizability enabled can be created using this piece of XML code. Take a look, try to figure out what happens with each of the properties, why is there a ViewGroup inside our CardView viewgroup or simply continue reading to find out.
0. Adding CardView to Project
With the release of Android Lollipop, Google started separating Android Components like RecyclerView and CardView from support library with their own repositories. CardView library can be added to a project by adding the following dependency to dependencies in build.gradle (module: app),
If using Android Studio 3.0 and above, then this needs to be added instead,
1. Why is there a RelativeLayout inside our CardView?
I know I did say a CardView is a ViewGroup but it inherits from FrameLayout which is the simplest form of ViewGroup created to handle a single frame at a time. That’s why we need a RelativeLayout to hold all of our views together while acting like a single frame to the CardView.
2. Card Background Color
The most straightforward property of all. By default, a CardView comes with white card background color which can be modified as per our need to any other color using this property. Sample declaration of cardBackgroundColor (white) in XML and Java looks like this,
3. Card Corner Radius
Card Corner Radius gives the CardView a rounded corner of radius equal to the value provided to it. On Android Lollipop and above, it simply clips the child views that may be intersecting CardView’s rounded corners. It also ensures that a padding is maintained between corners and child views on previous versions to avoid expensive clipping of views. We will soon see how we can enable it. Sample code for 0 corner radius:
4. Card Elevation
Card Elevation property simply elevates the cardview on the z-axis to a height equal to the passed value. Since elevation came with Android Lollipop, Card Elevation on previous versions uses shadows to create a similar effect. It adds padding on its content’s sides using
and on top and bottom using
and then applies shadows to that space. MaxCardElevation property, if not set manually, will be equal to CardElevation. In our example, we have set elevation to 0.7dp and maxElevation to 1dp. If you look at the Java part, you’ll notice the values passed to the methods are different than the values to xml properties. This is because we can specify nature of value with xml but not with java methods which expect the value to be in pixels (px) only and thus we have to pass number of pixels that make up the same dp as xml values.
5. Card Content Padding
As previously mentioned, the normal CardView padding is used to create a space for drawing shadows and thus we use ContentPadding to add padding between the edges and child views. As it’s with normal view padding, ContentPadding can be used to selectively add padding on any of the four edges. In our example, we have used content padding to set padding on all the edges to 10dp and then content padding bottom to 0dp to make sure there is no padding at the bottom. As usual, the Java method needs values for all edges to be passed in pixels. The first parameter of setContentPadding represents left edge, with the last representing bottom.
6. Card Use Compat Padding
One more attribute related to padding. Since CardViews use padding for drawing shadows on platforms before Lollipop, the content area will change on platforms before and after Lollipop. To make sure the content area remains the same on all the platforms, Compat Padding is used which simply adds inner padding on platforms Lollipop and after.
7. Card Prevent Corner Overlap
As mentioned in Corner Radius, the CardView avoids clipping the child views on platforms before Lollipop due to expensive nature of clipping and rather gives an option to distance content from rounded corners with Prevent Corner Overlap. The definition in XML and Java looks like this,
Okay, now that we have discussed about attributes and their method counterparts, let’s see what attribute namespaces we get with CardView. There are actually 2 namespaces that hold the attributes of CardView. The first is the normal android namespace which holds all of the inherited attributes for CardView like width or height or scale. The other one is the app namespace, formerly card and card_view, which holds all the exclusive CardView attributes we discussed just now. It’s often easier to look for special attributes using app namespace.
The complete Java representation of the CardView’s XML layout above looks like this,
The following code does the same as the XML does, same elevation and stuff. The only difference with code is that the methods want the values to be passed in pixels (px) instead of dp or px or mm. This causes a problem on phones with different pixel density and the required value has to be calculated for every device and then converted to px using dpToPx(…) method using device density. Here
will give the same result as
on a Nexus 5 where the pixel density is 3.
That’s it. We now know what a CardView is, what’s the advantage using it, how to correctly use it on different Android versions without making it look different on Lollipop or above and v20 or below. We now also have the idea of different attributes we are supposed to use with a CardView and how they perform on different platforms. Also, knowing the namespaces will help us get better at identifying attributes for our CardView.
If we missed out on any of the CardView features or there’s anything to correct, share it with us in comments below.
Источник
Android studio cardview тень
This library draw android view shadow by ShadowLayer. You may don’t like the CardView’s black shadow which we can’t change it’s color. Same to CardView wrap content and set shadow radius. You can change shadow color, foreground color and corner radius everywhere. Because the shadow is draw in the view. So you must add space to draw the shadow. The ShadowView add one param shadowMargin which must be set before you add shadow radius to the view.
Caveat: Margin In UI
= layout_margin + shadow_margin(Add by ShadowView)
| H | H | H |
|---|---|---|
| Change Radius | Change foreground | Change Corners |
 |  |  |
| Change shadow color | Change shadow margin | Demo |
 |  |  |

About
Android custom shadow view, can replace your CardView
Источник
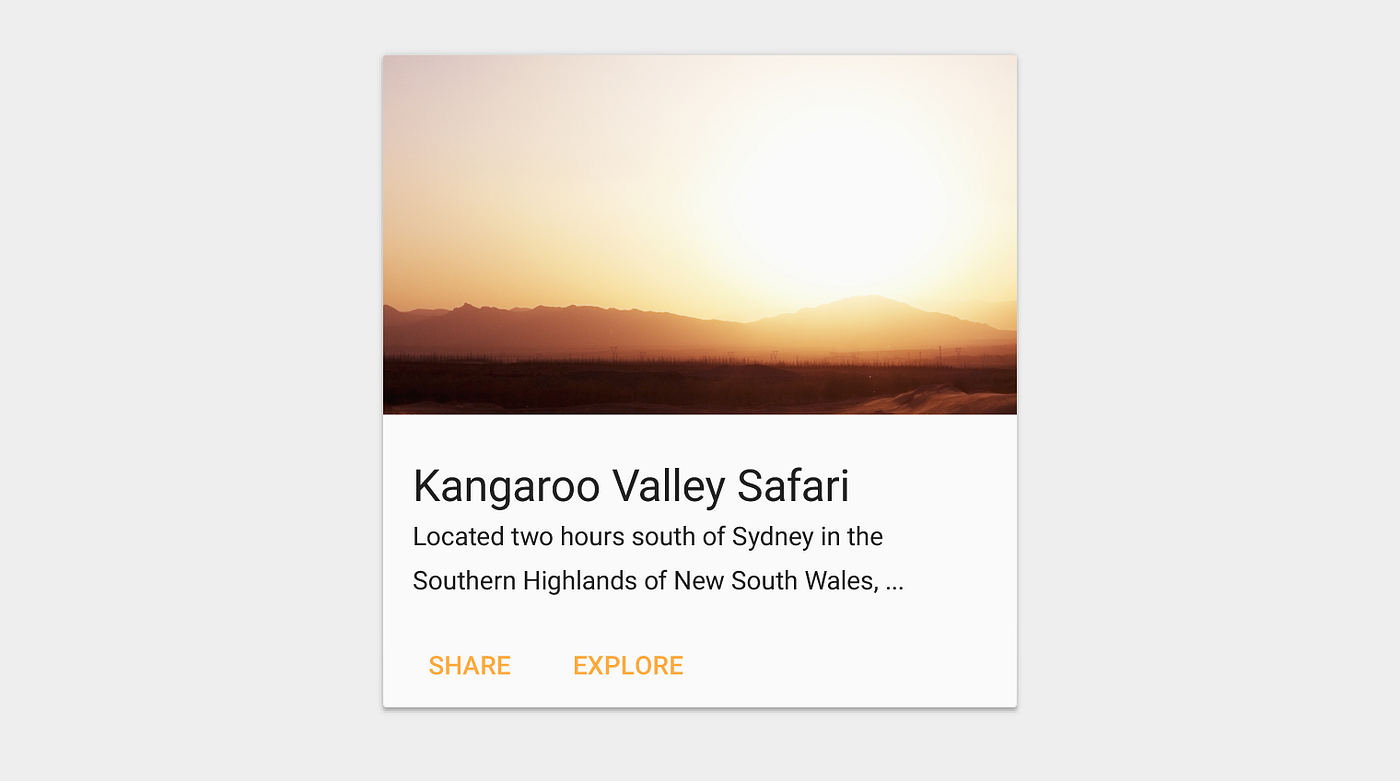
Cardview with Recyclerview Android Example [beginners]


Cardview Android is a new widget for Android, which can be used to display a card sort of a layout in android. Cardview was introduced in Material Design in API level 21 (Android 5.0 i.e Lollipop).
Since, Cardview is part of material design.It’s such a view which has all material design properties, most importantly showing shadows according to the elevation.
The best part about this view is that it extends FrameLayout and it can be displayed on all the platforms of Android since it’s available through the Support v7 library.
The design of the cardview will be looks like,

In the above picture, every boxes made with cardview in android.
Before jumping into the coding part, Let’s see the Cardview XML attribute, that makes the cardview looks beautiful.
Cardview XML attribute
CardView_cardBackgroundColor : ColorStateList: The new ColorStateList to set for the card background
CardView_cardCornerRadius : float: The radius in pixels of the corners of the rectangle shape
CardView_cardElevation : float: The backward compatible elevation in pixels.
CardView_cardMaxElevation : float: The backward compatible maximum elevation in pixels.
CardView_cardPreventCornerOverlap : boolean: Whether CardView should add extra padding to content to avoid overlaps with the CardView corners.
CardView_cardUseCompatPadding : boolean: true> if CardView should add padding for the shadows on platforms Lollipop and above.
CardView_contentPadding : Sets the padding between the Card’s edges and the children of CardView.
CardView_contentPaddingBottom : int: The bottom padding in pixels
CardView_contentPaddingLeft : int: The left padding in pixels
CardView_contentPaddingRight : int: The right padding in pixels
Done with explanation about the android cardview. Let get into the coding part.
Cardview android example with Recyclerview
In this post, I am going to create cardview with recyclerview in android to list the movies with the image and the movie title.
example application demo,
Step 1 — Adding dependencies
In this example, I am using recyclerview with cardview. But I am not going deeper into recyclerview. I am already have a post on recyclerview in android.
Источник


