- Keddit — Part 1: Configuring Android Studio with Kotlin
- Content
- Part 1: Configuring Android Studio with Kotlin
- Create Project
- Android Studio 3.x
- Android Studio 2.x
- Kotlin Plugin
- Configure Project with Kotlin — “first attempt”
- From Java to Kotlin file
- Configure Project with Kotlin — “Last one :)”
- Run, run, run!
- Repository
- Conclusion
- How to Set Up Android Studio for Kotlin Development
- Kotlin has many benefits, including an IntelliJ/Android Studio Plugin. Adding the plugin to a new Android project and converting your code from Java to Kotlin is easy.
- Install Kotlin Plugin for Android Studio
- Create a New Android Project
- Apply Kotlin Plugin to the Project
- Add Kotlin Gradle Plugin
- Apply the Kotlin Android Plugin
- Convert Activity Code from Java to Kotlin
- Bonus: Staying Up-to-Date With Kotlin Versions
- Further Reading
- Keddit — Часть 1: Настройка Android Studio для Kotlin
- Создание проекта
- Плагин Kotlin
- Настройка проекта для Kotlin — «первая попытка»
- Из Java файла в Kotlin
- Настройка проекта для Kotlin — «последний шаг»
- Запускаем!
- Репозиторий
- Заключение
Keddit — Part 1: Configuring Android Studio with Kotlin

Juan Ignacio Saravia
Jan 28, 2016 · 6 min read

Content
Part 1: Configuring Android Studio with Kotlin
In this Part we are going to configure an Android Studio project to use Kotlin and leave everything prepared for the next story to start developing the Keddit App from the beginning and learning some Kotlin concepts.
If you missed the first part of these Stories you can go to the Introduction just to get a quick overview of what we are going to be developing, which Kotlin topics are going to be covered and also which libraries are going to be used.
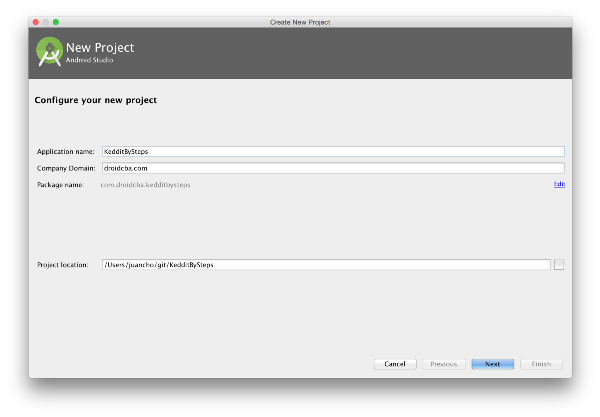
Create Project
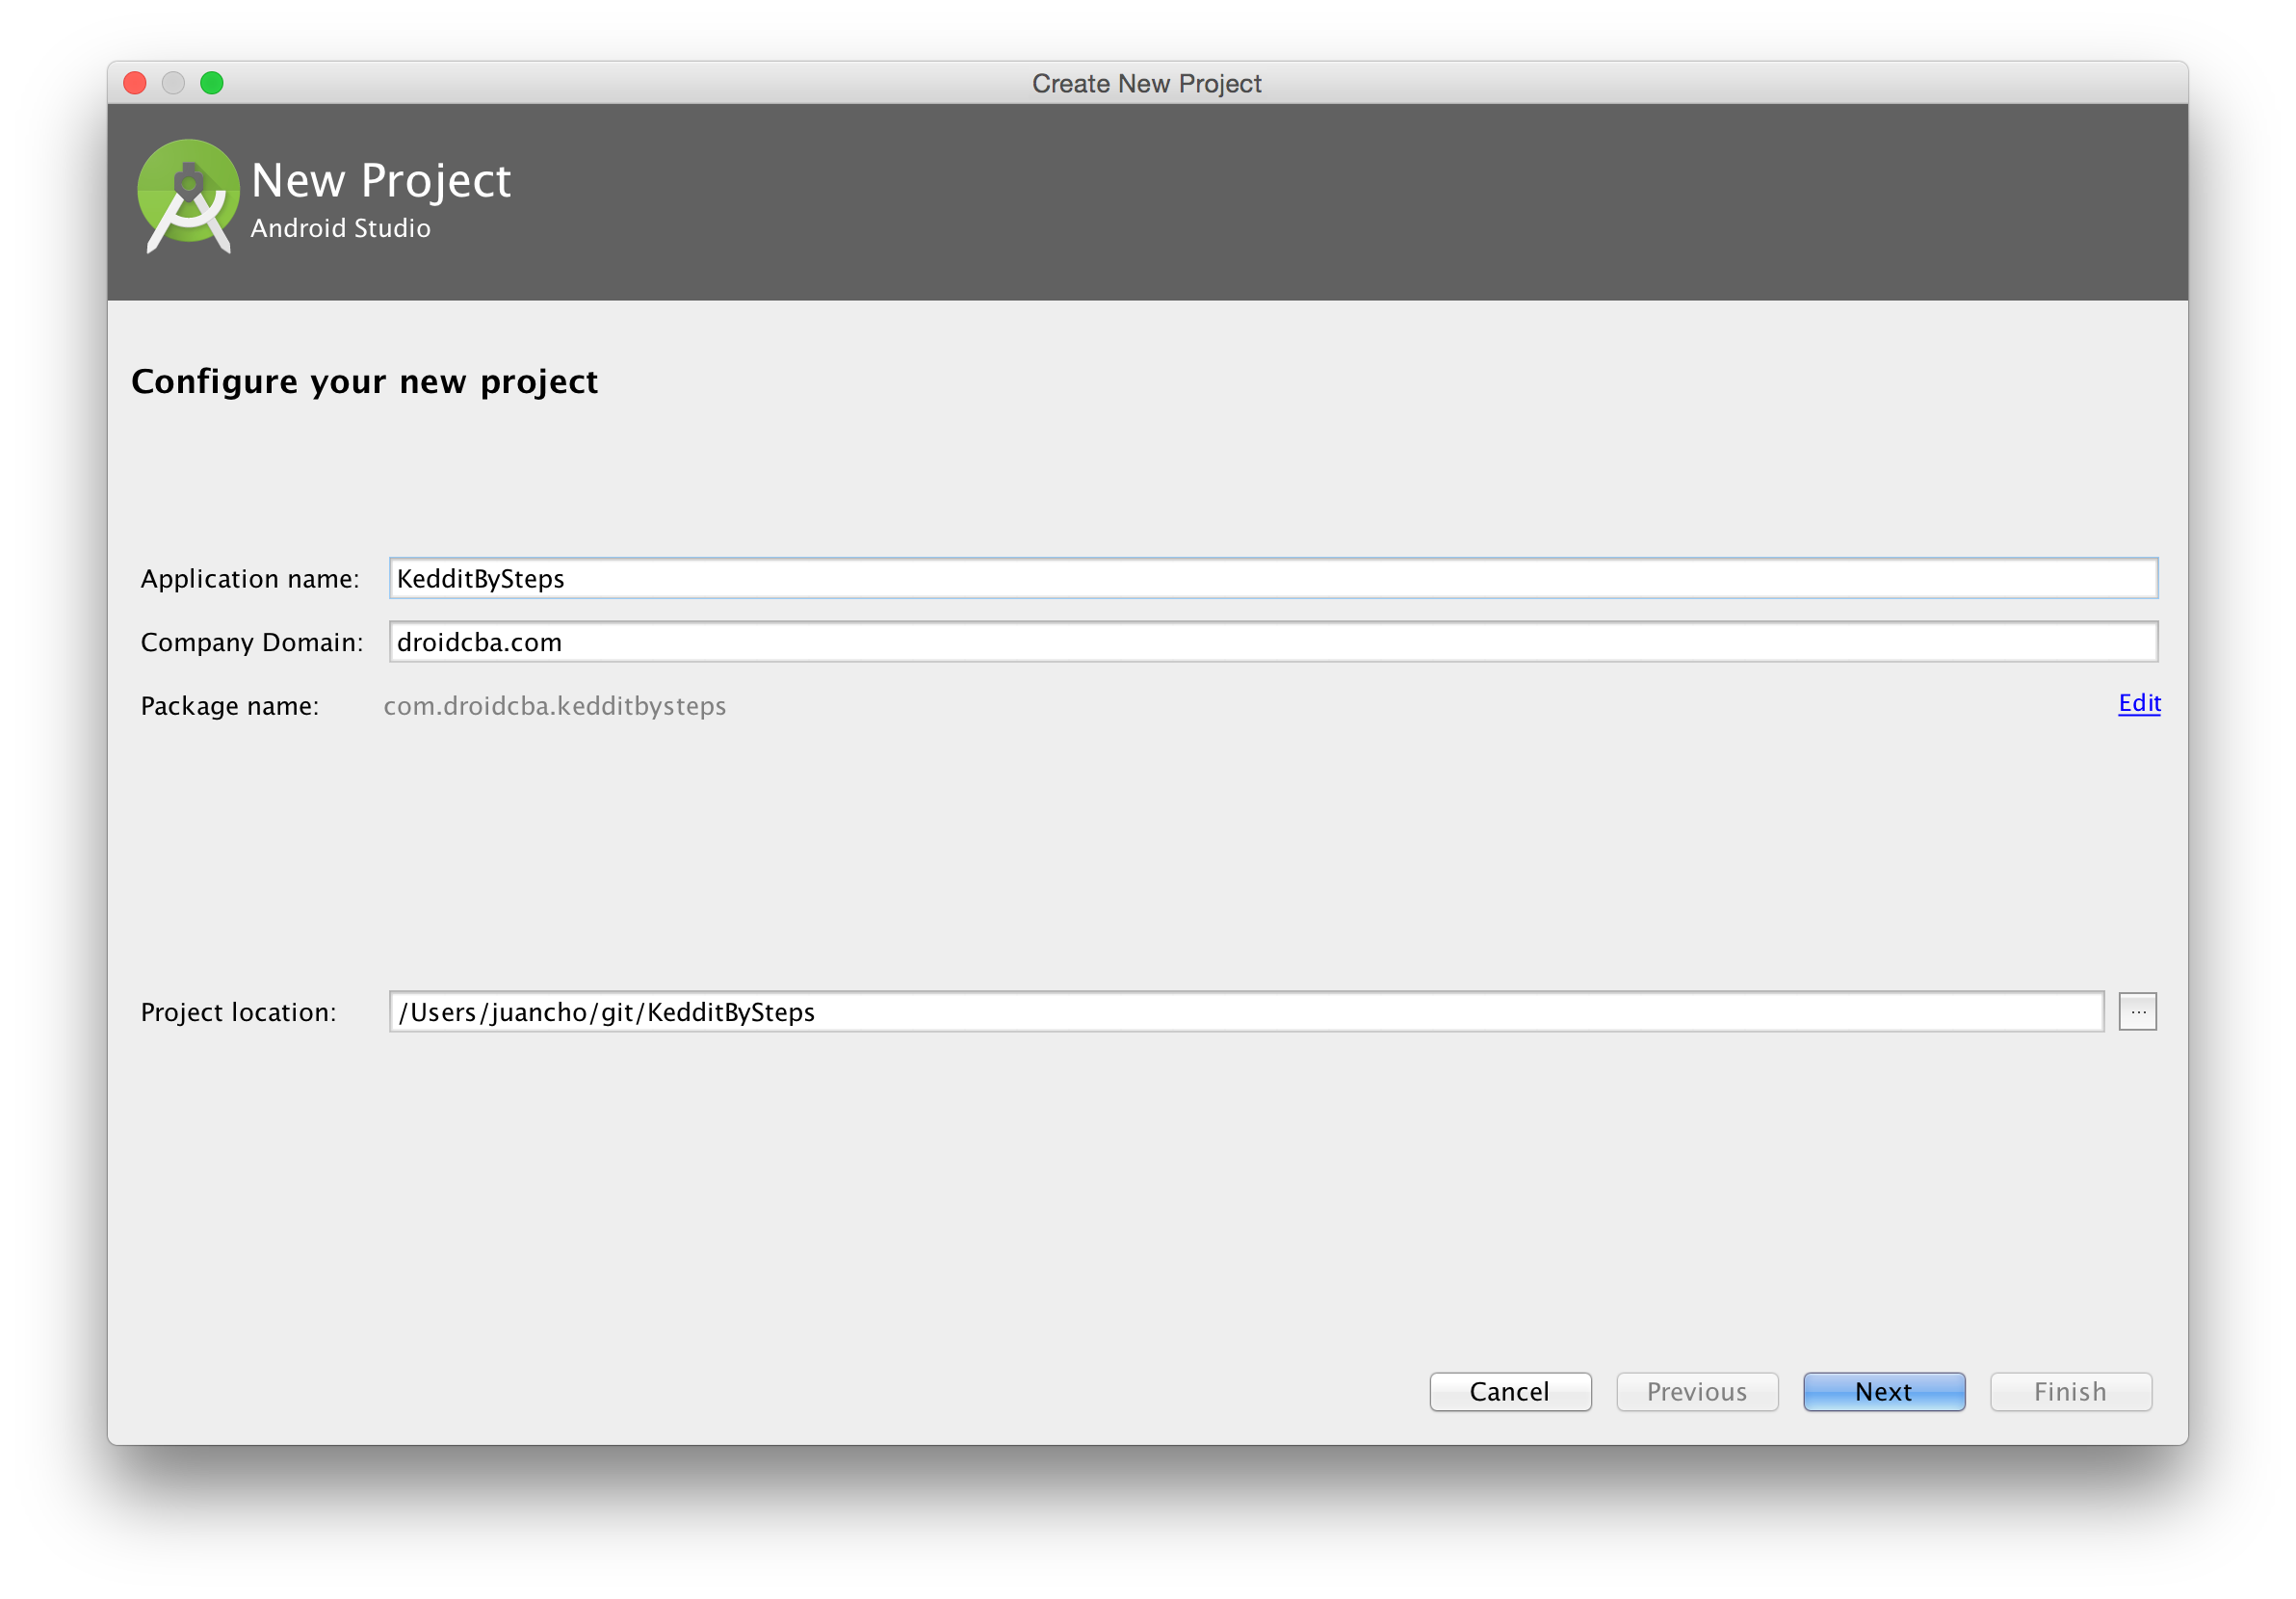
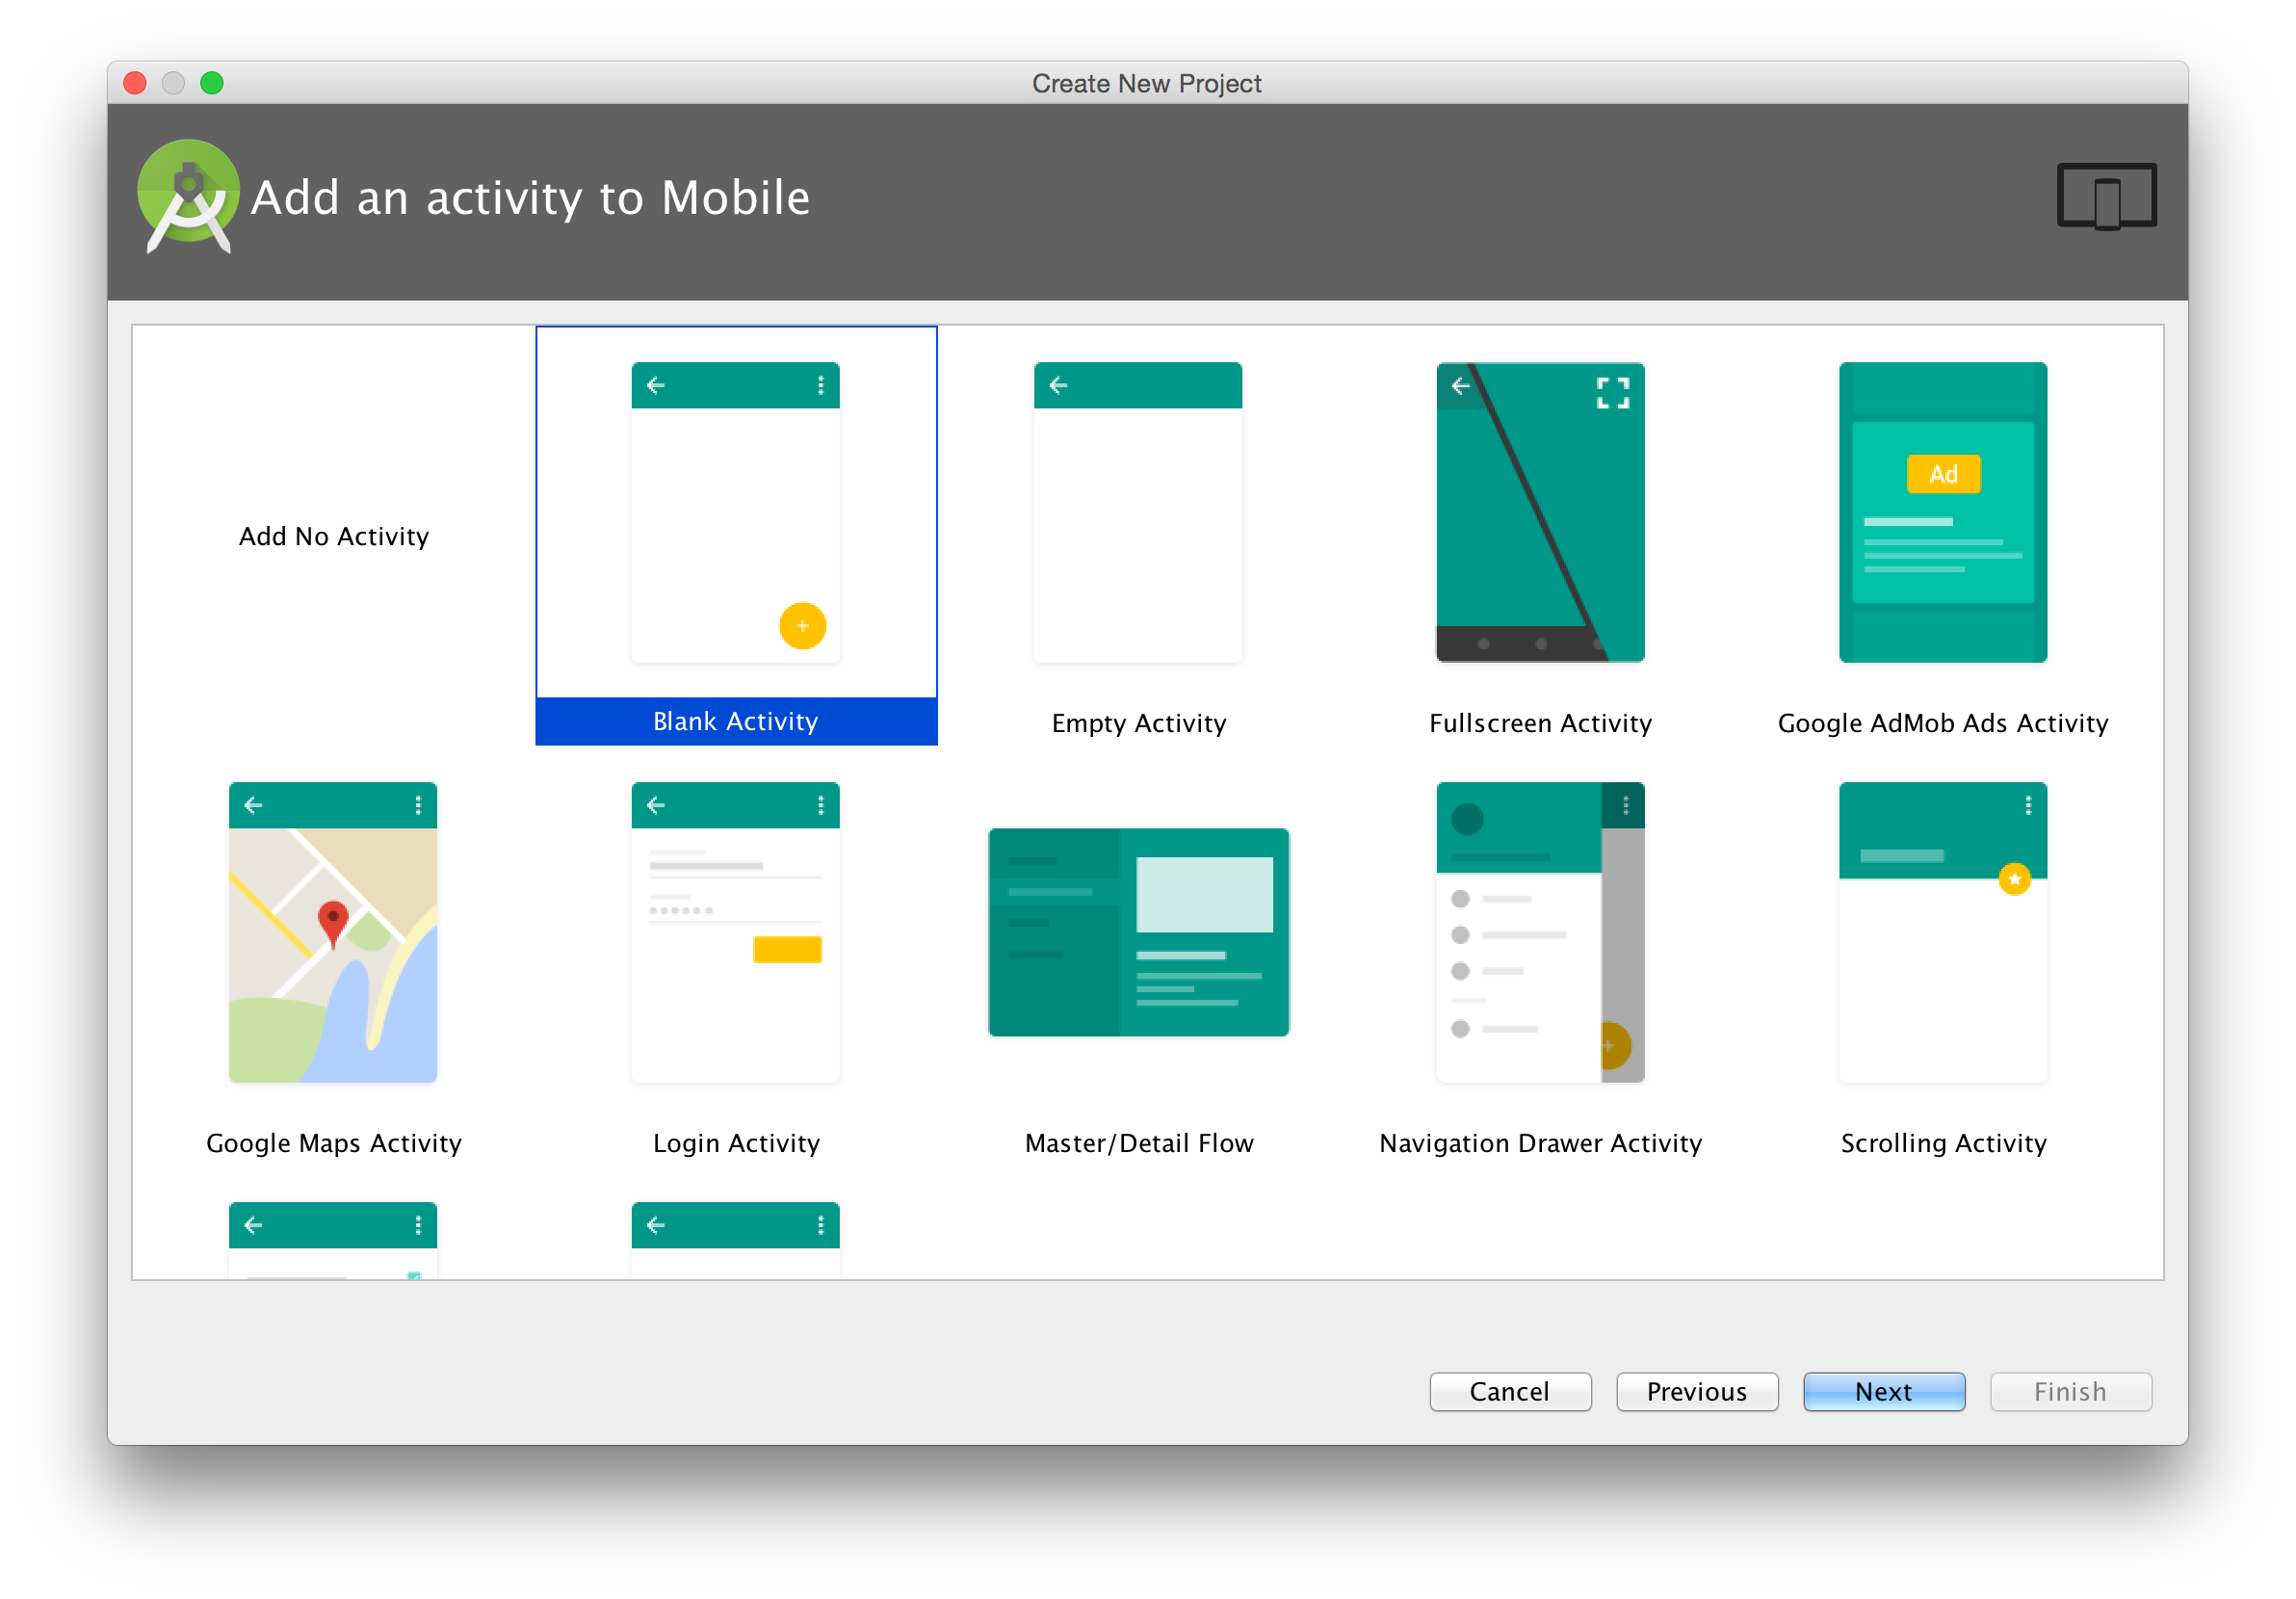
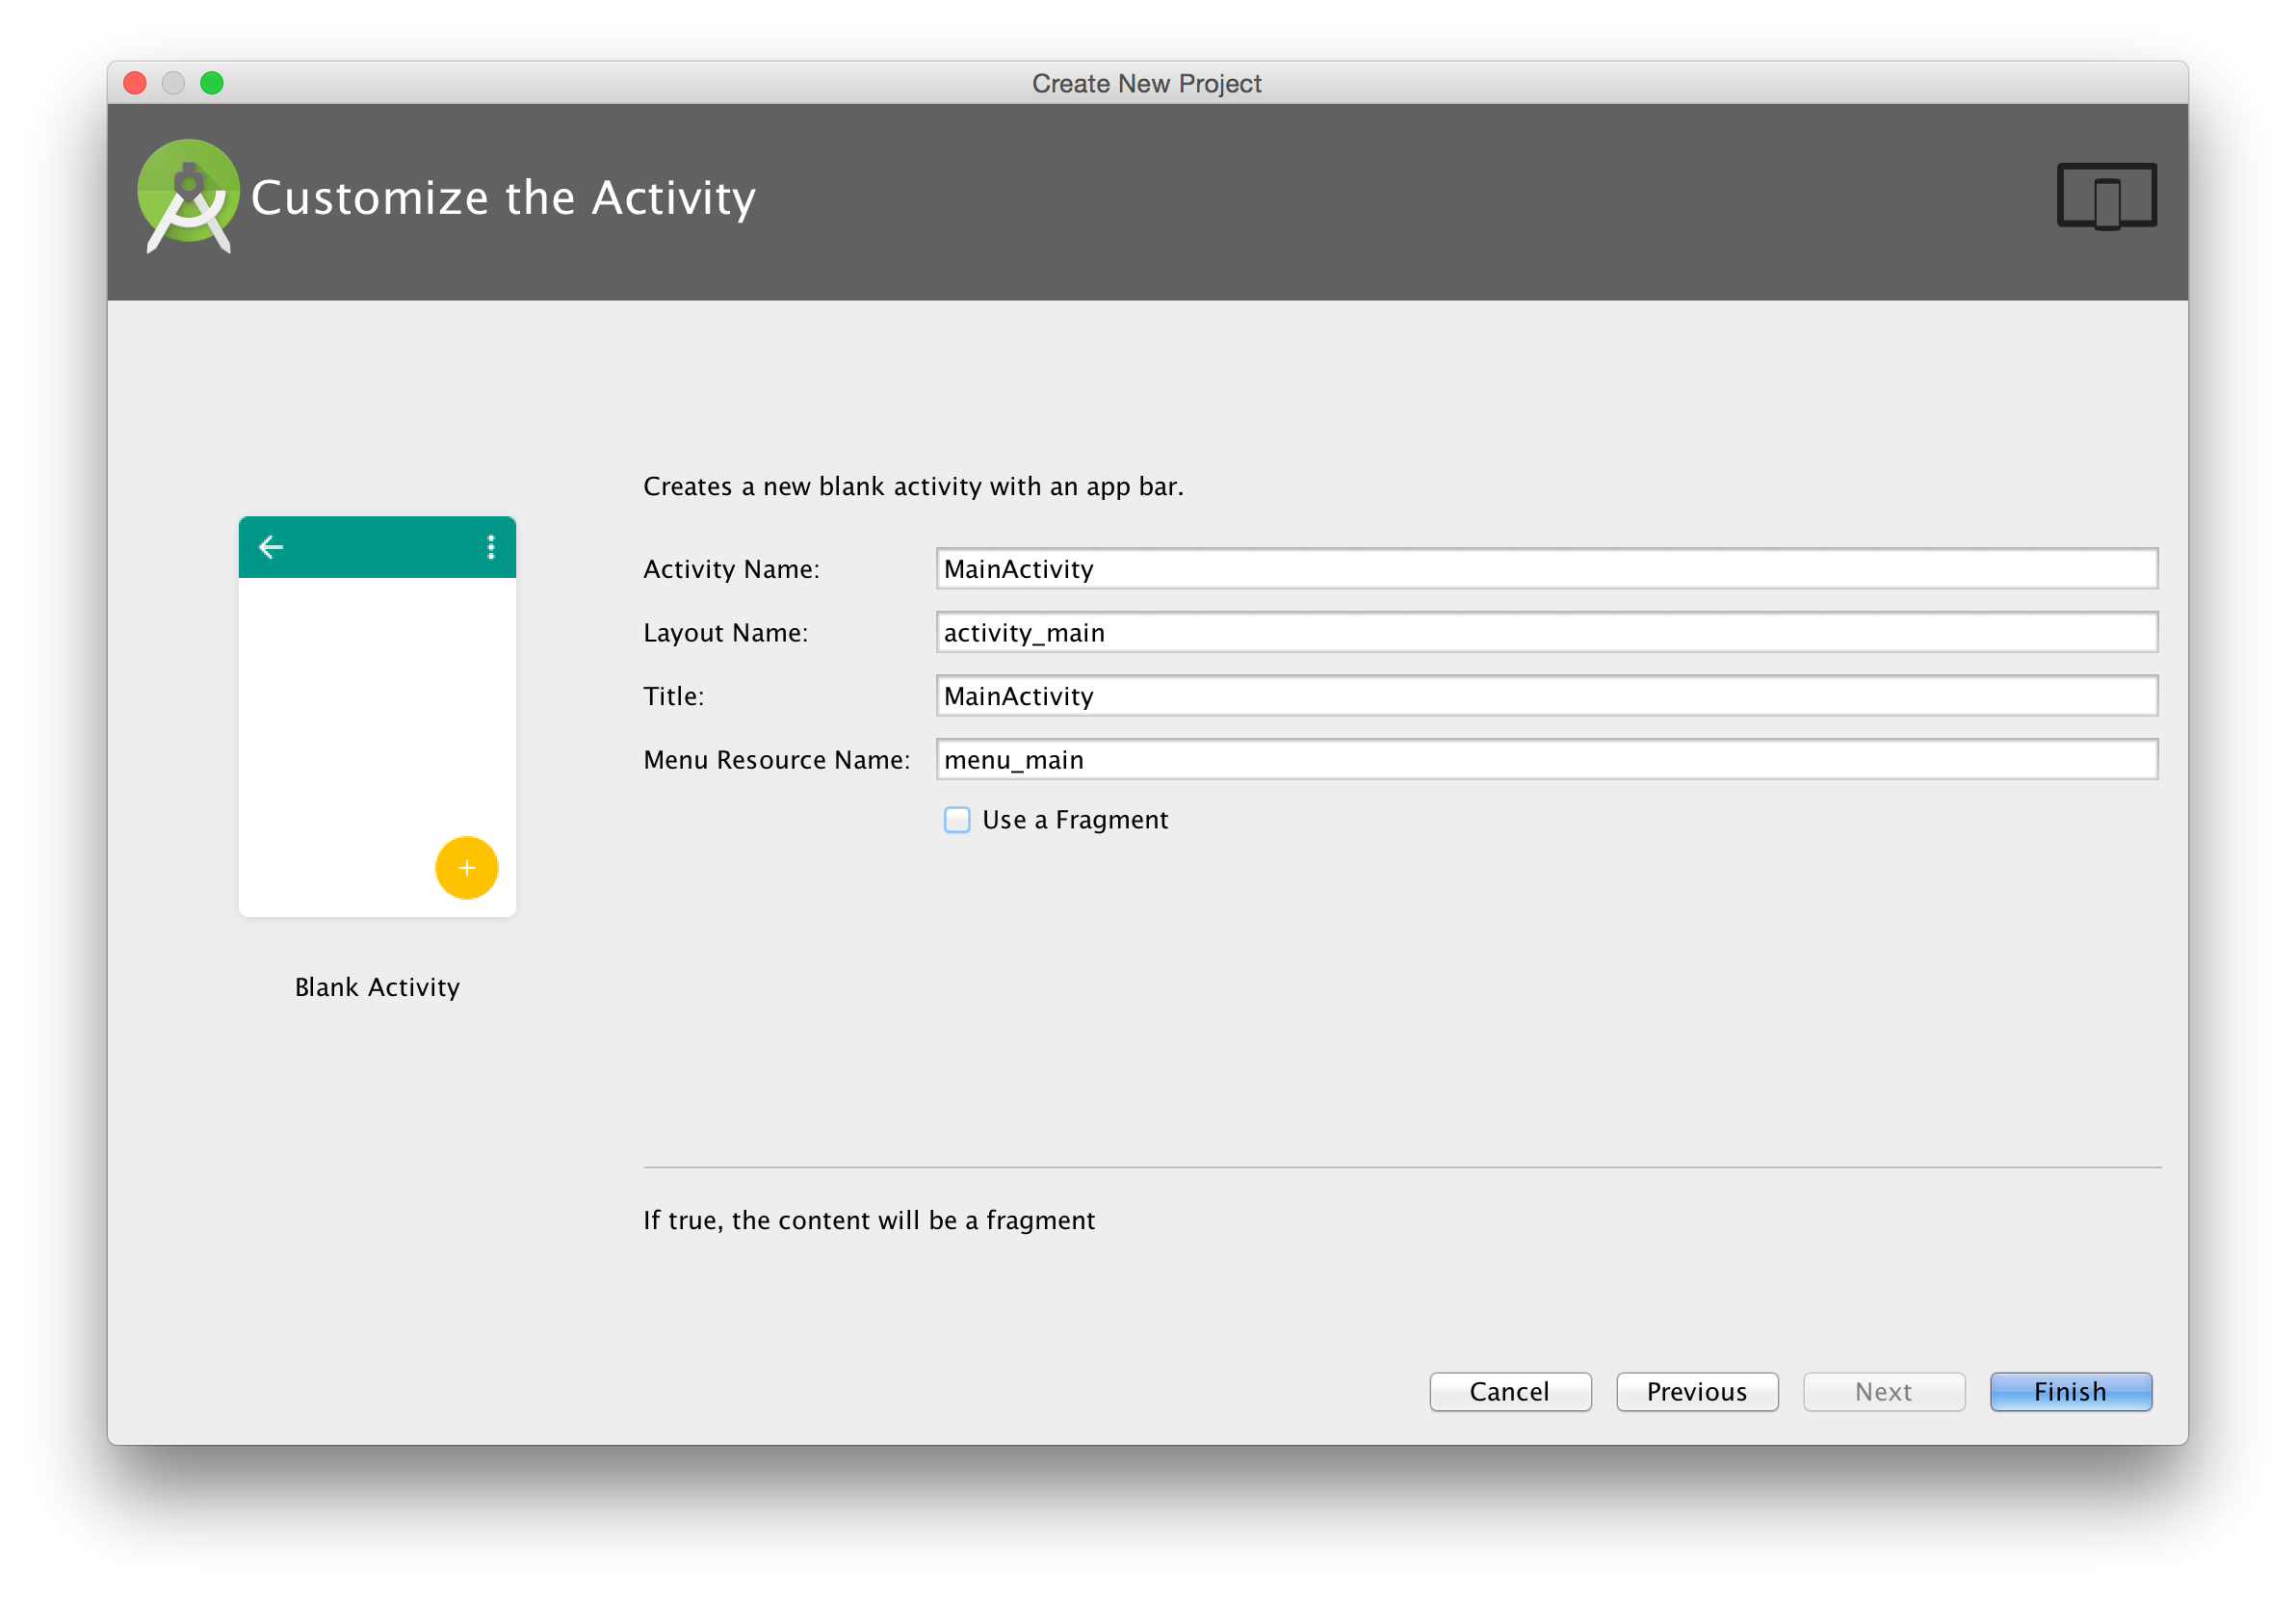
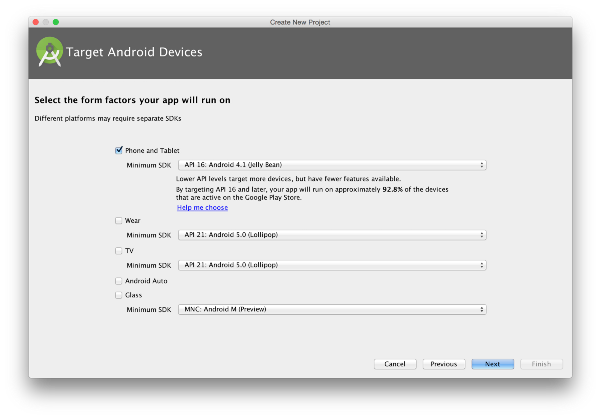
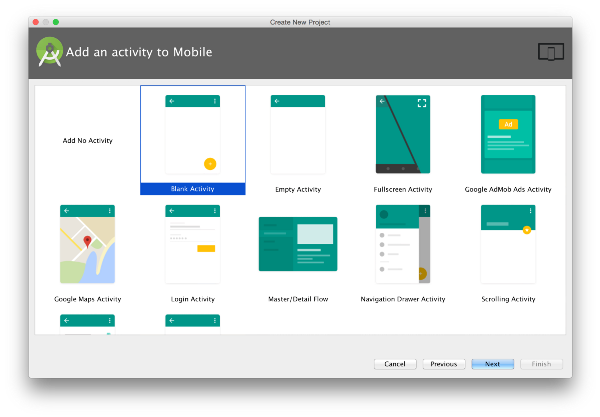
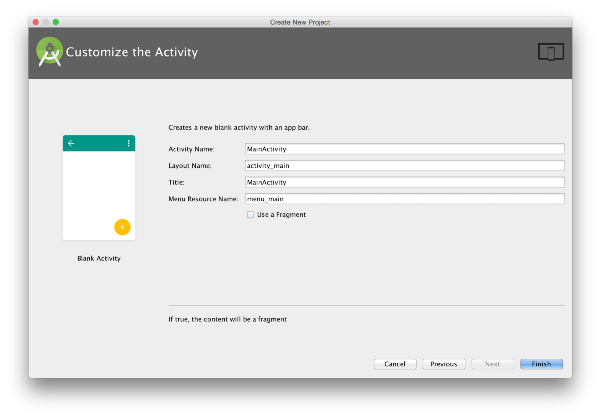
We are going to s t art from scratch, launch Android Studio and create a new Project, I’ll name it “ KedditBySteps” and select “ Blank Activity”.
Note: In AS 3.x these preview images change a little bit but still helps to understand which options we are going to use.

Android Studio 3.x
In Android Studio 3.0 the plugin is already built-in there and while creating the new project you just have to make sure to check “ Include Kotlin support” and the complete project will just support Kotlin from the beginning without requiring you any extra steps:

If you are using AS 3.x then you just can skip the following configuration and just jump to “ Repository” section.
Android Studio 2.x
Kotlin Plugin
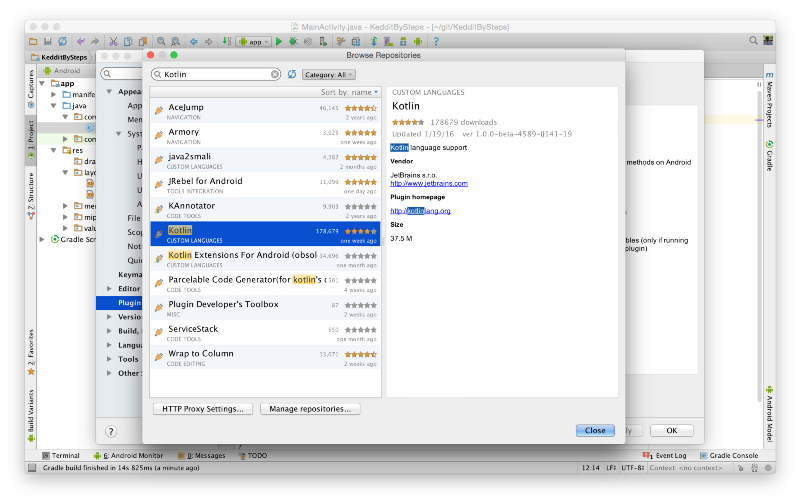
Ok we have a new Project, let’s install the required Plugin for Kotlin. Go to:
Android Studio Pref > Plugins > Browse Repositories > search for “Kotlin”
Install only the Plugin called “Kotlin” and restart Android Studio.

There are other Kotlin plugins but we only need this one as the Kotlin Extensions Plugin was already integrated in the first plugin so we are OK with this one.
N̶o̶t̶e̶:̶ ̶I̶f̶ ̶y̶o̶u̶ ̶a̶r̶e̶ ̶u̶s̶i̶n̶g̶ ̶A̶n̶d̶r̶o̶i̶d̶ ̶S̶t̶u̶d̶i̶o̶ ̶2̶.̶0̶ ̶P̶r̶e̶v̶i̶e̶w̶,̶ ̶e̶x̶p̶e̶c̶t̶ ̶s̶o̶m̶e̶ ̶w̶e̶i̶r̶ ̶b̶e̶h̶a̶v̶i̶o̶u̶r̶s̶ ̶i̶n̶ ̶t̶h̶e̶ ̶P̶l̶u̶g̶i̶n̶,̶ ̶a̶l̶s̶o̶ ̶i̶n̶ ̶s̶o̶m̶e̶ ̶s̶i̶t̶u̶a̶t̶i̶o̶n̶s̶ ̶i̶t̶ ̶s̶t̶o̶p̶ ̶w̶o̶r̶k̶i̶n̶g̶,̶ ̶s̶o̶ ̶f̶o̶r̶ ̶n̶o̶w̶ ̶I̶ ̶s̶u̶g̶g̶e̶s̶t̶ ̶y̶o̶u̶ ̶t̶o̶ ̶u̶s̶e̶ ̶1̶.̶5̶ ̶v̶e̶r̶s̶i̶o̶n̶ ̶a̶s̶ ̶i̶t̶’̶s̶ ̶w̶o̶r̶k̶i̶n̶g̶ ̶a̶s̶ ̶e̶x̶p̶e̶c̶t̶e̶d̶.̶
Note Updated: Now you can use Android Studio 2.0 that was released with the Kotlin Plugin.
Configure Project with Kotlin — “first attempt”
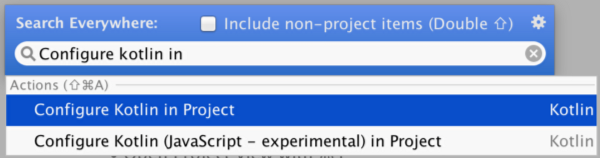
If you already read something on how to configure Kotlin, maybe you feel tempted to execute the plugin action to “ Configure Kotlin in Project” which is accessible from Tools > Kotlin or by Android Studio Find Actions (pressing Shift button twice) and searching for “Configure Kotlin…” like in this image:
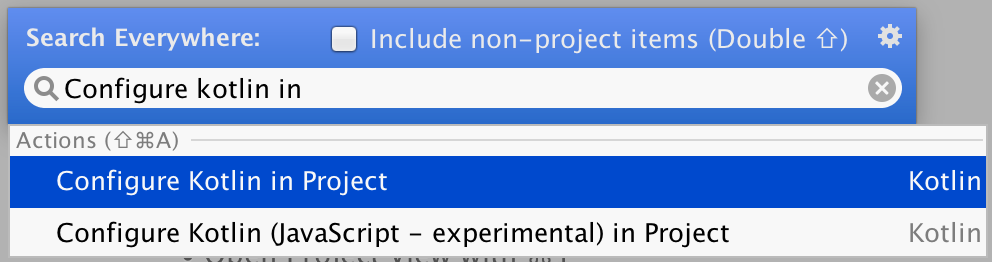

If you do this, you will notice that nothing happens. The only thing that you will see is a message that all modules with Kotlin files were configured.
And that’s why nothing happens because we don’t have any Kotlin file in our project so the Plugin didn’t configure our project. So let’s create a Kotlin file and configure this project again.
From Java to Kotlin file
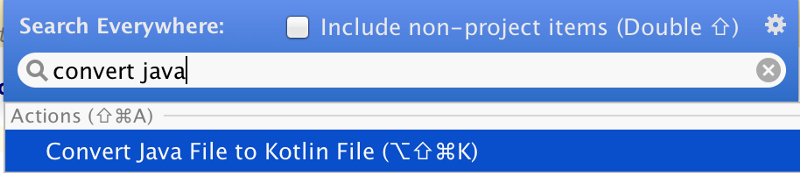
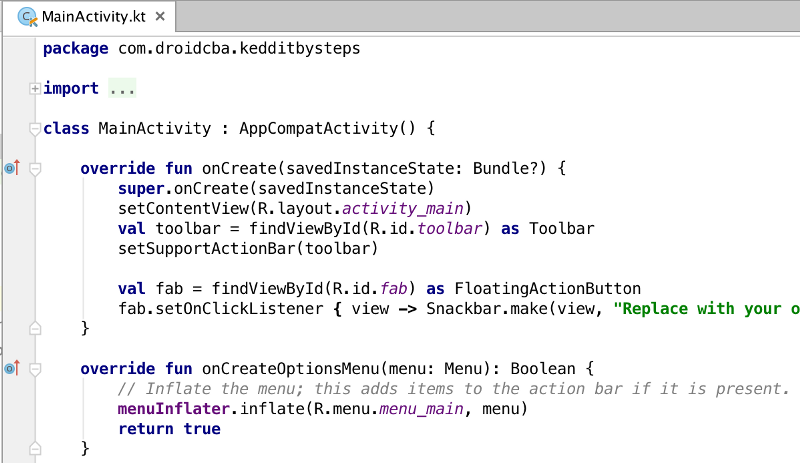
In order to have a Kotlin file we are going to convert our already created MainActivity.java file into a Kotlin file. In order to do that just open the MainActivity.java file and open Find Action and start searching “Convert Java to…”

A message will warn us that maybe the conversion is not accurate and required some manual modifications but we are fine for now with this.
You will see something like this:

Right now we are not going to review this file (this will be in the next Post) so we can continue configuring this. Also for sure you notice the extension name of our new Kotlin file which is “.kt”.
Configure Project with Kotlin — “Last one :)”
Now we are ready to configure it. Let’s run again the “ Configure Project with Kotlin” action:

A new message will appear allowing us to select which modules we would like to convert and also the Kotlin plugin version that we want to use (just pick the latest one in this case).
You will notice that the build.gradle file from your module was updated. It will have new configurations like this:
At the beginning you had to do this manually but now with the Plugin this is really easy.
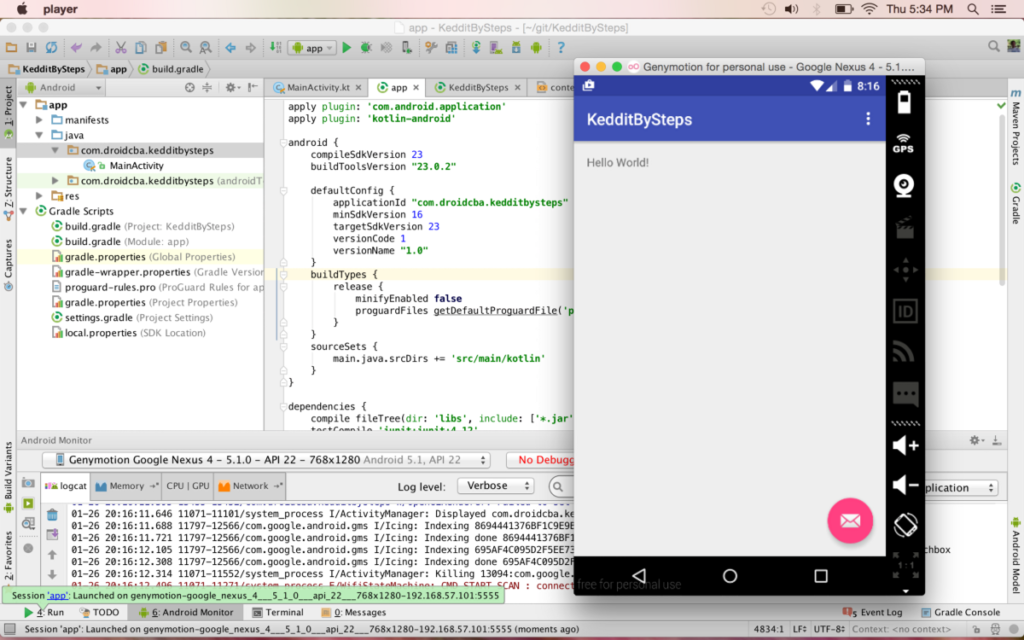
Run, run, run!
Everything is ready to run this App and using our new MainActivity.kt Kotlin file 🙂

Repository
Here you have the code that we developed in this Part, also it was tagged with the tag name “v0.1” which identify the Part1 of this tutorial.
Conclusion
As you can see, it’s really easy to configure an Android Studio project with Kotlin, we only need a Kotlin file in the module in order to configure it with the Plugin.
With this new project we are ready to start developing the Keddit App but most important to start learning some Kotlin concepts.
Please, if you find something to improve or any suggestion, don’t hesitate to contact me, I’ll try to do my best to answer any question or improve this tutorial.
Источник
How to Set Up Android Studio for Kotlin Development
Kotlin has many benefits, including an IntelliJ/Android Studio Plugin. Adding the plugin to a new Android project and converting your code from Java to Kotlin is easy.
Join the DZone community and get the full member experience.
If you have been following the latest trends in the AndroidDev world, you are likely to have heard about Kotlin.
Kotlin is a (not so) new programming language developed by JetBrains, the makers of IntelliJ IDE that the Android Studio is based on. Kotlin is statically typed, it runs on the JVM, and it offers a lot of benefits. There are tons of articles that talk about the advantages of Kotlin in comparison to Java, so I won’t be covering that in this post.
In this post, however, we will learn how to set up Android Studio for Kotlin development and will write our “Hello World” app in Kotlin.
Let’s get started!
Install Kotlin Plugin for Android Studio
The good people at JetBrains have created an IntelliJ/Android Studio Plugin for Kotlin. First, we’re going to go ahead and install the plugin.
To do this, navigate to Preferences > Plugins > Browse Repositories, search for Kotlin, and click Install, as shown in the figure below.

When the install is complete, you will need to restart Android Studio to apply the new plugin.
Just in case you’re using IntelliJ IDEA 15 or above, you’re in luck. Koltin plugin ships with the IDE.
Create a New Android Project
Now that we have the plugin installed, let’s go ahead and create a new Android project the usual way we would. Navigate to File > New > New Project and follow through the project creation wizard. Select the Create Empty Activity option at the end.
For more information on creating an Android project, check out this guide.
Apply Kotlin Plugin to the Project
The next step is to apply the Kotlin plugin to the project. There is an automated tool to do this but sometimes, the tool messes things up, so let’s just walk through the manual process of applying the plugin in our build.gradle files (both at the project level and the app module level).
Add Kotlin Gradle Plugin
To configure the plugin, we first need to add the plugin to the root project’s build.gradle , the same way it’s done for the Gradle plugin (automatically). Add the plugin to the dependencies closure in the project build.gradle file. The project build.gradle file looks like this:
A few notes about the block of code above:
- We created a variable ext.kotlin_version . The reason we have this is we may have other places in the project where we need to reference the Kotlin version, so it makes sense to “externalize” that value. You can check out this post about externalizing your dependencies versions using gradle extra properties for more info.
- We placed this variable in the buildscript closure. This is because the buildscript is the entry point into this file when the project is being built. If we place the variable outside this closure, this variable won’t be available before the project is built, and the build will fail.
Apply the Kotlin Android Plugin
After adding the Kotlin Gradle plugin, the next step is to apply the plugin. To do this, we need to add apply plugin: kotlin-android to the app-module’s build.gradle file:
Convert Activity Code from Java to Kotlin
We’ve applied the plugin and setup all we need to, but our “Empty Activity” generated code is still in Java.
Luckily for us, the Kotlin plugin can help us convert our code from Java to Kotlin.
Currently, our Java Activity looks like this:

To do this, select the file and navigate to Code > Convert Java File to Kotlin File, or use the shortcut Command + Alt + Shift + K (I believe you can replace Command with Control if you’re on a PC).
After converting our code to Kotlin, our “Empty Activity” looks like this:

Bonus: Staying Up-to-Date With Kotlin Versions
You’ve made it this far — let’s add a bonus tip!
Kotlin is still heavily being worked on, and there are (frequent) fixes and updates. It’s generally a good idea to stay up to date with the new features and changes in the language. The Kotlin Android Studio plugin helps us manage the versions of Kotlin. If you navigate to Tools > Kotlin > Configure Kotlin Plugin Updates as shown in the screenshots below, you will be able to select the update channel — Stable , Early Access Preview — 1.0.x , or Early Access Preview — 1.1 — which is currently the bleeding edge version.

Further Reading
There are a number of great resources scattered around the internet for learning Kotlin. Some of them are:
In future posts, I’ll be writing about some specific features of the language.
Thanks for reading this post. I am always open to questions and comments. If you have any, kindly drop them in the comments section below or send me a tweet.
If you found this post useful, or know someone that may find it useful, please feel free to share. Thank you!
Источник
Keddit — Часть 1: Настройка Android Studio для Kotlin

В этой части мы настроим проект Android Studio для использования Кotlin и подготовим все остальное для следующей части, чтобы уже начать разрабатывать приложение Keddit и изучить некоторые концепции Kotlin.
Если Вы пропустили вводную часть вы можете по ссылке Введение, чтобы быстро ознакомиться чем мы будем заниматься, темы которые мы затронем и какие библиотеками воспользуемся.
Создание проекта
МЫ начнем с самого начала, запустите Android Studio и создайте новый проект. Я назвал приложение «KedditBySteps».
Выберите уровень API 16 и шаблон «Blank Activity» и просто оставьте имя активити по умолчанию.
Плагин Kotlin
И так мы создали новый проект, давайте сейчас установим необходимый нам плагин:
File > Settinngs > Plugins > Browse Repositories > в поисковой строке введите «Kotlin» > установите плагин.
Обращаю ваше внимание, если вы уже используете версию Android Studio 2.0, то в нем уже встроен этот плагин. Также отключите функцию “мгновенный запуск”.
Настройка проекта для Kotlin — «первая попытка»
Если вы уже прочитали о том как настроить Kotlin, то возможно, Вы уже хотите использовать его в своем проекте. Перейдите Tools > Kotlin > Configure in Project или нажав два раза кнопку Shift и введя в появившейся поисковой строке «Configure Kotlin…», как на изображении ниже:
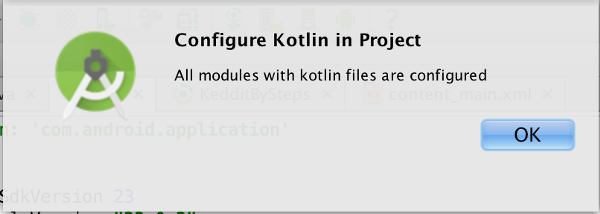
Если вы сделали это, то вы наверняка обратите внимание на то, что ничего не произошло. Единственное, что вы увидите сообщение, что все модули с файлами Kotlin были настроены. Ничего не произошло потому, что у нас нет файлов Kotlin в нашем проекте. Давайте создадим Kotlin-файл.
Из Java файла в Kotlin
Для того, чтобы у нас был файл Kotlin мы преобразуем уже существующий java файл MainActivity.java в Kotlin файл. Для этого просто откройте файл MainActivity.java и откройте поисковую строку (двойным нажатием Shift) и введите строку «Convert Java to…»:
Сообщение предупредит нас, что преобразование может быть не точным и требует ручной модификации, но не беспокойтесь. Вы увидите что-то наподобие этого:
Мы пока не будем анализировать этот код, мы сделаем это в следующей части, просто продолжим настраивать наш проект. Еще вы можете заметить, что расширения нашего файла «.kt».
Настройка проекта для Kotlin — «последний шаг»
Теперь мы готовы полностью настроить наш проект. Давайте снова запустим поисковую строку и введем «Configure Project with Kotlin». (прим. от переводчика: или нажмите сверху над кодом на надпиcь Configure).
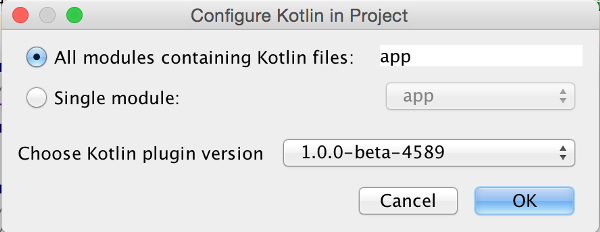
Появится новое диалоговое окно, в котором мы можем выбрать модули, которые мы хотели бы конвертировать, а также версии плагинов Kotlin (просто выбери последний).
Далее, когда вы нажмете на кнопку ОК вы увидите файл build.gradle. В нем будут новые конфигурации:
Запускаем!
Все готово для запуска приложения:
Репозиторий
Вы можете скачать и посмотреть на исходный код, отмеченный как v.01:
Заключение
Как Вы уже заметили это реально очень просто настроить проект Android Studio для Kotlin, нам нужен только файл Kotlin в модуле для того, чтобы настроить плагин.
С этого нового проекта мы готовы начать разработку приложения Keddit и самое главное это изучить основные концепции Kotlin.
Источник


