- Android studio circle image
- How to Create CircleImageView using hdodenhof in Android App
- What is CircleImageView?
- Limitations of CircleImageView
- Step 1: Create a new Project
- Step 2: Adding the CircleImageView dependency
- Step 3: Modify activity_main.xml
- CircleImageView Attributes:
- Step 4: MainActivity.java file
- Output:
- Conclusion:
- Android Studio How To Create Circular ImageView
- 6 thoughts on “Android Studio How To Create Circular ImageView”
- Android Shape Drawables Tutorial
- Have you ever wanted to reduce your Android application’s size or make it look more interesting? If yes, then you should try out ShapeDrawables.
- Why should you use ShapeDrawables?
- Are there any disadvantages?
- Let’s start coding
- Create a simple gradient ShapeDrawable in XML
- How to Create Circle Image View using CardView in Android App
- Step 1: Create a new Project
- Step 2: Adding the CircleImageView dependency
- Step 3: Modify activity_main.xml
- Android CardView Attributes:
- Step 4: MainActivity.java file
- Output:
- Conclusion:
Android studio circle image


![]()
![]()

![]()
This is an Android project allowing to realize a circular ImageView in the simplest way possible.

To make a circular ImageView add CircularImageView in your layout XML and add CircularImageView library in your project or you can also grab it via Gradle:
You must use the following properties in your XML to change your CircularImageView.
| Properties | Type | Default |
|---|---|---|
| app:civ_circle_color | color | WHITE |
| app:civ_circle_color_start | color | civ_circle_color |
| app:civ_circle_color_end | color | civ_circle_color |
| app:civ_color_direction | left_to_right, right_to_left, top_to_bottom or bottom_to_top | left_to_right |
| app:civ_border | boolean | true |
| app:civ_border_width | dimension | 4dp |
| app:civ_border_color | color | WHITE |
| app:civ_border_color_start | color | civ_border_color |
| app:civ_border_color_end | color | civ_border_color |
| app:civ_border_color_direction | left_to_right, right_to_left, top_to_bottom or bottom_to_top | left_to_right |
| app:civ_shadow | boolean | false |
| app:civ_shadow_color | color | BLACK |
| app:civ_shadow_radius | dimension | 8dp |
| app:civ_shadow_gravity | center, top, bottom, start or end | bottom |
ℹ️ You can also use android:elevation instead of app:civ_shadow to have default Material Design elevation.
Источник
How to Create CircleImageView using hdodenhof in Android App
LAST UPDATED: AUGUST 18, 2021
We have seen the circular image view in many apps such as Facebook, Instagram, YouTube, WhatsApp, Google, Gmail, etc. It is mainly used to show the profile picture of the user or display stories or status and at many other places. A circular image will make the UI of your Android app more beautiful and interactive.
What is CircleImageView?
It is mainly used for creating the circular profile picture in your android app but it is not limited to that. You can use it according to your needs in your app. CircleImageView is based on the RoundedImageView from Vince Mi which itself is based on techniques recommended by Romain Guy with some changes and advancements.
It uses a BitmapShader and,
create the copy of the original bitmap
It use a clipPath (which is neither hardware accelerated nor anti-aliased)
It use setXfermode to clip the bitmap (it means drawing twice to the It canvas)
Limitations of CircleImageView
Using the TransitionDrawable with CircleImageView will not work properly and it will leads to messed up images.
The ScaleType of CircleImageView is always CENTER_CROP and if we try to change it we get an exception. So it is perfect for the profile pictures.
Enabling adjustViewBounds is not supported as this requires an unsupported ScaleType
If you use an image loading library like Picasso or Glide, you need to disable their fade animations to avoid messed up images. For Picasso we use the noFade() option and for Glide use dontAnimate() . And if we Iwant to keep the fadeIn animation, firstly we have to fetch the image into a Target and then apply a custom animation ourself when receiving the Bitmap .
So let’s implement a simple CircleImageView in our android app.
Step 1: Create a new Project
Open Your Android Studio Click on «Start a new Android Studio project«(Learn how to setup Android Studio and create your first Android project)
Choose «Empty Activity» from the project template window and click Next
Enter the App Name, Package name, save location, language(Java/Kotlin, we use Java for this tutorial ) and minimum SDK(we are using API 19: Android 4.4 (KitKat) )
Next click on Finish button after filling the above details
Now wait for the project to finish building.
Step 2: Adding the CircleImageView dependency
To show the circular image in our app we also have to implement the hdodenhof CircleImageView in our app, to do so follow the below steps.
Go to Gradle Scripts->build.gradle (Module: app) section and import below dependencies and click the «sync Now» show at the top:
Now our build.gradle file will look like:
Step 3: Modify activity_main.xml
Before applying changes to the activity_main.xml file we need a image which we will show in the circleImageView, so you can download any image and past the image in the app->res->drawable
Now go to app->res->layout->activity_main.xml and add the CircleImageView as shown below:
The complete code of activity_main.xml is show below:
CircleImageView Attributes:
Following are the attributes available in the CircleImageView:
| Attribute | Description |
|---|---|
| It is used to set the width of the border around the circle image view | |
| It is used to set the color of the border around the circle image view | |
| It is used to set the border overy value of the circle image view |
Step 4: MainActivity.java file
There is nothing to do with the MainActivity.java file for this project, so keep it as it is.
Output:
You can download the final apk by clicking the link.
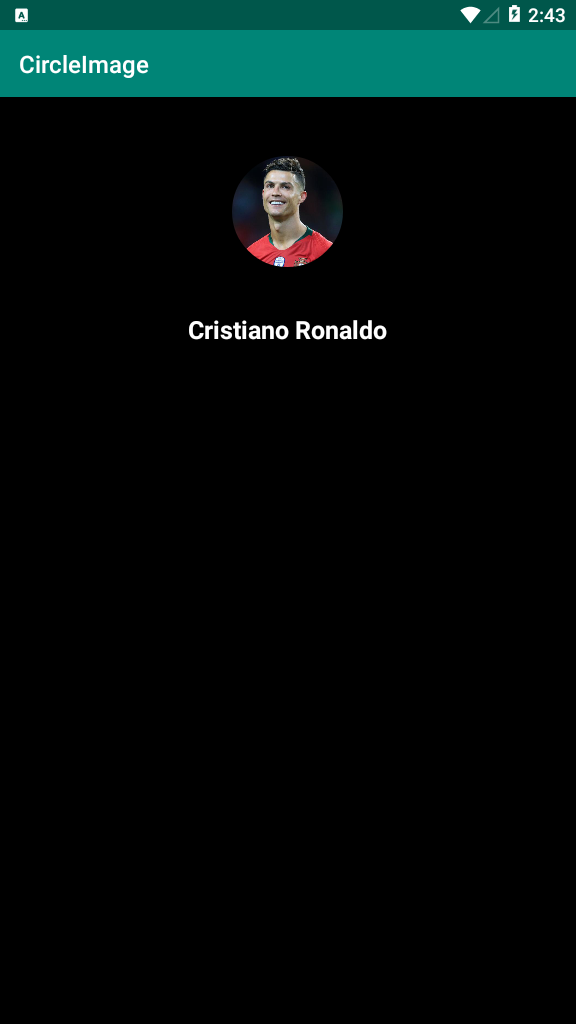
In the below snapshots , you can see how the Circle Image View will look in the android application.

Conclusion:
In just 3 simple steps we have integrated and shown you the basic example for creating a Circle Image View in your android app. If you face any issue while doing this, please share it in the comment section below and we will be happy to help.
Источник
Android Studio How To Create Circular ImageView
In this Android Studio article iam going to show you How To Create Circular ImageView. so for good explanation you can watch the video for this article at the end .
Also you can read more android development articles
Also you can check Python GUI Development Tutorials in the below link.
1: First of all create a new project in your Android Studio, and choose Empty Activity also
iam using API 20 for this project.
2: After that you need to open your build.gradle(module:app) file, and add this library
in the dependencies section.
above is the library that we are using for circular imageview, it is a fast circular ImageView
perfect for profile images. This is based on RoundedImageView from Vince Mi.
It uses a BitmapShader and does not:
- create a copy of the original bitmap
- use a clipPath (which is neither hardware accelerated nor anti-aliased)
- use setXfermode to clip the bitmap (which means drawing twice to the canvas)
as this is just a custom ImageView and not a custom Drawable or a combination of both, it can be used with all kinds of drawables, i.e. a PicassoDrawable from Picasso or other non-standard drawables (needs some testing though).
After adding your build.gradle(module:app) file will look like this.
3: So now open your main_activity.xml file, basically we are going to add our Circular
ImageView library with a TextView in the xml file. also make sure that you have an image
in your drawable folder.
So now run the complete project and this will be the result
 Android Studio How To Create Circular ImageView
Also you can check the complete video for this article
If it was useful, Please share the article
6 thoughts on “Android Studio How To Create Circular ImageView”
deneme mal2 deneme mal2 deneme mal2
mal
Eşya Taşımacılığı Nasıl Yapılır?
Şehirlerarası nakliyat firması olarak eşyalarınızı evinizden ya da ofisinizden alır.
Uygun şekilde ambalajlayarak taşıma işlemini gerçekleştirir.
Bu sırada eşyalarınızda oluşabilecek herhangi bir hasara karşı kaskolu
nakliyat seçeneğini sitemizdeki yer alan firmalar üzerinden değerlendirebilirsiniz.
Şehirlerarası Eşya Taşımacılığı Nasıl Yapılır?
İstanbul şehirlerarası nakliyat firması olarak nakliye araçlarımızı
uygun yapıda seçiyor ve iç kısımları da eşya taşınacak düzeyde ayarlıyoruz.
Şehirlerarası nakliyat İstanbul sizin için eşyalarınızı ambalajlar ve gideceği yer şehir dışında olsa dahi hızlı
bir şekilde transferini sağlar. İşlemlerin sorunsuz yürümesi sizin yıpranmadan taşınma işinin üstesinden gelebilmeniz açısından önemlidir.
Şehirlerarası nakliyat fiyatları politikamız
ekonomik olarak belirlenmiştir. Sizde en iyi hizmeti alabilir ve kısa sürede yeni adresinize huzurlu bir geçiş sağlayabilirsiniz.
I love your blog.. very nice colors & theme. Did you create
this website yourself or did you hire someone to do it for you?
Plz respond as I’m looking to design my own blog
and would like to know where u got this from. cheers
Источник
Android Shape Drawables Tutorial

Nov 3, 2017 · 6 min read

Have you ever wanted to reduce your Android application’s size or make it look more interesting? If yes, then you should try out ShapeDrawables.
First, we will go over the advantages and disadvantages of the ShapeDrawables. Then we will create some Drawables that could be used in your app and lastly for the grand finale we will try to replicate a gradient as can be seen in the Spotify app/website.
Why should you use ShapeDrawables?
When you want to use PNG or JPEG images in your applic a tion, you have to provide multiple copies of the same image for different screen densities. That, of course, clutters your app with copies of the same image. Yes, sometimes that is the path we have to choose because we can’t use Drawables for every single case, but we can dramatically reduce our application’s size if we can use Drawables instead. ShapeDrawables are a series of commands that tell how to draw something on the screen. That is why they can be resized and stretched as much as we want, without losing any quality. We can recolor and manipulate them even when the app is running and use the same ShapeDrawable multiple times in our app. Since ShapeDrawables are a subclass of the Drawable abstract class, we can use them in methods where a Drawable is expected. Click for the documentation of the ShapeDrawable.
Are there any disadvantages?
Of course, just like I have mentioned before we can’t use them in every case. I have said before that ShapeDrawable class is a subclass of the Drawable abstract class. There are other subclasses as well and every one of them has its own use case. You can click here to check other Drawable types and figure out which one is right for your case. Another issue is that they took a bit longer to draw than a Bitmap since there is a lot of parsing and drawing going on behind the scenes. But I think that is not a huge problem if your Drawables are simple.
My opinion is that you should use Drawables (ShapeDrawables) wherever you can, because they are easy to modify and they don’t take much space.
Let’s start coding
First let’s take a look at a simple example and then we will recreate a gradient as can be seen in the Spotify app/website.
Create a simple gradient ShapeDrawable in XML
First create a new drawable resource file.
Right click on res/drawable > New > Drawable resource file > give your file a name > use shape as a root element > click Ok
Shape root element defines that this is a ShapeDrawable.
This is how the first example looks like:
Источник
How to Create Circle Image View using CardView in Android App
LAST UPDATED: AUGUST 26, 2021
We can easily use an Android ImageView to show Image in our App. But what if we want to show a circular image on our App screen, how will we do it? It is not possible to do it using a simple ImageView as it is not made for doing this type of stuffs, so to do so we have to use an external library.
One such external library is the hdodenhof module which provides the hdodenhof CircleImageView using which we can create a simple CircleImageView, but or for this tutorial we will use CardView to create a circular image view our our app in android studio.

So let’s create a simple Circular ImageView using CardView in our android app.
Step 1: Create a new Project
Open Your Android Studio Click on «Start a new Android Studio project«(Learn how to setup Android Studio and create your first Android project)
Choose «Empty Activity» from the project template window and click Next
Enter the App Name, Package name, save location, language(Java/Kotlin, we use Java for this tutorial ) and minimum SDK(we are using API 19: Android 4.4 (KitKat) )
Next click on Finish button after filling the above details
Now wait for the project to finish building.
Step 2: Adding the CircleImageView dependency
To show the circular image in our app we also have to implement the hdodenhof CircleImageView in our app, to do so follow the below steps.
Go to Gradle Scripts -> build.gradle (Module: app) section and import below dependencies and click the «sync Now» shown at the top:
Step 3: Modify activity_main.xml
So before applying any changes to the activity_main.xml file we need an image which we will show in the CircleImageView, so you can download any image and put the image in the app -> res -> drawable and give it a suitable name.
Now go to app -> res -> layout -> activity_main.xml and remove the default code then change the layout to Android RelativeLayout and inside the layout add CardView as shown below:
Now inside the CardView we will add a simple ImageView with following attributes:
android:src=»https://www.studytonight.com/post/@drawable/img» : Where img is the name of the image which we have pasted in the drawable folder.
android:scaleType=»centerCrop» : It means to scale the image uniformly (maintain the image’s aspect ratio) so that both dimensions (width and height) of the image will be equal to or larger than the corresponding dimension of the view (minus padding).
The complete code of activity_main.xml is show below:
Android CardView Attributes:
Following are the few main attributes available in the CardView:
| Attribute | Description |
|---|---|
| android:layout_width | It is used to set the width of the card view |
| android:layout_height | It is used to set the width of the card view |
| app:cardCornerRadius |


