- Install Android Studio on Fedora
- Android Studio
- The IDE for Android
- Details for Android Studio
- Enable snaps on Fedora and install Android Studio
- Enable snapd
- Install Android Studio
- Android studio fedora install
- Start developing Android apps on Fedora in 10 minutes
- Introduce the different Fedora Linux editions
- Use BespokeSynth on Fedora Linux
- Use Diffoscope in packager workflows
- Install needed Dependencies
- Get the SDK
- Update the SDK
- Set up your PATH variable to point at the SDK
- Create the App
- Building your Android app
- Test out your app on a real device
- Test out your app on the emulator
- Further Reading
- Like this:
- Ryan Lerch
- 13 Comments
- Kuehner Joseph
- Ryan Lerch
- How to install Android Studio on Fedora 30?
- Install Android Studio on Fedora 30
- Conclusion
Install Android Studio
on Fedora

Android Studio
The IDE for Android
Android Studio provides the fastest tools for building apps on every type of Android device.
World-class code editing, debugging, performance tooling, a flexible build system, and an instant build/deploy system all allow you to focus on building unique and high quality apps.
This snap is maintained by the Snapcrafters community, and is not necessarily endorsed or officially maintained by the upstream developers.
Details for Android Studio
Enable snaps on Fedora and install Android Studio
Snaps are applications packaged with all their dependencies to run on all popular Linux distributions from a single build. They update automatically and roll back gracefully.
Snaps are discoverable and installable from the Snap Store, an app store with an audience of millions.
Enable snapd
Snap can be installed on Fedora from the command line:
Either log out and back in again, or restart your system, to ensure snap’s paths are updated correctly.
To enable classic snap support, enter the following to create a symbolic link between /var/lib/snapd/snap and /snap :
Install Android Studio
To install Android Studio, simply use the following command:
Источник
Android studio fedora install
Copy raw contents
Copy raw contents
If you run a 64 bit system, in a terminal window do this sudo dnf install zlib-devel.i686 ncurses-devel.i686 ant
Install libs for mksdcard SDK Tool sudo dnf install compat-libstdc++-296.i686 compat-libstdc++-33.i686 compat-libstdc++-33.x86_64 glibc.i686 glibc-devel.i686 libstdc++.i686 libX11-devel.i686 libXrender.i686 libXrandr.i686
Install Java development tools sudo dnf install java-1.8.0-openjdk-devel.x86_64
Download the Android Studio package from http://developer.android.com/sdk/index.html
Extract the package (it’s ok also the Downloads folder) and relocate the Android Studio folder mv /home/yourUserName/Downloads/android-studio /opt
Make symbolic lynk for a quick launch
- Using command line
- ln -s /opt/android-studio/bin/studio.sh /usr/local/bin/asb
- exit
- Using Android Studio (see quick-launch_via_Android_Studio.png)
- Run Andorid Studio with ./opt/android-studio/bin/studio.sh
- Menu > Tools > Create Command-line Launcher.
- Name: asb
- Path: /usr/local/bin
- Click OK
- Using Alacarte (sudo dnf install alacarte)
- New item under Programming
- Browse to /opt/android-studio/bin/studio.sh
- Browse icon to /opt/android-studio/bin/studio.png
Check Java environment
- echo $JAVA_HOME If it isn’t /usr/lib/jvm/default-java, type:
- export JAVA_HOME=/usr/lib/jvm/default-java
Run Android Studio and enjoy it
- Typing asb in terminal
- Using Android Studio icon in launcher
Источник
Start developing Android apps on Fedora in 10 minutes

photo CC-BY http://photos.jdhancock.com/photo/2011-08-16-215426-powered-by-android.html

Introduce the different Fedora Linux editions

Use BespokeSynth on Fedora Linux

Use Diffoscope in packager workflows
Android is one of the most popular mobile operating systems (and it is based on the Linux kernel too.) However, diving into developing apps for Android can appear to be a bit daunting at first. The following how-to runs you through the basics of setting up an Android development environment on your Fedora machine. The basic workflow is to download the Android SDK, use the SDK to generate a quick first “hello world” application, then test out that application with either a physical Android device or the Android emulator.
Let’s get started!
Photo by JD Hancock (CC-BY) http://bit.ly/1oGTI7I
Install needed Dependencies
First up we need to install a few packages from the Fedora Repos to make sure everything works correctly. To install these packages, run the command:
Note that the 32bit libraries in the command above are needed even if you have a 64bit install of Fedora.
Get the SDK
Now we need to create a new directory in your home directory to contain the Android SDK and your first project. I decided to name mine android-development :
Now, go to the Android SDK Download page and Download the SDK for Linux. Note that there are two types of download offered on the Android Download page, in this example we are after the SDK Tools Only option, not the ADT Bundle.
After downloading, unpack the bundle into the android-development/ directory.
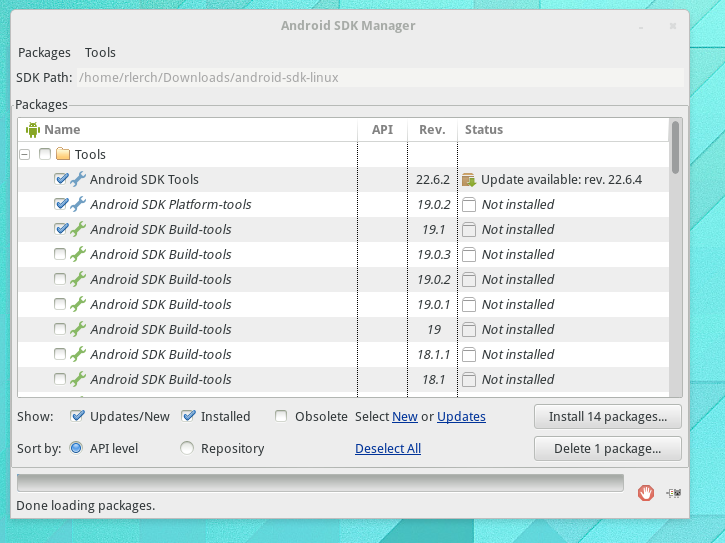
Update the SDK
Now that you have the SDK you will need to update it. To do this, we need to go to the tools directory in the SDK, and then run the Android SDK Manager:
The Android SDK Manager will appear, and will prompt you to install a number of updates. It will install them directly into the android-sdk-linux/ directory.
Set up your PATH variable to point at the SDK
Next up, we need to configure your path variable to point at a couple of directories in the Android SDK so we can run them as commands in bash. So open up the
file in your favourite text editor, and add the following lines to the bottom of the file:
Now log out of your desktop, and log back in to apply this change.
Create the App
Before we create our app, we need to know what version of the Android API we want to build against. Run the following command to see what Android API versions your SDK can target:
I only have the most recent version of android downloaded in my SDK, so I got the following output:
In this output, all we are concerned with is the ID of the API version we want to build against. In the example above, we just need “android-19”
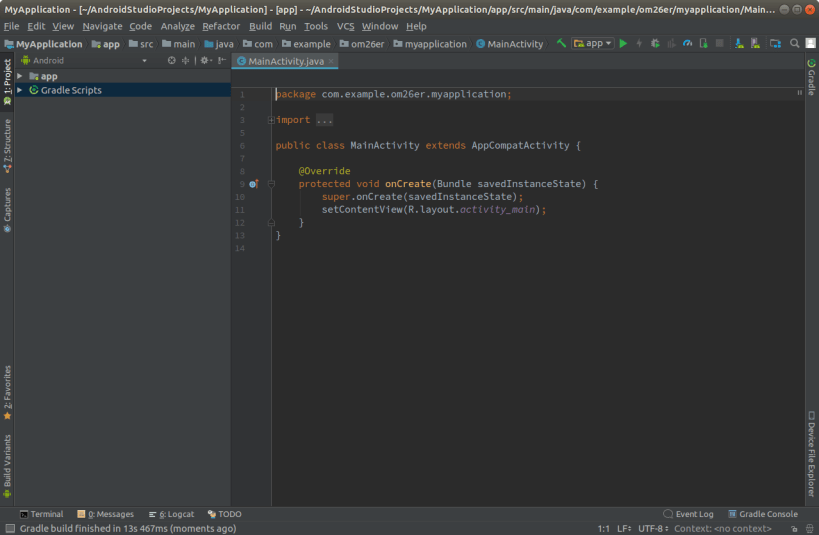
Now, run the following command to create a default Android project (being sure to enter in the correct directory location for the path option and the ID from above for the target):
Building your Android app
Now that you have done all the prep work, building your first Android app is actually pretty easy. First change into the directory that contains your app:
then run the following command to build the app:
If the build is successful, the following command will have created a an Android application package file (apk) file at
Test out your app on a real device
Now we have a built APK of our app, it’s time to try it out on an android device. To Install the APK to a device via USB, you need to enable USB Debugging mode on your device. Note that this step is different depending on the android version your device is running.
- For Android 3.2 or older, the USB Debugging option is under Settings > Applications > Development in the android menus.
- For Android 4.0 and 4.1 the USB Debugging option is under Settings > Developer options.
- For Android 4.2 and newer, the USB Debugging option is still under Settings > Developer options, but that menu item is disabled by default. To show the Developer Options, go to Settings > About phone and tap the Build Number item 7 times.
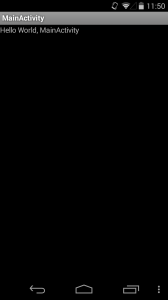
Now you have enabled USB Debugging mode, connect your device to your Fedora machine with a USB cable, and run the following command (make sure you are still in the
Now check your phone for the newly installed app (it will be called MainActivity). Run it and bask in all the Hello World goodness:

Test out your app on the emulator
Luckily, If you don’t have a Android device handy, or if you want to try out your app on a different style of device, the Android SDK also includes an the Android Virtual Device Manager to start a whole bunch of Android device emulators. To start the Android Virtual Device Manager, run the command:
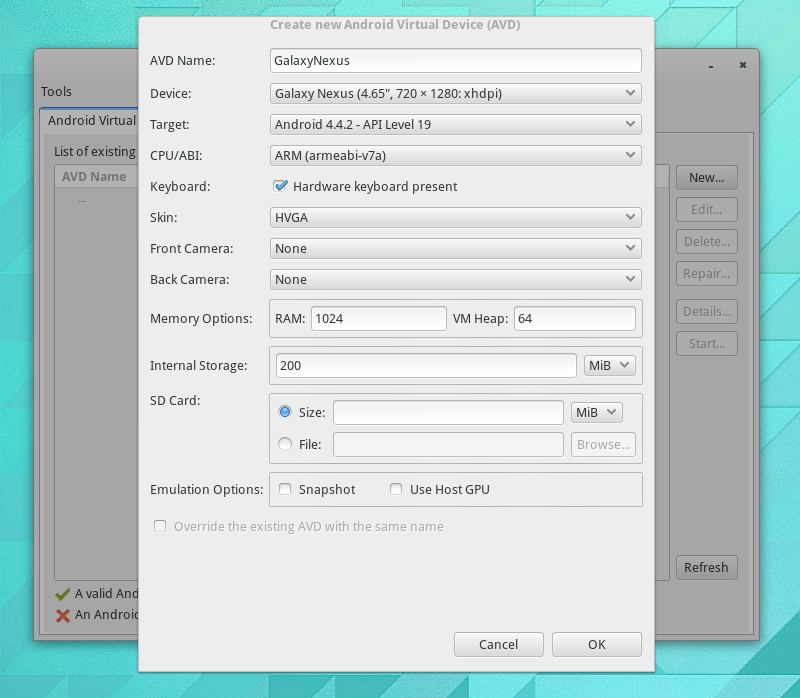
In the “Android Virtual Devices” tab, press the New… button to create a new virtual Android device. Fill out the details in the dialog and press OK:
Start the emulator, and you should see a stock android screen, and some controls: 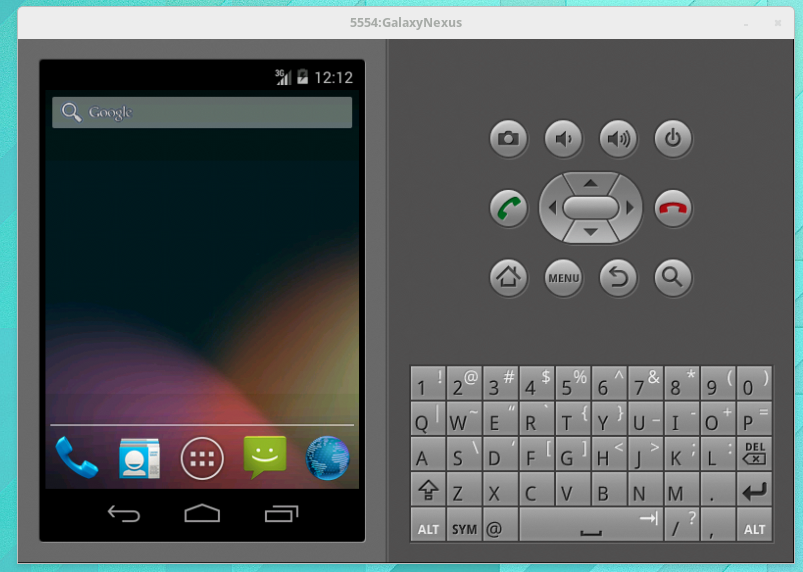
Now, follow the same steps as if you were installing on a real device. run the following command (make sure you are still in the
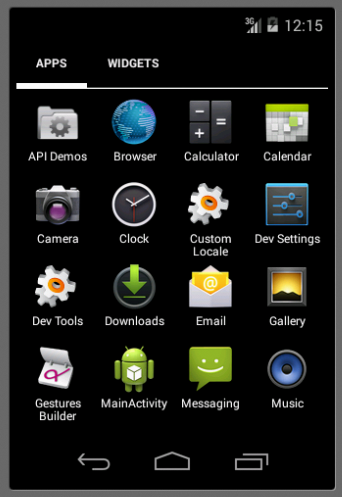
Now check the emulator for the newly installed app (it will be called MainActivity).
Further Reading
Now you have successfully set up your build and testing envrionment for Android apps on Fedora, the best place to go to get further information about developing apps for android is the Training section at Google’s Android Developer page.
Like this:
Ryan Lerch
Ryan is a designer that works on stuff for Fedora. He uses Fedora Workstation as his primary desktop, along with the best tools from the Libre Graphics world, notably, the vector graphics editor, Inkscape.
13 Comments
Kuehner Joseph
Thank you for post. I followed your instructions. Install and update seem to be fine.
When I do
BUILD FAILED
$HOME/android/android-sdk-linux/tools/ant/build.xml:653: The following error occurred while executing this line:
$HOME/android/android-sdk-linux/tools/ant/build.xml:698: null returned: 132
Regards Joseph Kuehner
Ryan Lerch
It’s hard for me to try to help here (also, i am not a developer, so i may or may not be able to help you 🙂 )
It might be more beneficial to ask your question over at http://ask.fedoraproject.org/ where there is likely to be more Java people lurking, and is a better interface for getting to the bottom of your issues.
Just for the record, I tried out my instructions on a clean Fedora 20 (x86_64) machine (from the DVD install)
Источник
How to install Android Studio on Fedora 30?

Fedora is a fairly popular Linux distribution. Many users highlight its speed and functionality to be taken into account as a reference. So many developers are interested in it as the main system in which to do their daily work. And there are many kinds of developers from web focus to mobile programming where iOS and Android dominate the market. In this sense, Android has a special IDE called Android Studio. So, in this post you will learn how to install Android Studio on Fedora 30.
Android is the world’s most popular mobile operating system and is present in hundreds of models. In addition, many major brands such as Samsung bet strongly on it. So Android has an IDE that is up to the system in Android Studio.
Android Studio is the official Android IDE. It is based on IntelliJ IDEA. Android Studio offers even more features that enhance your productivity when building Android apps, such as:
- A flexible Gradle-based build system.
- A fast and feature-rich emulator.
- A unified environment where you can develop for all Android devices.
- Instant Run to push changes to your running app without building a new APK.
- Code templates and GitHub integration to help you build common app features and import sample code.
- Extensive testing tools and frameworks.
So, let us install Android Studio on Fedora 30.
Install Android Studio on Fedora 30
First of all, go to the Android Studio website. Then download the Linux version. The website recognizes which system you are using. So just click on the Download Android Studio button.
 1.- Android Studio website
After you accept the license terms, the download will begin. It weighs 1 Gb so if you have a slow connection, it will take a while.
Once downloaded, it is necessary to install some dependencies. Open the terminal and type the following.
 2.- Install some required libraries
After that, decompress the downloaded file in /opt/.
Obviously, be careful with the path and name of the downloaded file.
Then, run the wizard.
Now, you will see the wizard.
 3.- Android studio setup wizard
Then, choose the type of the installation.
 4.- Install type
After that, select the theme. I like the dark theme, but select what you prefer.
 5.- Select UI theme
Next, you will see the summary.
 6.- summary
Then, the installation will begin. The wizard will download other required components. Be patience.
 7.- Installing Android Studio on Fedora
The process will take time. Then, you can start a new project.
 8.- Choose the type of project
The next step is to configure the project.
 9.- Configure the project
Now you can start to do fantastic Android applications.
 10.- Android Studio on Fedora 30
Conclusion
Android Studio is an IDE for developing Android applications. Installing it is not at all complex, however, there are some dependencies that should be taken into account to avoid problems. In addition, it is recommended to have a fairly modern computer because it is somewhat heavy.
Are you an Android developer? Have you used Android Studio? Let us know in the comments.
Источник


