- Improving Code Inspection with Annotations
- In this document
- See also
- Adding Nullness Annotations
- Adding Resource Annotations
- Creating Enumerated Annotations
- Использование Lint в Android Studio для проверки своего кода
- Содержание
- Способы запуска Lint.
- Запуск через меню в Android Studio
- Запуск через командную строку
- Запуск при сборке проекта.
- Настройка gradle сборки
- Настройка правил проверки lint
- Отключение проверки Lint с помощью анотаций в коде
- Выводы
- Debugging with Android Studio
- In this document
- See also
- Run your App in Debug Mode
- Attach the debugger to a running process
- Use the System Log
- Write log messages in your code
- View the system log
- Work with Breakpoints
- View and configure breakpoints
- Debug your app with breakpoints
- Track Object Allocation
- Analyze Runtime Metrics to Optimize your App
- Capture Screenshots and Videos
Improving Code Inspection with Annotations
In this document
See also
Using code inspections tools such as lint can help you find problems and improve your code, but inspection tools can only infer so much. Android resource ids, for example, use an int to identify strings, graphics, colors and other resource types, so inspection tools cannot tell when you have specified a string resource where you should have specified a color. This situation means that your app may render incorrectly or fail to run at all, even if you use code inspection.
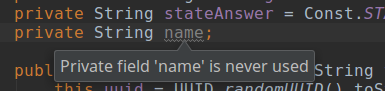
Annotations allow you to provide hints to code inspections tools like lint , to help detect these, more subtle code problems. They are added as metadata tags that you attach to variables, parameters, and return values to inspect method return values, passed parameters, and local variables and fields. When used with code inspections tools, annotations can help you detect problems, such as null pointer exceptions and resource type conflicts.
For more information on enabling lint inspections and running lint, see Improving Your Code with lint.
Android supports a variety of annotations for insertion in the methods, parameters, and return values in your code, for example:
@Nullable Can be null. @NonNull Cannot be null. @StringRes References a R.string resource. @DrawableRes References a Drawable resource. @ColorRes References a Color resource. @InterpolatorRes References a Interpolator resource. @AnyRes References any type of R. resource.
For a complete list of the supported annotations, either examine the contents of the Support-Annotations library or use the auto-complete feature to display the available options for the import android.support.annotation. statement. The SDK Manager packages the Support-Annotations library in the Android Support Repository for use with Android Studio and in the Android Support Library for use with other Android development tools.
To add annotations to your code, first add a dependency to the Support-Annotations library. In Android Studio, add the dependency to your build.gradle file.
The Support-Annotations library is decorated with the supported annotations so using this library’s methods and resources automatically checks the code for potential problems.
If you include annotations in a library and use the Android Plugin for Gradle to build an Android ARchive (AAR) artifact of that library, the annotations are included as part of the artifact in XML format in the annotations.zip file.
To start a code inspection from Android Studio, which includes validating annotations and automatic lint checking, select Analyze > Inspect Code from the menu options. Android Studio displays conflict messages throughout the code to indication annotation conflicts and suggest possible resolutions.
Adding Nullness Annotations
Add @Nullable and @NonNull annotations to check the nullness of a given variable, parameter, or return value. For example, if a local variable that contains a null value is passed as a parameter to a method with the @NonNull annotation attached to that parameter, building the code generates a warning indicating a non-null conflict.
This example attaches the @NonNull annotation to the context and attrs parameters to check that the passed parameter values are not null.
Note: Android Studio supports running a nullability analysis to automatically infer and insert nullness annotations in your code. For more information about inferring nullability in Android Studio, see Annotations in Android Studio.
Adding Resource Annotations
Add @StringRes annotations to check that a resource parameter contains a R.string reference. During code inspection, the annotation generates a warning if a R.string reference is not passed in the parameter.
This example attaches the @StringRes annotation to the resId parameter to validate that it is really a string resource.
Annotations for the other resource types, such as @DrawableRes , @ColorRes , and @InterpolatorRes can be added using the same annotation format and run during the code inspection.
Creating Enumerated Annotations
Use the @IntDef and @StringDef annotations so you can create enumerated annotations of integer and string sets to validate other types of code references, such as passing references to a set of constants.
The following example illustrates the steps to create an enumerated annotation that ensures a value passed as a method parameter references one of the defined constants.
When you build this code, a warning is generated if the mode parameter does not reference one of the defined constants ( NAVIGATION_MODE_STANDARD , NAVIGATION_MODE_LIST , or NAVIGATION_MODE_TABS ).
You can also define an annotation with a flag to check if a parameter or return value references a valid pattern. This example creates the DisplayOptions annotation with a list of valid DISPLAY_ constants.
When you build code with an annotation flag, a warning is generated if the decorated parameter or return value does not reference a valid pattern.
Источник
Использование Lint в Android Studio для проверки своего кода
Содержание
На практике в коде очень часто можно встретить очевидные ошибки, спустя какое-то время. Это может происходить из-за невнимательности при написании кода. Что бы свести такие ошибки к минимуму могут помочь статические анализаторы кода. Одним из таких анализаторов является Lint.
Lint — это статический анализатор кода, который сообщает о подозрительных или критических выражениях в коде. По факту это слово стало нарицательным и им называют анализаторы, которые сканируют код на наличие ошибок.
В Android Studio уже есть встроенные анализаторы кода, который дают подсказки “налету”.
Однако подсказки подсвечивают ошибки достаточно ненавязчиво и поэтому их легко пропустить. Но можно запустить проверку несколькими способами.
Способы запуска Lint.
Запуск через меню в Android Studio
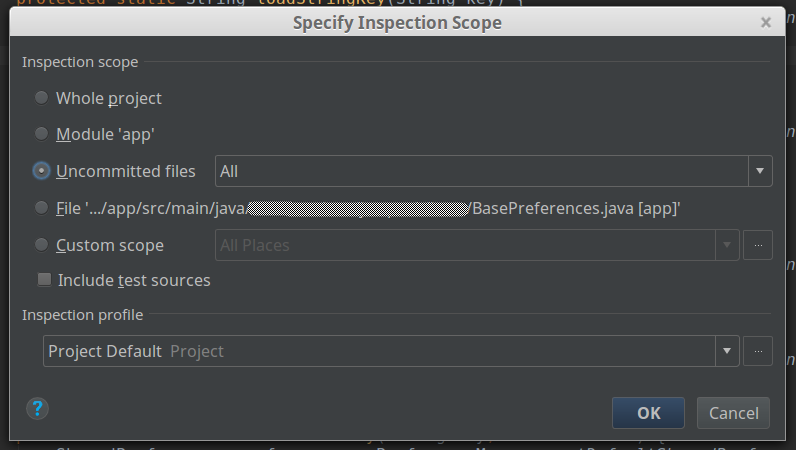
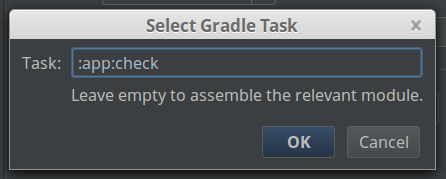
Самый простой и удобный способ запуска проверки — это через Android Studio. Для этого в меню необходимо выбрать пункты Analyze -> Inspect Code. В появившемся окне можно ограничить область сканирования кода. Можно проверить весь проект, определённый модуль или отдельный взятый класс. На мой взгляд самый полезных из пунктов — это проверка не закоммиченых файлов. Так же можно выбрать профиль с набором правил для проверки.
После выбора настроек можно начать проверку по нажатию на кнопку Ок. Когда проверка закончиться то появиться окно в котором все ошибки, и предупреждения будут выведены в специальном окне. Все замечания удобно собраны по типам с кратким описание причины и решением проблемы.

Запуск через командную строку
Так же проверку можно запустить через gradle выполнив в консоли команду:
После проверки сформируется отчёт в формате html, который можно посмотреть по следующему пути:
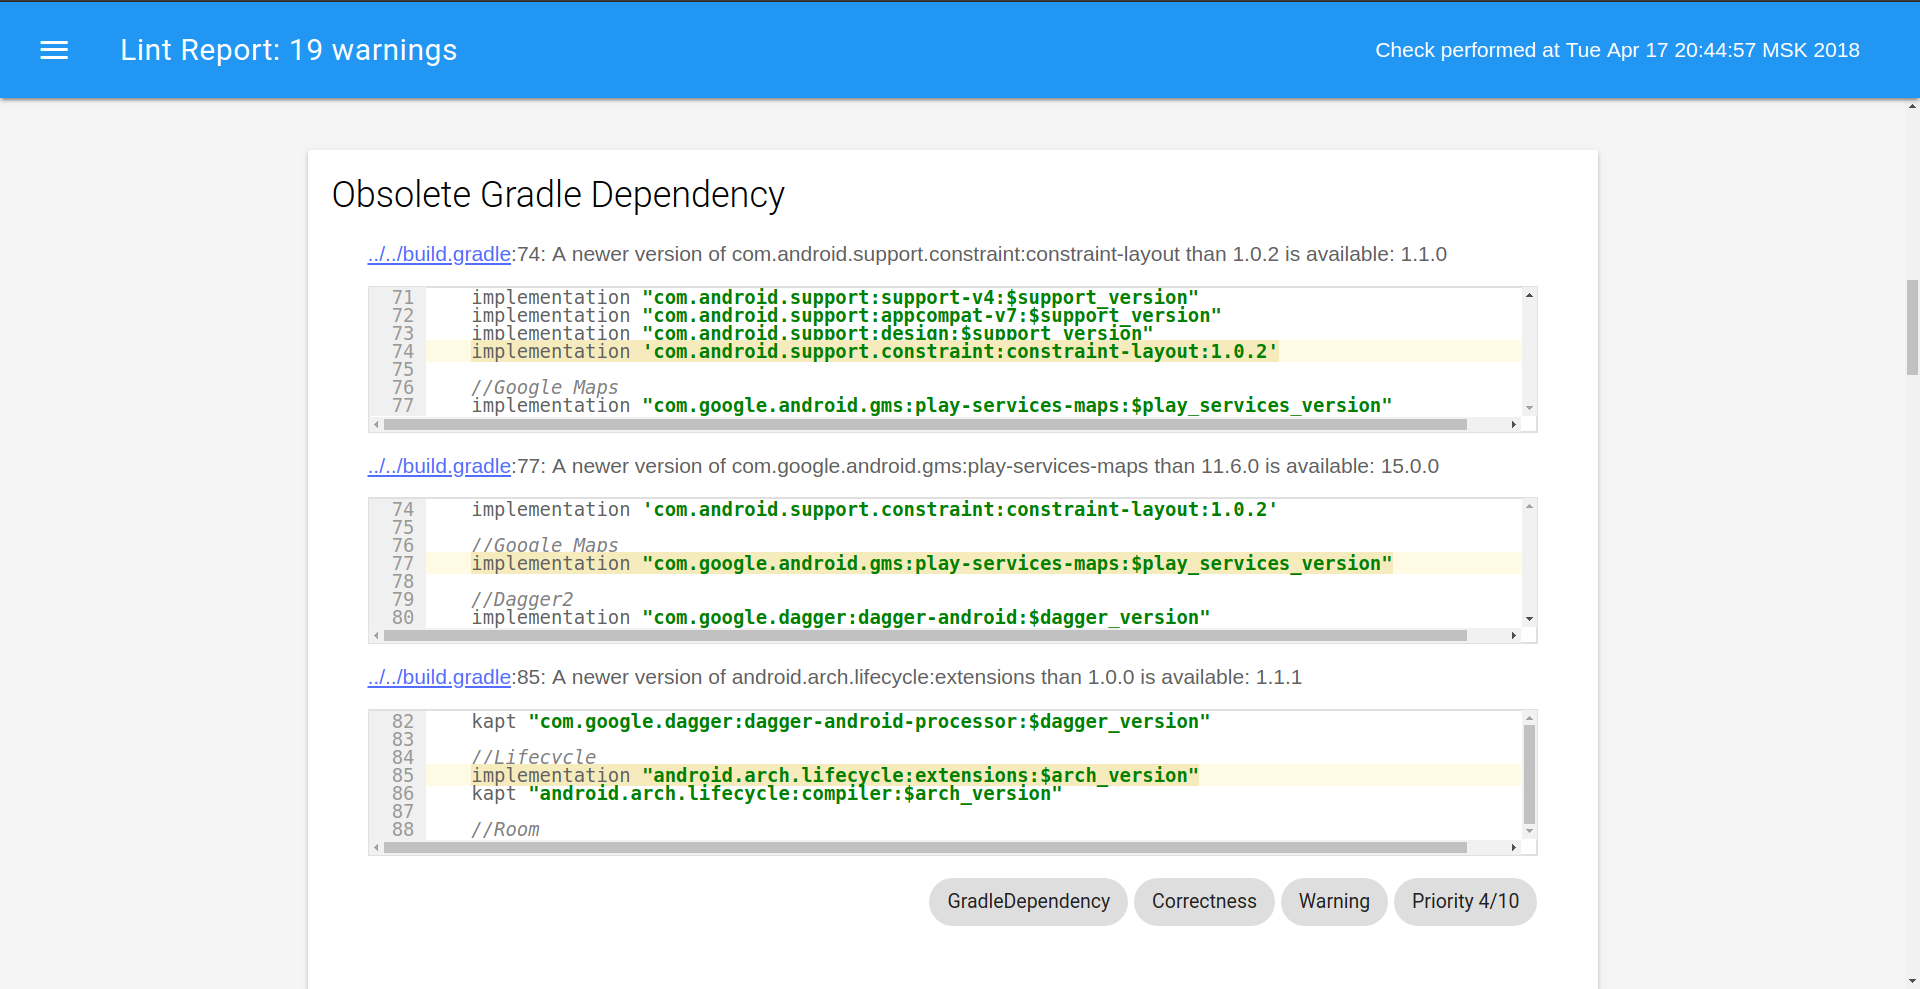
Этот способ менее удобный чем первый, так как отчёт формируется в отрыве от студии и для правки ошибок нужно постоянно переключаться между отчётом и IDE. Зато этот способ прекрасно подходит для случаев если проверку осуществляется на сервере, а в случае обнаружение ошибок, прикреплять файл с отчётом к письму.
Запуск при сборке проекта.
Можно автоматизировать запуск проверки lint, который будет осуществлять при каждой сборке проекта. Для этого необходимо зайти в настройки запуска проекта:
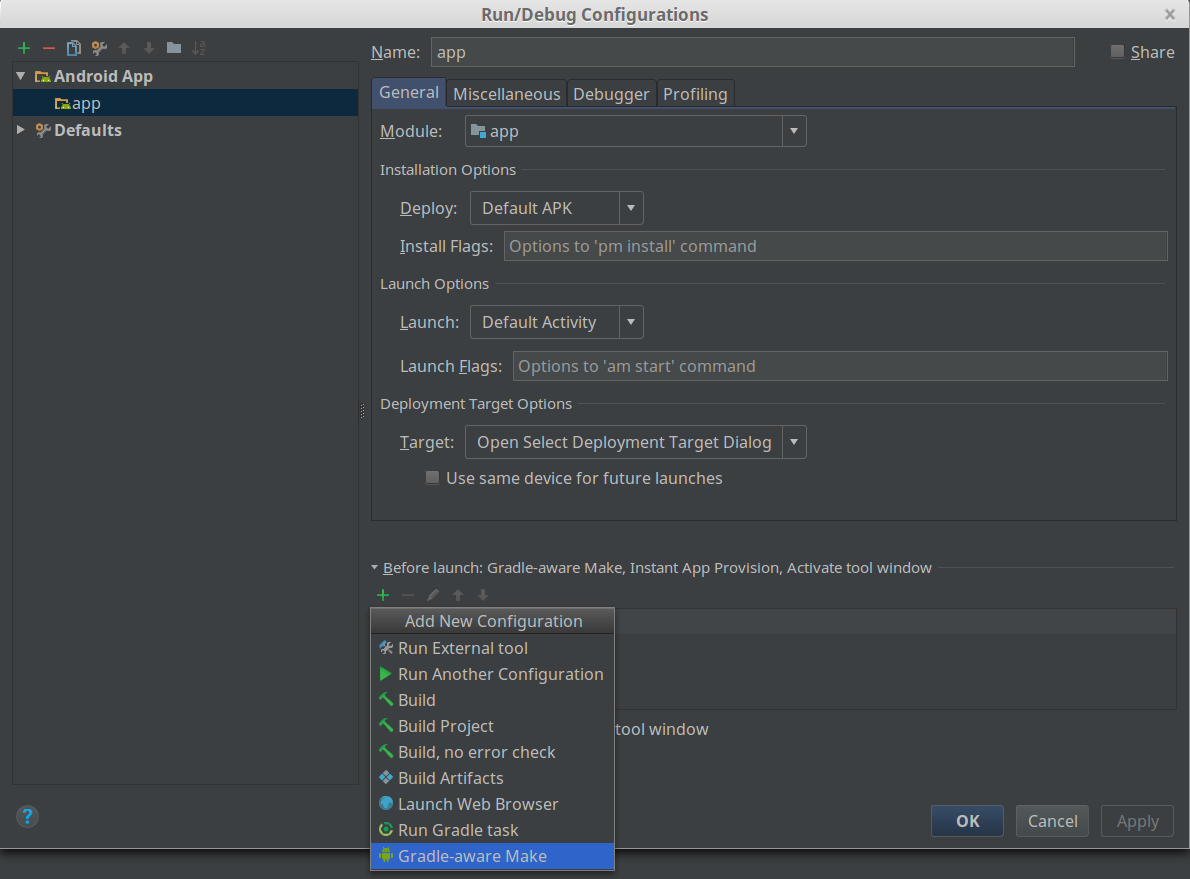
Добавить следующую строку:

Этот способ менее предпочтительный так как значительно замедлит скорость сборки и разработки.
Настройка gradle сборки
Так же lint проверку можно настроить в gradle файле.
- abortOnError: В случае обнаружение ошибки прекращается проверка.
- warningsAsErrors: определяет предупреждения как ошибки.
- lintConfig: путь к файлу проекта с настройками lint.
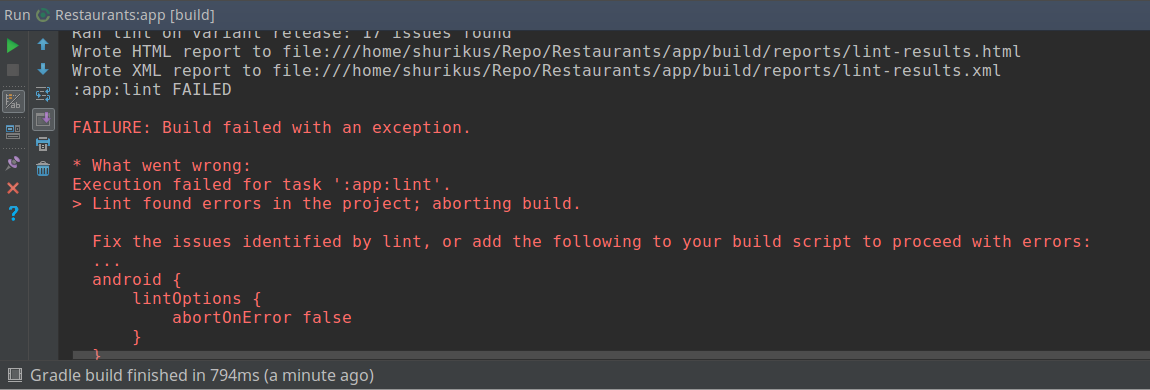
Если опция abortOnError включена, то при запуске сборки через gradle в случае обнаружении ошибки произойдёт исключение:
Настройка правил проверки lint
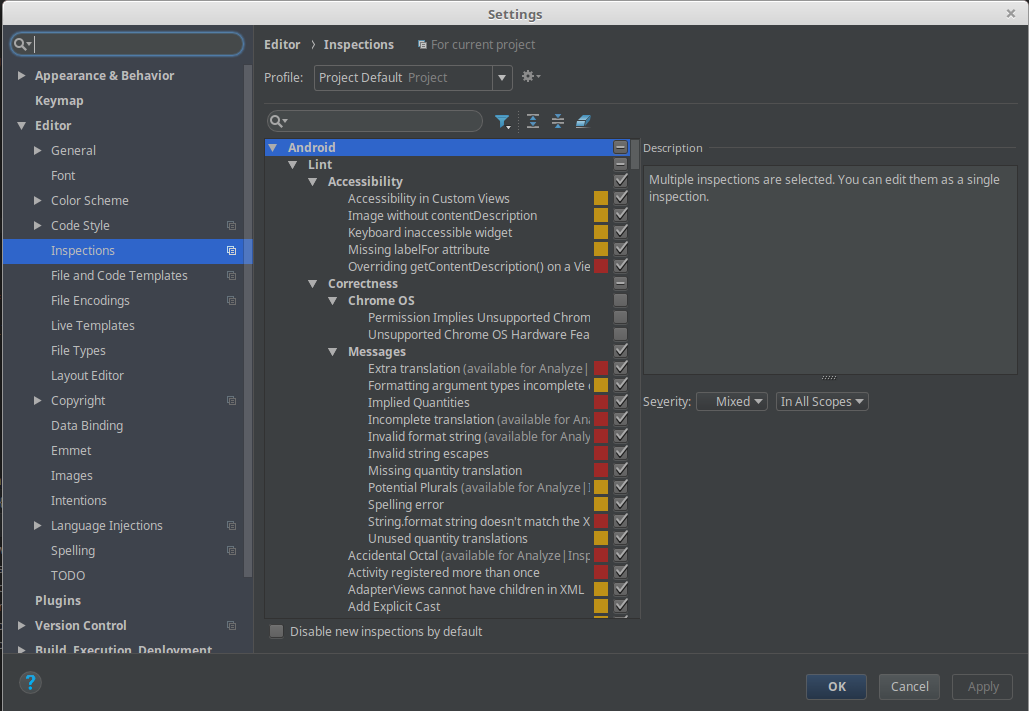
Отредактировать правила lint можно в настройках Android studio. Там же можно сделать отдельный конфигурационный профиль и использовать его.
Отключение проверки Lint с помощью анотаций в коде
Иногда бывают исключения, и может сложиться ситуация что необходимо отключить проверку какого-либо правила проверки для класса или метода. В Java коде это делается через аннотацию @SuppressLint(“NewApi”). В качестве параметра принимает строку названия проверки которую нужно исключить. Если нужно исключить все правила, то можно использовать следующую аннотацию:
Так же проверку можно обойти в xml файлах с помощью аттрибута tools:ignore=“NewApi,StringFormatInvalid”.
Выводы
В данной статье мы рассмотрели основные способы запуска проверки кода. Lint очень полезный инструмент для контроля за качеством кода, которым можно и нужно пользоваться.
Источник
Debugging with Android Studio
In this document
See also
Android Studio enables you to debug apps running on the emulator or on an Android device. With Android Studio, you can:
- Select a device to debug your app on.
- View the system log.
- Set breakpoints in your code.
- Examine variables and evaluate expressions at run time.
- Run the debugging tools from the Android SDK.
- Capture screenshots and videos of your app.
To debug your app, Android Studio builds a debuggable version of your app, connects to a device or to the emulator, installs the app and runs it. The IDE shows the system log while your app is running and provides debugging tools to filter log messages, work with breakpoints, and control the execution flow.
Run your App in Debug Mode

Figure 1. The Choose Device window enables you to select a physical Android device or a virtual device to debug your app.
To run your app in debug mode, you build an APK signed with a debug key and install it on a physical Android device or on the Android emulator. To set up an Android device for development, see Using Hardware Devices. For more information about the emulator provided by the Android SDK, see Using the Emulator.
To debug your app in Android Studio:
- Open your project in Android Studio.
- Click Debug in the toolbar.
- On the Choose Device window, select a hardware device from the list or choose a virtual device.
- Click OK. Your app starts on the selected device.
Figure 1 shows the Choose Device window. The list shows all the Android devices connected to your computer. Select Launch Emulator to use an Android virtual device instead. Click the ellipsis  to open the Android Virtual Device Manager.
Android Studio opens the Debug tool window when you debug your app. To open the Debug window manually, click Debug . This window shows threads and variables in the Debugger tab, the device status in the Console tab, and the system log in the Logcat tab. The Debug tool window also provides other debugging tools covered in the following sections.

Figure 2. The Debug tool window in Android Studio showing the current thread and the object tree for a variable.
Attach the debugger to a running process
You don’t always have to restart your app to debug it. To debug an app that you’re already running:
- Click Attach debugger to Android proccess
 .
. - In the Choose Process window, select the device and app you want to attach the debugger to.
- To open the Debug tool window, click Debug .
 .
.Use the System Log
The system log shows system messages while you debug your app. These messages include information from apps running on the device. If you want to use the system log to debug your app, make sure your code writes log messages and prints the stack trace for exceptions while your app is in the development phase.
Write log messages in your code
To write log messages in your code, use the Log class. Log messages help you understand the execution flow by collecting the system debug output while you interact with your app. Log messages can tell you what part of your application failed. For more information about logging, see Reading and Writing Logs.
The following example shows how you might add log messages to determine if previous state information is available when your activity starts:
During development, your code can also catch exceptions and write the stack trace to the system log:
Note: Remove debug log messages and stack trace print calls from your code when you are ready to publish your app. You could do this by setting a DEBUG flag and placing debug log messages inside conditional statements.
View the system log
Both the Android DDMS (Dalvik Debug Monitor Server) and the Debug tool windows show the system log; however, the Android DDMS tool window lets you view only log messages for a particular process. To view the system log on the Android DDMS tool window:
- Start your app as described in Run your App in Debug Mode.
- Click Androidto open the Android DDMS tool window.
- If the system log is empty in the Logcat view, click Restart.
 to open the Android DDMS tool window.
Figure 4. The system log in the Android DDMS tool window.
The Android DDMS tool window gives you access to some DDMS features from Android Studio. For more information about DDMS, see Using DDMS.
The system log shows messages from Android services and other Android apps. To filter the log messages to view only the ones you are interested in, use the tools in the Android DDMS window:
- To show only log messages for a particular process, select the process in the Devices view and then click Only Show Logcat from Selected Process. If the Devices view is not available, click Restore Devices Viewon the right of the Android DDMS tool window. This button is only visible when you hide the Devices window.
- To filter log messages by log level, select a level under Log Level on the top of the Android DDMS window.
- To show only log messages that contain a particular string, enter the string in the search box and press Enter.
 . If the Devices view is not available, click Restore Devices View
 on the right of the Android DDMS tool window. This button is only visible when you hide the Devices window.
Work with Breakpoints
Breakpoints enable you to pause the execution of your app at a particular line of code, examine variables, evaluate expressions, and continue the execution line by line. Use breakpoints to determine the causes of run-time errors that you can’t fix by looking at your code only. To debug your app using breakpoints:
- Open the source file in which you want to set a breakpoint.
- Locate the line where you want to set a breakpoint and click on it.
- Click on the yellow portion of the side bar to the left of this line, as shown in figure 5.
- Start your app as described in Run your App in Debug Mode.
Android Studio pauses the execution of your app when it reaches the breakpoint. You can then use the tools in the Debug tool window to identify the cause of the error.

Figure 5. A red dot appears next to the line when you set a breakpoint.
View and configure breakpoints
To view all the breakpoints and configure breakpoint settings, click View Breakpoints on the left side of the Debug tool window. The Breakpoints window appears, as shown in figure 6.

Figure 6. The Breakpoints window lists all the current breakpoints and includes behavior settings for each.
The Breakpoints window lets you enable or disable each breakpoint from the list on the left. If a breakpoint is disabled, Android Studio does not pause your app when it hits that breakpoint. Select a breakpoint from the list to configure its settings. You can configure a breakpoint to be disabled at first and have the system enable it after a different breakpoint is hit. You can also configure whether a breakpoint should be disabled after it is hit. To set a breakpoint for any exception, select Exception Breakpoints in the list of breakpoints.
Debug your app with breakpoints
After you set breakpoints in your code, click Rerun  to start the app again. When a breakpoint is hit, Android Studio pauses the app and highlights the breakpoint in the source code. The Debug tool window lets you examine variables and control the execution step by step:
To examine the object tree for a variable, expand it in the Variables view. If the Variables view is not visible, click Restore Variables View .
To evaluate an expression at the current execution point, click Evaluate Expression .
To advance to the next line in the code (without entering a method), click Step Over .
To advance to the first line inside a method call, click Step Into .
To advance to the next line outside the current method, click Step Out .
To continue running the app normally, click Resume Program .

Figure 7. The Variables view in the Debug tool window.
Track Object Allocation
Android Studio lets you track objects that are being allocated on the Java heap and see which classes and threads are allocating these objects. This allows you to see the list of objects allocated during a period of interest. This information is valuable for assessing memory usage that can affect application performance.
To track memory allocation of objects:
- Start your app as described in Run Your App in Debug Mode.
- Click Androidto open the Android DDMS tool window.
- On the Android DDMS tool window, select the Devices | logcat tab.
- Select your device from the dropdown list.
- Select your app by its package name from the list of running apps.
- Click Start Allocation Tracking
- Interact with your app on the device.
- Click Stop Allocation Tracking


Android Studio shows the objects that the system allocated with the following information:
- Allocation order
- Allocated class
- Allocation size
- Thread ID
- Allocation method, class, and line number
- Stack trace at the point of allocation

Figure 8. Object allocation tracking in Android Studio.
Analyze Runtime Metrics to Optimize your App
Even if your application does not generate runtime errors, this does not mean it is free of problems. You should also consider the following issues:
- Does your app use memory efficiently?
- Does your app generate unnecessary network traffic?
- What methods should you focus your attention on to improve the performance of your app?
- Does your app behave properly when the user receives a phone call or a message?
The Android Device Monitor is a stand-alone tool with a graphical user interface for serveral Android application debugging and analysis tools, including the Dalvik Debug Monitor Server (DDMS). You can use the Android Device Monitor to analyze memory usage, profile methods, monitor network traffic and simulate incoming calls and messages.
To open the Android Device Monitor from Android Studio, click Monitor on the toolbar. The Android Device Monitor opens in a new window.
For more information about the Android Device Monitor and DDMS, see Device Monitor and Using DDMS.
Capture Screenshots and Videos
Android Studio enables you to capture a screenshot or a short video of the device screen while your app is running. Screenshots and videos are useful as promotional materials for your app, and you can also attach them to bug reports that you send to your development team.
To take a screenshot of your app:
- Start your app as described in Run your App in Debug Mode.
- Click Androidto open the Android DDMS tool window.
- Click Screen Captureon the left side of the Android DDMS tool window.
- Optional: To add a device frame around your screenshot, enable the Frame screenshot option.
- Click Save.
 on the left side of the Android DDMS tool window.
To take a video recording of your app:
- Start your app as described in Run your App in Debug Mode.
- Click Androidto open the Android DDMS tool window.
- Click Screen Recordon the left side of the Android DDMS tool window.
- Click Start Recording.
- Interact with your app.
- Click Stop Recording.
- Enter a file name for the recording and click OK.
 on the left side of the Android DDMS tool window.
Источник


