- История о том, как запустить эмулятор Android или сэкономить на процессоре intel
- Предыстория
- Инструкция
- Android studio intel x86 emulator
- New Features
- Get Android Emulator 2.0
- Create new Android Virtual Device (AVD)
- Troubleshooting
- Check Intel x86 Emulator Accelerator Installation
- Installing CPU Accelerator (HAXM)
- Known Issues
- Installation Instructions on Windows
История о том, как запустить эмулятор Android или сэкономить на процессоре intel
Предыстория
Я собрал года 4 назад домашний комп, который подходил всем моим запросам. На процессоре решил сэкономить — взял amd. К компу вопросов нет.

Потом занялся разработкой под Android и тут меня ждал сюрприз! Эмулятор запускался только на процессоре intel. Его можно было запустить без аппаратной виртуализации конечно, используя вот этот совет www.youtube.com/watch?v=QTbjdBPKnnw&t=127s, но кто пользовался знает, что эмулятор может запускаться очень долго. У меня с 12ГБ доходило до 10 мин. Это может конечно из-за встроенной видеокарты.
Основное рабочее место у меня было в офисе, поэтому особо переживал и тестировал дома на реальных устройствах. Но пару месяцев назад стал нужен именно эмулятор. Первой мыслью было конечно купить intel-овский процессор. Но нужно было покупать ещё материнскую плату и видеокарту. Скорее всего я бы так и поступил, если бы не наткнулся на обновлённые требования к системе. В требованиях написано, что эмулятор всё таки можно запустить на Windows 10 (с обновлениями после апреля 2018) с помощью технологии WHPX.
Теперь основная часть истории, как это сделать. Всё оказалось не так тривиально. Заранее прошу прощения за упущения, потому что не могу назвать себя знатоком ни в “железе”, ни в Windows.
Инструкция
После всех обновлений эмулятор естественно не запустился. AndroidStudio пыталась запустить эмулятор с помощью HAXM и выбрасывала ошибку “Emulator: emulator: ERROR: x86 emulation currently requires hardware acceleration!”.
Далее приведу инструкцию с ссылками упустив кучу подробностей и моих “танцев с бубном”.
Должен поддерживать для работы с аппаратной виртуализацией.
2. Обновляем Windows 10 до версии 1803 (апрель 2018):
4. Включаем в bios режим виртуализации. Он там может называеться IOMMU, а не VT.
5. Качаем обновления для bios с официального сайта. Для моего asus, например, они были здесь.
Версия Bios должна стать что-то около 3001:
7. Заходим на сайт microsoft и изучаем инструкцию для включения компонента.
8. Нужно проверить требования Hyper-V. Для этого в командной строке набираем systeminfo. Проверяем, чтобы отображались эти значения:
У меня же вместо это было сообщение:
На официальном сайте написано, что пока не будет стоять Yes-Yes-Yes-Yes система WHPX не будет работать. У меня же эмулятор запускается, при включенной низкоуровневой оболочке.
9. Далее в руководстве предлагается включить компонент hyper-v (он по умолчанию отключен):
В русском переводе наименования несколько отличаются:
Кстати, после отключения компонента “Платформа низкоуровневой оболочки Windows”, “Требования hyper-v” становятся Yes-Yes-Yes-Yes. Не понял этот момент. Если кто разбирается, напишите в комментариях.
10. Определяем, нужно ли нам всё это? Или легче было купить intel)
После этих настроек всё должно заработать:
Хочу отметить, используя технологию WHPX и процессор amd, запуск эмулятора занимает примерно столько же времени, сколько на процессоре intel. Учитывая, что остальное «железо» сравнимо по своим параметрам.
Источник
Android studio intel x86 emulator
The Android Studio 2.0 (or higher) preview includes the new Android Emulator 2.0 with improved performance and a new user interface to control device features. This page describes some of the changes compared to the emulator available with the stable version of Android Studio 1.5 and how to setup your development environment to use the Android Emulator.
For best performance with Android Emulator 2.0, your system should meet the following specifications:
Windows: Intel® processor with support for Intel® VT-x, Intel® EM64T (Intel® 64), and Execute Disable (XD) Bit functionality. AMD and Intel Atom processors do not support VT-x virtual machine acceleration.
Linux: Intel® processor with support for Intel® VT-x, Intel® EM64T (Intel® 64), and Execute Disable (XD) Bit functionality or AMD processors with support for AMD Virtualization™ (AMD-V™)
64-bit Operating Systems.
New Features
The most valuable updates to the Android Emulator are the speed improvements. When running with Android Studio 2.0 or higher on an x86 machine, response time is faster than the previous Android Emulator and you can transfer files from your machine faster than a physical Android device.
The latest Android Emulator supports new multi-finger touch inputs, including pinch zoom and two finger rotate gestures. Holding down Alt or Option reveals two finger points. Moving the mouse moves one finger and the second finger is mirrored across an anchor point. Clicking the left mouse button enables pinch-zoom gestures and clicking the right mouse button enables two-finger rotate gestures (such as to tilt the perspective when viewing a map).
The panel on the right side of the emulator lets you perform common tasks, such as rotate the screen, capture screenshots, and zoom in on the display.
To install apps, you can drag and drop an APK right on the emulator. You can also drag and drop other file types and they’ll be saved to the /sdcard/Download/ directory.
At the bottom of the toolbar on the right is an ellipsis button that opens the Extended Controls window. In here you’ll find various controls that invoke device events and mock device sensors.
Keyboard shortcuts are available for most actions and are listed in the Help panel, listed on the left.
Get Android Emulator 2.0
The new Android Emulator is available with Android Studio 2.0 or higher, which is available in both the Stable, Beta and Canary channels .
Once you make sure you have the appropriate emulator system image and other tools:
Open the SDK Manager from Android Studio.
Click the SDK Platforms tab, and select the check box for a recent version such as the Android 6.0 (Marshmallow) . By default, this includes the x86 system image that you need for the emulator. You can see and modify the files to download by clicking Show Package Details at the bottom-right.
Click the SDK Tools tab, then select the check boxes for the following:
Android SDK Tools ( 25.0.0 or higher to get the new emulator)
Android SDK Platform-Tools (23.1.0 or higher to get the fast ADB)
Intel x86 Emulator Accelerator (HAXM installer) (rev 6.0.1 or higher to get CPU acceleration)
Click OK to check for updates.
Create new Android Virtual Device (AVD)
To take advantage of the new Android Emulator and adb speeds, you need to create new AVDs. In this example below, we are creating a Nexus 5x AVD.
Open the AVD Manager from Android Studio.
Click Create Virtual Device .
Select the defaults for Nexus 5x .
Select a system image, such as Marshmallow — API 23 — x86 .
Select Show Advanced Settings .
Select the Multi-Core CPU check box. The number of cores available depends on the number of cores available on your development machine.
Run your new Android Virtual Device by click on the green Play button.
You should see the Android Emulator now start up.
Troubleshooting
Check Intel x86 Emulator Accelerator Installation
If you selected the defaults during the Android Studio installation you should be ready to go. If you created a custom Android Studio installation or run into issues, read the troubleshooting guide below. If your Intel x86 Emulator Accelerator is out of date, Android Studio will automatically inform you and suggest a quick fix to update, as shown in the following screenshot in the AVD Manager.
Installing CPU Accelerator (HAXM)
If you skipped the initial setup of Android Studio, you should make sure the CPU acceleration is installed.
You can manually install Intel x86 Emulator Accelerator by opening intelhaxm-android.exe (on Windows) or intelHAXM_6.0.1.dmg (on Mac) from /sdk/extras/intel/Hardware_Accelerated_Execution_Mangager , as shown below:
Installing HAXM in Windows
Installing HAXM in OS X
For Linux, the Android emulator uses Kernel-based Virtual Machine (KVM). If you are using Ubuntu, you can run check your KVM system compatibility by running the following on the command line:
$egrep –c ‘(vmx|svm)’ /proc/cpuinfo
on the command line to check for for a return value of greater than 1
To check if you have KVM installed by running the following on the command line:
If KVM is missing or to ensure you have the latest KVM installed, run the following on the command line:
$sudo apt-get install qemu-kvm libvirt-bin ubuntu-vm-builder bridge-utils ia32-libs-multiarch
The linux commands look like the following on Ubuntu:
Known Issues
Emulating inbound phone call freezes emulator.
Screenshot feature crashes emulator in certain conditions.
If an AVD has been opened in a previous version of the emulator, it may not boot in the new emulator, therefore create a new AVD.
OSX — screen doesn’t go black when you sleep the device.
Linux — segfault on exit in some conditions.
«-gpu mesa» option not supported.
«-net*» option not supported.
«-no-window» option not supported.
Remote desktop not supported.
Emulated hardware «recents» key doesn’t work in older system images.
Multiple DNS servers not supported.
If you find other issues in the Android Emulator, please file a bug report .
We have more features in the pipeline, but if you may also submit feature requests .
Источник
Installation Instructions on Windows
Clone this wiki locally
Table of Contents
This document will guide you through installing the Intel Hardware Accelerated Execution Manager (Intel HAXM), a hardware-assisted virtualization engine (hypervisor) that uses Intel Virtualization Technology (Intel VT) to speed up Android development.
Intel HAXM requires the Android SDK to be installed (version 17 or higher). For more information, refer to the Android developer website (https://developer.android.com/studio/index.html).
Hardware Requirements:
- Intel processor with support for Intel VT-x, Intel EM64T (Intel 64), and Execute Disable (XD) Bit functionality
- At least 4 GB of available RAM, 8 GB recommended
Supported Operating Systems:
- Microsoft Windows 10 64-bit
- Microsoft Windows 8 and 8.1 64-bit
- Microsoft Windows 7 64-bit*
Important: Intel HAXM cannot be used on systems without an Intel processor, or with an Intel processor that lacks the hardware features described in the «Hardware Requirements» section above.
To determine the capabilities of your Intel processor, visit http://ark.intel.com.
Additionally, Intel HAXM can be used only with Android x86 and x86_64 emulator images provided by Intel. Intel HAXM cannot be used with ARM Android emulator images or non-Intel x86 or x86_64 Android emulator images.
[*] For Windows 7 Service Pack 1, Microsoft security update KB3033929 is required when upgrading HAXM to the latest version (see Known Issues for details). Otherwise, keep using HAXM v7.3.2 instead.
Downloading Intel HAXM
Overview
Intel HAXM can be installed either through the Android SDK Manager (recommended), or manually, by downloading the installer from Intel’s website.
Note:
Intel HAXM does not currently check for updates automatically. To get the latest version, download the Intel HAXM package using the Android SDK Manager (recommended) or from the Intel Developer Zone Android developer site.
Downloading Manually
- Go to https://github.com/intel/haxm/releases.
- Choose the Intel HAXM installer package for your platform.
- Extract the installer and follow installation instructions for your platform.
Downloading through Android SDK Manager
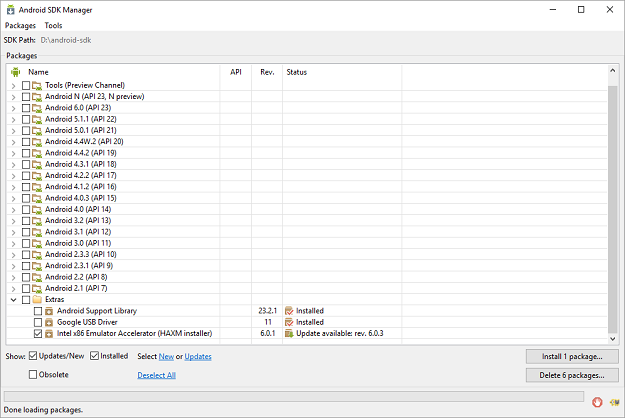
- Start the Android SDK Manager.
- Under Extras, check the box next to «Intel x86 Emulator Accelerator (HAXM).»

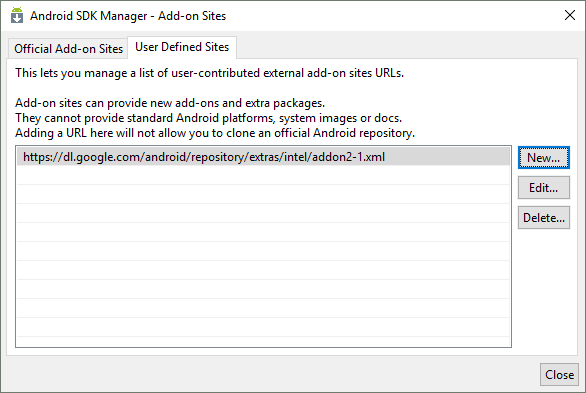
If there is no such option, manually add https://dl.google.com/android/repository/extras/intel/addon2-1.xml to the SDK Manager’s list of add-on sites via Tools > Manage Add-on Sites… > User Defined Sites > New… - Click the «Install package…» button.
- Review the Intel Corporation license agreement. If you accept the terms, select Accept and click Install.
- The SDK Manager will download the installer to the «extras» directory, under the main SDK directory. Even though the SDK manager says «Installed» it actually means that the Intel HAXM executable was downloaded. You will still need to run the installer from the «extras» directory to get it installed.
- Run the installer inside the /extras/intel/Hardware_Accelerated_Execution_Manager/ directory and follow the installation instructions for your platform.
Installing Standalone Intel HAXM on Windows
Warning: Intel HAXM installation will fail if your system does not meet the system requirements, including support for Intel processor features, such as Intel Virtualization Technology (Intel VT).
- Download the installer package from https://github.com/intel/haxm/releases or using the SDK manager.
- Run the installer (and accept the UAC prompt, if applicable).
If an older version Intel HAXM is already installed, you will see a notification dialog:Click «Yes» to upgrade Intel HAXM, or click «No» to exit the installation and keep the currently installed version of Intel HAXM. - You will see a setup wizard screen:
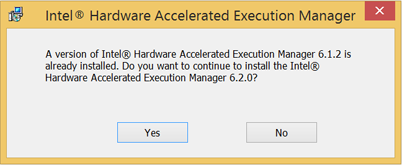 Click «Yes» to upgrade Intel HAXM, or click «No» to exit the installation and keep the currently installed version of Intel HAXM.
Click «Install»
Note: You can access the documentation by clicking Intel HAXM Documentation
When the Intel HAXM installation is finished, you will see the completion screen:
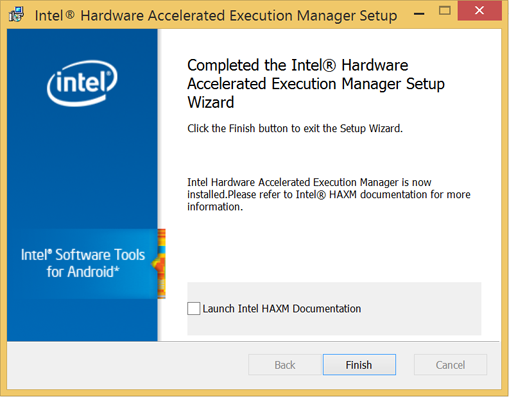 Click «Finish» to exit the installer. Intel HAXM is now installed and ready to use.
To verify that Intel HAXM is running, open a Command Prompt window with administrator privileges (Run as Administrator) and execute the following command:
sc query intelhaxm
If Intel HAXM is working, the command will show a status message indicating that the state is: «4 RUNNING».
To stop or start Intel HAXM, use these commands:
sc stop intelhaxm
sc start intelhaxm
Installing HAXM silently on Windows
- Download the installer package from https://github.com/intel/haxm/releases and extract it locally.
- Enter the extracted folder and run below command in an elevatedCommand Prompt or Windows PowerShell.
> silent_install.bat
The installer will check the system environment first. If the installation is successful, it will output as below.
Intel HAXM installed successfully!
The installer executable itself also supports to run in silent mode by passing /S on the Command Prompt or Windows PowerShell, e.g.,
Please note that the parameter /S must be in uppercase.
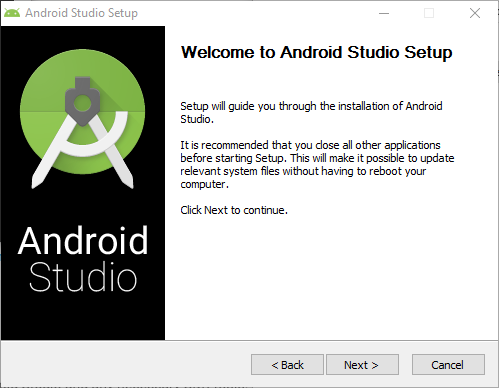
Installing Intel HAXM on Windows via Android Studio
- Download the Android Studio installer package from http://developer.android.com/sdk/index.html
- Run the Android Studio installer
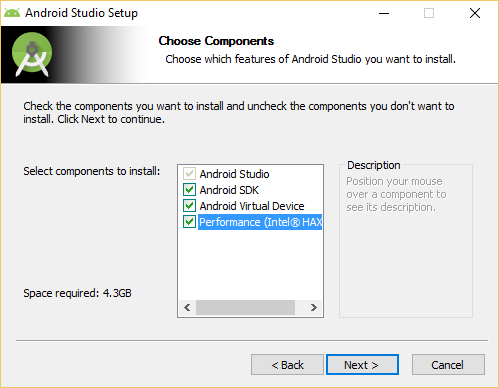
Select Performance (Intel HAXM) and click Next
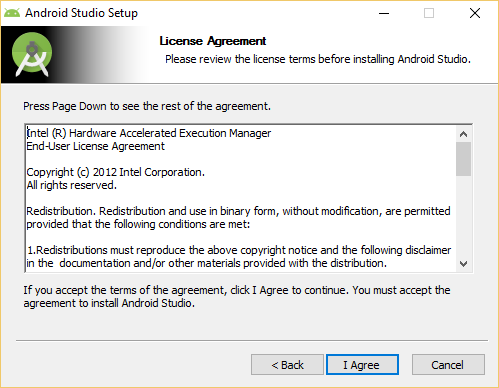
Accept the Android SDK License Agreement and the Intel HAXM License Agreement
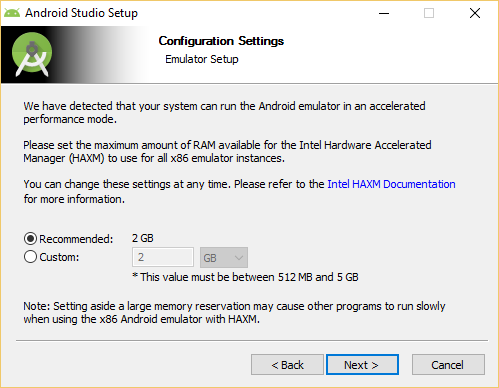
Note: This setting is obsolete since Intel HAXM 6.2.0.
To verify that Intel HAXM is running, open a Command Prompt window with administrator privileges (Run as Administrator) and execute the following command:
sc query intelhaxm
If Intel HAXM is working, the command will show a status message indicating that the state is: «4 RUNNING».
To stop or start Intel HAXM, use these commands:
sc stop intelhaxm
sc start intelhaxm
Removing Intel HAXM
Warning: Close all instances of the Android x86 emulator before removing Intel HAXM. Intel HAXM cannot be removed while in use.
To uninstall Intel HAXM, use Uninstall a program in the Control Panel or uninstall in silent mode as below.
- Launch an elevatedCommand Prompt or Windows PowerShell.
- Enter the extracted folder of installer package, which is previously downloaded from https://github.com/intel/haxm/releases, and run below command.
> silent_install.bat -u
Important: Removing Intel HAXM will disable acceleration of all Intel x86 Android emulators. Existing x86 Android Virtual Devices will not boot.
Installing Intel HAXM again will re-enable Android emulator acceleration.
Using Intel HAXM
Intel HAXM requires an Android x86 system image provided by Intel. These images can be downloaded through the Android SDK manager or manually from the Intel Developer Zone website.
Intel x86 Android emulator images will automatically be executed using the «emulator-x86» binary, provided with the Android SDK. If Intel HAXM is installed and working, emulation will be accelerated by Intel HAXM (using Intel Virtualization Technology).
Execute Disable Bit capability error
When installing Intel HAXM, you may encounter an error regarding Execute Disable Bit support. This error message can be triggered by the following conditions:
- Execute Disable Bit is not supported by your computer’s processor.
- Execute Disable Bit is not enabled.
Execute Disable Bit is not supported
Intel HAXM requires an Intel processor with Execute Disable Bit functionality and cannot be used on systems lacking this hardware feature. To determine the capabilities of your Intel processor, visit http://ark.intel.com.
Execute Disable Bit is not enabled
In some cases, Execute Disable Bit may be disabled in the system BIOS and must be enabled within the BIOS setup utility. To access the BIOS setup utility, a setup key must be pressed during the computer’s boot sequence. This key is dependent on which BIOS is used but it is typically the F2, Delete, or Esc key. Within the BIOS setup utility, Execute Disable Bit may be identified by the terms «XD», «Execute Disable», «No Execute», or «Hardware DEP», depending on the BIOS used.
Windows hosts may need to enable DEP (Data Execution Prevention) in addition to Execute Disable Bit, as described in this Microsoft KB article: http://support.microsoft.com/kb/875352.
For specific information on entering BIOS setup and enabling Execute Disable Bit, please contact your hardware manufacturer.
Intel Virtualization Technology (Intel VT-x) capability
When installing Intel HAXM, you may encounter an error regarding Intel VT-x support. This error message can be triggered by the following conditions:
- Intel VT-x is not supported by your computer’s processor
- Intel VT-x is not enabled
Intel VT-x is not supported
Intel HAXM requires an Intel processor with Intel VT-x functionality and cannot be used on systems lacking this hardware feature. To determine the capabilities of your Intel processor, visit? http://ark.intel.com.
Intel VT-x not enabled
In some cases, Intel VT-x may be disabled in the system BIOS and must be enabled within the BIOS setup utility. To access the BIOS setup utility, a key must be pressed during the computer’s boot sequence. This key is dependent on which BIOS is used but it is typically the F2, Delete, or Esc key. Within the BIOS setup utility, Intel VT may be identified by the terms «VT», «Virtualization Technology», or «VT-d.» Make sure to enable all of the Virtualization features.
For specific information on entering BIOS setup and enabling Intel VT, please contact your hardware manufacturer.
Tips and Tricks
Below are some recommendations to get the best experience out of the Android emulator using the Intel HAXM driver.
Источник


