- How do I parse JSON in Android? [duplicate]
- 3 Answers 3
- Android Studio: получение JSON в RecyclerView и CardView. Урок № 1
- Смотрите видео: Android Studio: получение JSON в RecyclerView и CardView. Урок № 1
- Android Studio: получение JSON в ListView и ArrayAdapter. Урок № 2
- Смотрите видео: Android Studio: получение JSON в ListView и ArrayAdapter. Урок № 2
- Android — JSON Parser
- JSON — Elements
- JSON — Parsing
- Example
- JSON Parsing in Android
- Step by Step Implementation
How do I parse JSON in Android? [duplicate]
How do I parse a JSON feed in Android?

3 Answers 3
Android has all the tools you need to parse json built-in. Example follows, no need for GSON or anything like that.
Get your JSON:
Assume you have a json string
Create a JSONObject:
If your json string is an array, e.g.:
then you should use JSONArray as demonstrated below and not JSONObject
To get a specific string
To get a specific boolean
To get a specific integer
To get a specific long
To get a specific double
To get a specific JSONArray:
To get the items from the array
Writing JSON Parser Class
Parsing JSON Data
Once you created parser class next thing is to know how to use that class. Below i am explaining how to parse the json (taken in this example) using the parser class.
2.1. Store all these node names in variables: In the contacts json we have items like name, email, address, gender and phone numbers. So first thing is to store all these node names in variables. Open your main activity class and declare store all node names in static variables.
2.2. Use parser class to get JSONObject and looping through each json item. Below i am creating an instance of JSONParser class and using for loop i am looping through each json item and finally storing each json data in variable.
Источник
Android Studio: получение JSON в RecyclerView и CardView. Урок № 1
Всем привет, в этой статье я расскажу вам, как в Android Studio можно работать с json файлами.
Это будет первая статья, поскольку есть различия в работе с json , существует массив с именем, или не именной, можно выводить данные в recyclerview или listview , поэтому будут различные подходы в парсинге.
Смотрите видео: Android Studio: получение JSON в RecyclerView и CardView. Урок № 1
Это будет первая статья, затем мы перейдём к парсингу JSON файлов с хостинга. Но это будет немного позже начнем с самого простого примера, локального файла в папке assets .
Создадим новый проект, выбираем empty Activity , давайте назовём приложение, например, Load Json from assets-01 .
Идёт подготовка проекта, в нем мы будем использовать не listView будем использовать recyclerview и cardview .
А пока, если хотите можете поставить на паузу ролик и повторять то, что я пишу, и какие изменения делаю.
В файл build.gradle проекта внесем записи
это recyclerview и cardview для вывода данных и синхронизируем проект.
Всё хорошо, теперь займемся работой с нашими слоями в activity_main.xml введем RelativeLayout а в него androidx.recyclerview.widget с android:id=»@+id/recyclerView» .
Не будем делать фрагменты, в данном примере будет при запуске сразу отображаться нужная информация.
Создадим еще один слой назовем его row.xml в нем androidx.cardview.widget.CardView , LinearLayout с двумя TextView с android:id=»@+id/name» и android:id=»@+id/email» соответственно.
Хочу рассказать о json файле с которым будем работать, он состоит из идентификатора пользователя (id), имени пользователя (name) и электронной почты (email), то есть начнём с простейшего примера и далее будем это всё выводить.
Создадим в папке проекта New File Folder дикторию assets, и в ней нужно будет создать файл users.json.
Я заполнил его такими данными, название нашего массива – users , в нем поля — id, name, email, чисто случайные данные, для наглядности. В принципе больше нечего с ним мы делать не будем.
Теперь поработаем в файле mainactivity.java. Нам нужно будет объявить переменную recyclerView с типом RecyclerView перед onCreate , нужно связать список через findViewById(R.id.recyclerView) .
и передадим управление recyclerView
Так же нужно будет создать новый класс Java New Class, назовем его HelperAdapter для работы со списком, с данными json.
Он будет наследоваться от
MyViewClass мы напишем позже.
Выглядит это всё достаточно сложно на первый взгляд, но потом можно будет использовать этот код, вносить небольшие правки в именах полей и тому подобном. Делается практически один раз и нам не нужно будет создать каждый раз для аналогичных проектов.
для хранения имя и почты пользователей из users.json файла, поле id использовать в этом примере не будем.
Также объявим переменную для контекста,
будем определять его для работы с mainactivaty .
В конструкторе HelperAdapter
Соединим наши ранее объявленные переменный с классом, соответственно здесь присваиваются эти переменные.
В onCreateViewHolder , мы сделаем layout inflator , будем передавать ему данные, укажем что у нас ключевым для вывода данных является row.xml файл, в который будет все значения попадать.
Теперь давайте чтобы меньше было красных подчеркиваний, создадим всё-таки MyViewClass , спустим его ниже, выглядит он будет вот так:
MyViewClass наследуется от recyclerview viewholder объявляем переменные для имя и почты, в принципе это можно уже убрать, как бы понятно и передаем данные в пункт списка.
Нужно будет знать количество записей, сделать это можно чуть выше,
И ещё нам здесь осталось добавить onBindViewHolder в котором при нажатии на сам список будет появляться всплывающий текст.
Теперь перейдём в файл mainactivity.java , в ней будем работать с json объектами и массивами.
Нужно будет json файл получить в переменную jsonObject . Поскольку у нас ещё не написана JsonDataFromAsset функция, давайте её здесь вставлю, покажу и расскажу как она работает.
Поскольку будем базироваться в следующих видео тоже на похожем коде, то давайте разберемся как работает эта функция.
Мы передаем ей имя нашего json файла здесь у нас возвращается строковое значение, дальше разбор массива произойдет в цикле, try/catch — обработка исключений, здесь мы пробегаем по всему массиву через
открываем его в inputstream входящий поток, определяем размер, создаем массив байтов, передаём этот массив байтов через чтение из inputstream .
Закрываем поток, в переменную json в строковом виде в формате utf-8 наша функция JsonDataFromAsset будет возвращать данные.
Теперь из объекта получаем массив, обратите внимание данную конструкцию нужно обрабатывать через try/catch с исключениями, потому как здесь будет работать ещё цикл.
В цикле for мы будем пробегать по-нашему массиву ну и соответственно
Источник
Android Studio: получение JSON в ListView и ArrayAdapter. Урок № 2
Всем привет, и сегодня мы продолжим рассматривать возможности работы с json файлами в Android Studio.
На этот раз будем использовать listView для отображения данных, хочу напомнить, что в прошлом видео мы работали с recyclerview и cardview , и сегодня будем делать макет попроще, будет иной принцип подключения файла json со списком.
Подобный пример можно использовать в качестве различных справочных андроид приложений, для курсовых и дипломных работ, храня данные в локальном файле, так что приятного просмотра, будет интересно.
Смотрите видео: Android Studio: получение JSON в ListView и ArrayAdapter. Урок № 2
Давайте создадим новый проект с пустой активностью, дадим названием, как вы помните в прошлый раз проект назывался Load Json from assets -01 , назовем также с цифрой два, Load Json from assets -02 .
Проект у нас загружен, и давайте создадим папку assets для json файла, создадим новый файл users.json, на этот раз вставим значение, но без имени массива users , сейчас поработаем с безымянном массивом, позже я покажу как работать с этим файлом, сохраним, закроем файл.
Откроем activity_main.xml , заменим виджет ConstraintLayout на RelativeLayout , а TextView изменения на ListView . Уберём отсюда всё лишнее и добавим Android:id ListView .
Список ListView будет для общего плана, а для пунктов списка создадим в папке layout ещё один Resource File, как и в прошлом примере назавем его row.xml . Заменим в разметке RelativeLayout , id не нужен, добавим отступы 6dp.
Внутри RelativeLayout добавим LinearLayout , ориентация – вертикальная, внутренний отступ – 5dp.
Так же добавим два TextView с id, name и email, соответственно, размер текста – 30sp.
Для RelativeLayout и LinearLayout установим ширину — match_parent , высоту — wrap_content , с разметкой закончили.
Переходим в MainActivity , объявим переменную типа ListView – listview , обратимся к элементу экрана из кода через findviewbyid
Давайте создадим новый класс которая нас будет отвечать за работу с данными в json файле и списком.
Назовем его UserAdapter , адаптер будет наследоваться от
Нам нужна будет int переменная listLayout , ArrayList list и как уже говорилось контекст, Context context .
Далее напишем конструктор
Напишем присвоение переменных
Ну теперь нам нужно будет сделать, как мы в прошлый раз делали, получение нашего View , создадим Layout inflator , который будет обращаться к объекту, к нашему файлу разметки row.xml для отображения пунктов списка.
Вот так у нас выглядит наш обработчик, здесь получилось, что мы меньше писали кода в классе UserAdapter чем в прошлом примере.
Теперь перейдем в mainactivity и продолжим, поскольку у нас массив users.json безымянный, нам проще обратиться к нашему файлу, чем если бы он имел имя.
Пишем в onCreate
И ниже, вне onCreate напишем функцию getJSonData
Объявим переменную и проинициализируем ее.
В блоке обработки исключений try/catch получим содержимое файла
Источник
Android — JSON Parser
JSON stands for JavaScript Object Notation.It is an independent data exchange format and is the best alternative for XML. This chapter explains how to parse the JSON file and extract necessary information from it.
Android provides four different classes to manipulate JSON data. These classes are JSONArray,JSONObject,JSONStringer and JSONTokenizer.
The first step is to identify the fields in the JSON data in which you are interested in. For example. In the JSON given below we interested in getting temperature only.
JSON — Elements
An JSON file consist of many components. Here is the table defining the components of an JSON file and their description −
| Sr.No | Component & description | ||||||||||||||||
|---|---|---|---|---|---|---|---|---|---|---|---|---|---|---|---|---|---|
| 1 |
| Sr.No | Method & description | ||||||||||||
|---|---|---|---|---|---|---|---|---|---|---|---|---|---|
| 1 | |||||||||||||
| 4 | getInt(String name) This method returns the integer value specified by the key This method returns the long value specified by the key This method returns the number of name/value mappings in this object.. This method returns an array containing the string names in this object. ExampleTo experiment with this example , you can run this on an actual device or in an emulator.
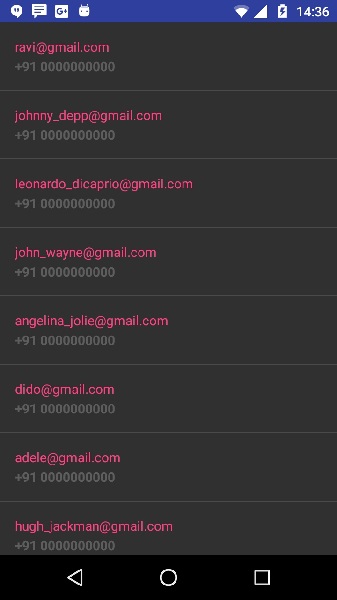
Following is the content of the modified main activity file src/MainActivity.java. Following is the modified content of the xml HttpHandler.java. Following is the modified content of the xml res/layout/activity_main.xml. Following is the modified content of the xml res/layout/list_item.xml. Following is the content of AndroidManifest.xml file. Let’s try to run our application we just modified. I assume you had created your AVD while doing environment setup. To run the app from Android studio, open one of your project’s activity files and click Run Above Example showing the data from string json,The data has contained employer details as well as salary information. Источник JSON Parsing in AndroidJSON (JavaScript Object Notation) is a straightforward data exchange format to interchange the server’s data, and it is a better alternative for XML. This is because JSON is a lightweight and structured language. Android supports all the JSON classes such as JSONStringer, JSONObject, JSONArray, and all other forms to parse the JSON data and fetch the required information by the program. JSON’s main advantage is that it is a language-independent, and the JSON object will contain data like a key/value pair. In general, JSON nodes will start with a square bracket ([) or with a curly bracket (<). The square and curly bracket’s primary difference is that the square bracket ([) represents the beginning of a JSONArray node. Whereas, the curly bracket ( <)represents a JSONObject. So one needs to call the appropriate method to get the data. Sometimes JSON data start with [. We then need to use the getJSONArray() method to get the data. Similarly, if it starts with <, then we need to use the getJSONobject() method. The syntax of the JSON file is as following: In this article, we are going to parse a JSON file in Android. Note that we are going to implement this project using the Kotlin language. Step by Step ImplementationTo parse a JSON file in Android, follow the following steps: Step 1: Create a New Project To create a new project in Android Studio please refer to How to Create/Start a New Project in Android Studio. Note that select Kotlin as the programming language. Источник  Когда к мобильному устройству присоединены наушники  ОС Google Android развивается, и по всему видимому |
 icon from the toolbar. Android studio installs the app on your AVD and starts it and if everything is fine with your setup and application, it will display following Emulator window −