- Hands-on with Material Components for Android: Buttons
- Part 4 of a series covering practical usage of Material Components for Android
- Setting up a Material Components theme for Android
- Attribute by attribute
- Basic usage 🏁
- Choosing a style 🤔
- Adding an icon 🔷
- Grouping Buttons to create a Toggle Button 👨👩👧👦
- Grouping
- Adjusting selected behavior
- Listening for selection state
- Orientation
- Theming 🎨
- Color
- Typography
- Shape
- More resources 📚
- Material Design Buttons in Android with Example
- Why MDC Buttons in Android?
- Approach
- Step 1: Create a New Project
- Step 2: Add Required Dependency
- Step 3: Change the Base application theme
- Buttons
- Responding to Click Events
- Kotlin
- Using an OnClickListener
- Kotlin
- Styling Your Button
- Borderless button
- Custom background
Hands-on with Material Components for Android: Buttons
Part 4 of a series covering practical usage of Material Components for Android

This post will be covering the features and API of Button components. To find out how to handle initial setup of Material Components for Android (including the Gradle dependency and creating an app theme), please see my original post:
Setting up a Material Components theme for Android
Attribute by attribute
Buttons are arguably the most widely-used components in any app. This is largely due to their versatility, allowing users to perform actions and make choices that ultimately guide the flow of an experience. A single line of contained text and/or an icon indicate the action a button can perform.

Material Buttons are slightly different to traditional Android buttons in that they do not include additional insets (4dp on the left/right) and have more letter-spacing, different default colors and other attributes that improve legibility and affordance amongst other components.

From a design perspective, there are three main types of buttons which are intended to offer hierarchical levels of emphasis:
- Text button (low emphasis): No container. Best used for less important actions, especially when other main content needs to be emphasised.


In addition to this, buttons can be grouped together into a fourth type: Toggle button. This allows related button actions to be horizontally arranged in a common container. The buttons themselves can be selected/deselected to indicate an active/inactive choice.

Basic usage 🏁
A MaterialButton can be included in your layout like so:
Choosing a style 🤔
As discussed in the intro section above, a variety of button types exist. These types map to styles that you can apply to a MaterialButton . There also exists a variety of sub-styles for specific use cases, such as to adjust padding for an icon. The full list of styles and their attributes can be found on GitHub. These style variants inherit from Widget.MaterialComponents.Button , each with an optional style suffix:
- Text button: *.TextButton (main), *.TextButton.Icon , *.TextButton.Snackbar , *.TextButton.Dialog , *.TextButton.Dialog.Icon , *.TextButton.Dialog.Flush
- Outlined button: *.OutlinedButton (main), *.OutlinedButton.Icon
- Contained button (unelevated): *.UnelevatedButton (main), *.UnelevatedButton.Icon
- Contained button (raised): No suffix (default, main), *.Icon
Adding an icon 🔷
An icon can be added to a button. It is displayed at the start, before the text label. In order to get the correct icon padding, it is recommended that you use a *.Icon style variant (shown above in the “Choosing a style” section).

The icon can be added in XML:
Alternatively, it can be done programmatically:
A few additional attributes exist for adjusting the icon size and position:
- iconSize : The width/height of the icon. The default value is the supplied Drawable ’s intrinsic width.

- iconGravity : The gravity of the icon. This can be set to start ( ICON_GRAVITY_START , default, at start of button), end ( ICON_GRAVITY_END , at end of button), textStart ( ICON_GRAVITY_TEXT_START , at start of centered text label) or textEnd ( ICON_GRAVITY_TEXT_END , at end of centered text label).


- iconPadding : The spacing between the icon and the text label. Typically you would not want to change this. The default value is 4dp for text buttons and 8dp for all other types.
Attributes related to icon tinting are discussed in the “Theming” section below.
Grouping Buttons to create a Toggle Button 👨👩👧👦
In order to create a toggle button, we need to add MaterialButton s as child View s to a MaterialButtonToggleGroup (a custom ViewGroup ).
Note: MaterialButtonToggleGroup was added in the 1.1.0-alpha05 release of Material Components for Android.
Grouping
This can be done in XML:
Alternatively, it can be done programmatically:
The MaterialButtonToggleGroup handles layout and adjusting of only the relevant shape corners in the row of MaterialButton s. The appearance of the MaterialButton s is determined by whichever style they each use. It is advised to use a consistent style for all children and also recommended to use the outlined button type.
Adjusting selected behavior
When added to a MaterialButtonToggleGroup , child MaterialButton s automatically become “selectable” (i.e. The android:checkable attribute is set to true).
Thus, there exists a couple of attributes for adjusting how MaterialButtonToggleGroup manages this:
- singleSelection : Determines whether or not only a single button in the group can be checked at a time. The default value is false, meaning multiple buttons can be checked/unchecked independently.

Listening for selection state
We are able to query for and adjust the current checked button(s) in a variety of ways:
We are also able to listen for checked changes by adding an OnButtonCheckedListener to a MaterialButtonToggleGroup :
Listeners can also be removed with the MaterialButtonToggleGroup#removeListener and MaterialButtonToggleGroup#clearListeners functions.
Orientation
The default arrangement of buttons within a toggle group is horizontal. However, seeing as MaterialButtonToggleGroup extends LinearLayout , it also supports vertical arrangement. This can be set programmatically or in XML:

The interesting thing to note here is the extra attributes on the child MaterialButton (s). It is recommended to set the width to match_parent and to remove the top/bottom insets from the child buttons so as to have them sit flush against each other vertically. This also, however, requires adjusting the minHeight to make up for the lack of insets.
Theming 🎨
Buttons can be themed in terms of the three Material Theming subsystems: color, typography and shape. We have already shown which styles to use in the “Choosing a style” section above. When implementing a global custom MaterialButton and MaterialButtonToggleGroup styles, reference them in your app theme with the materialButtonStyle / materialButtonOutlinedStyle and materialButtonToggleGroupStyle attributes respectively.
Color
The color of the MaterialButton background can be customized with the backgroundTint attribute. This requires a ColorStateList , meaning a for checked/enabled/disabled states is required. It defaults to colorPrimary (enabled)/ colorOnSurface (disabled) for contained buttons and transparent(unchecked)/ colorPrimary (checked) for all other types, with different opacities per state. There is also a backgroundTintMode attribute to change the tint PorterDuff.Mode , although typically you would want to keep this the same.
The color of the text label can be customized with the android:textColor attribute. This too requires a ColorStateList . It defaults to colorOnPrimary (enabled)/ colorOnSurface (disabled) for contained buttons and colorPrimary (enabled or checked)/ colorOnSurface (disabled or unchecked) for all other types, with different opacities per state.
The color of the optional icon can be customized with the iconTint attribute. This too requires a ColorStateList and the defaults are the same as those of android:textColor . As before, there is also an iconTintMode attribute.
Lastly, the color of the button touch ripple can be customized with the rippleColor attribute. It too accepts a ColorStateList and defaults to colorOnPrimary for contained buttons and colorPrimary for all other types, with different opacities per state.

Typography
The button text label will adopt the fontFamily attribute defined in your app theme.
While you would typically want to keep most aspects of the button text appearance as is, the Material Guidelines suggest we can use sentence case over the standard all caps for the text label, if desired. To achieve this, we would create a new style:
We could apply this directly to a button or in an individual button style by referencing it with the android:textAppearance attribute. Alternatively, it can be applied globally by referencing it in your app theme with the textAppearanceButton attribute.

Shape
The shape of a button background can be customized with the shapeAppearance attribute. This defaults to shapeAppearanceSmallComponent .
While not strictly shape theming, it is worth mentioning that the width of an outlined button stroke can be adjusted with the strokeWidth attribute. This defaults to 1dp.

More resources 📚
- The source code for the Playground app used in this article can be found on GitHub.
- Buttons Design Documentation
- Buttons API Documentation
- Toggle Buttons API Documentation
I hope this post has provided some insight into Material Buttons and how they can be used in your Android app(s). If you have any questions, thoughts or suggestions then I’d love to hear from you!
Источник
Material Design Buttons in Android with Example
Material Design Components (MDC Android) offers designers and developers a way to implement Material Design in their Android application. Developed by a core team of engineers and UX designers at Google, these components enable a reliable development workflow to build beautiful and functional Android applications. If you like the way how the UI elements from Google Material Design Components for android which are designed by Google are pretty awesome, then here are some steps that need to be followed to get them, and one of them is Google Material Design Components (MDC) Buttons. A Button is a user interface that is used to perform some action when clicked or tapped. Under the Button category, there are mainly 4 types of buttons in Google material design components:
- Contained Button
- Outlined Button
- Text Button
- Toggle Button
Below is a demo for all types of Buttons that we are going to create in this project.

Why MDC Buttons in Android?
Before going to implement all types of Button let’s understand why choosing these material components over ordinary inbuilt components in android? Please refer to the following points to understand this.
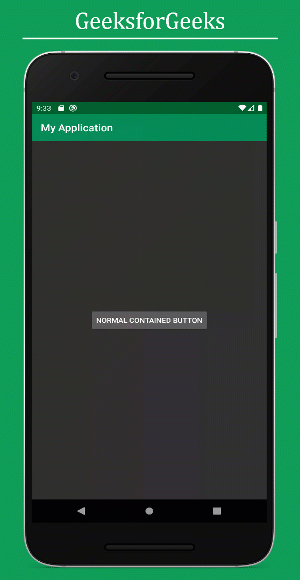
Normal Contained Button behavior under dark theme.
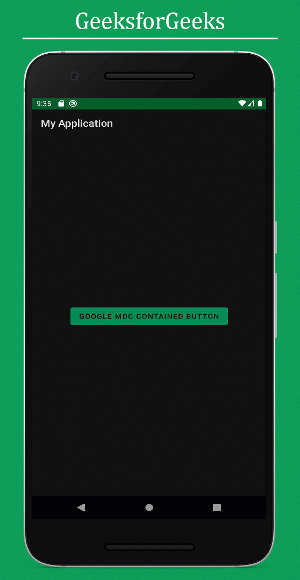
Google MDC button behavior under dark theme.
Approach
Step 1: Create a New Project
Step 2: Add Required Dependency
Include google material design components dependency in the build.gradle file. After adding the dependencies don’t forget to click on the “Sync Now” button present at the top right corner.
Note that while syncing your project you need to be connected to the network and make sure that you are adding the dependency to the app-level Gradle file as shown below.

Step 3: Change the Base application theme
Go to app -> src -> main -> res -> values -> styles.xml and change the base application theme. The MaterialComponents contains various action bar theme styles, one may invoke any of the MaterialComponents action bar theme styles, except AppCompat styles.
Why the theme needs to be changed:
Источник
Buttons
A button consists of text or an icon (or both text and an icon) that communicates what action occurs when the user touches it.
Depending on whether you want a button with text, an icon, or both, you can create the button in your layout in three ways:
- With text, using the Button class:
- With an icon, using the ImageButton class:
- With text and an icon, using the Button class with the android:drawableLeft attribute:
Key classes are the following:
Responding to Click Events
When the user clicks a button, the Button object receives an on-click event.
To define the click event handler for a button, add the android:onClick attribute to the element in your XML layout. The value for this attribute must be the name of the method you want to call in response to a click event. The Activity hosting the layout must then implement the corresponding method.
For example, here’s a layout with a button using android:onClick :
Within the Activity that hosts this layout, the following method handles the click event:
Kotlin
The method you declare in the android:onClick attribute must have a signature exactly as shown above. Specifically, the method must:
- Be public
- Return void
- Define a View as its only parameter (this will be the View that was clicked)
Using an OnClickListener
You can also declare the click event handler programmatically rather than in an XML layout. This might be necessary if you instantiate the Button at runtime or you need to declare the click behavior in a Fragment subclass.
To declare the event handler programmatically, create an View.OnClickListener object and assign it to the button by calling setOnClickListener(View.OnClickListener) . For example:
Kotlin
Styling Your Button
The appearance of your button (background image and font) may vary from one device to another, because devices by different manufacturers often have different default styles for input controls.
You can control exactly how your controls are styled using a theme that you apply to your entire application. For instance, to ensure that all devices running Android 4.0 and higher use the Holo theme in your app, declare android:theme=»@android:style/Theme.Holo» in your manifest’s element. Also read the blog post, Holo Everywhere for information about using the Holo theme while supporting older devices.
To customize individual buttons with a different background, specify the android:background attribute with a drawable or color resource. Alternatively, you can apply a style for the button, which works in a manner similar to HTML styles to define multiple style properties such as the background, font, size, and others. For more information about applying styles, see Styles and Themes.
Borderless button
One design that can be useful is a «borderless» button. Borderless buttons resemble basic buttons except that they have no borders or background but still change appearance during different states, such as when clicked.
To create a borderless button, apply the borderlessButtonStyle style to the button. For example:
Custom background
If you want to truly redefine the appearance of your button, you can specify a custom background. Instead of supplying a simple bitmap or color, however, your background should be a state list resource that changes appearance depending on the button’s current state.
You can define the state list in an XML file that defines three different images or colors to use for the different button states.
To create a state list drawable for your button background:
- Create three bitmaps for the button background that represent the default, pressed, and focused button states.
To ensure that your images fit buttons of various sizes, create the bitmaps as Nine-patch bitmaps.
Источник


