- KVM, speed up the Android Studio emulator in Ubuntu
- How to know if we can use KVM
- Installing KVM to speed up Android emulator
- Android studio kvm linux
- About
- VirtualBox — Запуск Android эмулятора в виртуальной среде для тестирования Android проекта
- Введение
- Требования:
- Трудности:
- Предлагаемое решение в данной статье:
- Предполагаемые преимущества:
- В настоящей статье будет использоваться оборудование:
- Шаг 1: Установка ПО на нативную OS
- x11vnc сервер
- Установка VirtualBox
- Создание VM
- Шаг 2: Установка ПО на VM
- Установка KVM
- Установка Android command line tools
- Устанавливаем Android tools
- Устанавливаем Git и клонируем проект
- Шаг 3: Проведение тестирования проекта на созданном Android эмуляторе
- Негативный тест
- Заключение
KVM, speed up the Android Studio emulator in Ubuntu
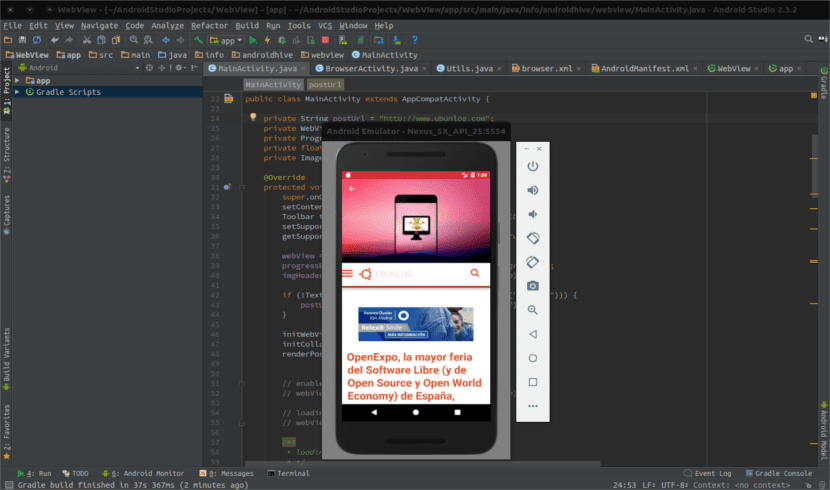
Today’s article is a tip for users who use Android Studio to develop their APPs. The only problem with this fantastic program is that you can despair when launching the emulator that it provides to test the application on duty. If your team is not an exceptional one, this may make you decide on another program to develop your applications. It takes a long time to execute (and when it does, its fluency leaves a lot to be desired).
Anyone who programs for Android on a regular basis is almost certainly using the android emulator that provides us Android Studio, although you have other options for it. For all those who are desperate with the performance of the emulator and also use Linux (Ubuntu in my case), here we are going to see a very simple solution by installing KVM ( Kernel-based Virtual Machine ). With it your team will not become a formula 1, but you will notice the difference.
The only requirement to be able to speed up the emulator is that you must have an Intel processor in the computer. In turn it must be compatible with Intel VT. For those who do not know, Intel VT is a virtualization technology that will allow us to significantly improve the performance of our virtual machines.
Table of Contents
How to know if we can use KVM
Before you start to install anything, you better make sure it is feasible to use KVM in our team. For this, the first thing we have to know is whether our processor supports hardware virtualization. To do this, we are going to open a terminal and write the following command in it:
After writing the previous command, the terminal will return a numeric value. If the value shown is 0 it will mean that our CPU does not support virtualization. If the value is greater than 0, we will continue with the next step. This will be install CPU Checker from the terminal using the command below:
After the installation is finished, it is the moment in which we must find out if our CPU supports KVM. This is the system that we will use to speed up the emulator. To clear up doubts from the terminal, we are going to use this command:

If we see something different like: «INFO: Your CPU supports KVM extensions INFO: / dev / kvm exists KVM acceleration can be used» we can continue on. In case the message shown is different, it means that we have to activate the Intel VT technology in the BIOS.
Installing KVM to speed up Android emulator
At this point, we are going to install a few packages necessary for accelerating the Android Studio emulator on our system. We will only have to write the following command string in the terminal:
In some cases, it will not ask us for configuration of any kind. But I have found others in which in the Postfix Configuration section you must select No configuration. This will prevent conflicts from starting to appear that can make our day bitter. To finish we just have to add our user to the following groups.
For the changes to the groups to take effect, you will have to log out of your account and log back in. Only members of the aforementioned groups will be able to use this technology for virtual machines. The previous step is essential to carry it out.
When we log in again we will verify the installation with the following command:
If everything has been correct, the terminal will return something like what you can see below:

In case of obtaining another result, it will be necessary to start over. We must perform the entire installation process again and re-add the users to the indicated groups.
In case we like more a graphical interface for KVM we can follow the instructions that a colleague left some time ago in the following post.
Without many complications and with a couple of commands we will have a more fluid and optimized emulator. Now we can continue programming and working without fear of «dying» when starting the Android Studio emulator.
The content of the article adheres to our principles of editorial ethics. To report an error click here!.
Full path to article: Ubunlog » Ubuntu » KVM, speed up the Android Studio emulator in Ubuntu
Источник
Android studio kvm linux
Setting Up Android Studio and all dependencies on Ubuntu with troubleshooting
I have faced so many issues while installing Android Studio on my Ubuntu 17.04 64-bit machine. I have done many hacks to get it finally worked. Hence sharing all the steps required to setup Android Studio successfully and running a project with that.
- AS— Android Studio. It is an IDE which will help you to make, build, and run your project.
- AVD— Android Virtual Device. Consider it as a virtual android mobile running on your machine. You’ll require a good graphics support to use it.
- Emulator— Requires to run an AVD on your machine.
Alert : I have observed that Android studio faces some issues with java9 currently. So better to install jdk8. Or if you face NoClassDefFoundError: javax/xml/bind/annotation/XmlSchema then install java8 instead of java9.
Install Android Studio
Download the package. Place it on desire location. You are gonna need it to install Android Studio and run it every time. So better not to leave it in /tmp or
/Downloads folder. Now Navigate to android-studio/bin/ in and run Android Studio from terminal using
On first run it’ll install Android Studio on your machine.
Alternatively you can install it from command prompt
If you don’t change the path then the SDK will be installed in
Update Android Studio
Whenever you open Android Studio, update it first. So you’ll have to less problems while running your project.
- Go to Configure > Settings > Updates OR File > Settings > Updates
- Check «Check for updates in channel»
- Set the channel to Stable Channel unless you’re feeling adventurous.
- Check Now
Check hardware support for virtualization
Intel’s KVM is required for Better AVD Performance. Check if your processor supports hardware virtualization;
If the output is non-zero, then your machine supports virtualization. Otherwise you’ll have to use actual Android device to test your application. Even if the output is 0 , it doesn’t mean virtualization is enabled. Let’s check it;
Then virtualization is enabled and ready to use otherwise you’ll have to enable it from BIOS if you see following;
Recheck the above command once you enable VT from BIOS settings.
Now install KVM and add your local user account to the group kvm and libvirtd.
In Ubuntu 16.10 and above, the group has been renamed to libvirt instead of libvirtd . In most of the cases, your user name will already be added to libvirtd . Above steps will create one more user in your account «Libvirt Qemu».
Alert Reboot your machine before going further.
Android Studio Requires mksdcard utility to create AVD. If you’re running 64-bit Linux OS. It won’t have these packages installed by default. Install those packages.
Let’s verify installation in Terminal using following commans;
installation was successful.
Install SDK Platforms, tools, system images
Open the android Studio from android-studio/bin/studio.sh . Open the SDK manager from tool panel or from File > Settings > Appearance & Behaviour > System Settings > Android SDK. Check following in the below image and install them using «Apply» button.


Now open AVD (Android Virtual Device) Manager from the tool palate or from Tools > Android > AVG Manager
If you already added soem device before you’ll see the window like this otherwise empty window asking to create your first AVD.

Create Virtual Device. It’ll open a window to configure virtual drive.

Select the type of device. You can create your own device too. And then click next. It’ll ask you to select the image. If you haven’t downloaded any image before, you can’t go next. I have already downloaded 3 images that you can see in below screen.

Click next > Final. Once selected images are downloaded you can check them in
\Android\Sdk\system-images folder. You can check all the AVDs in «
/.android/avd » folder or using following command;
When you will run your application it’ll automatically open the emulator with specified AVD. However to open it from command line;
Once the AVD is started using emulator you can even install an APK on that.
To enable GPU Emulation
Project not found
Android studio makes project folder by default in home directory until you specify another location. Ensure that you are not running android studio from any other user or from root or sudo. Otherwise it’ll create the project directory in home folder of particular user.
Error Installing APKs
If you see following while running your application
then go to File > Settings > Build, Execution, Deployment > Instant Run and uncheck «Enable Instant Run to . «

If you see following error while running emulator
then first check if /usr/lib64/libstdc++.so.6 presents. If not install following;
Now replace with the file comes with Android emulator.
Whenever you get «error: device offline» means that connection with emulator & adb bridge has been broken. stops & start adb bridge again with following commands
About
Setting Up Android Studio and all dependencies on Ubuntu with troubleshooting
Источник
VirtualBox — Запуск Android эмулятора в виртуальной среде для тестирования Android проекта
Введение
В данной статье я постараюсь описать пример инфраструктуры для автотестов Android приложений (mobile automation), а именно, среду для проведения тестранов UI автотестов на эмуляторе Android девайса в виртуальной среде.
Требования:
Для Android эмулятора нужна поддержка Intel Virtualization Technology или AMD Virtualization. Поэтому часто тестировщик сталкивается с необходимостью запуска тестранов только в нативной среде ПК с прямым доступом к центральному процессору.
В этом случае схема получается такая:

Трудности:
Невозможно легко пересоздать среду эмулятора.
Среда не создаётся перед проведением тестирования, и после проведения не удаляется, поэтому среда может влиять на тестируемое приложение.
Починка и настройка среды занимает много времени.
Предлагаемое решение в данной статье:
Создать VM с использованием возможностей nested virtualization VirtualBox (более подробное описание технологии в этой статье).
Пробросить поддержку Intel-VT или KVM внутрь созданной виртуальной машины.
Изнутри VM создать и запустить Android эмулятор девайса.
Провести тестран UI тестов приложения.
После проведения тестирования уничтожить VM.
В этом случае схема получится такая:

Предполагаемые преимущества:
VM можно автоматически создавать перед проведением тестирования, а после окончания уничтожать. В таком случае каждый новый тестран будет проведен в идеально чистых условиях.
Уменьшится время поддержки среды и управляющего ПО, так как не нужно каждый раз руками ничего устанавливать и чинить неисправности инвайронмента.
В настоящей статье будет использоваться оборудование:
процеcсор: Intel i5-1035G1
в BIOS включена поддержка виртуализации процессора
Шаг 1: Установка ПО на нативную OS
Отдельно обращу внимание на управление машиной. Будем использовать протокол VNC для создания удобного удаленного рабочего стола. Протокол универсальный, для Linux, Windows, Mac и т.д.
x11vnc сервер
Запуск с параметрами:
Установка VirtualBox
Вводим в командной строке:
Создание VM
Мы пойдем по самому простому пути и создадим VM из интерфейса VirtualBox с такими характеристиками. В дальнейшем создание VM будет code-first
Количество CPU — не больше половины имеющихся на Вашем процессоре (в идеале половина)
Оперативная память — будет достаточно 4Gb

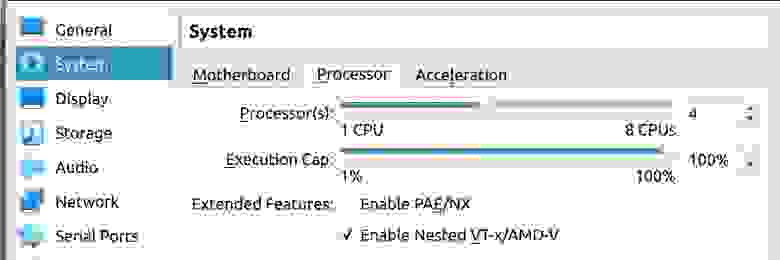
Nested Virtualization можно также включить из командной строки:
Далее переходим в саму VM.
Шаг 2: Установка ПО на VM
В первый раз мы установим всё руками. В дальнейшем весь установочный сценарий будет помещен в Packer, что позволит нам создавать VM с нужными настройками каждый раз перед началом тестирования.
Устанавливаем последний образ Ubuntu с официального сайта.
Установка KVM
Установка Android command line tools
Проверяем, что sdkmanager работает и Android SDK доступен:
Устанавливаем Android tools
Устанавливаем Git и клонируем проект
В данном примере я использую пустой проект мобильного Android приложения. В нём уже есть дефолтный интеграционный тест. Нам этого будет вполне достаточно.
Шаг 3: Проведение тестирования проекта на созданном Android эмуляторе
ADB видит подключенный к нему эмулятор:

Ура! Тест пройден!
Негативный тест
Чтобы убедится, в том что именно позволило нам сбилдить тесты, мы сделаем один негативный тест и воспроизведем запуск эмулятора в обычной VM.
Переустановка VirtualBox на родительской машине (чтобы избежать ошибочное сохранение конфигов)
VM мы создаём без проброса виртуализации и с одним CPU:
В созданной VM мы не устанавливаем:
Остальные шаги аналогичны шагу №2 с установкой ПО. Попробуем еще раз наш тестран. Обратите внимание, что ADB также видит эмулятор:
Ура! Тест не пройден! Никогда еще так не радовался проваленному тестрану:
Падает PackageManager, как и обычно при запуске из виртуальной среды без аппаратной поддержки процессора:
Заключение
Мы сделали первый этап построения инфраструктуры для проведения автотестов Android приложений. Следующим этапом должно стать упаковка описанного выше сценария в Packer (ссылка на официальный сайт) который умеет работать с образами VirtualBox. Затем весь сценарий мы попробуем запустить из CI Jenkins. Если учесть, что плагин для него уже порядком устарел, то будет очень интересно.
Все результаты опубликую, как пополнения к этой статье.
В идеале, у нас должна получится code-first инфраструктура для тестрана UI и интеграционных автотестов для Android приложений, которую можно поднять на любом современном офисном ПК, которая работает автономно, билдит тесты на родных Android эмуляторах и есть не просит.
Источник


