- FIX: Error launching Android Studio No JVM installation found
- Android Studio and Java Virtual Machine, the basics.
- Let’s fix: “No JVM installation found. Please install a 64-bit JDK. If you already have a JDK installed, define a JAVA_HOME variable”.
- First things, first…
- The true fix for when you’ve installed JDK.
- Summary
- Unable to launch Android Studio Emulator? Try this
- How can I fix Android Studio Emulator not working in Windows 10?
- 1. Download Intel’s HAXM through Android SDK Manager
- 2. Make sure you have adequate free disk space
- 3. Use an alternative Android Emulator program
- 4. Examine the current commit charge
- 5. Ensure you have the latest Intel graphics driver
- 6. Check antivirus software impact over Android Emulator
- Android Studio Windows 10 ошибок в 4 быстрых шага
- Не удается запустить Android Studio в Windows 10? Вот что делать
- 1: убедитесь, что у вас установлен SDK
- 2. Запустите приложение от имени администратора и в режиме совместимости.
- 3: отключить UAC и антивирус
- 4: переустановите все связанные приложения
FIX: Error launching Android Studio No JVM installation found
Table of Contents
Android Studio and Java Virtual Machine, the basics.
JVM means Java Virtual Machine and it can be used to execute certain codes in type bytecode JVM then converts this to other values. As a developer you do not have to develop a custom script to do this.
During the testing of one of my applications, I received the following error message:
In the tutorial below, I explain how you can solve this problem.
Let’s fix: “No JVM installation found. Please install a 64-bit JDK. If you already have a JDK installed, define a JAVA_HOME variable”.
The overall error message already indicates how you can solve the problem. I have a tutorial with screenshots below so that it is clearer for the dummies among us.
First things, first…
Have you actually installed Oracle JDK? If not, google first on JDK and download the latest version.
I only have a link to Google search. I do not use the Oracle link, but a Google search link because the JDK version can be updated and so you always download the latest version.
The true fix for when you’ve installed JDK.
Go to Start and search for This PC.
Right-click on this PC and open the properties.
Open Advanced System Settings in the menu to the right.
The next window should be opened on the ‘Advanced’ tab. If not click ‘Advanced‘ > ‘Environment Variables…‘
Add a new system variable.
Edit the System Variable:
- Variable name: JAVA_HOME
- Variable value: D:\Program Files\Java\JDK1.7.0_79
TI had the installation on the D-drive. As a result, the system variable was not applied correctly. So make sure that you indicate the correct location in the system variable.
Summary
The complete error message for those looking for another piece of the error message:
“Error launching Android Studio
No JVM installation found. Please install a 64-bit JDK. If you already have a JDK installed, define a JAVA_HOME variable in Computer > System Properties > System Settings > Environment Variables.”
Источник
Unable to launch Android Studio Emulator? Try this

- If this Android Emulator error occurs you probably have to change settings on your PC to resolve it.
- With our guided steps below you have great support to fix this kind of issue right away stress-free.
- It may be because of your disk space or current commit charge, or other causes we fully explained down below.
- So in this article, you will most probably fix this issue if you carefully following our guidance.

It seems that a few users are having issues with the Emulator running in Android Studio. Clicking Run and choosing Launch Emulator leads to no result.
The emulator is often refusing to work but be sure there are a few potential fixes for the error. The most prominent solutions we found are enlisted below so do give them a try.
How can I fix Android Studio Emulator not working in Windows 10?
1. Download Intel’s HAXM through Android SDK Manager

- Start the Android SDK Manager.
- Under Extras, check the box next to Intel x86 Emulator Accelerator (HAXM).
- Click the Install package button next.
- Review the Intel Corporation license agreement and accept the terms.
- Then, click Install.
- The SDK Manager will download the installer to the extras directory, under the main SDK directory.
- Even if the SDK manager says Installed it actually means that the Intel HAXM executable was downloaded. So, you need to run the setup located in
extrasintelHardware_Accelerated_Execution_Managerintelhaxm.exe - Now, just follow the installation instructions.
If the Android Emulator does not start properly, this problem is often related to discovering that your application’s minimum SDK is higher than your emulator SDK. If that’s not the case, make sure you have HAXM installer on your SDK Manager.
HAXM issues generally are the result of conflicts with other virtualization technologies or an out-of-date HAXM driver. Try reinstalling the HAXM driver by applying the above steps.
2. Make sure you have adequate free disk space
If this does not clear up the issue for you please consider that your problem is not caused by the version of the SDK in the emulator, but by the amount of RAM. The emulator always checks for sufficient free disk space on startup, and will not start unless at least 2 GB is free.
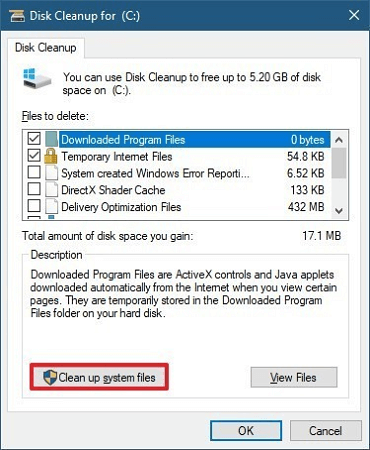
If the emulator repeatedly fails to launch for you, check to see that you have adequate free disk space. Up next, free physical RAM before launching the emulator by closing unused applications and files or use Disk Cleanup.
3. Use an alternative Android Emulator program
You can use third-party software on your PC and use Android emulation at its best. Using such a tool, you can optimize your Android gaming experience instantly and benefit from comprehensive support. Hence this job is perfectly created for LD Player.
Using this effective software you assure your emulator experience and do not have to worry about running issues. With lightweight functioning, it promises powerful quality for your favorite games.
It is known that android emulator software may consume much of your hardware resources and requires certain specifications of your PC. However, LD Player requires fewer resources to run Android games without large system requirements.
In conclusion, this easy solution may resolve the issue with its effective virtualization services and support. Also, the recommended specifications for LD Player are 8GB RAM, Intel i5 7500, and disk space of 100GB for a smoothly run time.
4. Examine the current commit charge
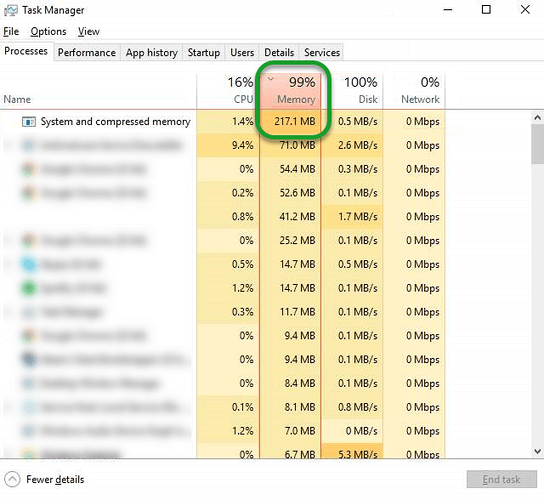
We suggest switching to an alternative. To be more precise, try examining the current commit charge. To open the Task Manager, press Ctrl+Shift+Esc. Then, enter y into the Performance tab.
In case of discovering any issues, try to disable all third-party memory management and memory compression utilities you might currently use. They can consume a good chunk of memory and bring your system closer to the commit limit without even knowing it.
5. Ensure you have the latest Intel graphics driver

An Android Emulator running slowly or at all is often related to the Intel GPU as well. If you have an Intel GPU (especially the Intel HD 4000), make sure you have downloaded and installed the latest Intel graphics driver.
Moreover, if your computer has both an Intel HD 4000 GPU and a discrete GPU, disable the Intel HD 4000 GPU in Device Manager to make sure only the discrete GPU remains functioning.
6. Check antivirus software impact over Android Emulator

Your antivirus software could also decrease the performance of tools like the Android Emulator. If you have additional antivirus tools installed besides the one coming with your operating system, don’t hesitate to run simple tests to determine which one has a greater impact on the emulator itself.
These resolutions usually make Android Studio Emulator work again in Windows 10. Don’t forget to share any alternative solutions in the comments section below.
Источник
Android Studio Windows 10 ошибок в 4 быстрых шага
В самой используемой ОС в мире есть и самые активные разработчики. Конечно, мы имеем в виду Android и его приложения. Теперь большинство пользователей будут работать под управлением Android Studio под Linux, но значительное количество разрабатывают приложения для ОС Windows. В последнее время пользователям, которые обновили Windows 7/8 до Windows 10, было трудно работать с Android Studio.
Мы позаботились о том, чтобы заручиться поддержкой нескольких проблем. Если вы не можете запустить Android Studio в Windows 10 , следуйте приведенным ниже инструкциям.
Не удается запустить Android Studio в Windows 10? Вот что делать
- Убедитесь, что вы установили SDK
- Запустите приложение от имени администратора и в режиме совместимости
- Отключить UAC и антивирус
- Переустановите все связанные приложения
1: убедитесь, что у вас установлен SDK
Странное появление приложений, работающих на Windows 7 или Windows 8 и внезапно заканчивающихся сбоем на Windows 10, не является чем-то новым. Однако в этом случае большинство пользователей смогли запустить Android Studio на Windows 10 так же легко, как и на предыдущих итерациях Windows. Просто некоторые пользователи не смогли запустить этот инструмент разработки, даже после нескольких попыток.
- ЧИТАЙТЕ ТАКЖЕ: эмулятор Android Hyper-V теперь доступен в Windows 10 v1803
Несмотря на то, что это редко, мы все равно должны посоветовать вам проверить Java SDK (Software Development Kit) от Oracle. Без этого Android Studio не будет работать. Даже если вы выполнили обновление до Windows 10 за предыдущие итерации, переустановка этого инструмента может помочь. Возможно, некоторые компоненты не были перенесены с системой, и именно это и является причиной проблемы.
2. Запустите приложение от имени администратора и в режиме совместимости.
Другим подходящим подходом, когда стороннее приложение не работает, является предоставление ему административного разрешения. Кроме того, запуск программы в режиме совместимости также может помочь. Многие сторонние приложения не будут работать так, как задумано в Windows 10, из-за более ограниченного характера системы.
- ЧИТАЙТЕ ТАКЖЕ: Windows 10 на ARM подвержена проблемам с производительностью и совместимостью приложений
Однако, как мы уже говорили, вы можете решить эту проблему, настроив параметры совместимости. Выполните следующие действия, чтобы разрешить административное разрешение для Android Studio:
- Щелкните правой кнопкой мыши ярлык Android Studio и откройте Свойства .
- Установите флажок « Запустить эту программу в режиме совместимости для ».
- Выберите « Windows 7 » в раскрывающемся меню.
- Установите флажок « Запустить эту программу от имени администратора ».

- Подтвердите изменения и перезагрузите компьютер.

3: отключить UAC и антивирус
Даже если мы не можем открыто рекомендовать отключить UAC (контроль учетных записей) в Windows (из-за очевидных причин безопасности), вы можете попробовать его временно. Когда дело доходит до более деликатных и сложных приложений, которыми, безусловно, является Android Studio, системные ограничения могут быть слишком большими.
- ЧИТАЙТЕ ТАКЖЕ: Ошибка установки программного обеспечения «Ошибка 5: доступ запрещен» в Windows [FIX]
Вот как отключить UAC в Windows 10:
- На панели поиска Windows введите UAC и откройте « Изменить настройки контроля учетных записей » из списка результатов.
- Перетащите ползунок вниз и подтвердите изменения.
- Если система попросит вас ввести пароль, введите его.
- Перезагрузите компьютер.
Более того, хотя мы говорим об ограничениях, сторонний антивирус может иногда блокировать выполнение различных приложений. По этой причине, если вы доверили защиту системы стороннему решению, обязательно отключите ее временно. Некоторым пользователям удалось заставить Android Studio работать, когда защита в режиме реального времени была отключена.
4: переустановите все связанные приложения
Наконец, все оставшиеся решения, которые мы можем понять и включить в этот список, указывают на переустановку. Теперь, как мы уже упоминали, обновление системы до Windows 10 должно позволить вам использовать все приложения из предыдущей итерации Windows. Однако в этом случае мы настоятельно рекомендуем переустановить все и начать с нуля.
- ЧИТАЙТЕ ТАКЖЕ: 10 лучших программ для создания игр для пользователей ПК
Конечно, если у вас есть несколько проектов, обязательно сделайте их резервную копию перед удалением Android Studio и SDK. Надеюсь, вы сможете продолжить работу позже. Здесь можно скачать Java SE Development Kit.А последнюю версию Android Studio-совместимой версии для Windows 10 можно найти здесь.
Это должно сделать это. Не забудьте поделиться альтернативными решениями в разделе комментариев ниже. Мы будем благодарны за ваше участие в этом деле.
Источник


