- How To Set Android SDK Path In Windows And Mac
- 1. Configure Android SDK Variable In Windows.
- 1.1 Get Android SDK Install Directory Path.
- 1.2 Set %ANDROID_HOME% and %Path% System Environment Variable.
- 2. Configure Android SDK Variable In macOS.
- Fix “SDK location not found. Define location with sdk.dir in the local.properties file or with an ANDROID_HOME environment variable” in Android Studio
- 11 Android Studio Shortcuts every Android Developer must know
- How to install Android SDK and setup AVD Emulator without Android Studio
- Understanding the Android SDK
- Installing the Android SDK
- Step 1 — Download the tools package
- Step 2— You need Java 8!
- Step 3 — Download the essential packages
- Step 4 — Set your environmental variables
- Step 5 — Download the platform specific packages you want
- Step 5 — Create a AVD device
- Step 6 — Run the Android Emulator
How To Set Android SDK Path In Windows And Mac
After you installed android studio, you still need to configure some android SDK environment variables then you can use it easily. This article will tell you how to correctly configure Android SDK environment variables such as ANDROID_HOME, PATH on Windows and macOS.
1. Configure Android SDK Variable In Windows.
1.1 Get Android SDK Install Directory Path.
Before you can configure it, you should first get the android SDK install directory follow below steps.
- Open android studio, click File —> Settings menu item in the top men bar.
- Expand Appearance & Behavior —>System Settings —>Android SDK menu item on the left side of the popup window. Then you can find the Android SDK Location directory path on the right side ( in this example, the Android SDK location path is C:\Users\Jerry\AppData\Local\Android\Sdk ), remember it.
1.2 Set %ANDROID_HOME% and %Path% System Environment Variable.
- Right-click the computer icon in Windows file explorer left side, click Properties menu item in the popup menu list. This will open the windows system configuration window.
- Click the Advanced system settings link on left panel, it will popup the System Properties window, click the Environment Variables button to open Environment Variables window.
- Click the New… button to add a new system variable, input ANDROID_HOME as the variable name, and input the Android SDK location directory path ( such as C:\Users\Administrator\AppData\Local\Android\Sdk ) as the variable value.
- Select variable Path and click Edit button and add ;%ANDROID_HOME%\tools;%ANDROID_HOME%\tools\bin;%ANDROID_HOME%\platform-tools at the end of its value. Please note the ; must be English character otherwise it will not take effect .
- Click OK to close the system environment variables settings window, open a dos window, type command adb in it. If you see output like below that means the android SDK path variable has been configured successfully.
2. Configure Android SDK Variable In macOS.
- Open Android Studio on macOS, then click Android Studio —> Preferences menu item at the left top toolbar.
- Input search keyword sdk in the search box of the popup Preferences dialog window left side.
- It will focus on the Android SDK menu item on the left side, and you can get the Android SDK Location directory path value on the right side Android SDK Location text box.
- Generally, the Android SDK is installed in the /Users/user-name/Library/Android/sdk folder on macOS.
- If you can not find the above folder in macOS finder or terminal, this is because the Library folder is a hidden folder by default, you should make the hidden folder visible by executing the command $ defaults write com. apple . finder AppleShowAllFiles TRUE in a macOS terminal window ( please read article How To Show Hidden Files In Mac OS Finder And Select Hidden Files In Html Upload File Form ).
- You can also see the hidden Library folder by opening a macOS Finder window, then click Go —> Go to Folder… menu item, and input
/Library in the popup dialog input text box, then click Go button.
Источник
Fix “SDK location not found. Define location with sdk.dir in the local.properties file or with an ANDROID_HOME environment variable” in Android Studio
SDK is a Software Development Kit. SDK brings together a group of tools that enable programing for mobile Applications such as Android, IOS. You can download SDK from HERE and then Extract/put it in the default folder if there is no such then make it. Default Path of SDK in PC is:
Windows:
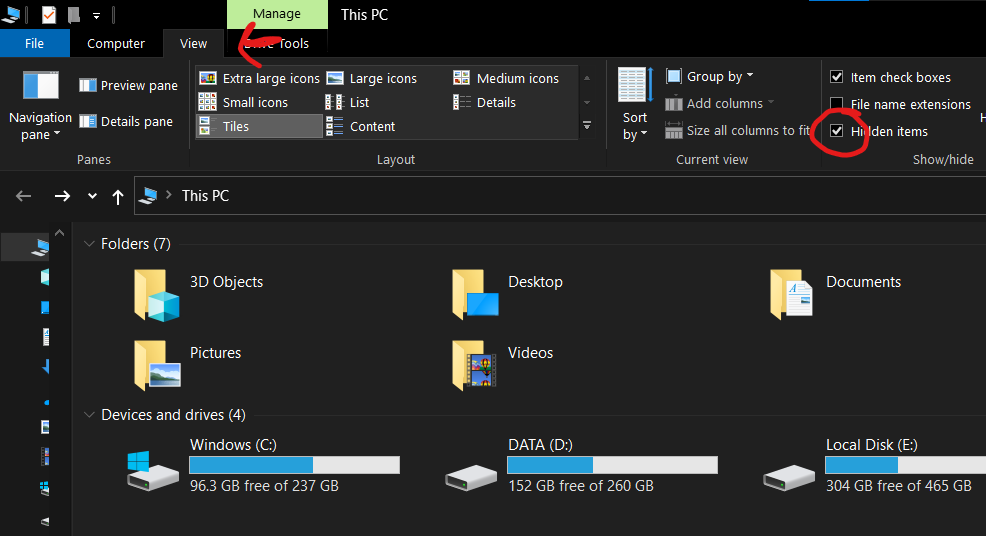
UserName above is the name of your PC. If you are not able to see AppData Folder then you have to change the View settings of File Explorer and mark Hidden Items.
Step 1. Go to the top of File Explorer and open drop-down
Step 2. Now go to View > Hidden Items
If this doesn’t work, Add ANDROID_HOME in Environment Variables. Go to System Properties -> Environment Variables -> Add Variable -> put Variable Name and Value.
Step 1. Open System Properties
Step 2. Select New and Insert Variable and Location
Step 3. Add Variable name: ANDROID_HOME and value: as your SDK path. If your path is something else not in C Drive you have to add that. Make sure you enter the correct path UserName below is the name of your PC. and press OK.
Now check the SDK location in your Android Studio and follow these steps.
Step 1. Go to the FILE > SETTINGS
Step 2. Search for SDK and place your SDK-LOCATION. **MAKE SURE YOU HAVE ADDED CORRECT PATH**
***IF YOUR LOCATION OF SDK IS NOT C DRIVE THEN YOU HAVE TO ADD CORRECT LOCATION***
Источник
11 Android Studio Shortcuts every Android Developer must know


This is how you may end up if you try and take a shortcut in real life, but it’s not true for the world of software !! Here you are encouraged to take shortcuts like auto complete, code generations, snippets and what not…
A software engineer must know all the shortcuts of the IDE he is using and must have the environment BENT to his will. Given a keyboard he must be able to navigate through the IDE all around. This can increase his productivity manifolds and is also less distracting than shifting to a mouse/touchpad during typing.
As an Android Engineer I can only speak of Android Studio and here I will mention my top 11 most useful Android Studio Shortcuts ( Windows / Mac ):

This is the holy grail of the navigational shortcuts. It’s really simple. Search Android assets, navigate to the Gradle files, image resources, layouts, colors.xml and much more. There is nowhere you can’t go with the Double Shift shortcut.
Just press Shift twice and a hovering menu will po2.pup. Something like this :
As you can see I searched for “color” and it presented me with all the file with name color. This is my favorite one and I use it a lot in Android Studio.

More often than not, you’ll not be working with all the project files at once. You would be working on a specific module in a project and will be playing around some specific files of that module. The Android Studio has an option where you can browse the most recently opened files on the go. Just press CTRL + E for windows and Command + E for mac and a list of recently opened files will popup.

So did you forgot what’s the shortcut for a replace action ? You forgot what’s the shortcut for a find action ? CTRL + SHIFT + A got you !! You can find actions such as Replace, Find, Run, Instant Run etc…
I searched for the Run action and it gave me all the run options Android Studio has to offer like running the garbage collector and debug runner.

This option is particularly useful if you want to search for some variable or method names. Many a times it so happens that you have declared a variable in some local code and forgot it’s origin, or you may want to find all the places it has been initialized or assigned some value. Well, android studio makes this very easy. Just press CTRL+ALT+SHIFT+N on Windows or Command+Option+O on Mac and type/guess a part of the variable name. Android studio will present you with a list of all possible options.

It can be time consuming to type out all the boilerplate code such as getters/setters in model classes, toString implementation, Parcelable Implementation and much more. Android Studio does all this for you. Press ALT+Insert on Windows or Command+N on Mac and android studio will list out all the options that are available such as override methods, implement interfaces, toString implementation etc…
Code Generation Android Studio Shortcut

When extending a Fragment or Activity class, you need to override certain methods such as onCreate and onCreateView. Apart from that you can also override lifecycle methods such as onPause, onResume, onDestroy. Android studio generates all this boilerplate code for you. Just press CTRL+O on Windows or Command+O on Mac and you’ll be presented with a list of methods that you can override.
You can see there are hundreds of methods which can be overridden and it is not possible to remember them all. So this shortcut comes in handy during development phase. You can also start typing a part of the name of method you want to override and the list will filter automagically.
If you want to delete the entire line, no need to select using a mouse or pressing backspace for the whole day. Just press CTRL+Y on Windows or Command+Backspace on Mac and you are good to go.

Forgot what all parameters your method requires ? Methods such as rawQuery (for SQLite) use many many parameters which are hard to remember. Here’s where Android Studio comes to the rescue. Just press CTRL+Space on Windows or Command+Space on Mac and you will be presented with a popup of all the variants of a method and the arguments that it expects.
Basic Completion Android Studio Shortcut
This feature is also demonstrated in the previous image. Notice the popup box in grey. This is the documentation box. Just like that we can view the documentation of a particular method, including the class it extends from and some links to more details. Press CTRL+Q on Windows or Command+J on Mac and the popup box will show up. It requires an active internet connection.

Every developer is familiar with the callback hell, OnClickListeners, Dialog Click Listeners etc… These are anonymous classes that have multitudes of methods that need to be overridden. If you have a large codebase, then looking at such code can be daunting. Android Studio provides this option of collapsing all the blocks of code, just showing the method names so that you can find the method you are looking for easily, or just close out all other distractions and make your IDE look neat!!
To expand or collapse code blocks press CTRL+ +/- on Windows or Command + +/- on Mac. Have a look at the image below. The file looks so neat, showing only the method names :
Collapse/Expand Android Studio Shortcut
Again this is one of the most important shortcut that you can use. No need to manually indent all the nested if blocks or the for loops. Android Studio takes care of all the formatting. Just Press CTRL+ALT+L on Windows or Command+Option+L on Mac. The android studio will reformat all the code for you.
And the good part is that it works for XML layouts as well. It takes care of ordering of the xml attributes and indenting nested layouts in your code so that you focus more on coding and less on figuring out what is nested under what.
So, this was my list of 11 most useful Android Studio Keyboard Shortcuts. These have helped me improve my productivity manifolds and hope it does for you as well.
Don’t forget to follow me on LinkedIn and Quora . If you have any questions or suggestions just drop a comment below and I’ll be happy to help.
Источник
How to install Android SDK and setup AVD Emulator without Android Studio
If you are trying to develop to Android, you probably will end up installing the Android Studio to get the Android SDK and the AVD Emulator working properly.
But if you are using another code editor, like Sublime Text or VSCode, installing the Android Studio will just mess up with your setup and consume your precious RAM for no good reason.
I had a hard time figuring out how to properly do this setup due the lack of documentation about it, so i hope this article helps you. 🙂
Recommended previous knowledge:
- SDK (Standard Development Kit); Read about on Wikipedia;
- AVD (Android Virtual Device); Read about on docs;
- CLI (Command Line Interface); Read about on Wikipedia;
- Android API levels; Read about on Vanderbilt University;
- How to open, navigate and execute files in your OS terminal;
- Know what are environmental variables;
Understanding the Android SDK
Basically, the Android SDK is a bunch of packages necessary to develop for Android.
These packages stays in subfolders of a folder called “sdk” (or “android-sdk” sometimes). You do not need to know how these packages really work, just what they do.
The picture below is my Android SDK folder, these are the basic packages you will need in order to get everything working properly.
Here is a brief explanation of each package:
- tools: This package is mainly used to manage the other packages and to create AVD’s;
- emulator: As the name suggest, this is the Android emulator;
- platform-tools: Some tools to communicate with Android devices when you plug then in your computer;
- patcher: This package is automatically downloaded by the SDK. I didn’t find what exactly this is for, so just leave it as it is;
The folders bellow contain sub-folders with the packages for each Android API level.
- platforms: The platform packages are required to compile your app for the specified API level.
- system-images: These are the android images used in the emulator.
- build-tools: These are necessary to build your Android apps
Installing the Android SDK
In order to install the SDK we will use the Command Line Tools. These are some quite simple CLI’s used to manage the Android SDK. You can read the documentation here for more details.
Step 1 — Download the tools package
First, you need to download the tools package. And with this package you can download the others.
- First, go to the Android Studio download page: https://developer.android.com/studio;
- Then click in “ Download Options”;
- There you will find a table named “ Command line tools only”;
- This table contain some zip files. Download the appropriate file for your system ( Windows, Mac or Linux);
- Extract this zip and you will get a folder called tools: This is the tools package i explained earlier;
Create a folder anywhere you prefer to place your SDK. I recommend you to stick with one of these commonly used places:
- Globally: C:\Android\sdk or C:\android-sdk (this is not default, but i usually set my SDK here on Windows)
- One user only: C:\Users\ \AppData\Local\Android\sdk
- Globally: /Library/Android/sdk
- One user only: /Users/ /Library/Android/sdk
And move the tools folder to this new sdk folder. Make sure you have admin access to this folder and any sub-folders inside it, or the tools package will fail to download new packages.
Note: You can also download a pre-build package for your SO (like the one available on Ubuntu repository). But i do not recommend you do to so, because they probably will not be updated and will be harder to manage, since it was automatically installed.
Step 2— You need Java 8!
The Android SDK packages require Java 8. If you do not have it, you need to download. If you are using a newer version, you have to downgrade to Java 8 or you will eventually get some errors, because it is not compatible.
If you do not have the Java 8 SDK, here is how you can install it:
On Ubuntu run these commands:
- # sudo apt-get update
- # sudo apt-get install openjdk-8-jdk
Sorry for MacOS users, i don’t know how to install it on this OS.
Step 3 — Download the essential packages
Now, download the platform-tools and the emulator packages, because they contain some CLI binary files you will need later. I decided to download these packages first in order to set all the necessary environment variables at once and make the rest of the process easier.
Open a terminal window (you need to use a terminal, not the file explorer), go to your sdk folder and navigate to the /tools/bin directory.
This folder contain the SDKManager binary: this is a CLI used to list the available packages in the Google’s repository and download, update or remove them from your SDK folder.
The bellow command will list all packages installed (the first items on the list) and all packages available to download:
To download the packages, simply copy the package names and pass it as a parameter to the SDKManager CLI using the terminal:
# ./sdkmanager platform-tools emulator
If you open your sdk folder you should see these packages folders there.
Step 4 — Set your environmental variables
You need to set the below environmental variables containing the path to our SDK, so any running program can find it in your pc:
ANDROID_SDK_ROOT = Path to your SDK folder
ANDROID_HOME = The same as ANDROID_SDK_ROOT. This variable is now deprecated, but i recommend setting it because some programs still using it to locate your sdk.
And add these folders to the PATH variable, making their binary files accessible from everywhere:
To add the environment variables on WIndows, just follow these steps:
- Open the “Control Panel”;
- Go to “ System and Security” option in the side menu;
- In the window “ System Properties” open the tab “ Advanced”;
- Click in the button “ Environment Variables” in the bottom of the page;
- In the “ Environment Variables” window you will see two tables: “User Variables” and ” System Variables”.
- If you created your sdk folder for one user only, set the variables in the “ User Variables” table;
- But, if you create your sdk folder globally, set the variables in the “ System Variables” table instead;
On Linux, you can set your environment variables in many places. So i choose the ones I found the most appropriate:
- If you created your sdk folder for one user only, set your environment variables in the file
/.bashrc;
Here is how i set these variables in my Ubuntu, using the file /etc/environment:
And sorry again, no MacOS instructions for this task.
You can find more about these environmental variables in the oficial docs here.
Now your SDK is ready! If you do not need to run the emulator there’s no need to follow the next steps.
Step 5 — Download the platform specific packages you want
You need more three packages: The platform, the system-image and the build-tools. You can download these packages for any Android version you prefer. In this article, i will download the packages for the API Level 28.
Use the “ sdkmanager — list” command to find these packages and download them using the command “ sdkmanager
Here’s an example:
Step 5 — Create a AVD device
Creating a AVD device is a simple task: run the AVDManager command (this is a binary file located in the tools/bin folder of your sdk) with the create avd option, a name for the new AVD and the image you want to use.
Here is a example:
# avdmanager create avd — name android28 — package “system-images;android-28;default;x86”
You will be asked if you want to alter some configurations. You can also modify these configurations later in the file config.ini, located in the avd folder (this folder usually is created in your user folder, under the android directory). The currently active configurations can be find in the file hardware-qemu.ini (this file just will be created after the emulator runs for the first time).
Step 6 — Run the Android Emulator
Now you just need to run the emulator command (remember that we added this package to the environmental variables?):
The emulator take some time to init for the first time. But if you done everything correctly you should see this screen:
Источник


