- Background Task Inspector
- Методы лечения различных ошибок в Android Studio при разработке проекта
- Get started with the Navigation component
- Set up your environment
- Groovy
- Kotlin
- Create a navigation graph
- Navigation Editor
- Save data in a local database using Room Part of Android Jetpack.
- Setup
- Groovy
- Kotlin
- Primary components
- Sample implementation
- Data entity
- Kotlin
- Data access object (DAO)
- Kotlin
- Database
- Kotlin
- Usage
- Kotlin
- Kotlin
- Additional resources
- Sample
- Codelabs
- Blogs
Background Task Inspector

Android Studio includes multiple inspectors, such as the Layout Inspector and Database Inspector, to help you investigate and understand the internal state of your running app. With Android Studio Arctic Fox, we are releasing a new inspector to help you monitor and debug workers your app schedules using WorkManager 2.5.0 or higher.
WorkManager is the recommended way to run asynchronous tasks in the background, even after the app is closed. Although it’s easy to configure your tasks as WorkManager workers, once a worker is queued, its execution is difficult to monitor and tricky to debug if you face issues.
With the Background Task Inspector, you can easily monitor the status of a worker, see its relationship with other chained workers, or inspect details, such as the worker output, frequency, and other timing information. Let’s see what the Background Task Inspector can do on a sample project.
To demo the Background Task Inspector, I’ll use the WorkManager sample app in architectural-components repo. If you want to give it a try, you can check out the repo and follow along as you read the article.
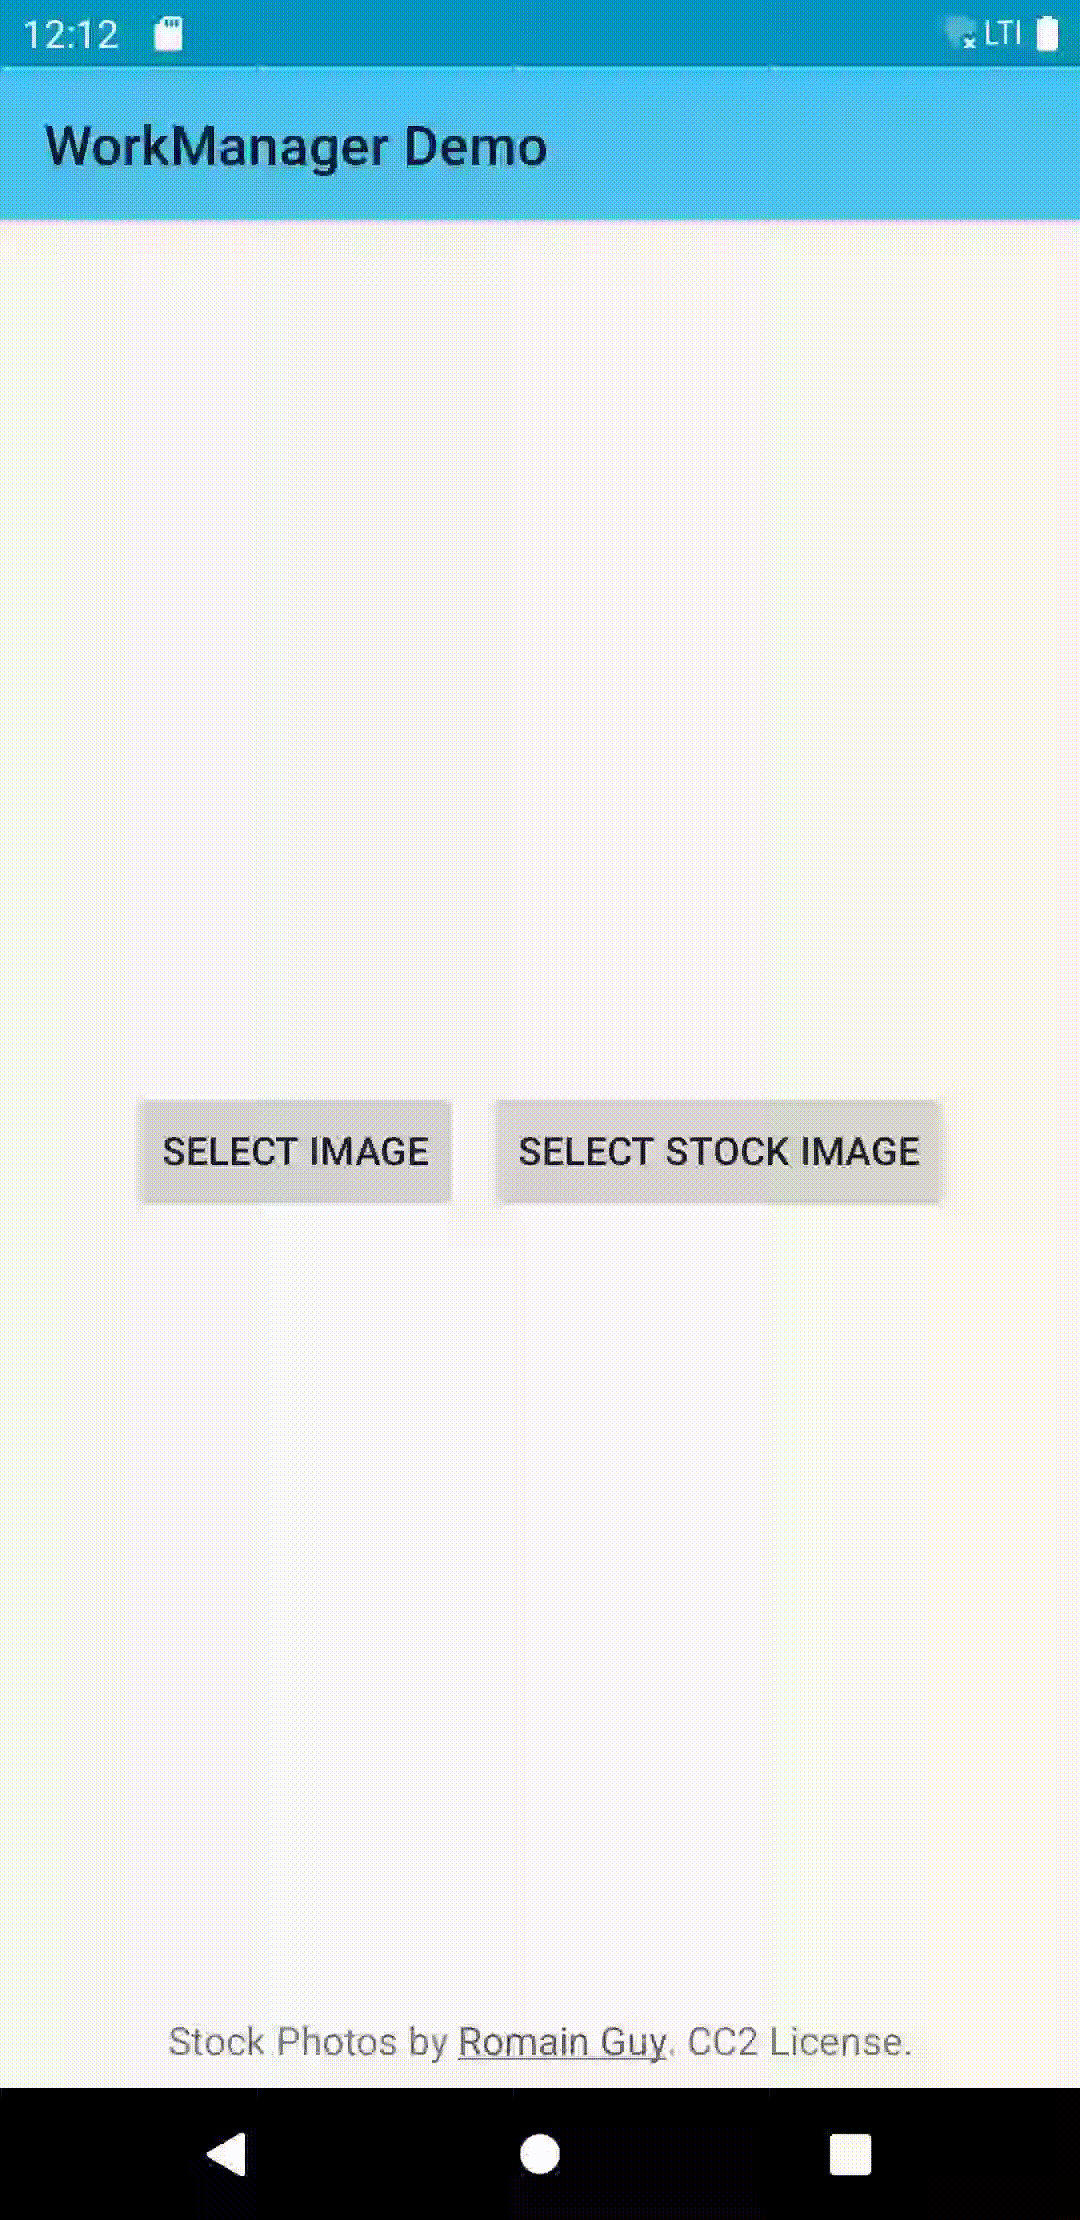
This app uses WorkManager to apply user selected filters on the selected photo. After running the app, users can choose a photo from the gallery or simply use a random stock photo. To see how the Background Task Inspector works, I run the app and select an image to apply some filters.
Each filter is implemented as a WorkManager worker. After a short wait, the app displays the photo with the selected filters applied. Without any further knowledge on the sample app, let’s see what else I can figure out by just using the Background Task Inspector.
To open the Background Task Inspector, select View > Tool Windows > App Inspection from the menu bar.
With the Background Task Inspector tab selected in the App Inspection window, I run the app again on a device or emulator running API level 26 or above. If it is not automatically selected, I choose the app process from the drop-down menu. After connecting to the app process, I can then go to my running app and select all filters and click apply. This time I can see a list of running jobs in the Background Task Inspector.
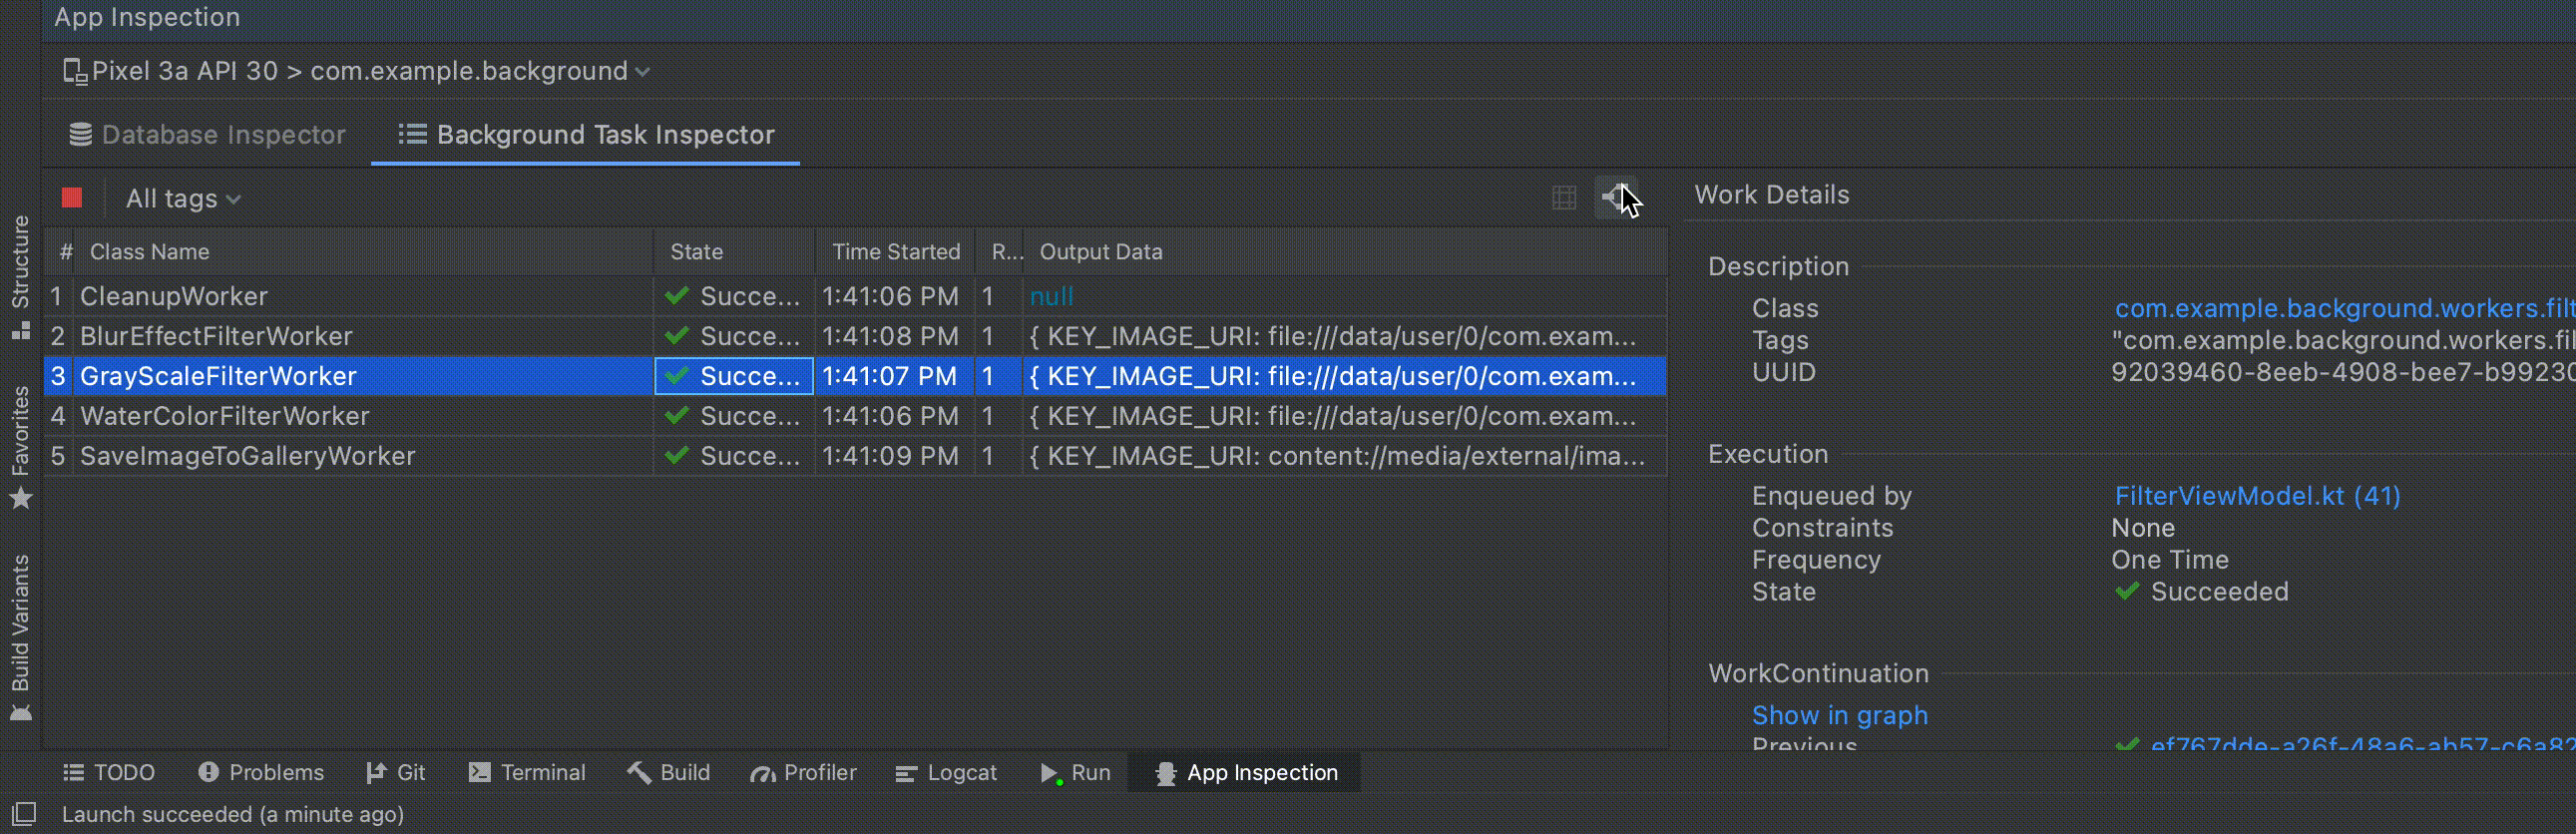
The Background Task Inspector lists the class name, current state, start time, retries and the output data of all the running/failed or completed jobs. Clicking on a specific job from the list opens the work details panel.
This panel provides more detailed information for each worker’s description, execution, work continuation and the results. Let’s take a close look at each section.
Description section lists the Worker class name with the fully qualified package, as well as the assigned tag and the UUID of this worker.
Next, the execution section shows the worker’s constraints (if any), running frequency, it’s state and which class created and queued this worker.
WorkContinuation section displays where this worker is in the work chain. You can check the previous or the next worker, if any, or the other jobs in the work chain. You can click to another Worker UUID to navigate and see the selected worker’s details. Looking at this work chain, I can see that the app uses 5 different workers. The number of workers may differ depending on the choice of filters by the user.
This is great but imagining the work chain is not always easy if you are not familiar with the app. Another great feature of Background Task Manager Inspector is the ability to display the work chain as a graph. To do that I click the ‘Show in graph’ link in the WorkContinuation section or switch to Graph View by clicking the ‘show Graph View’ button on top of the jobs list.
This graph view can help you to understand the order of the workers, the data which is passed between workers and the current state of each worker.
The last section in the Work Details panel is the Results pane. In this section you can see the start time, retry count and the output data of the selected worker.
Let’s say I want to test what happens when a worker stops. To do that, I’ll run the app again, select the worker, wait until it changes to running state and click the ‘Cancel Selected Work’ on the top left. Once I do that, the worker I selected and the remaining workers in the chain change their status to canceled.
Graph view becomes even more useful if your app includes complex chaining relationships, such as the one here. The graph allows you to quickly see relationships between a complex set of workers and monitor their progress.
If you want to try the Background Task Inspector with a more complex graph or make some WorkManager art, you can find the code here and add the DummyWorkers to the continuation object as seen here.
Background Task Inspector will be available with Android Studio Arctic Fox release but it is already available for you to try in the Arctic Fox Preview channel and soon will be in beta! If your app uses Work Manager, please give a try and let us know what you think or simply share your WorkManager art with us!
Источник
Методы лечения различных ошибок в Android Studio при разработке проекта
Сегодня хотел бы поделиться своим анализом и способами лечением разных ошибок при разработке своего продукта в Android Studio. Лично я, не раз сталкивался с различными проблемами и ошибками при компиляции и/или тестировании мобильного приложения. Данный процесс, всегда однообразный и в 99% случаев и всегда нужно тратить n-колличество времени на его устранение. Даже, когда ты уже сталкивался с данной проблемой, ты все равно идешь в поисковик и вспоминаешь, как же решить ту или иную ситуацию.
Я для себя завел файлик, в котором отметил самые частые ошибки — потратив на это несколько часов и перечислил самые популярные ошибки (в дальнейшем планирую просто их запомнить), чтоб сократить свое время в дальнейшем.
Итак, начну по порядку с самой распространенной проблемы и дальше буду перечислять их по мере появления:
1) Если подчеркивает красным код, где используются ресурсы: R. — попробовать (но вероятно не поможет): Build -> Clean Project.
В принципе на Build -> Clean Project можно не терять времени, а лучше всего — слева переключиться на Project, открыть каталог .idea, затем каталог libraries и из него удалить все содержимое. Затем нажать кнопку Sync Project. А затем (если все еще красное, но скорее всего уже будет все ок ) Build -> Clean Project.
2) После внезапного выключения компьютера, после перезапуска может быть во всех проектах весь код красным. Перед этим может быть ошибка: Unable to create Debug Bridge: Unable to start adb server: Unable to obtain result of ‘adb version’. Есть три решения — первое помогло, второе нет (но может быть для другого случая), а третье — не пробовал:
а) File — Invalidate Caches/Restart — Invalidate and Restart
б) Закрыть студию. В корне папки проекта удалить файл(ы) .iml и папку .idea. Вновь запустить студию и импортировать проект.
в) Нажать Ctrl-Alt-O и запустить оптимизацию импорта.
Кстати, adb сервер можно проверить на версию (и работоспособность) и затем перезапустить:
3) Если Android Studio выдает приблизительно такую ошибку: Error:Execution failed for task ‘:app:dexDebug’.
Надо слева переключиться на опцию Project, найти и удалить папку build которая лежит в папке app, т.е. по пути app/build. Затем перестроить весь проект заново: Build -> Rebuild Project.
Такое же решение если ошибка типа: «не могу удалить (создать) папку или файл» и указан путь, который в ведет в app/build. Тоже удаляем папку build и ребилдим проект.
4) В сообщении об ошибке упоминается heap — виртуальная память. А ошибка обычно вызвана ее нехваткой, т.е. невозможностью получить запрашиваемый объем. Поэтому этот запрашиваемый объем надо уменьшить, т.е. переписать дефолтное значение (обычно 2048 MB которое можно изменить в настройках), на меньшее 1024 MB.
В файле проекта gradle.properties пишем:

5) Android Studio пришет примерно такую ошибку: Plugin is too old, please update to a more recent version, or set ANDROID_DAILY_OVERRIDE environment variable to «83648b99316049d63656d7276cb19cc7e95d70a5»
Возможные причины (кроме необходимости регулярного обновления SDK):
а) Загруженный проект был скомпилирован с помощью уже несовместимого старого gradle плагина. В этом случае надо найти и подключить в своем build.gradle проекта этот более старый плагин. т.е. попробовать более старые версии, например: 1.1.3 (часто именно 1.1.x и подходит).
Найти все версии можно здесь.
б) Если в build.gradle проекта используется beta-версия плагина — это означает, что срок ее истек. Посмотреть последние релизы (продакшн и бета) можно также здесь:
6) Иногда при подключении сторонних библиотек могут дублироваться некоторые файлы (обычно связанные с лицензированием). В сообщении будет что-то содержащее слова: duplicate files. Решение — надо посмотреть в сообщении об ошибке или в документации подключенной сторонней библиотеки — какие именно файлы стали избыточными, и перечислить их в build.gradle модуля для исключения (exclude) из билда.
Это делается в директиве packagingOptions (которая, в свою очередь, находится в директиве android).
Источник
Get started with the Navigation component
This topic shows you how to set up and work with the Navigation component. For a high level overview of the Navigation component, see the Navigation overview.
Set up your environment
To include Navigation support in your project, add the following dependencies to your app’s build.gradle file:
Groovy
Kotlin
For information on adding other Architecture Components to your project, see Adding components to your project.
Create a navigation graph
Navigation occurs between your app’s destinations—that is, anywhere in your app to which users can navigate. These destinations are connected via actions.
A navigation graph is a resource file that contains all of your destinations and actions. The graph represents all of your app’s navigation paths.
Figure 1 shows a visual representation of a navigation graph for a sample app containing six destinations connected by five actions. Each destination is represented by a preview thumbnail, and connecting actions are represented by arrows that show how users can navigate from one destination to another.
 Figure 1. A navigation graph that shows previews of six different destinations that are connected via five actions.
- Destinations are the different content areas in your app.
- Actions are logical connections between your destinations that represent paths that users can take.
To add a navigation graph to your project, do the following:
- In the Project window, right-click on the res directory and select New > Android Resource File. The New Resource File dialog appears.
- Type a name in the File name field, such as «nav_graph».
- Select Navigation from the Resource type drop-down list, and then click OK.
When you add your first navigation graph, Android Studio creates a navigation resource directory within the res directory. This directory contains your navigation graph resource file ( nav_graph.xml , for example).
Navigation Editor
After adding a graph, Android Studio opens the graph in the Navigation Editor. In the Navigation Editor, you can visually edit navigation graphs or directly edit the underlying XML.
 Figure 2. The Navigation Editor
- Destinations panel: Lists your navigation host and all destinations currently in the Graph Editor.
- Graph Editor: Contains a visual representation of your navigation graph. You can switch between Design view and the underlying XML representation in the Text view.
- Attributes: Shows attributes for the currently-selected item in the navigation graph.
Click the Text tab to see the corresponding XML, which should look similar to the following snippet:
Источник
Save data in a local database using Room Part of Android Jetpack.
Apps that handle non-trivial amounts of structured data can benefit greatly from persisting that data locally. The most common use case is to cache relevant pieces of data so that when the device cannot access the network, the user can still browse that content while they are offline.
The Room persistence library provides an abstraction layer over SQLite to allow fluent database access while harnessing the full power of SQLite. In particular, Room provides the following benefits:
- Compile-time verification of SQL queries.
- Convenience annotations that minimize repetitive and error-prone boilerplate code.
- Streamlined database migration paths.
Because of these considerations, we highly recommend that you use Room instead of using the SQLite APIs directly.
Setup
To use Room in your app, add the following dependencies to your app’s build.gradle file:
Groovy
Kotlin
Primary components
There are three major components in Room:
- The database class that holds the database and serves as the main access point for the underlying connection to your app’s persisted data.
- Data entities that represent tables in your app’s database.
- Data access objects (DAOs) that provide methods that your app can use to query, update, insert, and delete data in the database.
The database class provides your app with instances of the DAOs associated with that database. In turn, the app can use the DAOs to retrieve data from the database as instances of the associated data entity objects. The app can also use the defined data entities to update rows from the corresponding tables, or to create new rows for insertion. Figure 1 illustrates the relationship between the different components of Room.
 Figure 1. Diagram of Room library architecture.
Sample implementation
This section presents an example implementation of a Room database with a single data entity and a single DAO.
Data entity
The following code defines a User data entity. Each instance of User represents a row in a user table in the app’s database.
Kotlin
To learn more about data entities in Room, see Defining data using Room entities.
Data access object (DAO)
The following code defines a DAO called UserDao . UserDao provides the methods that the rest of the app uses to interact with data in the user table.
Kotlin
Database
The following code defines an AppDatabase class to hold the database. AppDatabase defines the database configuration and serves as the app’s main access point to the persisted data. The database class must satisfy the following conditions:
- The class must be annotated with a @Database annotation that includes an entities array that lists all of the data entities associated with the database.
- The class must be an abstract class that extends RoomDatabase .
- For each DAO class that is associated with the database, the database class must define an abstract method that has zero arguments and returns an instance of the DAO class.
Kotlin
Note: If your app runs in a single process, you should follow the singleton design pattern when instantiating an AppDatabase object. Each RoomDatabase instance is fairly expensive, and you rarely need access to multiple instances within a single process.
If your app runs in multiple processes, include enableMultiInstanceInvalidation() in your database builder invocation. That way, when you have an instance of AppDatabase in each process, you can invalidate the shared database file in one process, and this invalidation automatically propagates to the instances of AppDatabase within other processes.
Usage
After you have defined the data entity, the DAO, and the database object, you can use the following code to create an instance of the database:
Kotlin
You can then use the abstract methods from the AppDatabase to get an instance of the DAO. In turn, you can use the methods from the DAO instance to interact with the database:
Kotlin
Additional resources
To learn more about Room, see the following additional resources:
Sample
- Android Sunflower, a gardening app that illustrates Android development best practices with Android Jetpack.
- Tivi, a TV show tracking app that uses the latest libraries and tools.
Codelabs
Blogs
Content and code samples on this page are subject to the licenses described in the Content License. Java is a registered trademark of Oracle and/or its affiliates.
Источник


