Android — MediaPlayer
Android provides many ways to control playback of audio/video files and streams. One of this way is through a class called MediaPlayer.
Android is providing MediaPlayer class to access built-in mediaplayer services like playing audio,video e.t.c. In order to use MediaPlayer, we have to call a static Method create() of this class. This method returns an instance of MediaPlayer class. Its syntax is as follows −
The second parameter is the name of the song that you want to play. You have to make a new folder under your project with name raw and place the music file into it.
Once you have created the Mediaplayer object you can call some methods to start or stop the music. These methods are listed below.
On call to start() method, the music will start playing from the beginning. If this method is called again after the pause() method, the music would start playing from where it is left and not from the beginning.
In order to start music from the beginning, you have to call reset() method. Its syntax is given below.
Apart from the start and pause method, there are other methods provided by this class for better dealing with audio/video files. These methods are listed below −
| Sr.No | Method & description | |||||||||||
|---|---|---|---|---|---|---|---|---|---|---|---|---|
| 1 |
| Steps | Description |
|---|---|
| 1 | You will use Android studio IDE to create an Android application under a package com.example.sairamkrishna.myapplication. |
| 2 | Modify src/MainActivity.java file to add MediaPlayer code. |
| 3 | Modify the res/layout/activity_main to add respective XML components |
| 4 | Create a new folder under MediaPlayer with name as raw and place an mp3 music file in it with name as song.mp3 |
| 5 | Run the application and choose a running android device and install the application on it and verify the results |
Following is the content of the modified main activity file src/MainActivity.java.
Following is the modified content of the xml res/layout/activity_main.xml.
In the below code abcindicates the logo of tutorialspoint.com
Following is the content of the res/values/string.xml.
Following is the content of AndroidManifest.xml file.
Let’s try to run your application. I assume you have connected your actual Android Mobile device with your computer. To run the app from Eclipse, open one of your project’s activity files and click Run  icon from the toolbar. Before starting your application, Android studio will display following screens
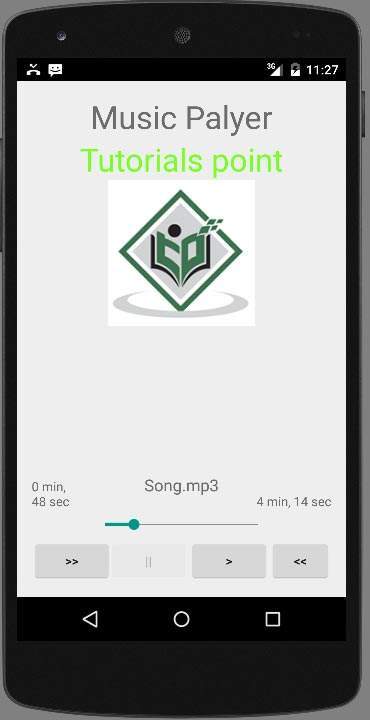
By default you would see the pause button disabled. Now press play button and it would become disable and pause button become enable. It is shown in the picture below −
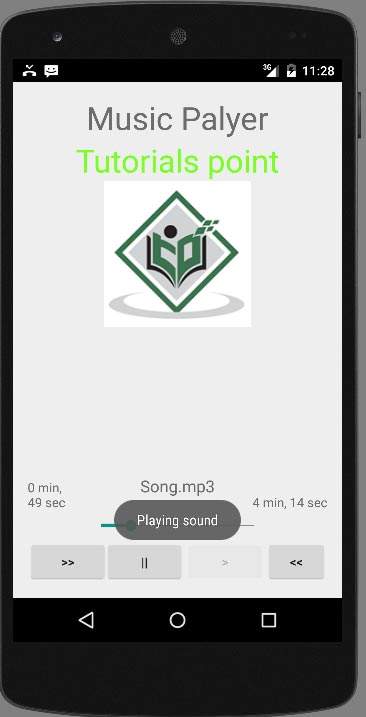
Up till now, the music has been playing. Now press the pause button and see the pause notification. This is shown below −
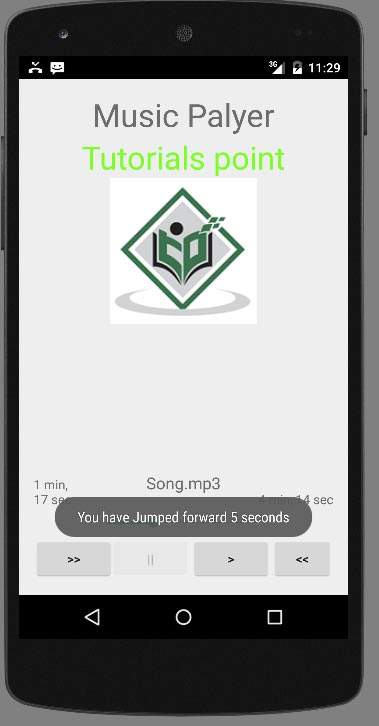
Now when you press the play button again, the song will not play from the beginning but from where it was paused. Now press the fast forward or backward button to jump the song forward or backward 5 seconds. A time came when the song cannot be jump forward. At this point , the notification would appear which would be something like this −
Your music would remain playing in the background while you are doing other tasks in your mobile. In order to stop it , you have to exit this application from background activities.
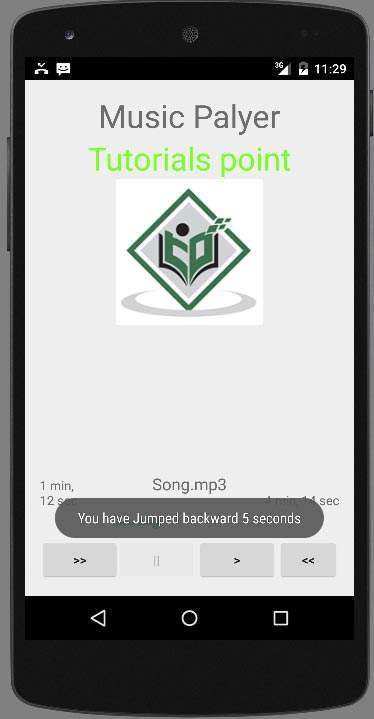
Above image shows when you pick rewind button.
Источник
Building a simple audio app in Android (Part 1/3)
MediaPlayer introduction


Introduction
Android Media APIs encompass a lot of advanced functionality that allow developers to create rich media experiences. They include things like ExoPlayer , MediaSession , audio focus, volume shaping, and lots of other amazing capabilities just around media playback and control.
The goal of this series of articles is to get you started with the Android MediaPlayer API by going thru the journey of creating a very basic audio playback application called “A Simple MediaPlayer” app. This is the first part of a 3 part series that includes:
Part 1/3 — MediaPlayer introduction
This article will cover the following:
- How the MediaPlayer works by considering some simple audio playback tasks and how they map to the MediaPlayer state machine.
Basic MediaPlayer tasks
Here are the basic tasks that MediaPlayer needs to handle:
- Load a media file for playback. This is done with the methods setDataSource() , prepare() , and prepareAsync() .
- Start playback / Play audio. This is handled by start() .
- Pause playback (once playback has started). This is handled by pause() .
- Stop playback and reset the MediaPlayer, so that you can load another media file into it. This is handled by reset() .
- Find the length of a song (in ms). This is handled by getDuration() .
- Find what part of the song is playing. This is handled by getCurrentPosition() .
- Jump to a specific time position (in ms) in the song and play from there. This is handled by seekTo(position) .
- Check to see if audio is being played back right now. This is handled by isPlaying() .
- Find out when a song is done playing. This is handled by attaching a MediaPlayer.OnCompletionListener . Your code will get an onCompletion() callback from the listener.
- Deallocate resources used by the player. This is handled by release() , which releases all the resources attached to the player. After being released the player is no longer usable.
This list covers the basic playback tasks for audio content, but it isn’t exhaustive. There are more complex functions for sophisticated audio apps such as streaming media, dealing with audio focus, volume shaping, and working with MediaSession . For more information on these advanced topics, please consult the MediaPlayer API guide.
Simplified state machine
Here is a simplified description of MediaPlayer’s state machine for audio playback:
First create an instance of MediaPlayer .
- Then load the media file that you want into the player. This means using the setDataSource() method with a parameter that describes where the media file is coming from.
- Now you need to prepare your data source. There are two ways of doing this:
- Use prepare() . This method will block the calling thread so should only be used for data sources which are stored locally on the device.
- Use prepareAsync() . This method will prepare the data source asynchronously and should be used for remote or large data sources. Using this method you get a callback when your media is ready for playback, and you can enable media playback controls in your app’s UI at this point. You can use the MediaPlayer.OnPreparedListener to get notified when the player has loaded the content for you to start playback. You can attach this listener to your player using setOnPreparedListener(listener) .
Now that your audio has been loaded, you can play and pause your audio. And you can stop and restart playback.
- Play — use start() to tell the player to start playback. You can ask the player if it’s playing using isPlaying() .
- Pause — you can pause only if isPlaying() is true so always check this before you call pause() .
- Stop — use the reset() method to do this. It will stop playback and reset the player so that you can load other media files into it.
- Seek — use the seekTo() method with a time offset to move audio playback to the desired position. This is needed when you allow the user to move playback to any position in the currently loaded media.
When you are done with the instance of MediaPlayer, be sure to release() it. Once released, you have to create a new MediaPlayer object and start from Step 1 in order to play another media file.
To get started with building the app, please checkout Part 2/3 of this series- Building the app.
Источник
Полный список
MediaPlayer – класс, который позволит вам проигрывать аудио/видео файлы с возможностью сделать паузу и перемотать в нужную позицию. MediaPlayer умеет работать с различными источниками, это может быть: путь к файлу (на SD или в инете), адрес потока, Uri или файл из папки res/raw.
Напишем небольшое приложение аудио-плеер и используем в нем все эти возможности.
Project name: P1261_MediaPlayer
Build Target: Android 2.3.3
Application name: MediaPlayer
Package name: ru.startandroid.develop.p1261mediaplayer
Create Activity: MainActivity
Добавляем строки в strings.xml:
Так это выглядит на экране
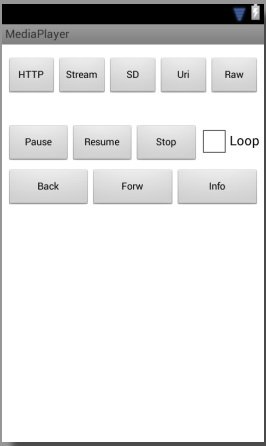
Кнопки верхнего ряда запускают проигрывание треков из различных источников. Кнопки среднего ряда – это пауза, возобновление, стоп и чекбокс повторения трека. А в нижнем ряду кнопки перемотки назад/вперед и вывод в лог текущей информации.
Создайте папку res/raw и положите в нее какой-нить звуковой файл с именем explosion.mp3. Например, его можно скачать здесь — http://dl.dropboxusercontent.com/u/6197740/explosion.mp3.
Разбираемся. Сначала создаем константы-пути, которые будет использовать проигрыватель. Это файл в инете (DATA_HTTP), поток в инете (DATA_STREAM), файл на флэшке (DATA_SD) и Uri на мелодию из системы (DATA_URI). Для SD и Uri укажите ваши значения, чтобы такие файлы существовали. (По получению Uri в конце урока есть вспомогательный код)
В onCreate получаем AudioManager, находим на экране чекбокс и настраиваем так, чтобы он включал/выключал режим повтора для плеера.
onClickStart – метод для обработки нажатий на кнопки верхнего ряда. Сначала мы освобождаем ресурсы текущего проигрывателя. Затем в зависимости от нажатой кнопки стартуем проигрывание. Какие методы для этого используются?
setDataSource – задает источник данных для проигрывания
setAudioStreamType – задает аудио-поток, который будет использован для проигрывания. Их существует несколько: STREAM_MUSIC, STREAM_NOTIFICATION и п. Подробнее их можно посмотреть в доках по AudioManager. Предполагаю, что созданы они для того, чтобы можно было задавать разные уровни громкости, например, играм, звонкам и уведомлениям. Этот метод можно и пропустить, если вам не надо явно указывать какой-то поток. Насколько я понял, по умолчанию используется STREAM_MUSIC.
Далее используется метод prepare или prepareAsync (в паре с OnPreparedListener). Эти методы подготавливают плеер к проигрыванию. И, как понятно из названия, prepareAsync делает это асинхронно, и, когда все сделает, сообщит об этом слушателю из метода setOnPreparedListener. А метод prepare работает синхронно. Соотвественно, если хотим прослушать файл из инета, то используем prepareAsync, иначе наше приложение повесится, т.к. заблокируется основной поток, который обслуживает UI.
Ну и метод start запускает проигрывание.
В случае с raw-файлом мы используем метод create. В нем уже будет выполнен метод prepare и нам остается только выполнить start.
Далее мы для плеера включаем/выключаем повтор (setLooping) в зависимости от текущего значения чекбокса. И вешаем слушателя (setOnCompletionListener), который получит уведомление, когда проигрывание закончится.
В методе releaseMP мы выполняем метод release. Он освобождает используемые проигрывателем ресурсы, его рекомендуется вызывать когда вы закончили работу с плеером. Более того, хелп рекомендует вызывать этот метод и при onPause/onStop, если нет острой необходимости держать объект.
В методе onClick мы обрабатываем нажатия на кнопки управления проигрывателем. Какие здесь используются методы?
start – возобновляет проигрывание
seekTo – переход к определенной позиции трека (в милисекундах)
getCurrentPosition – получить текущую позицию (в милисекундах)
getDuration – общая продолжительность трека
isLooping – включен ли режим повтора
getStreamVolume – получить уровень громкости указанного потока
Далее идут методы
onPrepared – метод слушателя OnPreparedListener. Вызывается, когда плеер готов к проигрыванию.
onCompletion – метод слушателя OnCompletionListener. Вызывается, когда достигнут конец проигрываемого содержимого.
В методе onDestroy обязательно освобождаем ресурсы проигрывателя.
В манифесте добавляем права на интернет — android.permission.INTERNET.
Все сохраняем, запускаем приложение. Дизайн получившегося плеера, конечно, не ахти какой :), но нас сейчас интересует функционал.
Еще раз перечислю возможные действия. Нажимая верхние кнопки, мы запускаем проигрывание из различных источников. Кнопки среднего ряда позволят нам поставить паузу, возобновить/остановить проигрывание и включить режим повтора. Кнопки нижнего ряда перематывают назад/вперед на 3 сек (3000 мсек) и выводят инфу в лог.
Я включу проигрывание файла с SD и выведу инфу в лог (кнопка Info).
start SD
Playing true
Time 4702 / 170588
Looping false
Volume 10
Проигрывание идет, текущая позиция – 4-я секунда из 170, режим повтора выключен, громкость — 10.
Уменьшу громкость (кнопками устройства или эмулятора), включу режим повтора (чекбокс Loop), поставлю паузу (кнопка Pause) и снова выведу инфу в лог:
Playing false
Time 46237 / 170588
Looping true
Volume 6
Видим, что проигрывание остановилось, текущая позиция уже 46 секунд, режим повтора включен, а громкость уменьшилась до 6.
Теперь включу проигрывание потока (кнопка Stream). Смотрим лог:
08:49:13.799: D/myLogs(18805): start Stream
08:49:13.809: D/myLogs(18805): prepareAsync
08:49:27.589: D/myLogs(18805): onPrepared
Обратите внимание, сколько прошло времени с начала (prepareAsync) до завершения (onPrepared) подготовки проигрывателя – 14 секунд. Если бы мы использовали метод prepare, а не prepareAsync, то наше приложение было бы недоступно все это время.
Расскажу еще про несколько методов, которые я не использовал в примере, но о которых стоит знать.
Метод reset – сбрасывает плеер в начальное состояние, после него необходимо снова вызвать setDataSource и prepare. Похож на onRelease, но позволяет продолжить работу с этим же объектом. А вот после onRelease надо создавать новый объект MediaPlayer.
Метод setOnBufferingUpdateListener устанавливает слушателя буферизации проигрываемого потока. По идее слушатель будет получать процент буферизации, но у меня оно как-то странно работает — показывает или 0 или 100.
Метод setOnErrorListener устанавливает слушателя для получения ошибок. Особенно это полезно при методe prepareAsync. Если в ходе этого метода возникнут ошибки, то их можно поймать только так.
Метод setWakeMode позволяет ставить стандартную (PowerManager.WakeLock) блокировку на время проигрывания, указав тип блокировки. Не забудьте в манифесте добавить права на WAKE_LOCK.
По поводу видео. Метод setDisplay позволяет указать плееру, куда выводить изображение. Размещаете на экране компонент SurfaceView (вкладка Advanced), вызываете его метод getHolder и полученный объект передаете в setDisplay. Плеер выведет изображение на этот компонент.
Чтобы узнать размер проигрываемого изображения можно использовать методы getVideoHeight и getVideoWidth.
В хелпе класса MediaPlayer есть хорошая схема состояний плеера. Она кажется запутанной, но если посидеть и поразбираться, то вполне можно все понять. Схема полезная, советую вникнуть.
А здесь можно посмотреть какие форматы поддерживаются системой.
Также хелп любезно предоставляет нам код, который позволит просмотреть существующие медиа-файлы в системе:
На следующем уроке:
— работаем с SoundPool
Присоединяйтесь к нам в Telegram:
— в канале StartAndroid публикуются ссылки на новые статьи с сайта startandroid.ru и интересные материалы с хабра, medium.com и т.п.
— в чатах решаем возникающие вопросы и проблемы по различным темам: Android, Kotlin, RxJava, Dagger, Тестирование
— ну и если просто хочется поговорить с коллегами по разработке, то есть чат Флудильня
— новый чат Performance для обсуждения проблем производительности и для ваших пожеланий по содержанию курса по этой теме
Источник


