- Android Absolute Layout
- Absolute Layout
- AbsoluteLayout Attributes
- Public Constructors
- Example
- Android studio position absolute
- Android Absolute Layout Syntax Code:
- Attributes of Absolute Layout:
- Example of Absolute Layout in Android:
- Основы верстки для нативных андроид приложений
- FrameLayout
- LinearLayout
- RelativeLayout
- TableLayout
- Alternate Layouts
- Стили
- Design Tools Suite UX enhancements in Android Studio 4.1
- Layout editor
- ConstraintHelpers support
- Design-time attributes toggle
- Visibility control on component tree
- Keyboard shortcuts + keymap settings
- Transform panel
- Resource manager
- Gutter drawable picker
- Vector asset icon auto-download
- Navigation editor
- New destinations tree
- Deeplink dialog new attributes + autocomplete
- Motion editor
- Motion keyframe path graph
- Transition curve editor
Android Absolute Layout
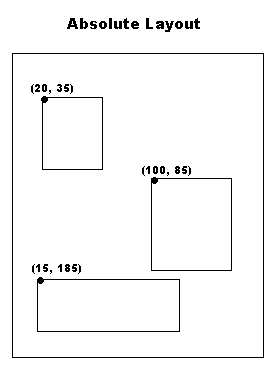
An Absolute Layout lets you specify exact locations (x/y coordinates) of its children. Absolute layouts are less flexible and harder to maintain than other types of layouts without absolute positioning.
Absolute Layout
AbsoluteLayout Attributes
Following are the important attributes specific to AbsoluteLayout −
| Sr.No | Attribute & Description | |||||||||||||
|---|---|---|---|---|---|---|---|---|---|---|---|---|---|---|
| 1 |
| AbsoluteLayout(Context context) |
| AbsoluteLayout(Context context, AttributeSet attrs) |
| AbsoluteLayout(Context context, AttributeSet attrs, int defStyleAttr) |
| AbsoluteLayout(Context context, AttributeSet attrs, int defStyleAttr, int defStyleRes) |
Example
This example will take you through simple steps to show how to create your own Android application using absolute layout. Follow the following steps to modify the Android application we created in Hello World Example chapter −
| Step | Description |
|---|---|
| 1 | You will use Android studio IDE to create an Android application and name it as demo under a package com.example.demo as explained in the Hello World Example chapter. |
| 2 | Modify the default content of res/layout/activity_main.xml file to include few widgets in absolute layout. |
| 3 | No need to modify string.xml, Android studio takes care of default constants |
| 4 | Run the application to launch Android emulator and verify the result of the changes done in the application. |
Following is the content of the modified main activity file src/com.example.demo/MainActivity.java. This file can include each of the fundamental lifecycle methods.
Following will be the content of res/layout/activity_main.xml file −
Following will be the content of res/values/strings.xml to define two new constants −
Let’s try to run our modified Hello World! application we just modified. I assume you had created your AVD while doing environment setup. To run the app from Android Studio, open one of your project’s activity files and click Run  icon from the toolbar. Android Studio installs the app on your AVD and starts it and if everything is fine with your setup and application, it will display following Emulator window −
Источник
Android studio position absolute
In Android, an Absolute Layout is a layout used to design the custom layouts. In this layout you can specify the exact location of its children by using x and y coordinates.
 Important Note 1: Absolute layout are harder to maintain for different mobile screen sizes than other types of layouts because we set the exact location of a child view or called component. The positioning is based on x(top) and y(left) coordinates and that positioning is not as useful in world of various screen resolutions(sizes) and aspect ratios.
Important Note 2: Absolute layout is depreciated in Android because of the same reason as discussed in above note.
Table Of Contents
Android Absolute Layout Syntax Code:
Attributes of Absolute Layout:
1.id: In android id is a attribute used to uniquely identify a Absolute Layout.
Below is id attribute’s example code with explanation included.
2.layout_x: In Absolute Layout layout_x attribute is used to specify the x- coordinate of the view(TextView or any other view). The possible value for this is in dp or px.
Below is the layout_x attribute’s example code with explanation included in which we set the 200px value for the x-coordinate.
3.layout_y: In AbsoluteLayout layout_y attribute is used to specify the y- coordinate of the view(TextView or any other view). The possible value for this is in dp or px.
Below is the layout_y attribute’s example code with explanation included in which we set the 200px value for the y- coordinate.
Example of Absolute Layout in Android:
Below is the example code of Absolute Layout in which we design a login screen with two field user name and password and one button for login. We set the all views using x and y coordinates of the screen and set the values in px(pixels). Below is the final output and code:
Step 1: Create a new project and name it AbsoluteLayoutExample.
Select File -> New -> New Project. Fill the forms and click “Finish” button.
Step 2: Open res -> layout -> activity_main.xml (or) main.xml and add following code. Here we are designing a login form inside Absolute Layout.
Step 3: Now Open java -> package -> MainActivity.java and paste the below code.
Step 4: Now Open Manifests and click on AndroidManifest.xml and paste the below code
Step 5: Lastly Open res -> values ->strings.xml and paste the below code.
Output:
Now run the App in Emulator or AVD. You will see the login form designed in Absoulte Layout having fix x and y coordinate.
Important Note: Try opening the same layout in different size Emulator and you will see it doesn’t fit in different size device. That’s why Android has depreciated the use of Absolute Layout.
Источник
Основы верстки для нативных андроид приложений
( пользоваться не рекомендуется, deprecated )
AbsoluteLayout — означает что каждый элемент верстки будет иметь абсолютную позицию относительно верхнего левого угла экрана задаваемую с помощью координат x и y. Т.е. верхнийлевый угол экрана при AbsoluteLayout имеет координаты x = 0, y = 0.
Позиция указывается в атрибутах элемента android:layout_x и android:layout_y.
Пример кода:

FrameLayout
FrameLayout — тип верстки внутри которого может отображаться только один элемент в строке. Т.е. если внутри FrameLayout вы поместите несколько элементов, то следующий будет отображаться поверх предыдущего.
Пример кода:
LinearLayout
LinearLayout — тип верстки при котором область верстки делится на строки и в каждую строку помещается один элемент. Разбиение может быть вертикальное или горизонтальное, тип разбиения указывается в атрибуте LinearLayout android:orientation. Внутри верстки возможно комбинировать вертикальную и горизонтальную разбивки, а кроме того, возможна комбинация нескольких разных типов верстки например использование LinearLayout внутри FrameLayout.
Пример вертикальной разбивки LinearLayout:
Пример горизонтальной разбивки LinearLayout:
Комбинация нескольких LinearLayout:
RelativeLayout
RelativeLayout — тип верстки при котором позиционирование элементов происходит относительно друг друга и относительно главного контейнера.
За то, каким образом будут позиционироваться элементы отвечают следующие атрибуты:
Атрибуты позиционирования относительно контейнера
- android:layout_alignParentBottom – Низ элемента находится внизу контейнера
- android:layout_alignParentLeft – Левая часть элемента прилегает к левой части контейнера
- android:layout_alignParentRight – Правая часть элемента прилегает к правой части контейнера
- android:layout_alignParentTop – Элемент находится в верхней части контейнера
- android:layout_centerHorizontal – Элемент позиционируется по центру относительно горизонтального размера контейнера
- android:layout_centerInParent – Элемент позиционируется по центру относительно горизонтального и вертикального размеров размера контейнера
- android:layout_centerVertical – Элемент позиционируется по центру относительно вертикального размера контейнера
Атрибуты позиционирования относительно других элементов.
В качестве значений этих атрибутов ставятся id элемента относительно которого будет производится позиционирование.
android:layout_above – Распологает элемент над указанным
android:layout_below – Распологает элемент под указанным
android:layout_toLeftOf – Распологает элемент слева от указанного
android:layout_toRightOf – Распологает элемент справа от указанного
Выравнивание относительно других элементов.
android:layout_alignBaseline – Выравнивает baseline элемента с baseline указаннго элемента
android:layout_alignBottom – Выравнивает низ элемента по низу указанного элемента
android:layout_alignLeft – Выравнивает левый край элемента с левым краем указанного элемента
android:layout_alignRight – Выравнивает правый край элемента с правым краем указанного элемента
android:layout_alignTop – Выравнивает верхнюю часть элемента в соответствие с верхней частью указанного элемента
TableLayout
TableLayout — табличная верстка.
Организует элементы в строки и столбцы таблицы.
Для организации строк служит таг
Alternate Layouts
Alternate Layouts — альтернативная верстка. Позволяет использовать различную верстку для различных ориентаций экрана.
XML для альтернативной верстки помещается в папки проекта:
res/layout-land – альтернативная верстка для landscape UI
res/layout-port –альтернативная верстка для portrait UI
res/lauout-square – альтернативная верстка для square UI
и перед тем как получить макет из res/lauout система проверяет наличие файлов в этих папках.
И в завершении немного о стилях.
Стили
Во первых стили элемента могут быть описаны в атрибутах самого элемента.
Например:
Кроме того стили можно вынести в отдельный xml файл и сохранить его в папке res/values/
Напимер:
Если мы вынесем стили в отдельный файл, то для описания стилей элемента будем использовать атрибут style.
Источник
Design Tools Suite UX enhancements in Android Studio 4.1

The Design Tools Suite in Android Studio is a collection of tools that aims to support developers in effectively designing, prototyping, building, and debugging their apps. These tools include but are not limited to a Layout Editor, Navigation Editor, Motion Editor, Resource Manager, and Layout Inspector. With Android Studio 4.1, we’ve focused our efforts on the backlog of users’ (your) feedback to enhance these existing tools — as a result, we’ve refined interactions and created missing features. Here’s a round-up of what we’ve done — a closer look at the UX refinements mentioned in the What’s new in Design Tools Talk!
Layout editor
ConstraintHelpers support
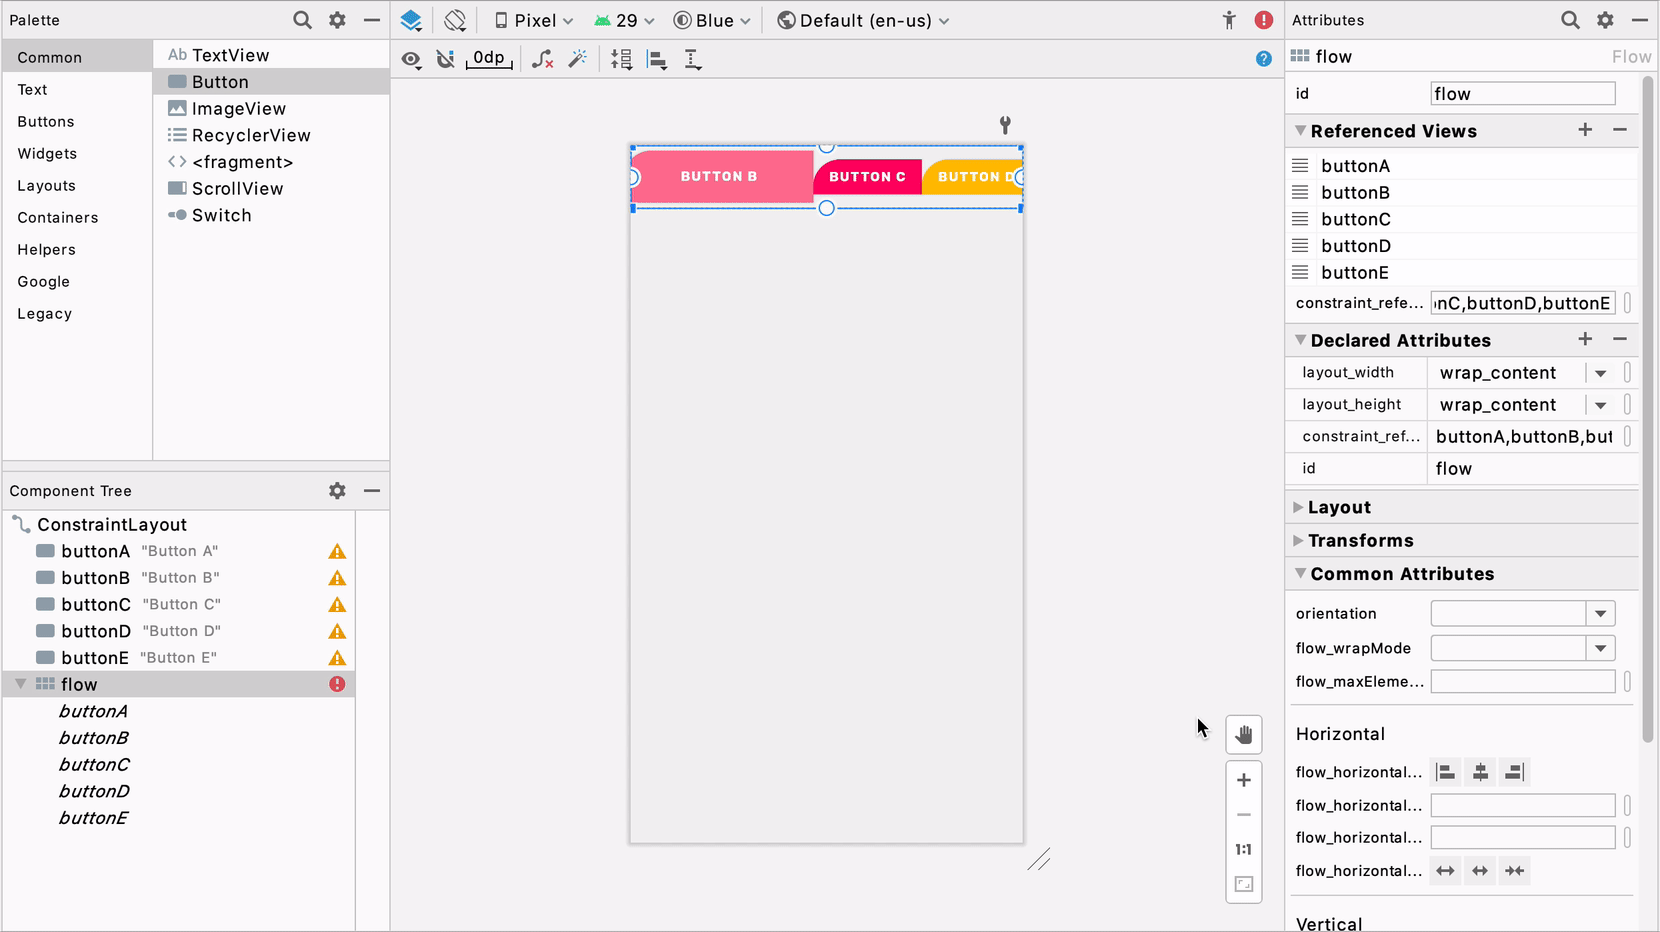
ConstraintHelpers such as Barriers and Guidelines were first introduced in ConstraintLayout 1.1 to allow multiple widgets to be referenced as input of an invisible view, and group-align them without code duplication. In 2.0, the helpers concept was extended: VirtualLayouts such as Flow and Groups were added to allow for simultaneously applying behaviors to all referenced widgets. For example, with Flow, views can be easily laid out horizontally or vertically with global adjustments of gaps and wrap styles.
In Android Studio 4.1, we wanted to make sure our tools support and optimize the experience and interaction of using these helpers in the IDE. Thus, we first mapped out the user journey from discovery to creation to manipulation, and then we set out to increase efficiency for every step of the journey. For discovery, we added a helpers section in Palette so that it’s easy to find and use available helpers.

For creation, you can now also select multiple views, and right-click to select a helper — we then automatically add the referenced id’s corresponding to what was selected.
For manipulation, we wanted to make Flow’s functionality more accessible, so we expanded the property panel with commonly used attributes specific to Flow, such as icons for quick alignment and a section for rearranging the order of referenced id’s.
Design-time attributes toggle
Android Studio offers a variety of tools attributes, which are XML attributes in the android:tools namespace that enable design-time features (i.e., showing the layout of a fragment). These attributes are removed when you build your app and have no effect on APK size or runtime behavior — they are merely to aid in the design / development process.
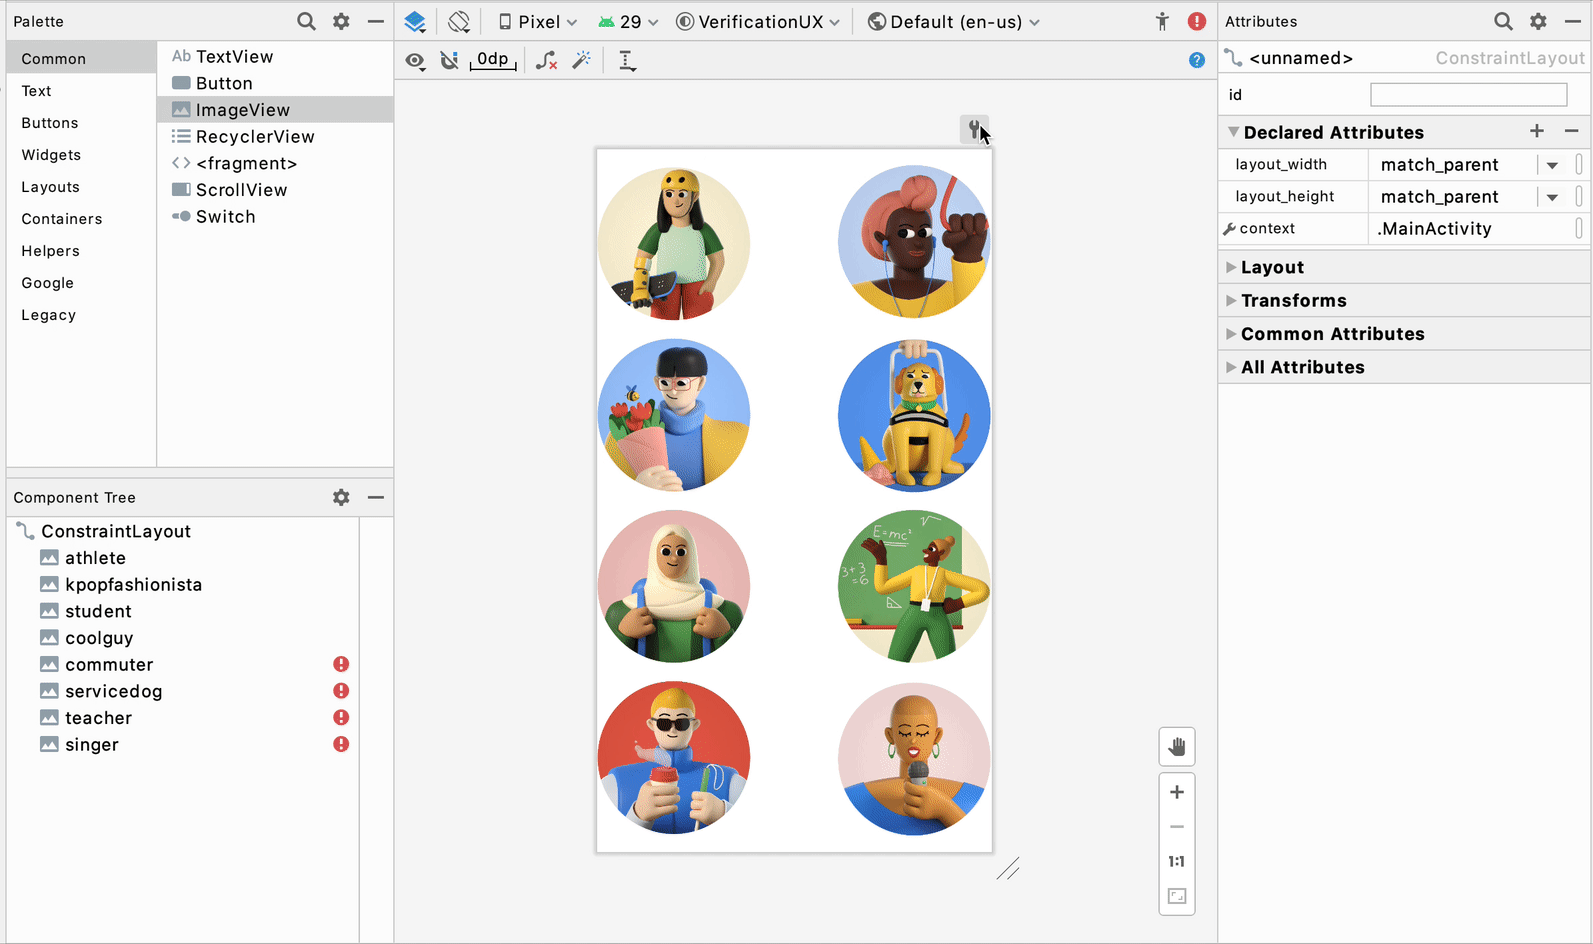
For building UI, we know that tools:visibility and absolute positioning ( tools:layout_editor_absoluteX and tools:layout_editor_absoluteY) are two widely used tools attributes because they allow designers to temporarily show/hide UI as well as to position views precisely in the Layout Editor before setting constraints on them. However, we observed in user studies that it is difficult to know when and if views are set with tools attributes, such that users were surprised by discrepancies between the Layout Editor’s preview and the app’s rendering on an emulator or physical device. For example, in the screenshot below, the images in the right column have absolute positioning, and even though they look nicely laid out in the Layout Editor preview, in the emulator they’re all superimposed on one another in the top left corner.
To resolve this, we decided to add a toggle near the design surface in the Layout Editor to allow users to easily turn on/off tools:visibility and absolute positioning.
With the toggle, our goal is to provide users with a more accurate / non-design-time rendering and increased awareness about when they’re using these tools attributes.
Visibility control on component tree
Visibility, as stated in the last section, is a very common and important attribute for a view. It’s particularly useful when you need to show/hide certain UIs based on different conditions or certain logic. For example, you may only want authenticated users to be able to see their user data. Thus, we wanted to optimize the visibility attribute by providing a quick way to easily set show/hide/gone visibility in the Layout Editor.
Starting in 4.1, you will be able to use the visibility control picker in the component tree next to any view to quickly change it. This allows you to take one look at the tree and know how the views are shown based on visibility and change them according to whichever parts of the UI you would like to work on.

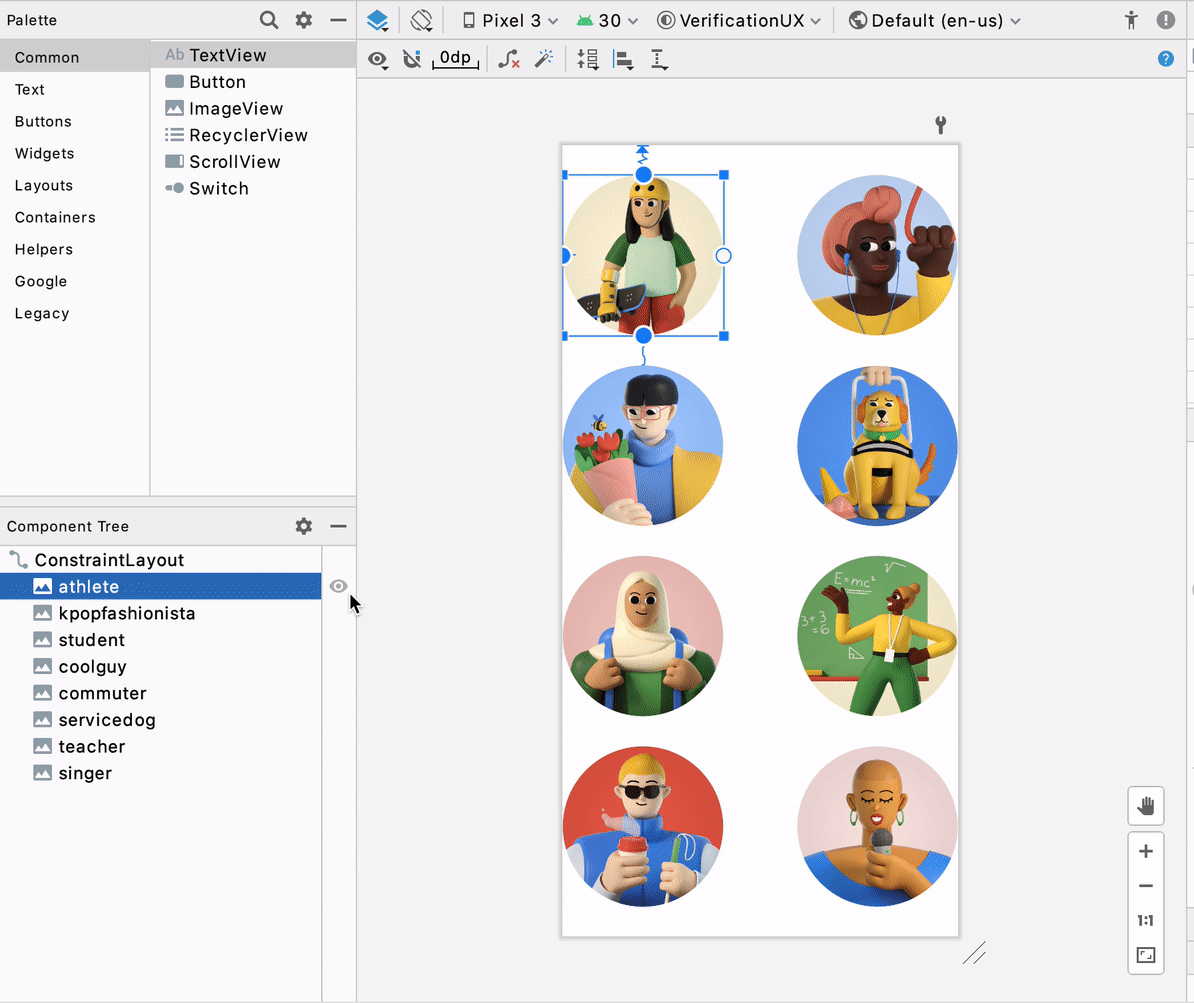
We included both the tools and android namespaces to accommodate different user needs. One thing to note here is that, during design-time, tools overrides android visibility, and thus this is reflected on the visibility controls as well — if you have a tools:visibility set, it will take precedence on the UI. For instance, in the screenshot below, the student image has an android:visibility = visible and tools:visibility = gone, and you can see that the tools visibility takes precedence.

Keyboard shortcuts + keymap settings
We all recognize the power of keyboard shortcuts in boosting productivity and efficiency for development. In Studio 4.1, we performed an audit of all the keyboard shortcuts in the Design Tools Suite and registered them in Preferences > Keymap, allowing you to discover, change, and edit the shortcuts to best fit your work style.
Transform panel
We’ve heard feedback from developers asking for more precision when manipulating transform attributes on a view. To make it easier to fine tune your view’s transformation, we added a visualizer and sliders to help with 3D rotation of views. On the attribute panel, once you’ve selected a view, you can use the controls under “Transform” to make adjustments.
Resource manager
Gutter drawable picker
Back in Android studio 3.6, we introduced the Color picker resource tab, which helps you quickly update color resource values in your app. The picker pattern was very well received since the interaction here provided a seamless transition from something textual (code) to something visual (colors) — users can stay in context within their code editor while using this graphical user interface (GUI) accelerator at the same time. Thus, in 4.1, we applied the same concept to Drawables — now when you have a drawable resource in your file, you will find a gutter icon that allows you to quickly change drawable resources. Moreover, clicking on “browse” will open the resource dialog allowing for more extensive search.
Vector asset icon auto-download
This update is perhaps not noticeable visually but is nevertheless significant. We received complaints about discrepancies between the Material icons on Material.io and those in our Vector Asset wizard. This was due to misalignment between Studio’s release cadence and updates to Material. To tackle this, we streamlined the process so that now every time Material updates their icon library, the Vector Asset wizard will also automatically update the library in the background. You can now expect we will always have the latest Material icons in the wizard! 🎉
Navigation editor
New destinations tree
Split View was introduced as a new way of switching editing modes for design files in Android Studio 3.6, and this created opportunities for us to optimize the side-by-side view for navigation files and the Navigation Editor. One of those optimizations is to use the component tree structure to represent the destination graph in the Navigation Editor. This way, users can see all their destinations (including nested ones) and actions at a glance, and they map 1:1 to the code in split mode.
As a side note, this was beneficial for the health of our code base as it reuses common components across all our design tools.
Deeplink dialog new attributes + autocomplete
Navigation 2.3.0 introduces two new attribute types for deeplinks: MIME and Action. To align the tools functionalities with that of the library, we added them to the creation dialog for deeplinks in the Navigation Editor, with autocomplete and validation support.
Motion editor
Motion keyframe path graph
MotionLayout supports different types of keyframes, and one of most commonly used types is Position keyframes ( ), which allows developers to modify the path of a widget at a given time during the animation. With the Motion Editor, introduced in 4.0, users can directly manipulate these keyframes by dragging them directly on the surface. However, a problem with this workflow is that, depending on how the keyframe is set up, the attributes applied to the keyframe can mean different things. For example, dragging the keyframe 20% to the left, there is no context of whether this is 20% relative to the path or 20% relative to the parent. To solve this, in 4.1 we added an overlay of the coordinate system as well as axis ghost objects on the design surface during drag, so that every time developers want to manually edit the keyframes, they can better understand their bounding, axis, and direction.

Transition curve editor
Similar to the Transform panel in the Layout Editor mentioned above, we have heard feedback from developers about how it’s difficult to specify Transition curves with pure numbers. Thus, in 4.1, we added support for a GUI curve editor in the Motion Editor, allowing developers to perfect the curves with visualization and control handles.

We hope that you are excited to try out these new improvements! We are constantly gathering feedback and applying them to improve our tools. The goal of the Design Tools Suite is to support, supplement, and boost your coding experience — to find areas where it makes sense to provide visual or GUI support. The learnings we uncovered here will also be applied to tools we build for Jetpack Compose. For instance, these pickers experiences (i.e., visibility toggle, gutter drawable pickers) are a form factor that we can further explore, since they are context-based, non-distracting, and provide a unique way to apply design tooling to the app development process.
As always, if you encounter any issues while using these tools, or have an idea for new features that can improve your productivity, please file a bug. We will continue to optimize the editors’ performance, fix bugs, and incorporate your suggestions and feedback.
Источник


