- Different Ways to Delete a Module in Android Studio
- Why There is a Need to Delete a Module in Android Studio?
- Method 1
- Method 2
- Method 3
- Esau Silva
- ASP.NET, JavaScript, React and more
- How To Delete a Module in Android Studio
- Русские Блоги
- Android-0. Как удалить модуль или библиотеку в Android Studio
- Как удалить модуль в Android Studio
- 15 ответов
- How to Install and Uninstall Plugins in Android Studio?
- Step by Step Process to Install and Uninstall Plugins in Android Studio
Different Ways to Delete a Module in Android Studio
We all know that Android Studio is one of the most famous IDE (Integrated Development Environment) out there. It is available for download on Windows, macOS, and Linux-based operating systems or as a subscription-based service in 2020. It is a replacement for the Eclipse Android Development Tools (E-ADT) as the primary IDE for native Android application development. Android Studio offers many features that enhance your productivity and makes your app-making experience more user-friendly and easy.
Why There is a Need to Delete a Module in Android Studio?
Deleting a module is necessary to save storage space and make the android studio more efficient. Modules take up unnecessary storage and make the process difficult. But, instead of giving you an easy-shortcut method of pressing the delete key on your keyboard, you have to follow certain steps, which, in this article, I am going to show you how can we do the same. So in this article, we are going to discuss three different methods to Delete a Module in Android Studio.
Method 1
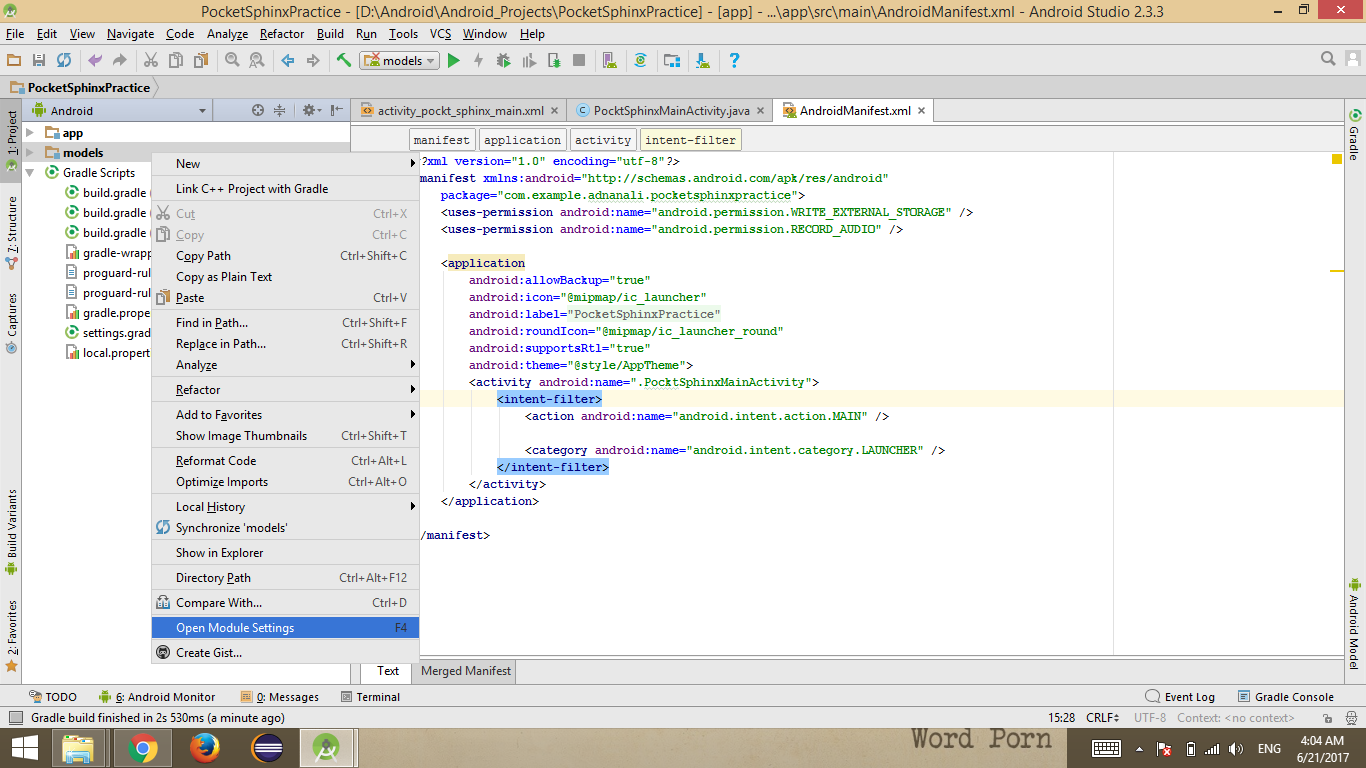
Step 1: Firstly, Go to the project section on the left-hand side of the android studio. Then, right-click on your project window list and select Open Module Settings from the menu. (as shown in the image given below).
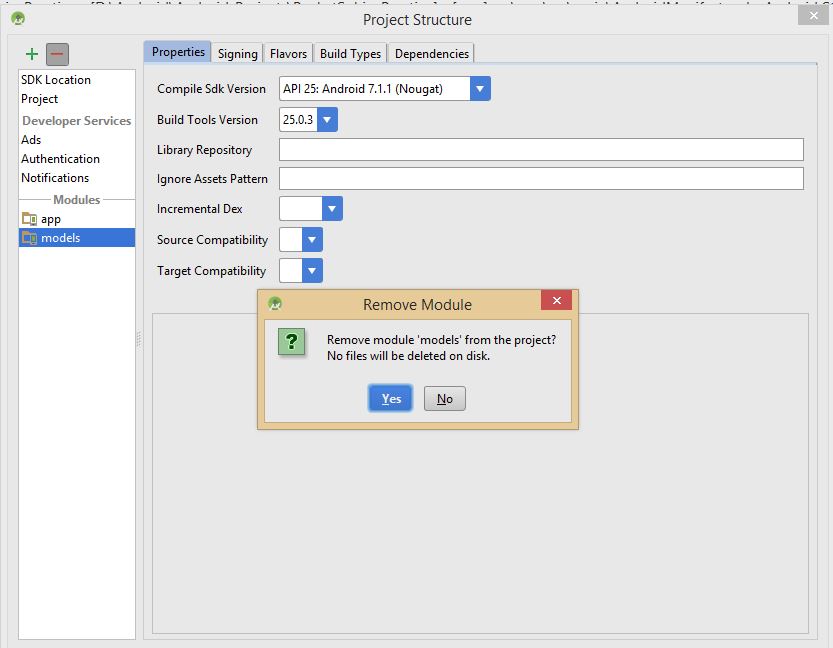
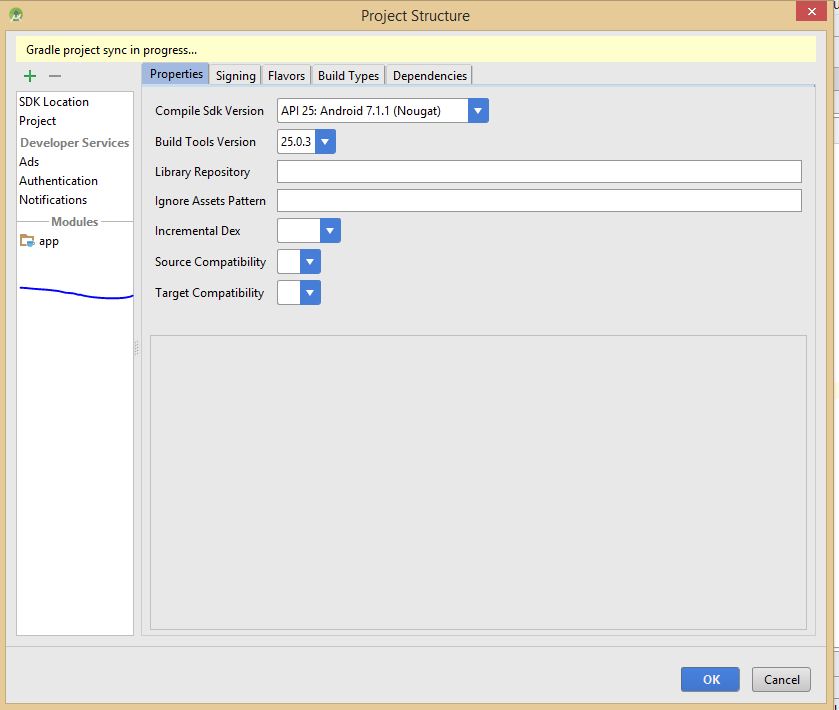
Step 2: Then select the module which is present in your project which you have selected, to delete. n the top left-hand side of the window, you will see a minus sign button, Click on it and press yes to delete the module. (Refer to the screenshot given below)
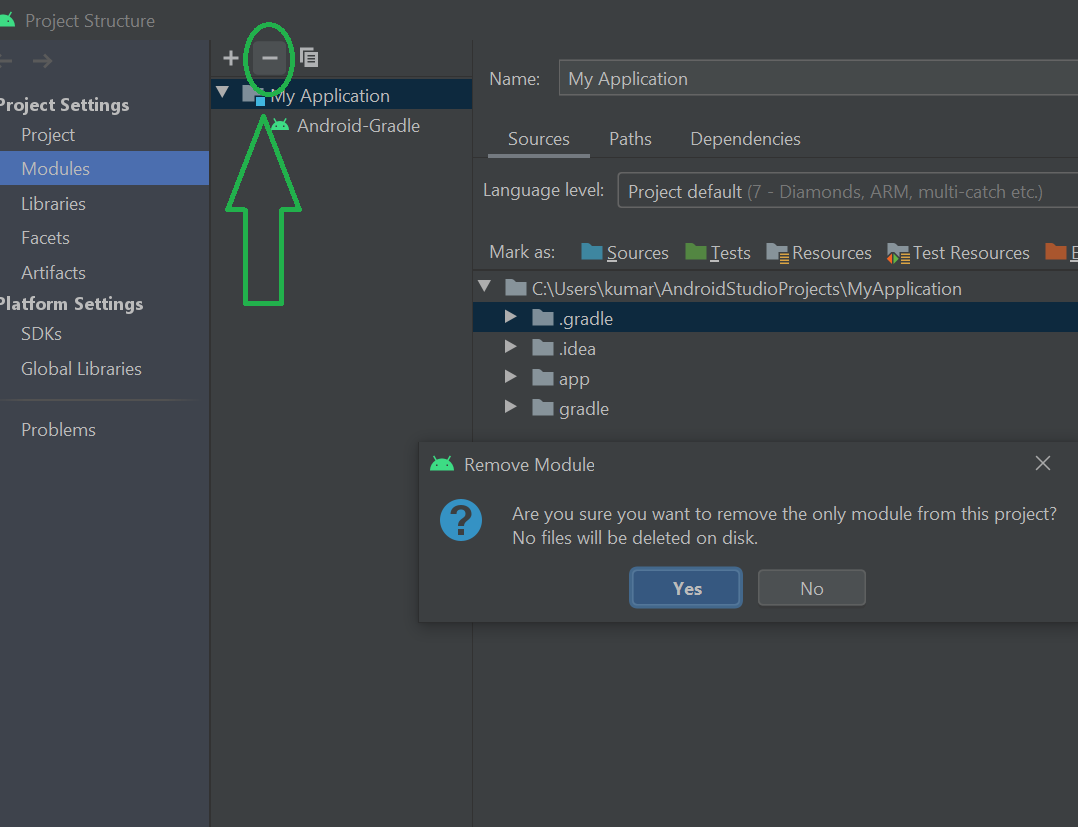
Since this will only remove the Module from Android Studio, you have to physically delete the files from the file system. (Told you it is a cumbersome process). That’s it.
Method 2
Go to the settings.gradle under Gradle scripts under the project section.
Delete the module’s name from the include statement. Sync project with Gradle files. Optionally, Delete it manually from the project folder. (Just like before)
For Example:
New: include ‘:app’
Method 3
Another method which you can use to achieve the same are as follows:
Step 1: First, go to the project section on the left-hand side of the Android studio.
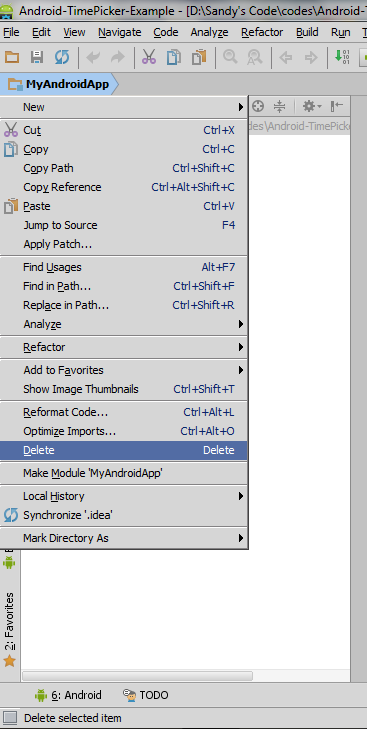
Step 2: Right-click on the project whose module you want to delete and go to the option of Load/Unload modules. Click on the module which you want to delete and click on unload button.
Step 3: Then back at the project section, right-click on the module and go to the remove module option, and press yes.
Источник
Esau Silva
ASP.NET, JavaScript, React and more
How To Delete a Module in Android Studio
Android Studio is a great tool, and way better design than Eclipse in my humble opinion, yet not every software is perfect and one of the things it falls short (and by that I mean user friendly) is when it comes to deleting a module within yout project. The folks over at JetBrains made this a complicated task. Instead of just having to press the Delete button, you have to perform several steps, and in my point of view, the less steps the better, but anyways, below I show you how to accomplish this.
- Right click on your project window list and select Open Module Settings from the menu
- Select the module you want to delete and press the minus button at the top left corner of the window. Then press Yes
- Since this will only remove the Module from Android Studio, you have to physically delete the files from the file system
- If you had configurations to run this Module, you will have to also remove those. Click the Select Run/Debug Configuration dropdown
- Select the Android Application you wish to delete and press the minus button from the top left corner of the window and then press OK button


That’s it folks, happy Android coding!!
Consider giving back by getting me a coffee (or a couple) by clicking the following button:
Источник
Русские Блоги
Android-0. Как удалить модуль или библиотеку в Android Studio
Когда мы хотим удалить модуль или библиотеку в Android Studio, мы обычно выбираем элемент, который хотим удалить, а затем щелкаем правой кнопкой мыши, чтобы найти меню удаления. Однако мы обнаружим, что меню удаления нет, как показано на фигура:

Почему нет кнопки удаления? Это ненаучно. Это ошибка в Android Studio? На самом деле кнопки удаления здесь нет.Основная причина в том, что в Android Studio есть механизм защиты для модулей, то есть вы не можете удалить модуль по своему желанию.Для удаления необходимо сначала удалить модуль из списка модулей.
1. Выберите «Структура проекта» в меню «Файл» или щелкните проект правой кнопкой мыши и выберите «Открыть настройки модуля», чтобы открыть структуру проекта. Выберите модуль, который хотите удалить, а затем нажмите красную кнопку «-». В настоящее время модуль или библиотека удаляются только из списка, но не из структуры каталогов Android Studio:

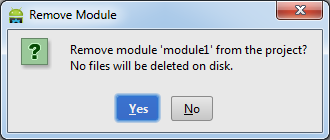
После выполнения этого шага щелкните правой кнопкой мыши, чтобы увидеть меню удаления, как показано на рисунке:

В то же время, сравните две верхние и нижние две картинки, вы найдете значок папки моего приложения стал
стал , Маленькая точка (или маленький телефон) отсутствует, что означает, что его нет в списке.
В это время нажатие на кнопку «Удалить» выполнит настоящее удаление, то есть папка на диске будет удалена, так что подумайте внимательно!

Возможно, мы не хотим удалять его после появления кнопки удаления. Как в это время восстановить отключенный модуль в списке модулей? ?
Дважды щелкните файл settings.gradle проекта:

Введите include ‘: module_name’, где module_name — имя модуля, который нужно связать, и затем синхронизируйте его. Обратите внимание: нельзя пропустить «:». Как показано на рисунке выше, вы можете нажать «Синхронизировать сейчас» в правом верхнем углу или использовать «Файл-> Синхронизировать» для синхронизации.
1. Следовательно, другой способ выйти из списка модулей:
Источник
Как удалить модуль в Android Studio
Есть ли способ удалить модуль в Android Studio? Когда я нажимаю правой кнопкой мыши на модуль, я не могу найти вариант для удаления, это где-то еще?
15 ответов
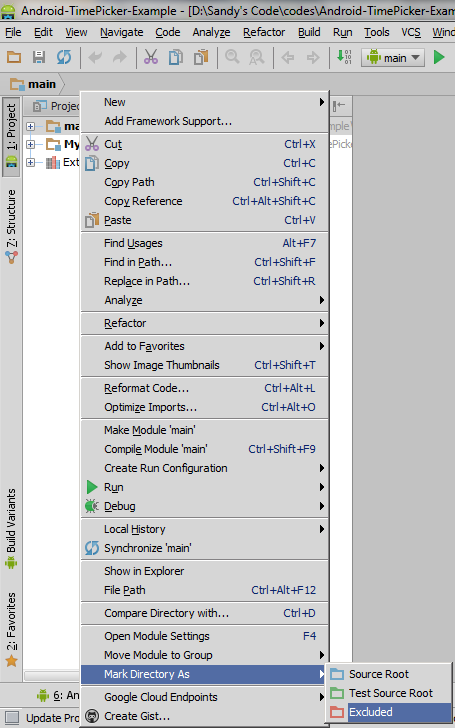
Опция «Отметить как исключение» больше не существует.
Текущий (Android Studio 0.8.x — 2.2.x) способ сделать это через диалог Структура проекта. Доступ к нему можно получить через «Файл → Структура проекта» или щелкнув правой кнопкой мыши по модулю и выбрав «Настройки модуля».
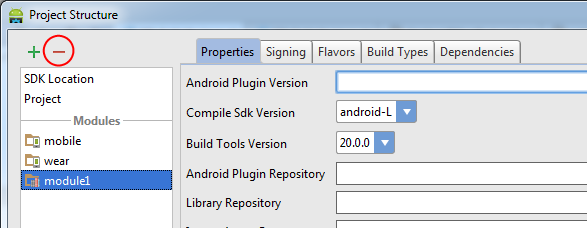
Затем выберите модуль и нажмите кнопку «минус», чтобы удалить его.
Каталог будет по-прежнему отображаться в представлении «Проект» (хотя и не в представлении «Android» ), поскольку он фактически не удаляется, но он больше не будет рассматриваться как модуль.
Если вы хотите, вы можете физически удалить файлы, щелкнув правой кнопкой мыши и нажав «Удалить».
(Примечание редактора: этот ответ был правильным в мае 2013 года для Android Studio v0.1, но с июля 2014 года он более не точен, так как упомянутый параметр меню больше не существует — см. этот ответ для актуальной альтернативы).
Сначала вы должны будете пометить его как исключенный. Затем, щелкнув правой кнопкой мыши, вы сможете удалить проект.
В Android Studio 1.0 — 1.1b4 я нашел, что это самый простой способ удалить модуль:
Откройте settings.gradle , найденный в Gradle Скрипты
Удалить имя модуля из оператора include
Синхронизировать проект с Gradle файлами
Необязательно удалите его вручную из папки проекта
Старый:
New:
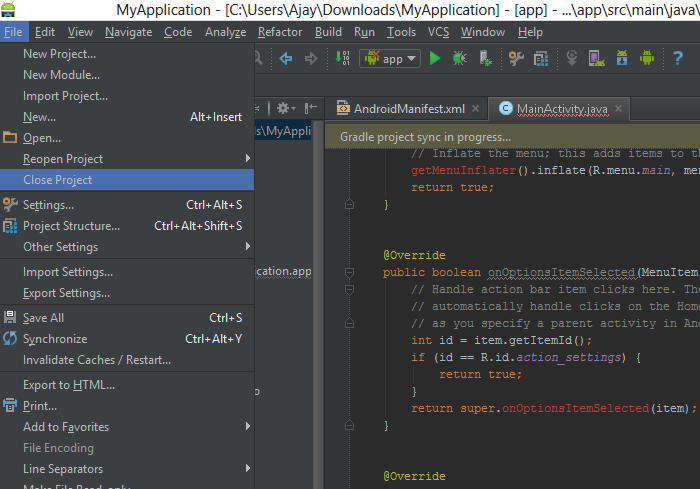
Как я увидел, что в Android Studio 0.5.1 вам нужно закрыть проект, просто сделав File → Close Project, затем наведите указатель мыши на проект, который вы хотите удалить, затем держите мышь в том же проекте и нажмите затем нажмите кнопку «ОК», чтобы удалить проект из Android Studio.
В Android studio v1.0.2
Перейдите к структуре проекта, File -> Project Structure. , как показано на следующем рисунке, нажмите значок — , чтобы удалить модуль. 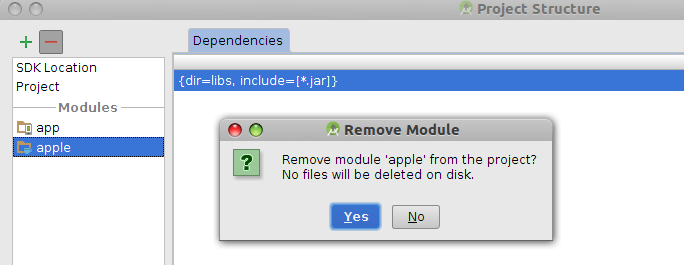
Отредактируйте файл settings.gradle и удалите запись, которую вы собираетесь удалить. например отредактируйте файл с include ‘:app’, ‘:apple’ до include ‘:app’ .
Это будет работать в большинстве ситуаций, однако, наконец, вы должны удалить модуль с диска вручную, если вам это больше не нужно.
Вот для Android studio 2.3.3 Я не нашел ни одной структуры проекта в меню » File . Итак, вот шаги в картинках

Удаление — такая головная боль. Я отправляю решение для Android Studio 1.0.2.
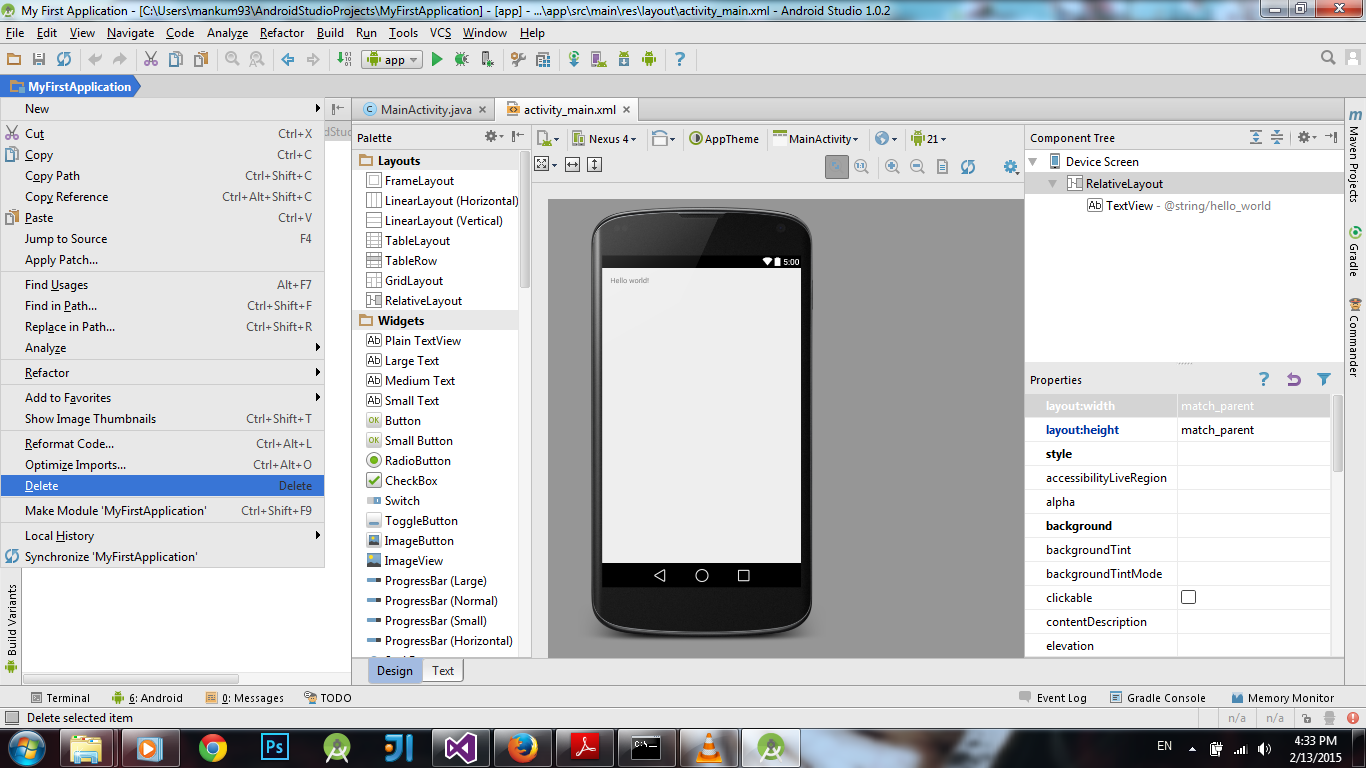
Шаг 1: Щелкните правой кнопкой мыши по названию проекта, выбранному из иерархии папок, как показано. Примечание: его также можно удалить из Commander View с правой стороны окна, щелкнув правой кнопкой мыши имя проекта и выбрав удаление из контекстного меню.
Шаг 2: проект удален (по-видимому), но gradle, похоже, сохраняет запись о папке приложения проекта (проверьте ее, щелкнув по gradle View). Теперь перейдите в Файл- > Закрыть проект.
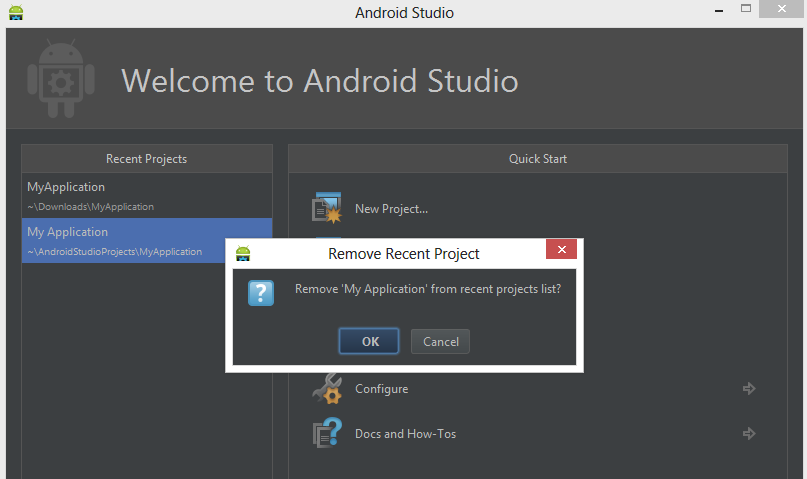
Шаг 3: Теперь вы находитесь в стартовом окне. Переместите курсор в списке последних проектов. Нажмите Удалить.
Шаг 4: Удалите папку из проводника, перемещая или удаляя ее на самом деле. Это местоположение находится в вашем_user_name- > Android Studio Projects → .
Шаг 5: Вернитесь в окно студии Android, и проект ушел навсегда. Теперь вы можете запустить новый проект.
Источник
How to Install and Uninstall Plugins in Android Studio?
Android Studio provides a platform where one can build apps for Android phones, tablets, Android Wear, Android TV, and Android Auto. Android Studio is the official IDE for Android application development, and it is based on the IntelliJ IDEA. One can develop Android Applications using Kotlin or Java as the Backend Language and it provides XML for developing Frontend Screens.
In computing, a plug-in is a software component that adds a particular characteristic to an existing computer program. When a program supports plug-ins, it enables customization. Plugins are a great way to increase productivity and overall programming experience.
Some tasks are boring and not fun to do, by using plugins in the android studio you can get more done in less time. Below is the list of some very useful plugins in the table that are highly recommendable for an android developer.
| Key Promoter X | Key Promoter X helps to get the necessary shortcuts while working on android projects. When the developers use the mouse on a button inside the IDE, the Key Promoter X shows the keyboard shortcut that you should have used instead. |
| Json To Kotlin Class | Json to Kotlin Class is a plugin to generate Kotlin data class from JSON string, in another word, a plugin that converts JSON string to Kotlin data class. With this, you can generate a Kotlin data class from the JSON string programmatically. |
| Rainbow Brackets | Rainbow Brackets adds rainbow brackets and rainbows parentheses to the code. Color coding the brackets makes it simpler to obtain paired brackets so that the developers don’t get lost in a sea of identical brackets. This is a very helpful tool and saves the confusion of selecting which bracket needs to be closed. |
| CodeGlance | Codeglance plugin illustrates a zoomed-out overview or minimap similar to the one found in Sublime into the editor pane. The minimap enables fast scrolling letting you jump straight to sections of code. |
| ADB Idea | ADB Idea is a plugin for Android Studio and Intellij IDEA that speeds up the regular android development. It allows shortcuts for different emulator functionalities that are usually very time consuming, like resetting our app data, uninstalling our app, or starting the debugger. |
Step by Step Process to Install and Uninstall Plugins in Android Studio
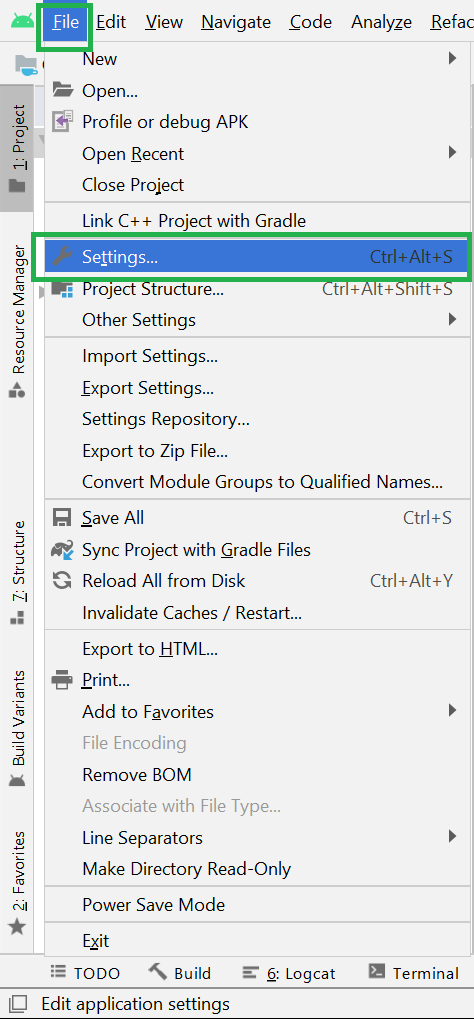
Step 1: Open the Android Studio and go to File > Settings as shown in the below image.
Step 2: After hitting on the Settings button a pop-up screen will arise like the following. Here select Plugins in the left panel. Make sure you are on the Marketplace tab. Then search for the required plugins as per the developer’s requirements. After selecting the required plugins then click on the green colors Install button at the right and at last click on the OK button below.
Note: There might be a need to Restart the Android Studio. For example, you may refer to How to Install Genymotion Plugin to Android Studio.

After these brief steps, you have your plugin installed and functional on Android Studio. Similarly if one wants to disable or uninstall the installed plugins then follow the last step.
Step 3: To disable or uninstall a plugin this time go to the Installed tab. And here you can find the all installed plugins in your android studio. Just click on that plugin which one you want to disable or uninstall. Then select the Disable or Uninstall button at the right as shown in the below image. At last click on the OK button and you are done.
Note: There might be a need to Restart the Android Studio.
Источник


