- Блог Виктора Деревянко
- пятница, 24 января 2014 г.
- REST под Android. Часть 2: разрабатываем API
- Принципы разработки REST API
- Apigee
- Другие ресурсы
- Тестовый пример: набор книг
- Первая попытка описания API: список URL в текстовом файле
- Инструменты для описания API
- Вторая попытка описания API: Apiary.io
- Выводы
- Rest API integration in Android Studio using Retrofit 2
- REST API
- Retrofit
- Retrofit
- Annotations on the interface methods and its parameters indicate how a request will be handled. Request Method Every…
- Getting Started
- 1. REST API creation
- 2. Android app creation
- Изучение Android Studio за одну статью! Создание программы с API
- Информация про Андроид
- Языки программирования для Андроид
- Установка всего необходимого
- Создание функций
- Видео на эту тему
- Дополнительный курс
Блог Виктора Деревянко
О жизни, о программировании. Все публикуемые исходные коды можно взять здесь
пятница, 24 января 2014 г.
REST под Android. Часть 2: разрабатываем API
Прежде чем переходить к разработке тестового проекта на RoboSpice, необходимо определиться с API для тестового проекта. Разумеется, можно взять одно из готовых API — благо их сейчас сотни. Однако гораздо интереснее написать свое, тем более, что это нетривиальный процесс. Рассмотрим, как пишутся REST API, какие инструменты для этого существуют, и попробуем реализовать простейшее тестовое API.
Принципы разработки REST API
Apigee
Там же на отдельной странице собраны примеры готовых REST API (github, twitter и т.д.). Специальная консоль позволяет поработать с выбранным API прямо из браузера.
Другие ресурсы
- Книга RESTful Web APIs (2013) by Leonard Richardson, Mike Amundsen, Sam Ruby.
- REST+JSON API Design — Best Practices for Developers: slides, video
- Best Practices for Designing a Pragmatic RESTful API by Vinay Sahni
- REST and JSON API guidelines and best practices by Niels Krijger — удобная шпаргалка, краткая компиляция из других источников.
- HTTP: The Definitive Guide by David Gourley, Brian Totty, Marjorie Sayer, Anshu Aggarwal, Sailu Reddy. В книге детально рассмотрен HTTP протокол, на котором в большинстве случаев реализуются REST API. Так же HTTP посвящена отдельная глава «HTTP for APIs» в книге «RESTful Web APIs».
Тестовый пример: набор книг
Первая попытка описания API: список URL в текстовом файле
Договоримся, что для формат представления ресурсов можно задавать следующим образом:
Теперь зафиксируем способ обработки ошибок. Будем считать, что в случае успеха сервер возвращает код 200 — OK , в случае ошибки один из следующих кодов: 400 — Bad Request, 500 — Internal Server Error . Для наших целей вполне достаточно, хотя можно задействовать и другие коды.
В случае ошибки сервер обязан вернуть сообщение с расшифровкой ошибки в формате:
Осталось описать формат представления ресурса и списков ресурсов.
- [1] получить полный список книг
- [2] получить информацию о книге
- [3] добавить книгу в набор
- [4] удалить книгу из набора
- [5] редактировать информацию о книге
- [6] провести поиск книг по автору, по названию — аналогично [1]
Инструменты для описания API
Вторая попытка описания API: Apiary.io
В целом, работа с API Blueprint Language не вызвала каких-то особых проблем. Смутил только один момент, с которым так и не удалось разобраться. Я создал ресурс Book: и действия к нему Параметр fields может использоваться только с GET, а в PATCN и DELETE его быть не может. Набор параметров я задаю отдельно для каждого действия. Тем не менее, в документации для Edit и Delete параметр fields присутствует в URL, что несколько сбивает с толку. Причем ниже, в списке возможных параметров, он отсутствует.

Выводы
- Прежде чем разрабатывать собственное REST API, имеет смысл ознакомиться как минимум с Web API Design. Crafting Interfaces that Developers Love (pdf), чтобы не наделать грубых ошибок.
- Сервис apiary.io — весьма функционален. Разрабатывать REST API на нем гораздо удобнее, чем в просто фиксировать список URL в текстовом файле. Возможность проверки реализации на соответствие спецификации и Mock-сервер стоят того, чтобы потратить время на изучение API Blueprint Language.
Цель достигнута — BooksSet REST API для тестового проекта создано. Переходим к разработке проекта. Об этом — в следующий раз.
Mindmap, созданный в процессе работы над этой статьей, можно скачать здесь, в формате Freemind 1.0 (портативная версия: freemind-bin-1.0.0.zip).
Update Mock-сервер Apiary не поддерживает компрессию gzip. Может когда-нибудь сделают, особенно если за эту функцию проголосует достаточное количество пользователей.
Источник
Rest API integration in Android Studio using Retrofit 2

A Web API is an application programming interface for either a web server or a web browser. API allows developers to interact with external services. These are the commands that the developer of the service has determined will be used to access certain features of their program.
Most APIs work using either XML or JSON. These languages allow us to send and retrieve large amounts of useful information in the form of objects.
XML is easy to understand and generally places keys inside triangle brackets, followed by their values.
JSON, “Javascript Object Notation.” It is a short-hand for sending data as value/attribute pairs.
REST API
A REST API is an application programming interface (API) that conforms to the constraints of REST architectural style and allows for interaction with RESTful web services. REST stands for representational state transfer and was created by computer scientist Roy Fielding.
REST API is designed to take advantage of existing protocols. While REST can be used over nearly any protocol, it usually takes advantage of HTTP when used for Web APIs. This means that developers do not need to install libraries or additional software in order to take advantage of a REST API design.
Retrofit
Retrofit is a type-safe REST client for Android, Java and Kotlin developed by Square. The library provides a powerful framework for authenticating and interacting with APIs and sending network requests with OkHttp.
This library makes downloading JSON or XML data from a web API fairly straightforward. Once the data is downloaded then it is parsed into a Plain Old Java Object (POJO) which must be defined for each “resource” in the response.
Retrofit
Annotations on the interface methods and its parameters indicate how a request will be handled. Request Method Every…
Today we are going to see how to use Retrofit HTTP client in your Android application.
Getting Started
This tutorial contains two parts
- Basic REST API creation in nodejs using express and hosting it in heroku.
- Basic android app creation and consume the custom api in it.
1. REST API creation
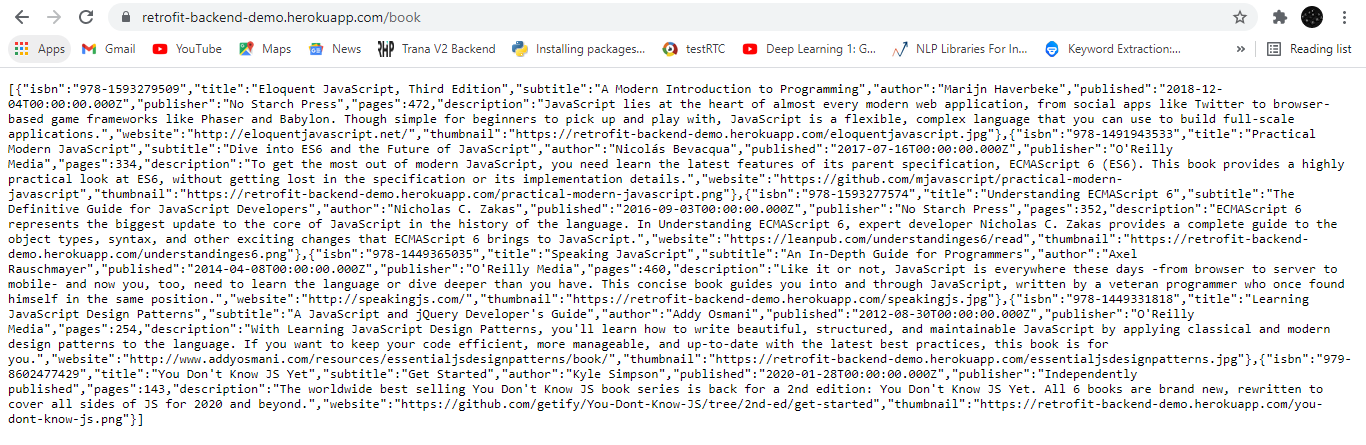
Consider I am going to create a REST API for reading some book information. For that, we have a JSON based database of books having the following books in a file books.json:
First we have to create a db handler to read the content from the books.json file. ( db_handler/book.js)
Then create a router file to catch all the requests for books. ( routes/book.js)
Finally we are going to create a server and add the router in it. ( index.js)
There is also a public folder for serving images to the client. You can provide access to the directory by the following code in your index file.
You can get the images in your client by it’s names along with server IP.
Now the server creation part is over. You can run the server by
It’s the time to deploy your node app in heroku. Heroku is a platform as a service (PaaS) that enables developers to build, run, and operate applications entirely in the cloud.
First you have to create an account in heroku and login to the portal. You will get the dashboard like this.

Click on Create new app button.

Provide an app name and click on Create app. Here I used retrofit-backend-demo. You can use your own name for your app. Now your app is ready and we can deploy the server in the app.

There are 3 methods available for deployment. I already have installed the Heroku Git in my system and I feel it as the simplest way to deploy your app. So, In this example we are going to push our node app using Heroku Git.
Use the commands that mentioned in the deploy tab (Fig 3) to deploy your app.
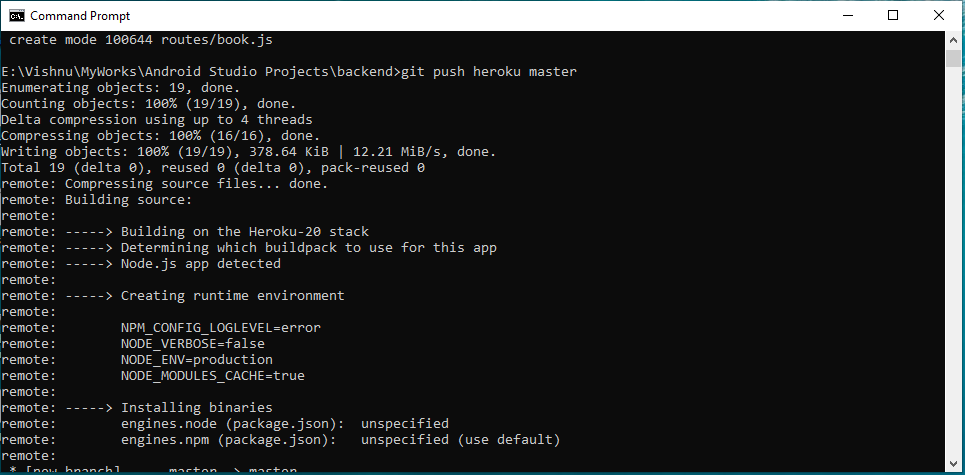

After successful deployment you will get a url along with deployed to Heroku message. This will be the url of your server. You can test the url in your browser to verify your app response. If it’s showing any error then use heroku logs to check the logs.

2. Android app creation
lets create a new project in Android Studio.
- Go to File ⇒ New Project. When it prompts you to select the default activity, select Empty Activity and proceed.
- First up, we need to add internet permission to our Android Manifest file to make sure our app is allowed to go online.
3. Open build.gradle in (Module:app) and add Retrofit, Picasso, RecyclerView, Gson dependencies.
4. Converting Json to Java object.
A route is a URL that represents an endpoint for the API. If we take a look at JSON Placeholder, you’ll see we have options such as ‘/book’ and ‘/comment’ etc. We already mentioned the JSON representation of books. So, to handle this information, we’re going to need a class that can build objects from the deserialized data.
For that, create a new class in your project named Book under model package. This will need variables that correspond to the data we’re getting from the /book api (isbn, titile, author etc). We’ll be getting that information from the web API, so we need a getter and setter for each of them.
The model class should look like this:
5. Create the Retrofit Instance
To issue network requests to a REST API with Retrofit, we need to create an instance using the Retrofit.Builder class and configure it with a base URL.
Create a class RetrofitClientInstance.java under network package. Here BASE_URL is the basic URL of our API where we will make a call.
6. Define the Endpoints
The endpoints are defined inside of an interface using special retrofit annotations to encode details about the parameters and request method.
This interface needs just a single method to retrieve all the data from /book. If you take a look at that JSON again, you’ll notice that the curly brackets are inside square brackets. This means that we have an array of objects, which is why we want to build a list for them. The objects are instances of our GetDataService that we just made.
7. Create custom adapter for binding data with RecycleView.
Create a class named CustomAdapter.java under adapter package like this.
8. Displaying the content
Inside the onCreate() method of the MainActivity.java, we initialize an instance of the GetDataService interface (line 16), the RecyclerView, and also the adapter. Finally, we call the generateDataList() method.
Let’s see what’s happening here.
enqueue() asynchronously sends the request and notifies your app with a callback when a response comes back. Since this request is asynchronous, Retrofit handles it on a background thread so that the main UI thread isn’t blocked or interfered with.
To use enqueue() , you have to implement two callback methods:
onFailure is, of course, where we need to handle any errors.
onResponse does not mean that everything went smoothly, however. It simply means that there was a response; that the website exists. Should we get a 404 message, this would still be considered a “response.” Thus, we need to check again if the process went smoothly with isSuccessful(), which checks to see that the HTTP code is not an error.
There you have it! Your own Android App in Android studio 🙂

I hope you had fun reading and/or following along. In the next story, we will look into how to build more features and interactions into this App. Stay tuned!
If you are interested in further exploring, here are some resources I found helpful along the way:
Источник
Изучение Android Studio за одну статью! Создание программы с API
ОС Андроид – одна из самых популярных ОС в мире. Мы подготовили большой урок по изучению программы Android Studio и построению полноценного Андроид приложения. За урок мы сделаем программу с API.
Информация про Андроид
На ОС Андроид сегодня работают не только мобильные и планшетные устройства, но также всевозможные часы, телевизоры, компьютеры и даже, как бы это не звучало, холодильники.

Несмотря на огромное множество устройств разработка под многие из них происходит через одну общую программу – Android Studio . Конечно же, у каждой платформы будут свои особенности: размер экрана, характеристики устройства и так далее. Тем не менее, общий процесс создания будет примерно схожим.
Таким образом, изучив Андроид Студио вы сможете в будущем спокойно переходить от одной платформы к другой. Напомним, на сегодняшний день только мобильные устройства на ОС Андроид занимают примерно 85% всего рынка смартфонов.
Языки программирования для Андроид
Разрабатывать под Андроид можно за использованием нескольких разных языков программирования. Зачастую все разрабатывают на основе языка Java, но помимо него можно использовать язык Kotlin, Python, React Native, Flutter и даже на HTML и CSS можно делать проекты.
Ниже видео на тему разработки Андроид проекта на HTML и CSS:
Вы можете использовать разные языки, но наиболее часто используется Джава или его более молодой собрат – Kotlin . В любом случае, если вы только приступаете к Андроид, то ни про какой другой язык помимо Джава вам не стоит думать. Если в будущем нужно будет писать на Котлин, то вам все равно знания разработки Андроид проектов на Джава будут нужны.
Установка всего необходимого
Для разработки под Андроид требуется всего две вещи. Во-первых, вам нужно скачать на компьютер Джава JDK. Это можно сделать через официальный сайт Oracle.
Во-вторых, вам потребуется программа Андроид Студио. Именно она является наиболее популярной программой для разработки приложений под Андроид. Скачать бесплатно эту программу можно также с ее официального сайта . После скачивания Джава и Андроид Студио выполните их установку и далее мы сможем приступить к разработке проекта.
Создание функций
Теперь нам нужно создать весь функционал для приложения.
В приложении мы будем получать данные о погоде. Чтобы это делать сперва зарегистрируйтесь и получите API ключ на сайте OpenWeaterMap .
Теперь остается прописать весь код. Код класса «MainActivity» представлен ниже вместе с комментариями.
Дополнительно скачать полностью весь проект можно по этой ссылке .
Видео на эту тему
Также вы можете просмотреть детальное видео по разработке данного приложения:
Дополнительный курс
На нашем сайте также есть углубленный курс по изучению языка Java . В ходе огромной программы вы изучите не только язык Java, но также научитесь создавать веб сайты, программы под ПК, приложения под Андроид и многое другое. За курс вы изучите массу нового и к концу программы будете уметь работать с языком Java и создавать на нём полноценные проекты.
Источник


