Android studio search bar
Встроенная строка поиска в app bar по умолчанию свернута и представлена в виде значка.  При нажатии по значку появляется поле для ввода поисковой фразы.
  Давайте добавим этот виджет на панель приложения.
Создадим новый проект с шаблоном Empty Activity. Это самый простой шаблон с одной активностью, в котором даже нет знаменитой плавающей кнопки, которая, кстати, нам здесь и не понадобится.
После этого создадим xml-файл с названием searchable.xml. В данном файле можно указать будет ли в строке использоваться голосовой поиск, также можно задать свою подсказку для пользователя (search hint), и изменить другие параметры. Файл searchable.xml нужно разместить в папке xml. Данную папку вы должны создать сами в уже существующей папке ресурсов – res.
Содержимое файла searchable.xml должно быть следующим: В строке android:label=»@string/app_name»атрибут android:label должен указывать на строковый ресурс с названием приложения.
В строке android:hint=»@string/search_hint» задаем подсказку для пользователя. Пользователь видит данную подсказку перед тем как ввести поисковой запрос в поле поиска.
В строке android:voiceSearchMode=»showVoiceSearchButton|launchRecognizer» добавляем функцию голосового поиска.
В строке android:searchSuggestAuthority=»ru.phpnick.MySuggestionProvider» мы указываем search authority для того чтобы включить показ последних поисковых запросов, во всплывающем окне под строкой поиска. Authority может быть любой уникальной строкой, но лучшей практикой считается указывать название пакета (в данном случае ru.phpnick) и название вашего класса, который расширяет класс SearchRecentSuggestionsProvider (в данном случае MySuggestionProvider).
В строке android:searchSuggestSelection=» ?» значение » ?» – это просто заполнитель для SQLite-функции select, в качестве аргумента которой будет использоваться значение из строки поиска.
С файлом searchable.xml закончили, далее нужно или создать новую Активность, которая будет осуществлять поиск и выводить его результат, или использовать для этих целей основную активность. Для простоты эксперимента мы будем использовать уже существующую MainActivity.
Но для начала мы должны указать, что мы будем использовать именно MainActivity, для этого откроем файл манифеста AndroidManifest.xml и добавим в него новые строки.
Создадим в папке с классом активности MainActivity.java новый файл MySuggestionProvider.java. Его содержимое должно быть следующим: Как видим кода здесь совсем немного. Метод setupSuggestions() передает значения констант AUTHORITY и MODE, которые будут использоваться далее.
Еще раз хочу напомнить, что в данном материале мы не будем ничего искать, а просто выведем фразу из строки поиска в TextView главной активности, для этого используем уже имеющийся виджет TextView, тот самый который выводит фразу «Hello World!» Изначально у него нет id, поэтому нам нужно его (id) добавить, чтобы обратиться к виджету из активности. Откроем файл activity_main.xml и внутри элемента
добавим строчку: Далее откроем файл MainActivity.java. В метод onCreate() добавим следующий код: В первой части кода мы получаем строку поиска из намерения ACTION_SEARCH и через метод setText() виджета TextView меняем выводимый им текст на строку поиска.
Во второй части кода, в методе saveRecentQuery() мы сохраняем новую поисковую фразу в коллекцию, содержащую все поисковые фразы, которые были введены нами в строку поиска.
После этого в метод onCreateOptionsMenu() нужно добавить код, активирующий виджет поиска (SearchView) и передающий в него настройки конфигурации. Осталось в файл options_menu.xml добавить элемент поиска: На этом все. Если теперь в строку поиска добавить какое-либо слово и нажать кнопку поиска на клавиатуре, данное слово заменит значение «Hello World!» виджета TextView. 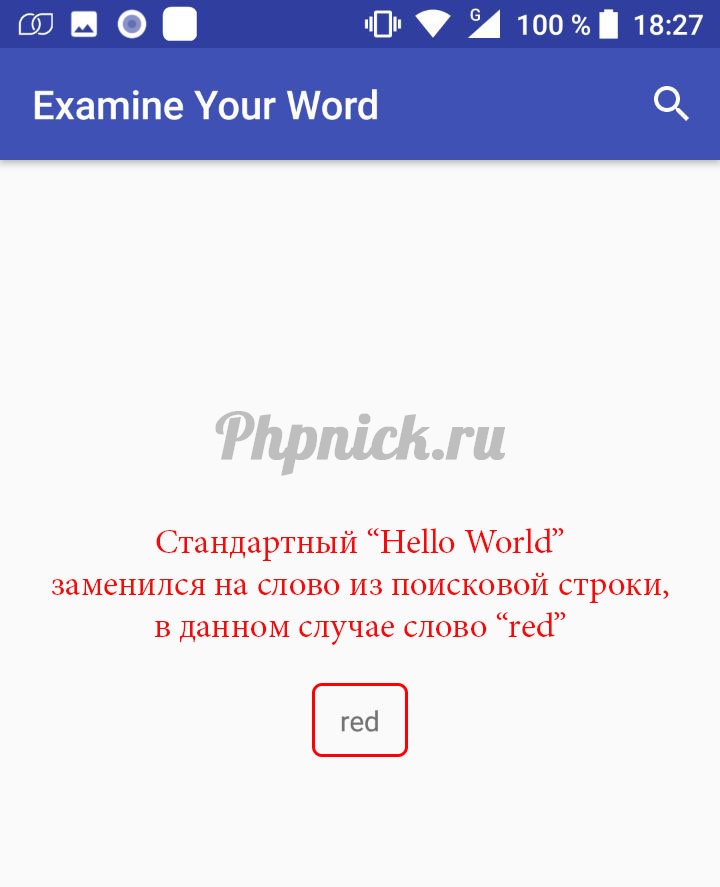 Не забывайте, что возможность голосового поиска и историю поисковых запросов мы также добавили.
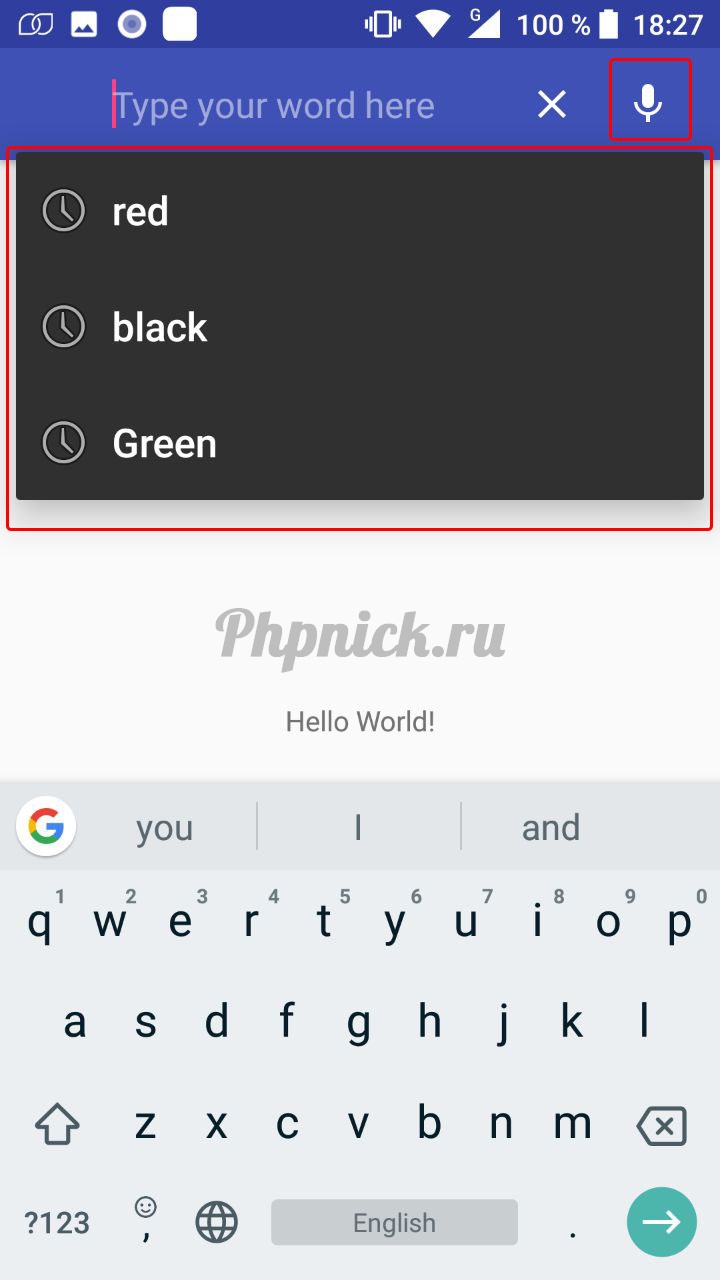
Источник
Android studio search bar
Material SearchBar Android
Material Design Search Bar for Android ![]()

This beautiful and easy to use library will help to add Lollipop Material Design SearchView in your project.


to include SearchBar to your project:
add this code to the the project level build.gradle file
add the dependency to the the app level build.gradle file
then add SearchBar to your activity:
MaterialSearchBar has the following xml attributes:
| Attribute | Description |
|---|---|
| mt_speechMode | if set to true, microphone icon will be displayed instead of search icon |
| mt_maxSuggestionsCount | specifies the max number of search queries stored |
| mt_navIconEnabled | set navigation icon enabled |
| mt_roundedSearchBarEnabled | use capsule shaped searchbar on v21+ and revert to default on lower |
| mt_dividerColor | set the colors of the suggestion and menu dividers |
| mt_searchBarColor | set the main color of the searchbar |
| mt_menuIconDrawable | set drawable of the menu icon |
| mt_searchIconDrawable | set drawable of the search icon when speech mode is false |
| mt_speechIconDrawable | set drawable of the speech icon when speech mode is true |
| mt_backIconDrawable | set drawable of the back arrow icon |
| mt_clearIconDrawable | set drawable of the clear icon |
| mt_navIconTint | set tint color of nav/back animated icon |
| mt_menuIconTint | set tint color of the menu icon |
| mt_searchIconTint | set tint color search/speech icon |
| mt_backIconTint | set tint color of the back arrow icon |
| mt_clearIconTint | set tint color of the clear icon |
| mt_navIconUseTint | should the animated nav icon use tint color |
| mt_menuIconUseTint | should the menu icon use the tint color |
| mt_searchIconUseTint | should the search/speech icon use the tint color |
| mt_backIconUseTint | should the back icon use the tint color |
| mt_clearIconUseTint | should the clear icon use the tint color |
| mt_hint | set the text of the hint when the searchbar is focused and search query is empty |
| mt_placeholder | set the placeholder text when the MaterialSearchBar is not focused |
| mt_textColor | set text color |
| mt_hintColor | set hint color |
| mt_placeholderColor | set placeholder color |
| mt_textCursorTint | set text cursors tint |
| mt_highlightedTextColor | set the text highlight tint color |
public methods:
- addTextChangeListener(TextWatcher textWatcher)
- clearSuggestions()
- closeSearch()
- openSearch()
- getLastSuggestions()
- getMenu()
- getText()
- hideSuggestionList()
- inflateMenu(int menuResource)
- inflateMenu(int menuResource, int icon)
- isSearchOpened()
- isSpeechModeEnabled()
- isSuggestionsVisible()
- setArrowIcon(int arrowIconResId)
- setArrowIconTint(int arrowIconTint)
- setCardViewElevation(int elevation)
- setClearIcon(int clearIconResId)
- setClearIconTint(int clearIconTint)
- setCustomSuggestionAdapter(SuggestionsAdapter suggestionAdapter)
- setDividerColor(int dividerColor)
- setHint(CharSequence hintText)
- setIconRippleStyle(boolean borderlessRippleEnabled)
- setLastSuggestions(List suggestions)
- setMaxSuggestionCount(int maxSuggestionsCount)
- setMenuDividerEnabled(boolean menuDividerEnabled)
- setMenuIcon(int menuIconResId)
- setMenuIconTint(int menuIconTint)
- setNavButtonEnabled(boolean navButtonEnabled)
- setNavIconTint(int navIconTint)
- setOnSearchActionListener(OnSearchActionListener onSearchActionListener)
- setPlaceHolder(CharSequence placeholder)
- setPlaceHolderColor(int placeholderColor)
- setRoundedSearchBarEnabled(boolean roundedSearchBarEnabled)
- setSearchIcon(int searchIconResId)
- setSearchIconTint(int searchIconTint)
- setSpeechModeEnabled(boolean speechMode)
- setSuggestionsClickListener(SuggestionsAdapter.OnItemViewClickListener listener)
- setText(String text)
- setTextColor(int textColor)
- setTextHighlightColor(int highlightedTextColor)
- setTextHintColor(int hintColor)
- showSuggestions()
- updateLastSuggestions(List suggestions)
Styling Material SearchBar
Custom Style — styles.xml Create a custom style and use one of the provided styles as the parent.
OR
Custom Colors — colors.xml Simply set/change these colors(or some) and you have your custom style.
To save search queries when the activity is destroyed, use the method searchBar.getLastSuggestions() and then, to restore them use searchBar.setLastSuggestions(List ); as shown in the example below
Here is a simple example of using MaterialSearchBar
Источник
Android Toolbar Searchview Tutorial
Hi and welcome to another tutorial from codingdemos, today you will learn how to build an android app that uses android toolbar searchview, using android searchview will allow your users to search for something through your app.
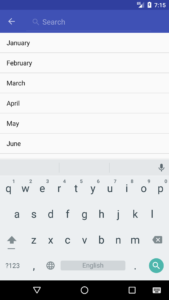
The final result will look something like this:
In this tutorial we will be using the following:
- Android studio version 2.3.3
- Android emulator Nexus 5X with API 24
- Minimum SDK API 16
- Open up Android Studio and create a new project and give it a name, in our case we’ve named it (ToolbarSearchview), choose API 16 as the minimum SDK, then choose blank activity and click on finish and wait for Android Studio to build your project.
- Open (styles.xml) file and change the parent theme from (Theme.AppCompat.Light.DarkActionBar) to (Theme.AppCompat.Light.NoActionBar) like this:
- We changed the parent theme in (styles.xml) file because we want to create a toolbar instead of using the actionbar.
- Open up (activity_main.xml) file and here we will need to add android toolbar to be able to show the search icon later, then we need to add android listview to be able to show the list of items and add an android textview, we use this textview when the listview don’t have any data and show this textview instead to indicate to the user that there is no data available. The code look like this:
- Next we need to create a string array of items that we need to show them in the listview, this string array will have the name of the months in a year like this:
- Now let’s create a menu folder and file, this menu file will have the search menu item that later will show up in android toolbar. Here is the code:
- Next we need to define the toolbar, listview and textview inside (MainActivity.java) file like this:
- In order for android search menu to appear in toolbar, we need to use setSupportActionBar like this:
- Then we need to create an array adapter that will hold the string array data like this:
- Let’s set the listview to the adapter so that the data will show up in the list like this:
- Now let’s make the listview clickable by calling ListView.setOnItemClickListener, once user clicks on any item from the list we will show the selected item inside a toast message like this:
- Let’s set the empty textview that we have declared earlier with the listview, so that when the user searches for something and it’s not available in that listview, instead of showing an empty screen we show a textview that says (No results) like this:
- Now let’s work on the search menu, first thing we need to do is override onCreateOptionsMenu like this:
- Next we need to inflate the menu file (menu_toolbar.xml) that have the search icon, so that we can have access to the search menu item like this:
- Now let’s declare the search menu item like this:
- Now that we have declared the search menu item, we can declare SearchView that we are going to use it to perform the actual search like this:
- In order to detect/listen to the user when performing a search request, we will use SearchView.setOnQueryTextListener like this:
- Inside onQueryTextChange method is where we will listen to the user typed query and instantly show the result from the android adapter that holds our string array data like this:
- Run the app and you will see the following output:

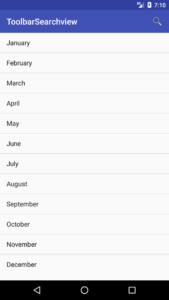
Android Toolbar Searchview App Demo
- There one thing missing!! When you tap on android searchview you don’t see any hint to indicate to the user that they can place the query here, same thing that you see in google search box.
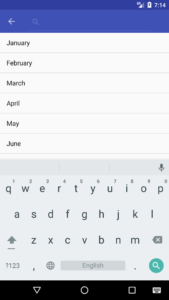
Android Toolbar Searchview without hint
- Let’s fix that by adding a hint to android searchview using SearchView.setQueryHint like this:
- Now run the app again and you will see the hint showing in android searchview
Android Toolbar Searchview with hint
Источник


