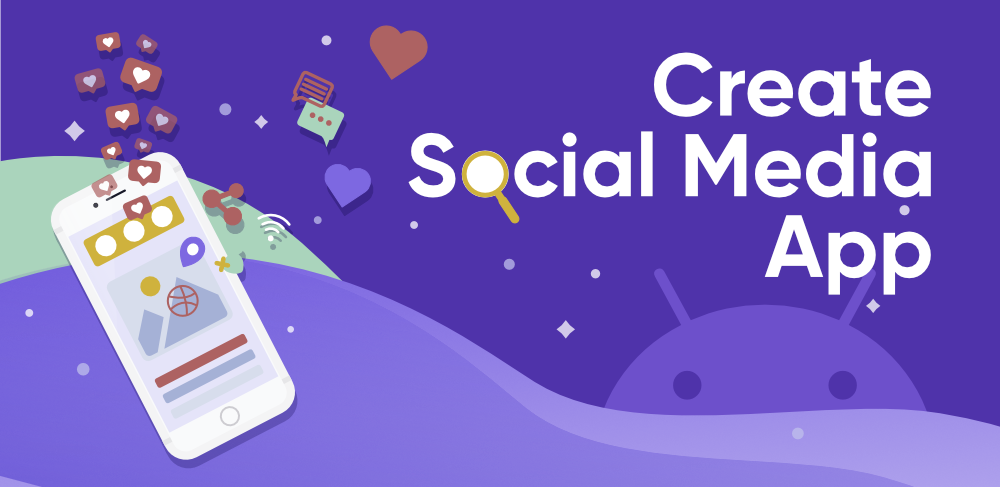
- Как создать андроид-приложение для соцсетей Twitter и Facebook
- Чему вы научитесь в этом курсе?
- Какой функционал приложения?
- Кому подойдет курс?
- В каком формате курс?
- Как записаться на курс?
- How to Create a Social Media App on Android Studio?
- List of Functionalities
- Use Case Diagram
- Implementation
- Социальная сеть на Android за несколько выходных — часть II (сервер)
- Краткое содержание первой части
- Содержание
- Введение
- Регистрация
- Синхронизация контактов
- Загрузка фотографий
- Push-уведомления
- Очереди асинхронных задач
Как создать андроид-приложение для соцсетей Twitter и Facebook
Чему вы научитесь в этом курсе?
В этом курсе вы сможете создать мобильное андроид-приложение для чтения социальных сетей Twitter и Facebook. После прохождения курса вы будете знать:
- как создать андроид-приложение для доступа к социальным сетям,
- как оформить приложение в стиле материального дизайна,
- как загрузить в приложение публикации из Twitter и Facebook,
- как встроить в приложение видеоплеер для воспроизведения видео,
- как настроить навигацию в приложении c Navigation Drawer,
- как настроить push-уведомления о новых публикациях,
- как встроить рекламные баннеры AdMob для монетизации приложения,
- как монетизировать приложение через In-app Billing (покупки в приложении),
- как опубликовать android-приложение в маркете Google Play.
По итогам прохождения курса вы научитесь создавать клиент-серверные приложения на языке java в среде разработки Android Studio. Узнаете, как обеспечить взаимодействие приложения с социальными сетями Twitter и Facebook и как настроить push-уведомления о новых публикациях. Также вы сможете монетизировать приложение за счет рекламы и внутренних покупок в приложении. Готовое приложение вы сможете опубликовать в маркете Google Play.
Какой функционал приложения?
Приложение обеспечит пользователям быстрый доступ к чтению новостей из любых заранее определенных аккаунтов или страниц социальных сетей Twitter и Facebook. Встроенный в приложение медиаплеер позволит просматривать видео и фото с возможностью шаринга и скачивания медиафайлов. Также в приложении будет функция оповещения пользователей о новых публикациях посредством push-уведомлений.
В приложении будет возможность шаринга материалов через другие приложения или соцсети. Кроме того, будет реализована монетизация приложения с помощью рекламных баннеров. Еще один вариант монетизации — отключение рекламы и открытие статей с ограниченным доступом через In-app Billing (покупки в приложении).
Приложение разрабатывается в соответствии с требованиями Material Design. Навигация по приложению реализована через Navigation Drawer.
Кому подойдет курс?
Курс подойдет как начинающим, так и более опытным разработчикам. Можно просто пошагово создать приложение без знаний программирования, используя исходный код проекта. Но если вы уже обладаете некоторыми знаниями, полученными на нашем канале, то этот курс поможет их закрепить, и дополнительно вы научитесь создавать клиент-серверные приложения для социальных сетей Twitter и Facebook.
В каком формате курс?
Продвинутый курс по разработке андроид-приложения для социальных сетей Twitter и Facebook будет опубликован в закрытом доступе на нашем сайте, в формате видеоурок + текстовый урок + исходный код + поддержка (вопросы — ответы в комментариях). Доступ к урокам будут иметь только подписчики курса. Срок доступа неограничен.
Как записаться на курс?
Воспользуйтесь кнопкой ниже для перехода на страницу оплаты. После оплаты отправьте через форму обратной связи сообщение с темой «Подписка на курс MySocialApp». В сообщении укажите email, на который будут отправлены данные для доступа.
Источник
How to Create a Social Media App on Android Studio?
Social media is not a new term for us. Our daily life is incomplete, or we can say we human beings survive on food, water, air, and social media. We are dependent to such an extent that we tend to share every bit of information about ourselves on social media platforms. Similarly, Android Studio is also not a new term for an Android Developer. For beginners there always a curiosity about how a complex app like Facebook, Instagram, Twitter, Linked In, etc. is developed. How do these apps work!! How do the likes, comments functionalities work in social media apps!! How does the messaging functionality works!! And many more.
In the previous article “Best Way to Become Android Developer – A Complete Roadmap” we have discussed that “The best way to learn Android is by developing some basic projects to some advanced projects“. So in this article, we are going to develop something like that. We are going to develop a clone of a social media app.
List of Functionalities
- SignUp themselves using their email and password.
- SignIn themselves using their email and password that they have using during the Signup process.
- Edit their profile data (Profile Pic, Name, and Password).
- Add various blogs.
- Search for a specific blog.
- Show all registered users.
- Search for a user out of all registered users.
- Like a blog post.
- Comment on a particular blog.
- Show all users who liked a particular blog.
- Delete a Blog Post
- Send Message
- Delete Sent Message
- LogOut themselves and LogIn with their other ID.
Use Case Diagram
Use Case diagram is a part of UML (Unified Modeling Language) that is used to depict the functionality of a system or a part of a system. They are widely used to illustrate the functional requirements of the system and its interaction with external agents (actors). A use case is basically a diagram representing different scenarios where the system can be used. A use case diagram gives us a high-level view of what the system or a part of the system does without going into implementation details. Below is the use case diagram for this project:

Implementation
Technology Stack Used:
- For frontend:XML
- For backend:Java
- IDE:Android Studio
- Database Used:Firebase
A sample video is given below to get an idea about what we are going to do in this tutorial.
This tutorial has comprised of 16 parts as the following:
Part 2:Create Fragment Using Bottom Navigation
- We are going to Create Bottom Navigation with 5Fragments (Home, Users, AddBlog, ChatList, Profile).
- On HomeFragment we will be Showing all the added blogs.
- In the UsersFragment, we will be showing all the Registered Users.
- In the AddBlogFragment We will be adding our blogs.
- In the ChatlistFragment we will be showing a chat list of all users with whom we have chat.
- In the ProfileFragment We will be showing the Profile of the user where we will be showing users’ data and the blogs written by the user.
Part 3:Edit Profile Data
- We are going to edit our profile data like changing name, changing the password of the user, and changing profile pic.
- Changing password is a very important feature because it may happen that sometimes someone knows our password and in that case, we need to change our password.
- We change our profile pic using selecting an image from the gallery or clicking an image from the camera.
Part 5:Add Blogs
- We are going to add blogs by any user. Here we are going to work in AddBlogs Fragment where the user will be adding a blog with a title, description, and an image related to that blogs.
- If the user doesn’t write any of the titles or descriptions then we will be showing an error.
Part 6:Retrieve Blog On Home Page
- We are going to retrieve the blogs written by users on HomeFragment.
- Here we have only shown the user data and title, description, and image of the blogs, but we are also going to implement the like and comment feature in upcoming blogs.
- Then We will be showing Post details Activity where users will be able to comment.
- We have also implemented the Like a Blog functionality.
Part 7:Search for a Specific Blog On Home Page and Logout Functionality
- We are going to Search For a Blog on Home Page.
- If there are few blogs in our app then it is easy to search for a blog manually. But what happens when we have 1000 blogs then search for a particular blog became a very complicated and time taking task.
- That’s why we are implementing this feature to search for a blog using the title or description provided.
- Also, we have implemented the Logout functionality in this article.
Part 8:Show All Registered Users
- We are going to Show all the Registered Users of our App.
- We are going to show the list of users in UsersFragment.
Part 9:Search For a User Out of All Registered Users
- We are going to Search For a user on the Users Page.
- If there are few people registered in our app then it is easy to search for a person.
- But what happens when we have 1000 users registered in our app then searching for a particular user became a very complicated and time taking task.
- That’s why we are implementing this feature to search for a user using the name or email provided.
Part 10:Like a Blog Post
- We are going to Like a Blog. We are implementing this feature using two images one like button with white background and another like button with blue background.
- When the user clicks on the button for the first time we will change the image to the button with the background color blue and will increase the count. When the user clicks again then we will decrease the count and change the like button with background white.
Part 11:Comment on a Particular Blog
- We are going to comment on the blog.
- Here we are going to write a comment, and then we will be showing the comments and will be updating the comment count.
- The comment feature is the best feature in any blogging app. It helps in interacting with the user who has written the blog and much more.
Part 12:Show All Users Who Liked On a Particular Blog
- We are going to view the list of users who have like a particular blog.
- After Click on total like we will be redirected to PostLikedBy.Activity.
- In that, we will be using a recycler view to show the list of users who have liked a post.
- We can also view the list of all users who likes our post from the PostDetailActivity.class.
Part 13:Delete a Blog Post
- We are going to delete the Blog written by the user.
- Blogs can only be deleted by the owner of blogs. In the top right of the blog, a button is there.
- After clicking on that a popup will come in that Delete button will come. After clicking on Delete, the blog will be successfully deleted from the blogs.
Part 14:Create Layout & Send Message in Chat
- We are going to Create a Layout for chat & Send Messages in Chat.
- A user can send either a Message or an Image.
- A user can send an image either using a camera or gallery.
- Firstly a request for permission will be asked to send an image using a gallery or after clicking the image using the camera.
- If permission is given then the user can send the image or it will again request for asking permission.
Part 15:Delete Messages
- We are going to delete the message in the ChatActivity.
- We are going to delete text and image messages. When we click on a text then an AlertBox will come.
- There will be two options to either delete that message or cancel the event. After Click on delete message will be deleted from both sides.
Part 16:Retrieve Blogs on User Profile
- We are going to Retrieve Blogs Written by users on their profile fragment.
- As previously we have already added Data of users in Profile Fragment like email, name, and profile pic.
- Here we are also going to retrieve Blogs Written By the current user on their profile.
- Let’s See the implementation of showing the blogs written by the current user.
Источник
Социальная сеть на Android за несколько выходных — часть II (сервер)
Краткое содержание первой части
Содержание
Введение
Регистрация
Синхронизация контактов
Для построения графа друзей на сервере ведется учет контакт-листов пользователей и сопоставление его с телефонными номерами пользователей, указанными при регистрации. Все контакт-листы хранятся в хэшированном виде. Телефонные номера должны быть приведены к нормальной форме, для чего используется библиотека libphonenumber от Google.
Стоит отметить один нюанс – код страны определяется в формате ISO-3166 относительно устройства пользователя, т.е. даже если в моей контактной книге находятся телефонные номера других стран, то при нормализации этих номеров необходимо использовать код страны «приписки» sim-карты моего устройства — RU.
Сопоставление телефонов происходит в одном из двух случаев:
- При регистрации нового пользователя, его телефон сравнивается с уже существующими контакт-листами
- Также при каждом запуске приложения контакт-лист повторно отправляется на сервер для выявления новых контактов
Для описанного сценария на БД сервера создается две таблицы – одна для самого контакт-листа и вторая для списка подтвержденных друзей (сам граф друзей). Такая схема позволяет изменять существующие контакты, не нарушая сформированные ранее ребра графа друзей.
Загрузка фотографий
В качестве хранилища фотографий мы выбрали два варианта – бесплатный аккаунт(free tier) AWS S3 как основной и собственный сервер как запасной (например на случай превышения лимита запросов в бесплатном аккаунте S3).
| Рис 1. Загрузка изображений на AWS S3 |
 |
Перед загрузкой клиент запрашивает у сервера временную публичную ссылку с правами записи, выполняет загрузку по этой ссылке напрямую на S3, после чего сообщает на сервер об успешной загрузке. Для работы с AWS S3 мы использовали aws-sdk gem. Перед работой необходимо завести аккаунт в AWS Web Services (на момент разработки была возможность завести бесплатный тестовый аккаунт на 5GB и 20,000 запросов) и получить пару ключей ACCESS_KEY/SECRET_ACCESS_KEY
Push-уведомления
При загрузке новых фотографий или добавлении комментариев подписчикам пользователя в реальном времени отправляются push-уведомления. Самым популярным и достаточно простым способом доставки push уведомлений в Android является GCM – Google Cloud Messaging. Перед использованием сервиса необходимо зарегистрировать свой проект в консоли разработчика, получить API-ключ и Project Number. API-ключ используется для авторизации сервера приложения при запросах к GCM, он добавляется в заголовок HTTP-запросов.
Со стороны клиента уникальным идентификатором получателя уведомлений является PushID, который получается путём обращения через GoogleCloudMessaging SDK с Android устройства напрямую к серверу GCM, при этом необходимо указать полученный ранее ProjectID. Полученный PushID отправляется на наш сервер приложения и впоследствии используется при доставке уведомлений.
| Код 6. Пример отправки push-уведомлений (HTTP) |
lib/push.rb Очереди асинхронных задачЧтобы ускорить взаимодействие с клиентом, некоторые задачи на сервере выполняются в фоновом режиме. В частности это отправка Push уведомлений, а также масштабирование изображений. Для таких задач мы выбрали resque gem. Список решений по обработке очередей и краткое описание можно изучить по ссылке. Мы выбрали resque за его простоту установки и конфигурации, поддержку персистентности с помощью БД redis, наличие минималистского веб-интерфейса. После запуска rails сервера необходимо отдельно запустить обработчик очередей resque следующим способом: После этого постановка новых задач в очередь осуществляется следующим способом (На примере отправки push-уведомлений) Источник  Когда к мобильному устройству присоединены наушники  ОС Google Android развивается, и по всему видимому |

