- Использование Open Source OCR библиотеки Tesseract в Android на примере простого приложения
- Optical Character Recognition in Android using Tesseract
- The Code City
- Search This Blog
- Creating OCR Android app using Tesseract in Android Studio Tutorial
- How to create Android app that performs OCR in Android Studio using Tesseract library :
- Android studio tesseract ocr
- About
Использование Open Source OCR библиотеки Tesseract в Android на примере простого приложения

Сегодня я покажу, как добавить опцию распознавания текста (OCR) в Ваше Android приложение.
Наш тестовый проект — это один единственный Activity, в который я запихнула и распознавание. Итого в общем счете всего 200 строк кода.
Важная фича — опция OCR работает offline. OCR увеличивает ваш .apk приблизительно на 17mb.
Tesseract — пожалуй, самая популярная и качественная бесплатная OCR библиотека, у которой до сих пор выходят апдейты. Создатели Tesseract — разработчики из Google.
Tesseract написан на С, но существует проект tess-two — готовый инструмент по использованию Tesseract на Android платформе. Он предоставляет Java API для доступа к изначально скомпилированным Tesseract классам. Все, что нужно — это добавить tess-two в ваш build.gradle:
Кроме этого тессеракту потребуется .traineddata файл. Этот файл содержит данные для эффективного распознавания, словари слов и прочее. Файл уникален для каждого языка. Скачать .traineddata для любого языка можно по ссылке. Замечу, что есть возможность создать свой собственный .traineddata файл. Это может быть полезно, если вы распознаете специфический текст или у вас свой словарь возможных слов. Теоретически, кастомизация повысит качество распознавания.
Перед тем, как перейти к java коду, убедитесь в том, что вы положили в проект файл для английского языка eng.traideddata. Например, в src\main\assets\tessdata.
Вам потребуется сконфигурировать тессеракт, перед тем как запускать распознавание. Для этого нужно передать в метод конфигурации (init) два параметра — путь к папке tessdata на вашем Android устройстве и язык («eng»). Будьте внимательны, путь к папке tessdata, а не к .traideddata файлу, если папка будет названа иначе, код не будет работать. Очевидно, вам эту папку нужно создать на external storage и поместить в неё eng.traideddata.
Привожу метод, который из Bitmap получает распознанный текст:
Да-да, очень просто.
Результат
Рекомендации
1. Лучше запускать OCR на сервер стороне. Если у вас Java проект — используйте tess4j — JNA wrapper для Tesseract. Качество распознавания выше на 20-30%. Не садит батарею, не утяжеляет .apk.
2. Используйте предобработку изображения, перед тем как распознавать. Самый простой способ — заставить юзера выделить блок с текстом, что бы уменьшить площадь распознавания. Сюда можно отнести и выравнивание искажений, удаление шумов, цветокоррекцию.
Источник
Optical Character Recognition in Android using Tesseract
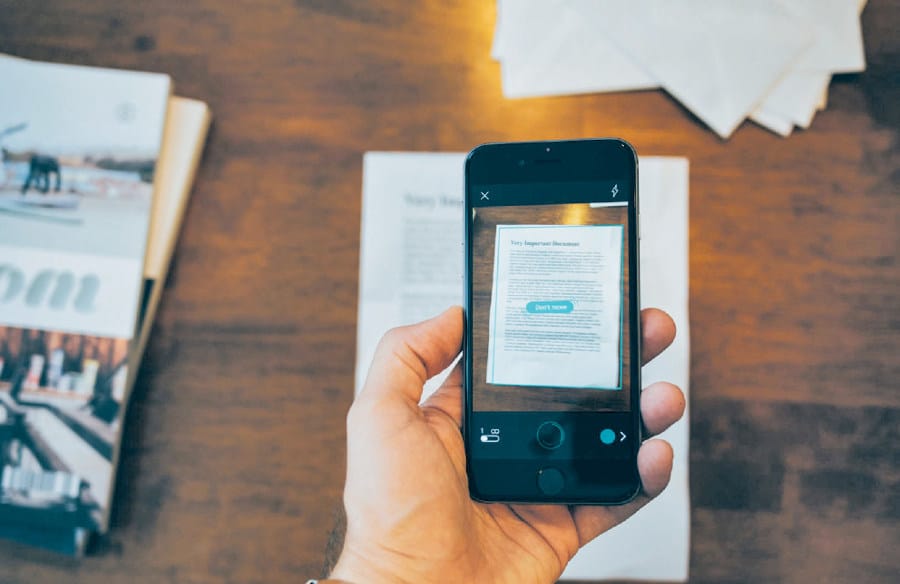

This article, which is aimed at Android developers and image processing enthusiasts, explains how to extract text out of a captured image, using the Tesseract library.
Optical character recognition (OCR) is a technology that enables one to extract text out of printed documents, captured images, etc. Android currently doesn’t come prebundled with libraries for OCR, unlike for voice-to-text conversion, which can be done using android.speech.RecognizerIntent. To build an Android app that can perform OCR or leverage these capabilities, one might have to opt for external libraries.
About Tesseract
Tesseract is a well-known open source OCR library that can be integrated with Android apps. It was originally developed by Hewlett Packard Labs and was then released as free software under the Apache licence 2.0 in 2005. The development has been sponsored by Google since 2006.
One could leverage OCR for building many Android applications like, for instance, scanning business cards and importing the text to a contact list, scanning an image and playing aloud the extracted text for the visually impaired, and so on. In this article, we will use the tess-two library, which is Tesseract with a Java native interface layer over it, to compile on Android platforms.
Integration with Android
The prerequisite is that the device should be running Android 2.3 (Honeycomb) or a higher version. In Android Studio, which is the official IDE for Android app development, tess-two could be integrated in the following way:
1. Start with downloading tess-two from https://github.com/rmtheis/tess-two.
2. Once complete, create a folder named ‘libraries’ in your application directory. Place the downloaded tess-two folder under Libraries. We may have to do this as tess-two needs to be configured using Gradle. The folder names here could be anything, but the same name needs to be given in settings.gradle and the app’s build.gradle while building the app.
3. Create build.gradle under the tess-two directory to configure the script that will build tess-two. You could use this simple build.gradle code given below:
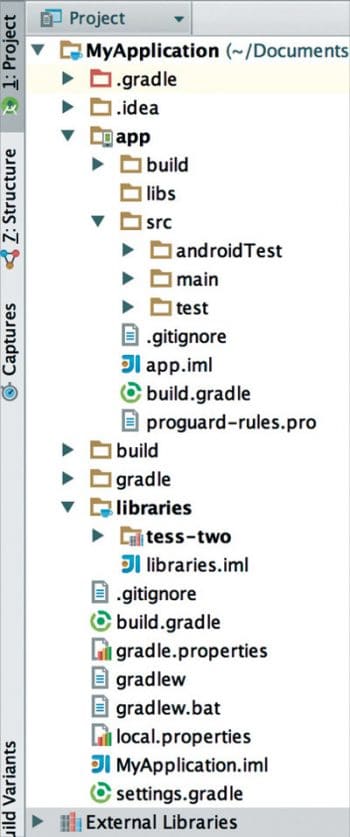 Figure 1: Project structure
Modify the compiled SDK and build versions according to the toolset available. The project structure will look somewhat like what’s shown in Figure 1.
4. tess-two needs Android NDK during runtime, which helps in embedding C and C++ code into your Android apps. This is needed for performance-intensive applications like OCR. Download the NDK if you don’t have one. You could get it from http://developer.android.com/ndk/downloads/index.html and build the NDK by following the steps shown below.
Set the following environment variables:
- NDK as path to your downloaded and uncompressed NDK folder
- PATH as $NDK:$PATH
- NDK_PROJECT_PATH to your tess-two folder’s path under Libraries, which was created in Step 2
Now, you are all set to build the NDK by running the ‘ndk-build’ command from the downloaded NDK directory in Linux and Mac terminals or by using ‘ndk-build.cmd’ from the Windows command prompt. Finally, set the NDK path in Android Studio (File->Project Structure->SDK Location->Android NDK Location).
5. Now that it is getting compiled as a separate library, we may have to include tess-two as a dependency for the actual app by adding the following line in the build script of the main project (the build.gradle under the app folder):
Append this under the dependencies element of the app’s build script (build.gradle under the app folder).
Finally, to compile both the app and the tess-two library, append the following line in settings.gradle (given below):
Using the tess-two methods
With the above steps, Tesseract APIs should be compilable from the app. Before jumping onto invoking tess-two, you need to convert the image in .png or .jpg form to an Android bitmap. The following code snippet explains how to achieve this. Here, it is assumed that the image is stored in the internal storage (being referred by Environment.getExternalStorageDirectory()).
One might experience several issues while obtaining the bitmap from an image. These include:
1. The BitmapFactory.decodeStream() might throw an out-of-memory exception or, in some cases, might not throw an exception but return a null bitmap. Make sure the image is not too big and RAM has enough space. A 500kb image typically takes nearly 5MB of RAM. Google provides suggestions for efficiently handling large bitmaps at http://developer.android.com/training/displaying-bitmaps/load-bitmap.html.
2. The bitmap could be null because there are no read/write permissions for the image storage. Make sure AndroidManifest.xml has these permissions set.
3. Double check the path from where the image is being read. It is always safe to use the getAbsolutePath() method for paths.
Once you have the bitmap, you could make use of tess-two methods for the text extraction.
A sample code is shown below:
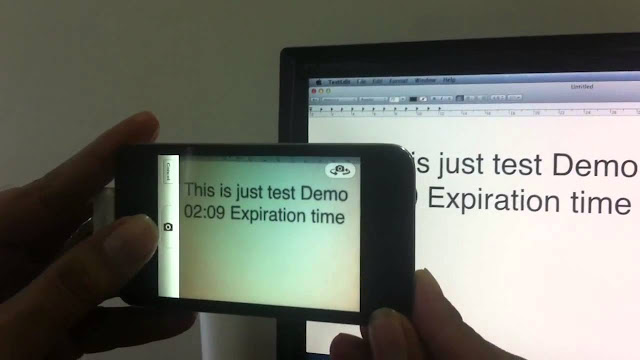
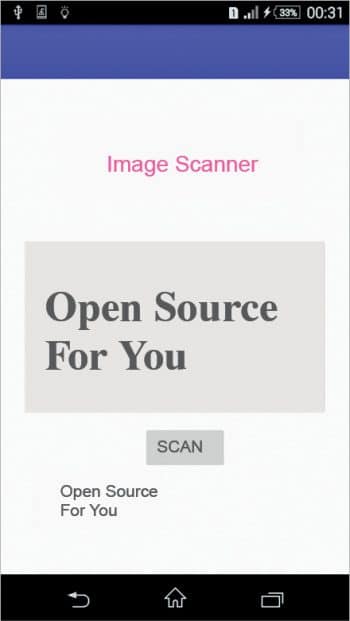 Figure 2: Sample application
Источник
The Code City
Search This Blog
Creating OCR Android app using Tesseract in Android Studio Tutorial
- Get link
- Other Apps
Text recognition in Android has become relatively easier. There are various library that allows you to perform OCR using and Android app. Some like Abby, are commercial text recognition solutions while others like Tesseract are free and open source, hence tesseract is the most common Text recognition library for Android. If you want to detect text regions and not read it, you can refer to my post here — Text detection in Android using openCV.
In this post we will learn —
How to create Android app that performs OCR in Android Studio using Tesseract library :
There are various approaches to do this but this is the most simple and quick approach —
1. Adding tess-two to dependency
2. Creating a class to manage Tesseract calls.
3. Initialize the object of the class and call methods on that object.
We will be using tess-two library for using Tesseract in Android. To use tess-two with Android Studio, just add the following to dependencies of app module-
Now sync the project and you will be able to use Tesseract with Android Studio. So out first step is complete, now let’s move on to the next step. We will create a class that will handle the initialization of TessBaseAPI and contain methods to facilitate call to recognize text from images. Here is the code for the class :
public class MyTessOCR <
private String datapath;
private TessBaseAPI mTess; Context context;
public MyTessOCR(Context context) <
// TODO Auto-generated constructor stub
this.context = context;
datapath = Environment.getExternalStorageDirectory() + «/ocrctz/»;
File dir = new File(datapath + «/tessdata/»);
File file = new File(datapath + «/tessdata/» + «eng.traineddata»);
if (!file.exists()) <
Log.d(«mylog», «in file doesn’t exist»);
dir.mkdirs();
copyFile(context);
>
mTess = new TessBaseAPI();
String language = «eng»;
mTess.init(datapath, language);
//Auto only
mTess.setPageSegMode(TessBaseAPI.PageSegMode.PSM_AUTO_ONLY);
>
public void stopRecognition() <
mTess.stop();
>
public String getOCRResult(Bitmap bitmap) <
mTess.setImage(bitmap);
String result = mTess.getUTF8Text();
return result;
>
public void onDestroy() <
if (mTess != null)
mTess.end();
>
private void copyFile(Context context) <
AssetManager assetManager = context.getAssets();
try <
InputStream in = assetManager.open(«eng.traineddata»);
OutputStream out = new FileOutputStream(datapath + «/tessdata/» + «eng.traineddata»); byte[] buffer = new byte[1024];
int read = in.read(buffer);
while (read != -1) <
out.write(buffer, 0, read);
read = in.read(buffer);
>
> catch (Exception e) <
Log.d(«mylog», «couldn’t copy with the following error : «+e.toString());
>
>
>
Remember to keep the traineddata file for the language that you need tesseract to recognize in the assets folder. For this example we have eng.traineddata.
Now only the final step remains to build our Android app for OCR. Now we just need to use this class and call required methods for recognition.
In the Activity in which you need to recognition, just Initialize an object of this class :
private MyTessOCR mTessOCR;
mTessOCR = new TessOCR(MainActivity.this);
Once initialized you can just call the following method and pass a bitmap as a parameter, your android app should read the text from the bitmap and return you a string now :
String temp = mTessOCR.getOCRResult(bitmap);
Temp now contains the string value of the text that is read from the bitmap that you passed as an argument in the code above! Congratulations, now you are ready to build your first OCR app for Android. If you want to learn how to recognize text region, and want an example for this code check out the following :
Text Region Detection using OpenCV.
Text Recognition app in Android Example.
Keep Coding, do comment you problems if you have any problems.
Источник
Android studio tesseract ocr

Fork of tess-two rewritten from scratch to build with CMake and support latest Android Studio and Tesseract OCR.
The Java/JNI wrapper files and tests for Leptonica / Tesseract are based on the tess-two project, which is based on Tesseract Tools for Android.
This project uses additional libraries (with their own specific licenses):
- Android 4.1 (API 16) or higher
- A v4.0.0 trained data file(s) for language(s) you want to use. Data files must be copied to the Android device to a directory named tessdata .
- Application must hold permission READ_EXTERNAL_STORAGE to access tessdata directory.
This library is available in two variants.
- Standard — Single-threaded. Best for single-core processors or when using multiple Tesseract instances in parallel.
- OpenMP — Multi-threaded. Provides better performance on multi-core processors when using only single instance of Tesseract.
You can get compiled version of Tesseract4Android from JitPack.io.
Add the JitPack repository to your project root build.gradle file at the end of repositories:
Add the dependency to your app module build.gradle file:
You can use Android Studio to open the project and build the AAR. Or you can use gradlew from command line.
To build the release version of the library, use task tesseract4android:assembleRelease . After successful build, you will have resulting AAR files in the
- Open this project in Android Studio.
- Open Gradle panel, expand Tesseract4Android / :tesseract4Android / Tasks / other and run assembleRelease .
In project directory create local.properties file containing:
Note for paths on Windows you must use \ to escape some special characters, as in example above.
Call gradlew tesseract4android:assembleRelease from command line.
About
Fork of tess-two rewritten from scratch to support latest version of Tesseract OCR.
Источник


