Android Toolbar Back Button Tutorial
Hi and welcome to another tutorial from codingdemos, today you will learn how to create android toolbar back button for your app.
You can use the android toolbar back button to navigate from one screen to another without having to tap on the actual device back button. Let’s get started 🙂
In this tutorial we will be using the following:
- Android studio version 2.3.3
- Android emulator Nexus 5X with API 24
- Minimum SDK API 16
- Open up Android Studio and create a new project and give it a name, in our case we’ve named it (ToolbarButtonTutorial), choose API 16 as the minimum SDK, then choose a blank activity and click on finish and wait for Android Studio to build your project.
- Open (styles.xml) file and change the parent theme from (Theme.AppCompat.Light.DarkActionBar) to (Theme.AppCompat.Light.NoActionBar) like this:
- Next let’s add android toolbar, open (activity_main.xml) file and make the following code changes
- Now let’s add the back arrow icon inside android toolbar by using Android asset studio. Click on res and then right click on drawable=>New=>Vector Asset.
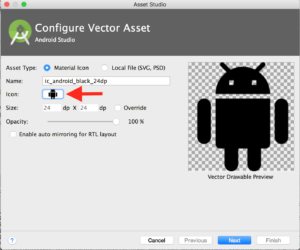
Android studio asset studio (Large preview)
- Click on icon where the red arrow is pointing and choose the back arrow icon from the icons list and then click on finish
- When you open (ic_arrow_back_white_24dp.xml) file you will see the following code:
- Change the color of the back arrow icon from black to white by adding white color code inside (android:fillColor) like this:
- Open (MainActivity.java) file and let’s define the toolbar, set the app name to be shown in the toolbar as well as the back arrow icon like this:
- Run the app, and you will be able to see the toolbar with app name and the back arrow icon.
Android Toolbar Back Button (Large preview)
- Now let’s make the back arrow icon clickable so that when you tap on the icon, you will exit the app like this:
In this tutorial we’ve built a simple android app that uses android toolbar back button, to allow the user to navigate between the screen(s) without using the actual device back button. The source code for android toolbar button is available on Github, and if you have a question(s), please let me know in the comment section, and I’ll do my best to answer them.
Источник
How to Add and Customize Back Button of Action Bar in Android?
The action bar (sometimes referred to as the app bar), if it exists for an activity, will be at the top of the activity’s content area, typically directly underneath the status bar. It is a menu bar that runs across the top of the activity screen in android. Android ActionBar can contain menu items that become visible when the user clicks the “menu” button. In general, an ActionBar composed of the following four components:
- App Icon: App branding logo or icon will be shown here
- View Control: A dedicated space to display the Application title. Also provides the option to switch between views by adding spinner or tabbed navigation
- Action Buttons: Major actions of the app could be added here
- Action Overflow: All unimportant action will be displayed as a menu
Below is a sample image to show where the Action Bar/Toolbar/App Bar is present on an android device.
Attention reader! Don’t stop learning now. Get hold of all the important Java Foundation and Collections concepts with the Fundamentals of Java and Java Collections Course at a student-friendly price and become industry ready. To complete your preparation from learning a language to DS Algo and many more, please refer Complete Interview Preparation Course.
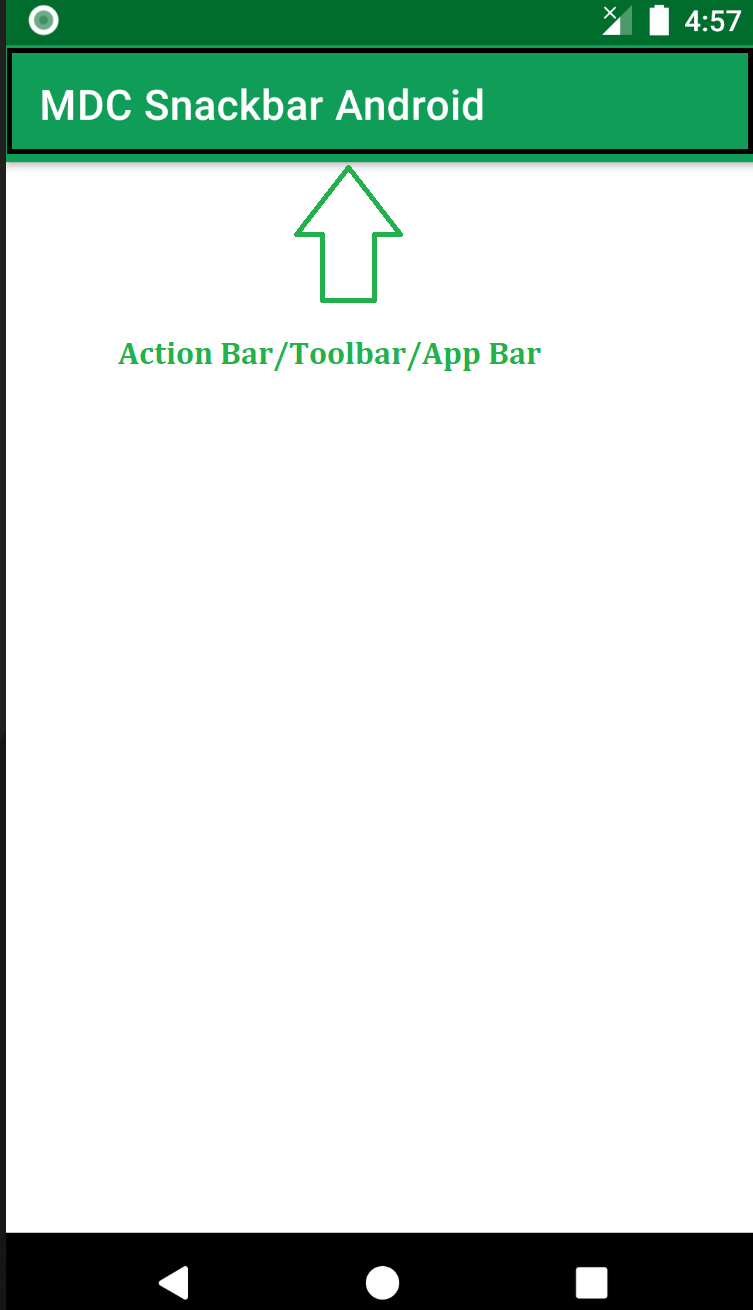
The action bar is a primary toolbar inside an activity that can be used to display an activity title and other interactive items. One of the most used items is a Back Navigation Button. The back button is used to move backward from the previously visited screen by the user. Most Android devices have a dedicated back button still a back button on the action bar enhances the user experience.
Источник
How to Create Custom AppBar/ActionBar/ToolBar in Android Studio | Java


Today in this tutorial, we’re going to see how to create a custom AppBar/ActionBar/ToolBar in android.
I also already created a tutorial on this topic, but here I will demonstrate it with different examples.
Gradle dependency
for circle image view:
Set the styles
now go to your styles.xml file and set the theme to NoAction Bar so that we can create our own toolbar.
Design our AppBar/ActionBar/ToolBar
now go to your main XML file and create a ToolBar and set the width and height, make sure min-height should be actionBar size.
this will give you just a toolbar without any field. Look at the below image.

for the logo, we’re using a circular image view. Already add the dependency. Put it inside the toolbar and do the adjustment.
here we set our title to null, so in the main java file assign our toolbar and do the below change
the result will be:

we can also set the logo by using app:logo=”your logo here” in your toolbar
the result will be:

for the menu, create a menu android resource folder and create a menu resource file ( /res/menu/custom_menu.xml)
import that menu in our main java file by using these code of lines
for adding a title simply add a textView inside the toolbar.
Источник


