- How to Set Up Android Studio for Kotlin Development
- Kotlin has many benefits, including an IntelliJ/Android Studio Plugin. Adding the plugin to a new Android project and converting your code from Java to Kotlin is easy.
- Install Kotlin Plugin for Android Studio
- Create a New Android Project
- Apply Kotlin Plugin to the Project
- Add Kotlin Gradle Plugin
- Apply the Kotlin Android Plugin
- Convert Activity Code from Java to Kotlin
- Bonus: Staying Up-to-Date With Kotlin Versions
- Further Reading
- Set up an environment for KMM development
- Keddit — Part 1: Configuring Android Studio with Kotlin
- Content
- Part 1: Configuring Android Studio with Kotlin
- Create Project
- Android Studio 3.x
- Android Studio 2.x
- Kotlin Plugin
- Configure Project with Kotlin — “first attempt”
- From Java to Kotlin file
- Configure Project with Kotlin — “Last one :)”
- Run, run, run!
- Repository
- Conclusion
- Working with Kotlin in Android Studio
- Installing the Kotlin Plugin
- Setting up the Project
- Adding Source folder for Kotlin
- Configuring Gradle
- Hello World with Kotlin
- Most likely going to be asked questions
- 19 Responses to Working with Kotlin in Android Studio
- Martin Krischik says:
- Hadi Hariri says:
- fanchao says:
- evilbloodydemon says:
- Stuart Rackham says:
- Stuart Rackham says:
- Marcin Koziński says:
- Natalia Ukhorskaya says:
- Lemuel Adane says:
- Andrey Breslav says:
- Igor says:
- Natalia Ukhorskaya says:
- Igor says:
- Natalia Ukhorskaya says:
- Igor says:
- Igor says:
- Natalia Ukhorskaya says:
- Andrew says:
- Andrey Breslav says:
- Discover more
- Gradle Kotlin DSL 1.0
- Kotlin 1.3 Released with Coroutines, Kotlin/Native Beta, and more
- KotlinConf 2018 Announcements
- Kotlin/Native 0.8.2 Released
How to Set Up Android Studio for Kotlin Development
Kotlin has many benefits, including an IntelliJ/Android Studio Plugin. Adding the plugin to a new Android project and converting your code from Java to Kotlin is easy.
Join the DZone community and get the full member experience.
If you have been following the latest trends in the AndroidDev world, you are likely to have heard about Kotlin.
Kotlin is a (not so) new programming language developed by JetBrains, the makers of IntelliJ IDE that the Android Studio is based on. Kotlin is statically typed, it runs on the JVM, and it offers a lot of benefits. There are tons of articles that talk about the advantages of Kotlin in comparison to Java, so I won’t be covering that in this post.
In this post, however, we will learn how to set up Android Studio for Kotlin development and will write our “Hello World” app in Kotlin.
Let’s get started!
Install Kotlin Plugin for Android Studio
The good people at JetBrains have created an IntelliJ/Android Studio Plugin for Kotlin. First, we’re going to go ahead and install the plugin.
To do this, navigate to Preferences > Plugins > Browse Repositories, search for Kotlin, and click Install, as shown in the figure below.

When the install is complete, you will need to restart Android Studio to apply the new plugin.
Just in case you’re using IntelliJ IDEA 15 or above, you’re in luck. Koltin plugin ships with the IDE.
Create a New Android Project
Now that we have the plugin installed, let’s go ahead and create a new Android project the usual way we would. Navigate to File > New > New Project and follow through the project creation wizard. Select the Create Empty Activity option at the end.
For more information on creating an Android project, check out this guide.
Apply Kotlin Plugin to the Project
The next step is to apply the Kotlin plugin to the project. There is an automated tool to do this but sometimes, the tool messes things up, so let’s just walk through the manual process of applying the plugin in our build.gradle files (both at the project level and the app module level).
Add Kotlin Gradle Plugin
To configure the plugin, we first need to add the plugin to the root project’s build.gradle , the same way it’s done for the Gradle plugin (automatically). Add the plugin to the dependencies closure in the project build.gradle file. The project build.gradle file looks like this:
A few notes about the block of code above:
- We created a variable ext.kotlin_version . The reason we have this is we may have other places in the project where we need to reference the Kotlin version, so it makes sense to “externalize” that value. You can check out this post about externalizing your dependencies versions using gradle extra properties for more info.
- We placed this variable in the buildscript closure. This is because the buildscript is the entry point into this file when the project is being built. If we place the variable outside this closure, this variable won’t be available before the project is built, and the build will fail.
Apply the Kotlin Android Plugin
After adding the Kotlin Gradle plugin, the next step is to apply the plugin. To do this, we need to add apply plugin: kotlin-android to the app-module’s build.gradle file:
Convert Activity Code from Java to Kotlin
We’ve applied the plugin and setup all we need to, but our “Empty Activity” generated code is still in Java.
Luckily for us, the Kotlin plugin can help us convert our code from Java to Kotlin.
Currently, our Java Activity looks like this:

To do this, select the file and navigate to Code > Convert Java File to Kotlin File, or use the shortcut Command + Alt + Shift + K (I believe you can replace Command with Control if you’re on a PC).
After converting our code to Kotlin, our “Empty Activity” looks like this:

Bonus: Staying Up-to-Date With Kotlin Versions
You’ve made it this far — let’s add a bonus tip!
Kotlin is still heavily being worked on, and there are (frequent) fixes and updates. It’s generally a good idea to stay up to date with the new features and changes in the language. The Kotlin Android Studio plugin helps us manage the versions of Kotlin. If you navigate to Tools > Kotlin > Configure Kotlin Plugin Updates as shown in the screenshots below, you will be able to select the update channel — Stable , Early Access Preview — 1.0.x , or Early Access Preview — 1.1 — which is currently the bleeding edge version.

Further Reading
There are a number of great resources scattered around the internet for learning Kotlin. Some of them are:
In future posts, I’ll be writing about some specific features of the language.
Thanks for reading this post. I am always open to questions and comments. If you have any, kindly drop them in the comments section below or send me a tweet.
If you found this post useful, or know someone that may find it useful, please feel free to share. Thank you!
Источник
Set up an environment for KMM development
Before you begin creating your first application to work on both iOS and Android, start by setting up an environment for Kotlin Multiplatform Mobile (KMM) development:
If you are going to work with shared code or Android-specific code, you can work on any computer with an operating system supported by Android Studio.
If you also want to write iOS-specific code and run an iOS application on a simulated or real device, use a Mac with a macOS. These steps cannot be performed on other operating systems, such as Microsoft Windows. This is due to an Apple requirement.
Install Android Studio 4.2 or 2020.3.1 Canary 8 or higher.
You will use Android Studio for creating your multiplatform applications and running them on simulated or hardware devices.
If you need to write iOS-specific code and run an iOS application, install Xcode – version 11.3 or higher.
Most of the time, Xcode will work in the background. You will use it to add Swift or Objective-C code to your iOS application.
Make sure that you have a compatible Kotlin plugin installed.
In Android Studio, select Tools | Kotlin | Configure Kotlin Plugin Updates and check the current Kotlin plugin version. If needed, update to the latest version in the Stable update channel.
Install the Kotlin Multiplatform Mobile plugin.
In Android Studio, select Preferences | Plugins, search for the plugin Kotlin Multiplatform Mobile in Marketplace and install it.

Install the JDK if you haven’t already done so.
To check if it’s installed, run the command java -version in the Terminal.
Источник
Keddit — Part 1: Configuring Android Studio with Kotlin

Juan Ignacio Saravia
Jan 28, 2016 · 6 min read

Content
Part 1: Configuring Android Studio with Kotlin
In this Part we are going to configure an Android Studio project to use Kotlin and leave everything prepared for the next story to start developing the Keddit App from the beginning and learning some Kotlin concepts.
If you missed the first part of these Stories you can go to the Introduction just to get a quick overview of what we are going to be developing, which Kotlin topics are going to be covered and also which libraries are going to be used.
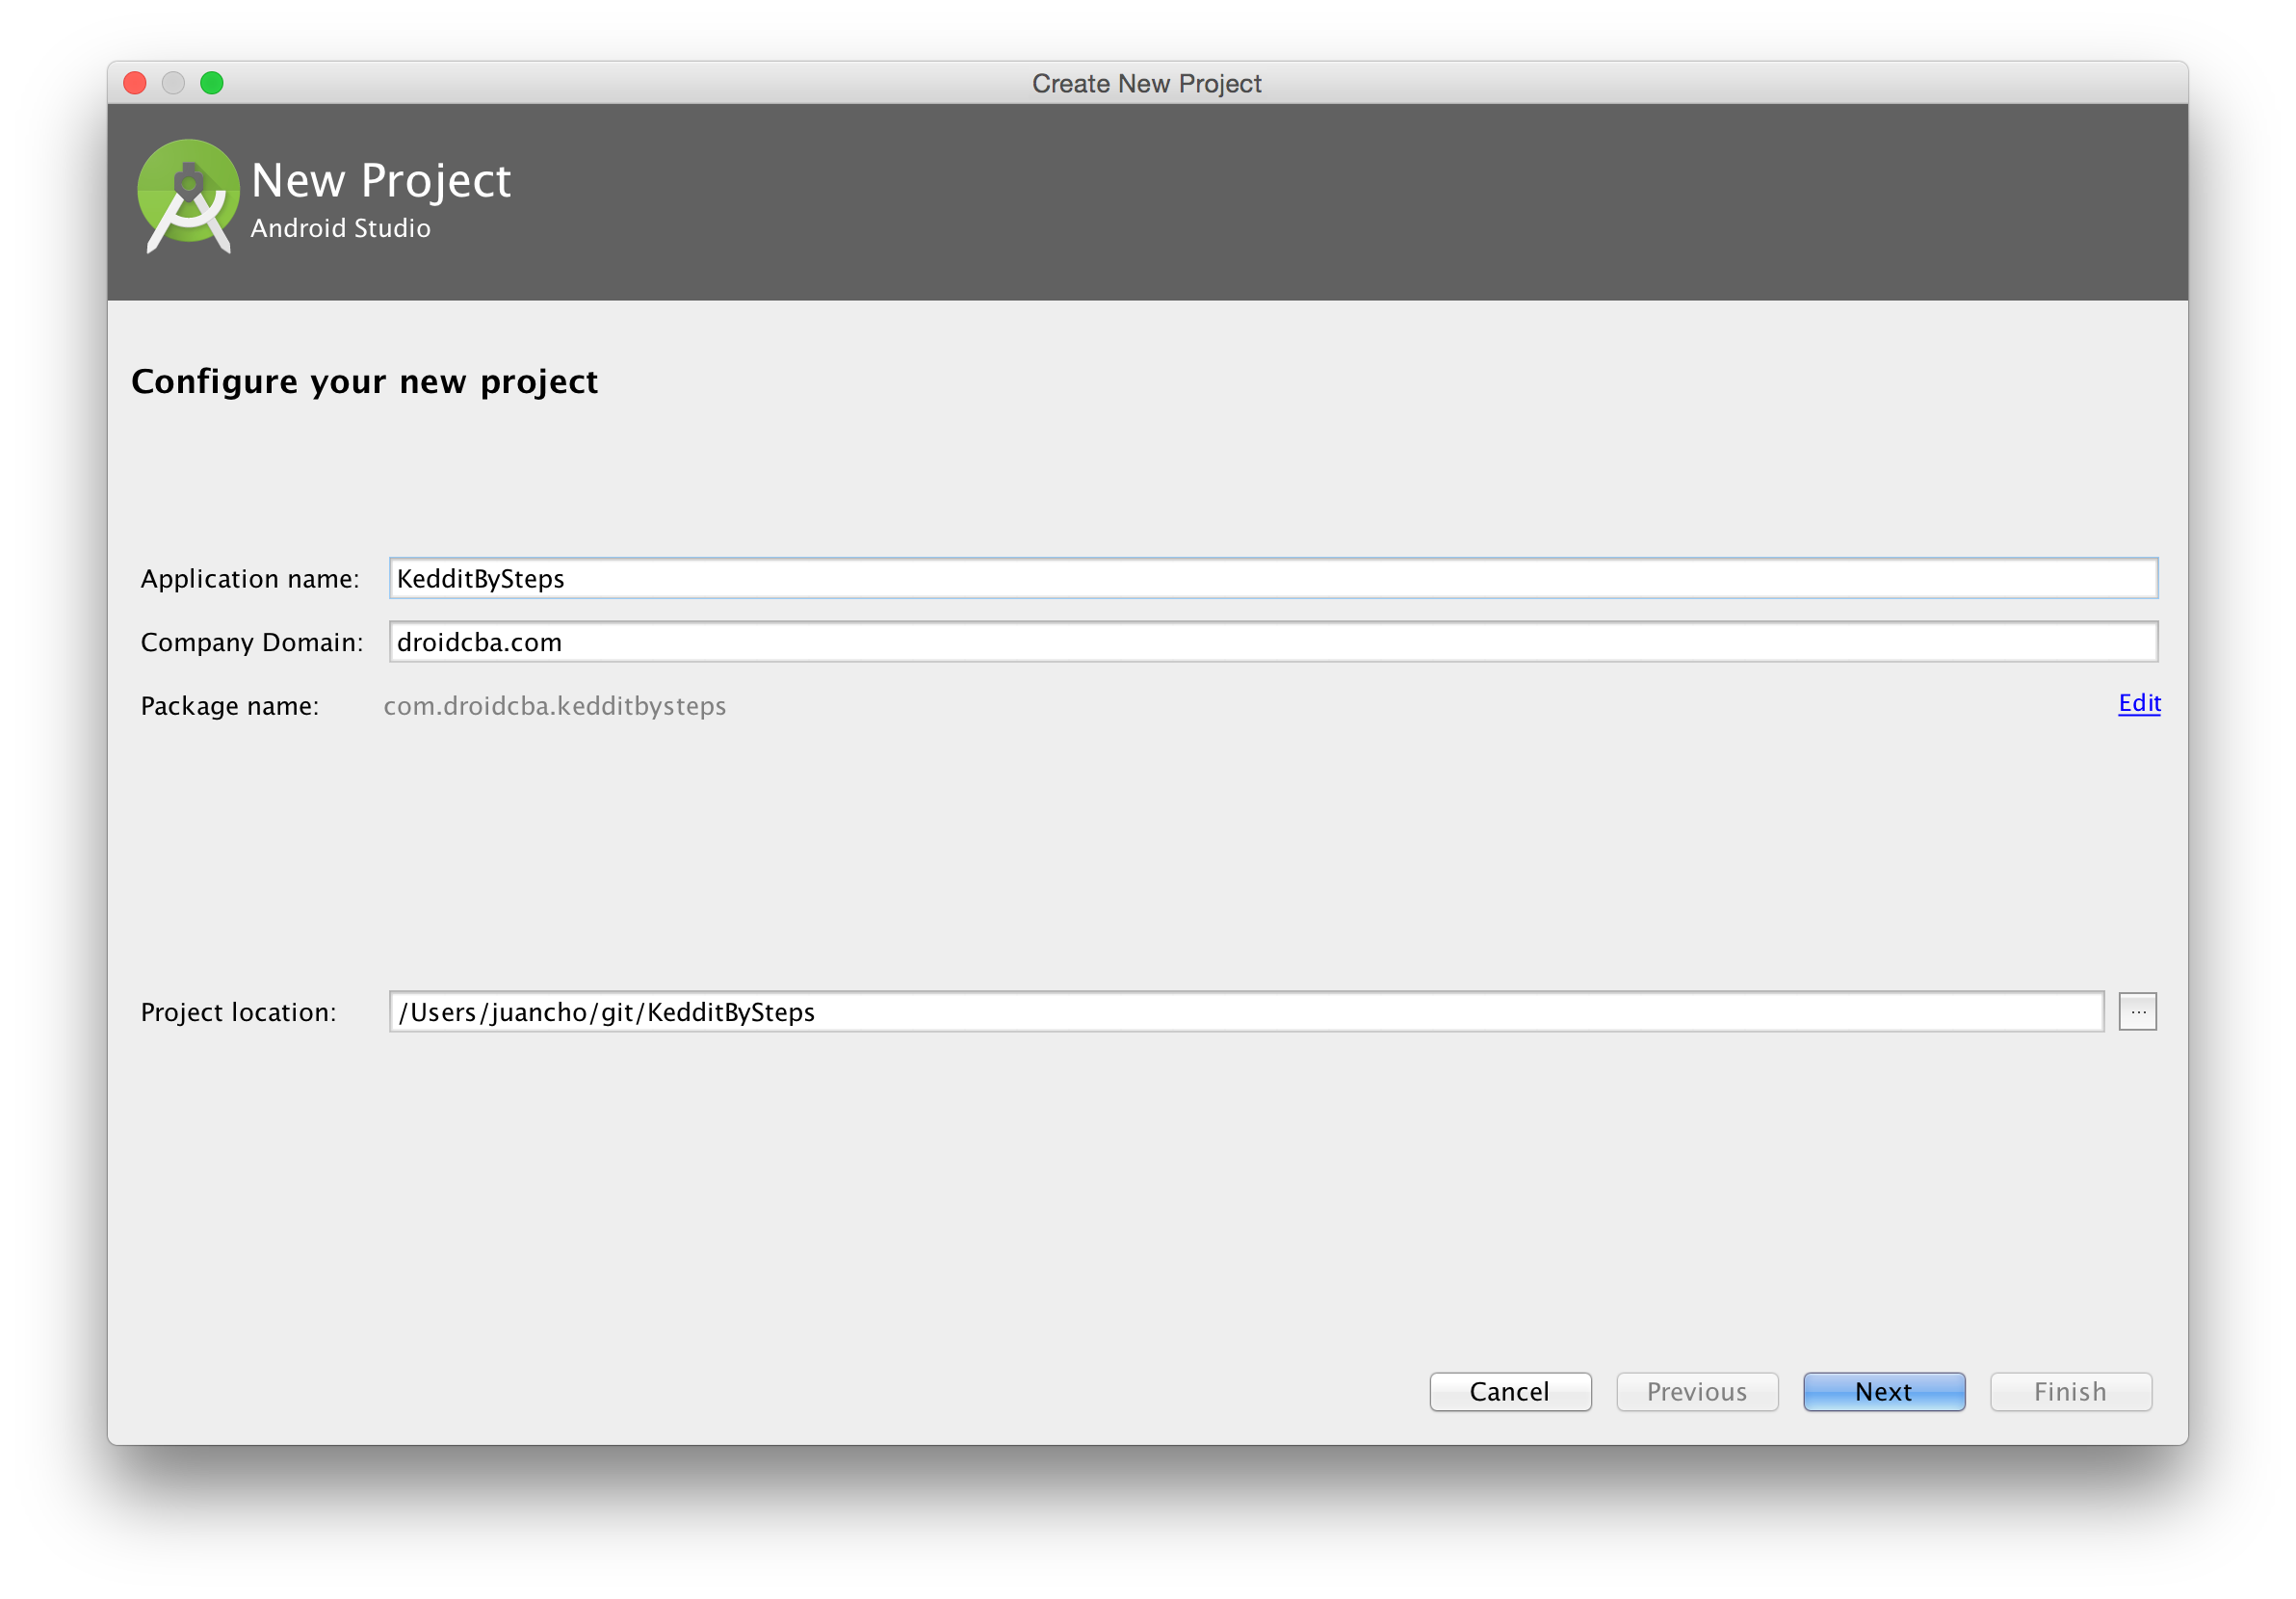
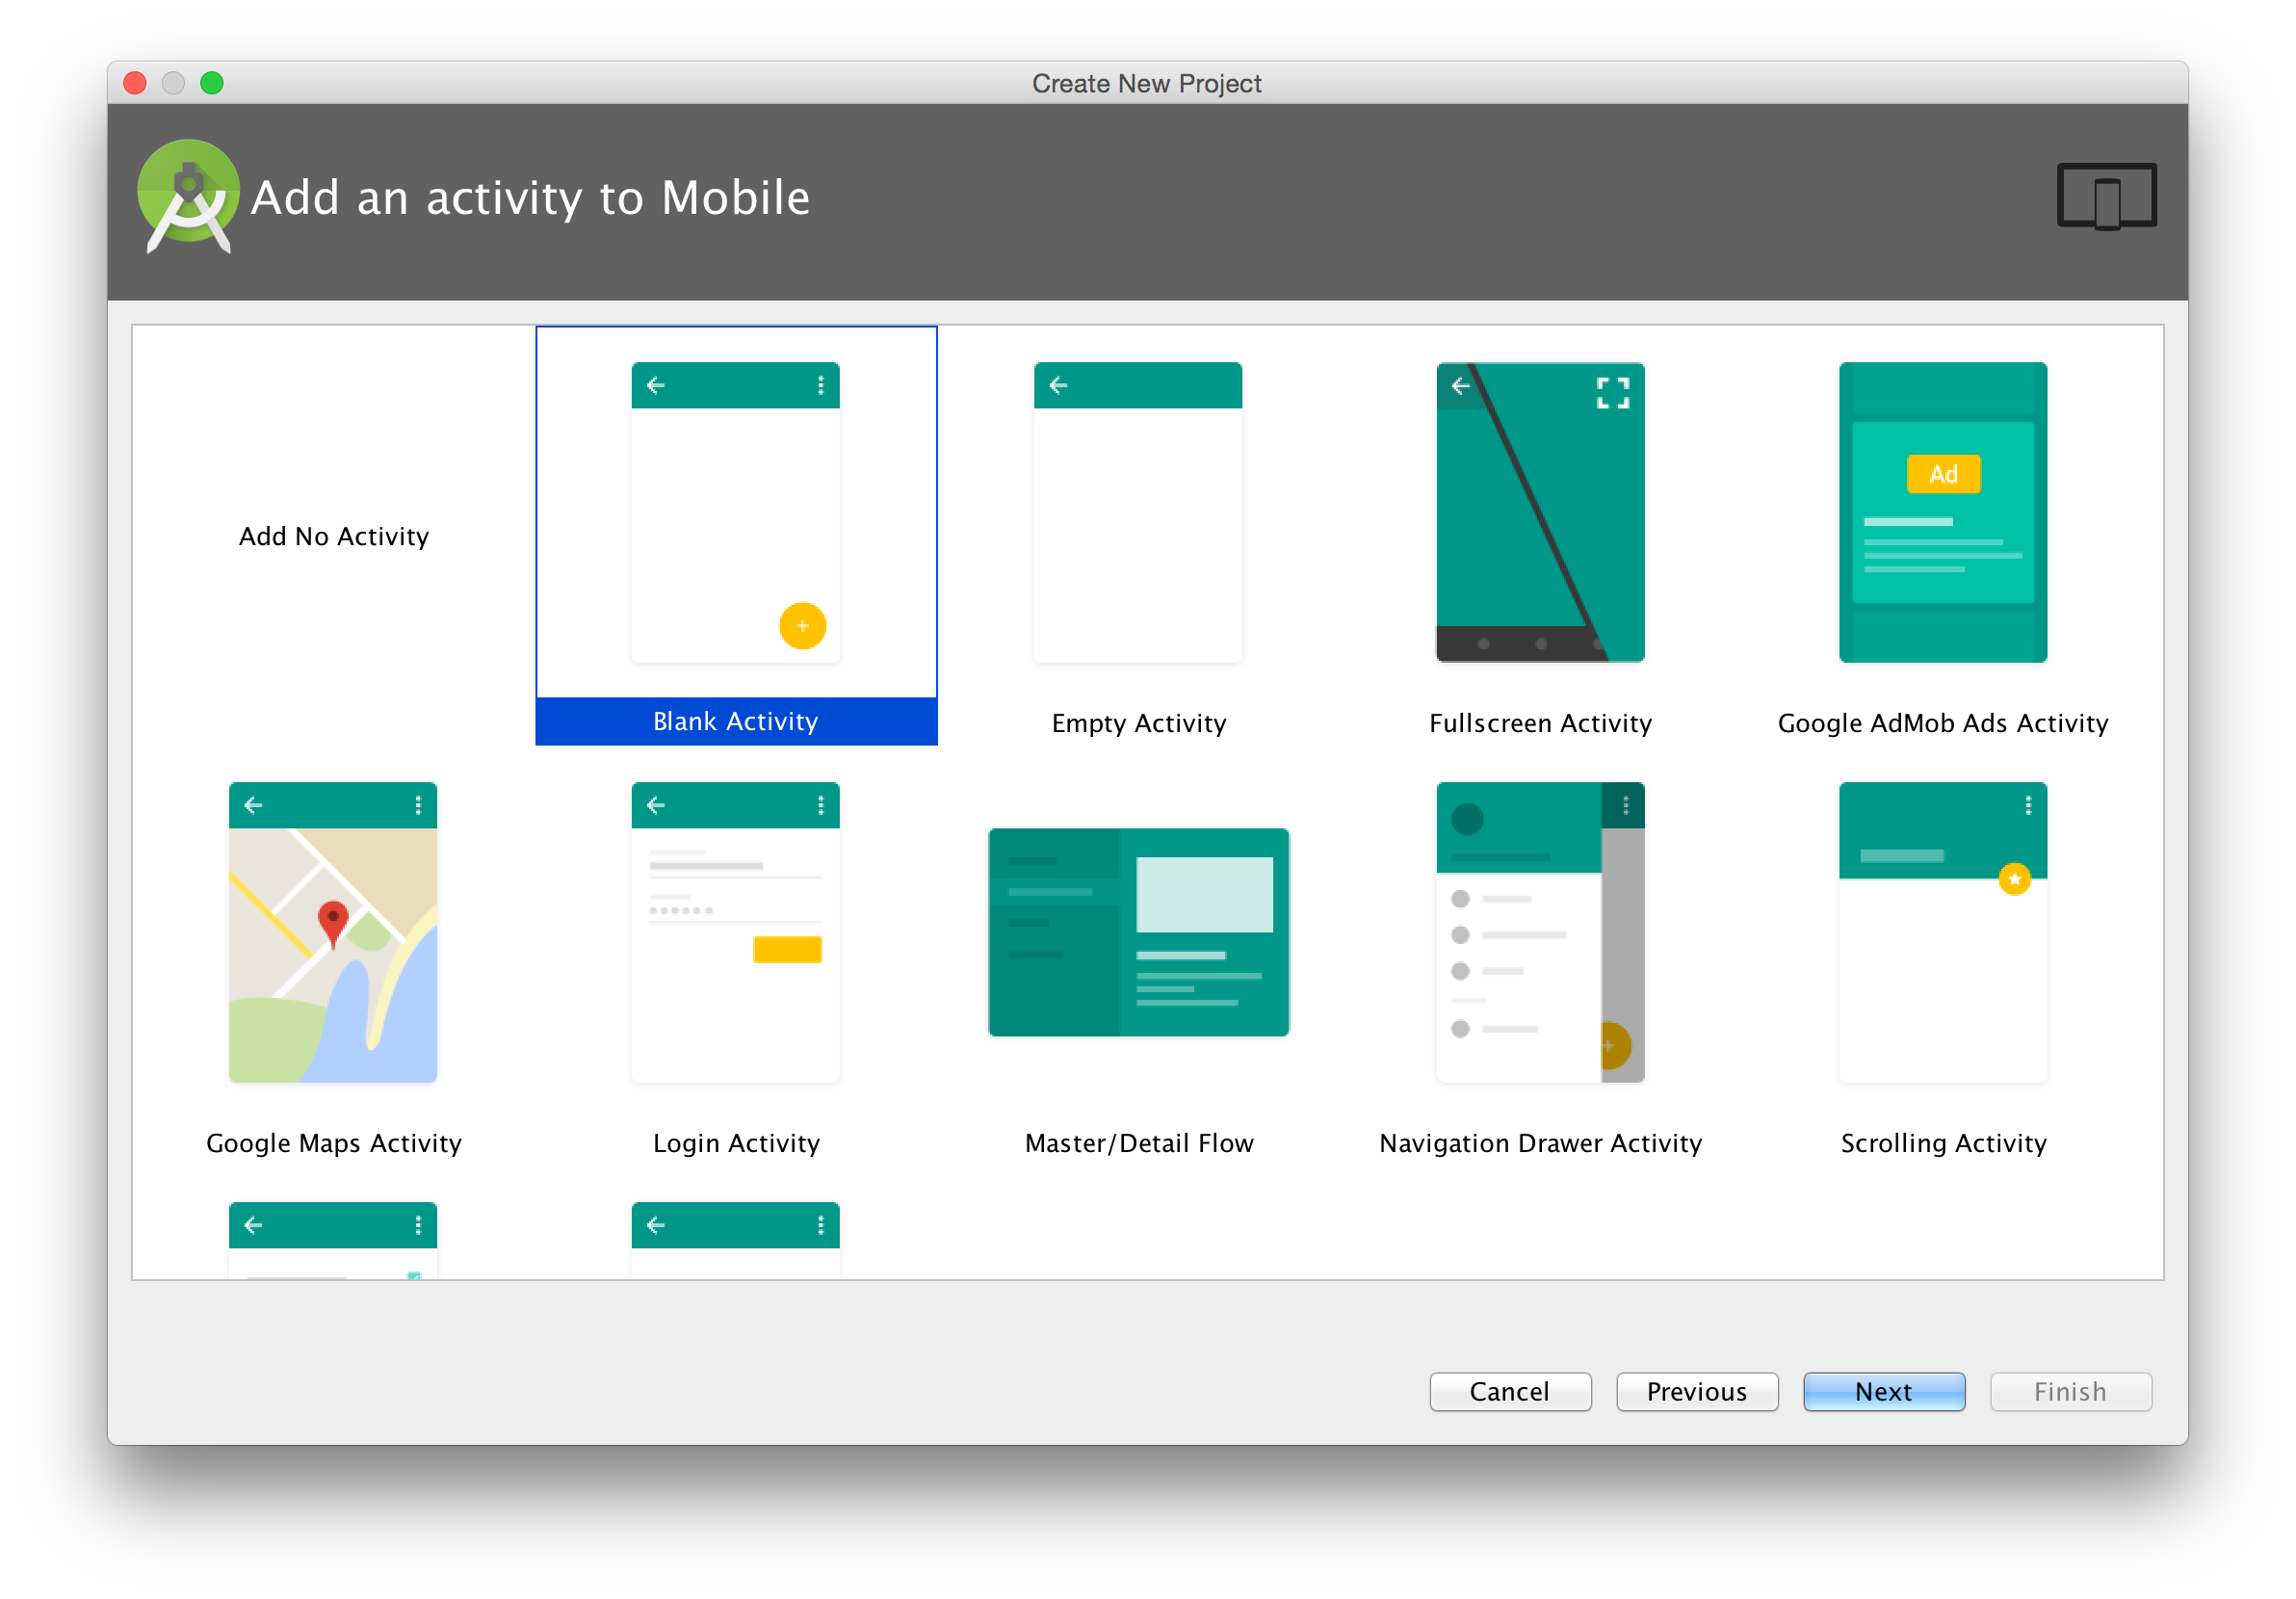
Create Project
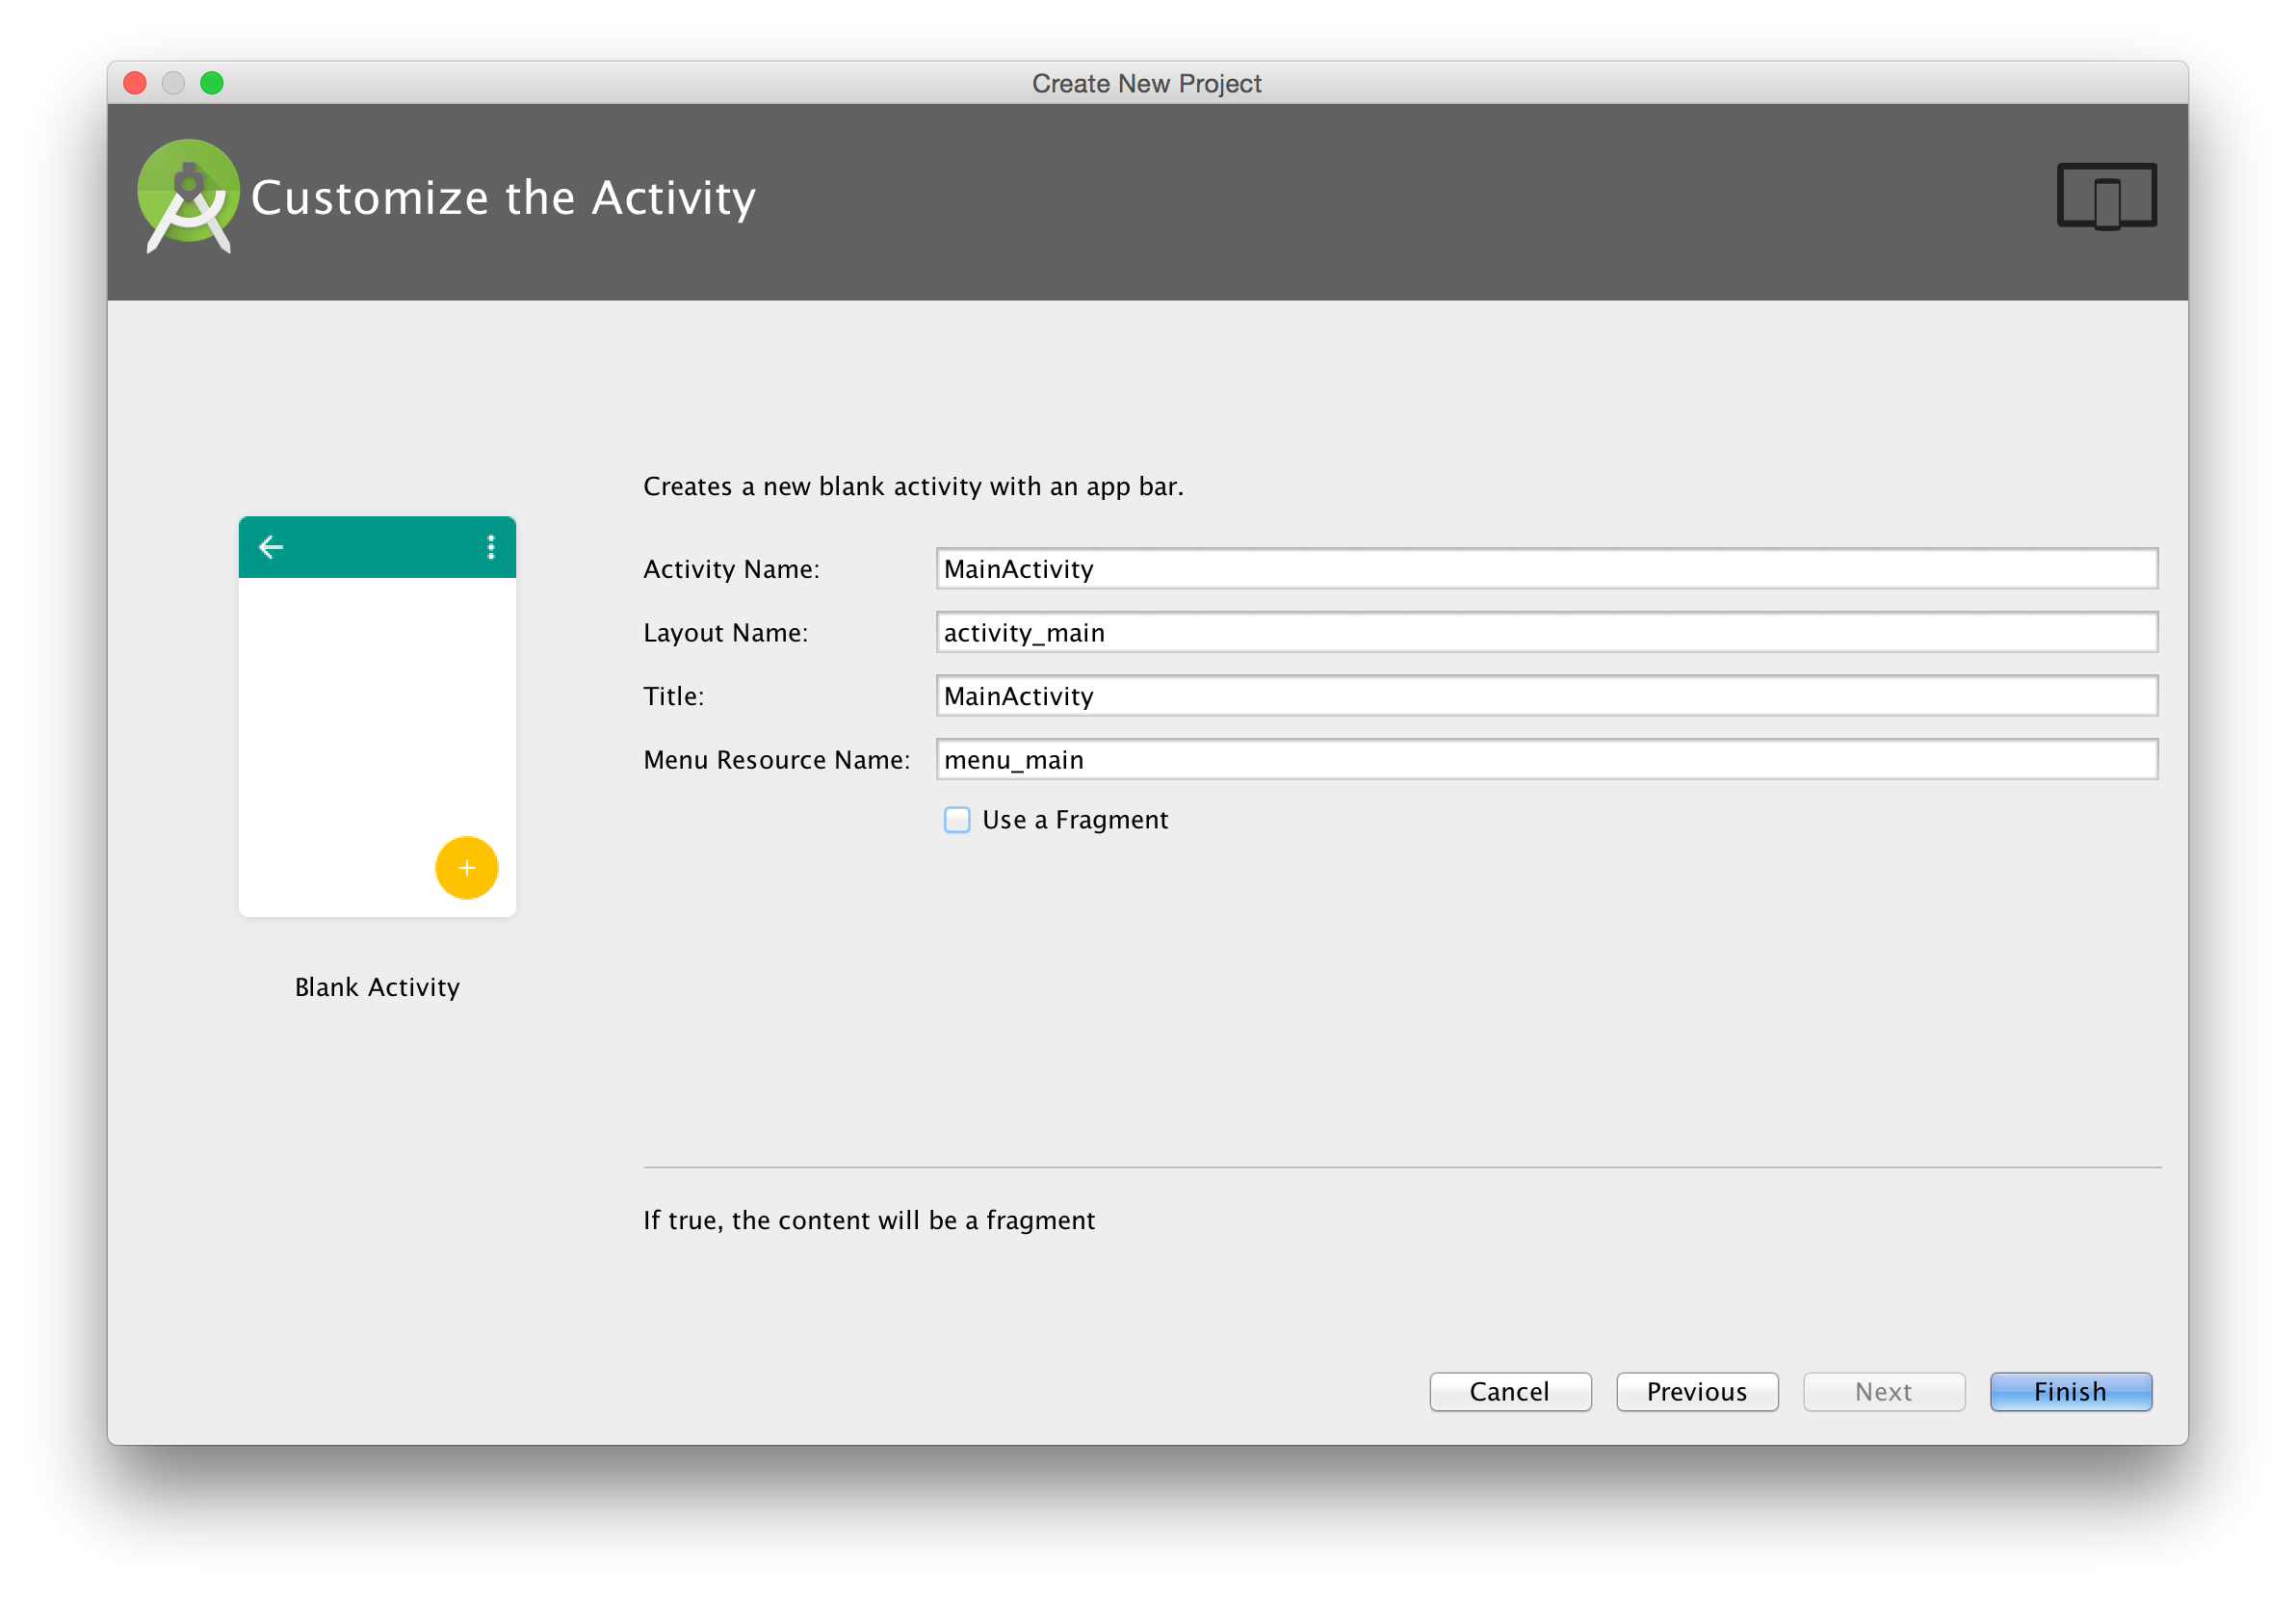
We are going to s t art from scratch, launch Android Studio and create a new Project, I’ll name it “ KedditBySteps” and select “ Blank Activity”.
Note: In AS 3.x these preview images change a little bit but still helps to understand which options we are going to use.

Android Studio 3.x
In Android Studio 3.0 the plugin is already built-in there and while creating the new project you just have to make sure to check “ Include Kotlin support” and the complete project will just support Kotlin from the beginning without requiring you any extra steps:

If you are using AS 3.x then you just can skip the following configuration and just jump to “ Repository” section.
Android Studio 2.x
Kotlin Plugin
Ok we have a new Project, let’s install the required Plugin for Kotlin. Go to:
Android Studio Pref > Plugins > Browse Repositories > search for “Kotlin”
Install only the Plugin called “Kotlin” and restart Android Studio.

There are other Kotlin plugins but we only need this one as the Kotlin Extensions Plugin was already integrated in the first plugin so we are OK with this one.
N̶o̶t̶e̶:̶ ̶I̶f̶ ̶y̶o̶u̶ ̶a̶r̶e̶ ̶u̶s̶i̶n̶g̶ ̶A̶n̶d̶r̶o̶i̶d̶ ̶S̶t̶u̶d̶i̶o̶ ̶2̶.̶0̶ ̶P̶r̶e̶v̶i̶e̶w̶,̶ ̶e̶x̶p̶e̶c̶t̶ ̶s̶o̶m̶e̶ ̶w̶e̶i̶r̶ ̶b̶e̶h̶a̶v̶i̶o̶u̶r̶s̶ ̶i̶n̶ ̶t̶h̶e̶ ̶P̶l̶u̶g̶i̶n̶,̶ ̶a̶l̶s̶o̶ ̶i̶n̶ ̶s̶o̶m̶e̶ ̶s̶i̶t̶u̶a̶t̶i̶o̶n̶s̶ ̶i̶t̶ ̶s̶t̶o̶p̶ ̶w̶o̶r̶k̶i̶n̶g̶,̶ ̶s̶o̶ ̶f̶o̶r̶ ̶n̶o̶w̶ ̶I̶ ̶s̶u̶g̶g̶e̶s̶t̶ ̶y̶o̶u̶ ̶t̶o̶ ̶u̶s̶e̶ ̶1̶.̶5̶ ̶v̶e̶r̶s̶i̶o̶n̶ ̶a̶s̶ ̶i̶t̶’̶s̶ ̶w̶o̶r̶k̶i̶n̶g̶ ̶a̶s̶ ̶e̶x̶p̶e̶c̶t̶e̶d̶.̶
Note Updated: Now you can use Android Studio 2.0 that was released with the Kotlin Plugin.
Configure Project with Kotlin — “first attempt”
If you already read something on how to configure Kotlin, maybe you feel tempted to execute the plugin action to “ Configure Kotlin in Project” which is accessible from Tools > Kotlin or by Android Studio Find Actions (pressing Shift button twice) and searching for “Configure Kotlin…” like in this image:
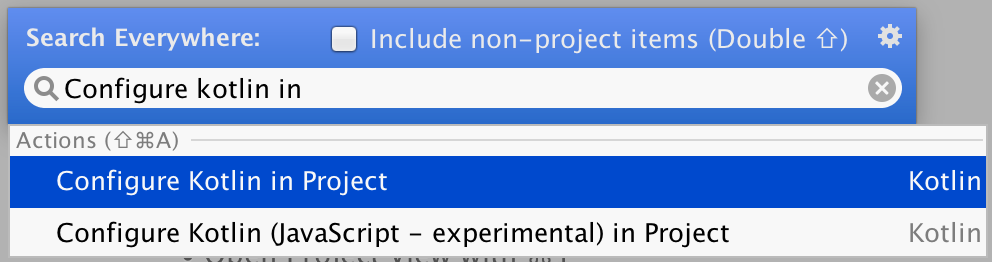
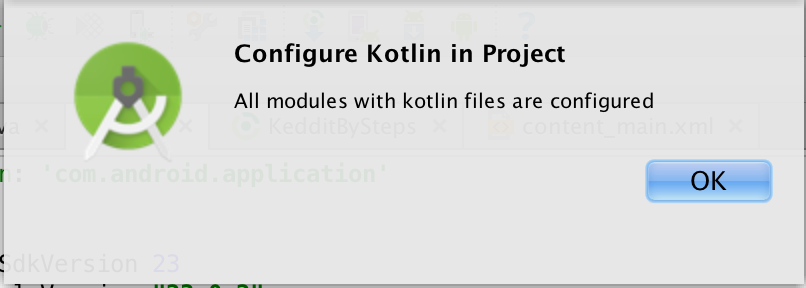
If you do this, you will notice that nothing happens. The only thing that you will see is a message that all modules with Kotlin files were configured.
And that’s why nothing happens because we don’t have any Kotlin file in our project so the Plugin didn’t configure our project. So let’s create a Kotlin file and configure this project again.
From Java to Kotlin file
In order to have a Kotlin file we are going to convert our already created MainActivity.java file into a Kotlin file. In order to do that just open the MainActivity.java file and open Find Action and start searching “Convert Java to…”

A message will warn us that maybe the conversion is not accurate and required some manual modifications but we are fine for now with this.
You will see something like this:

Right now we are not going to review this file (this will be in the next Post) so we can continue configuring this. Also for sure you notice the extension name of our new Kotlin file which is “.kt”.
Configure Project with Kotlin — “Last one :)”
Now we are ready to configure it. Let’s run again the “ Configure Project with Kotlin” action:

A new message will appear allowing us to select which modules we would like to convert and also the Kotlin plugin version that we want to use (just pick the latest one in this case).
You will notice that the build.gradle file from your module was updated. It will have new configurations like this:
At the beginning you had to do this manually but now with the Plugin this is really easy.
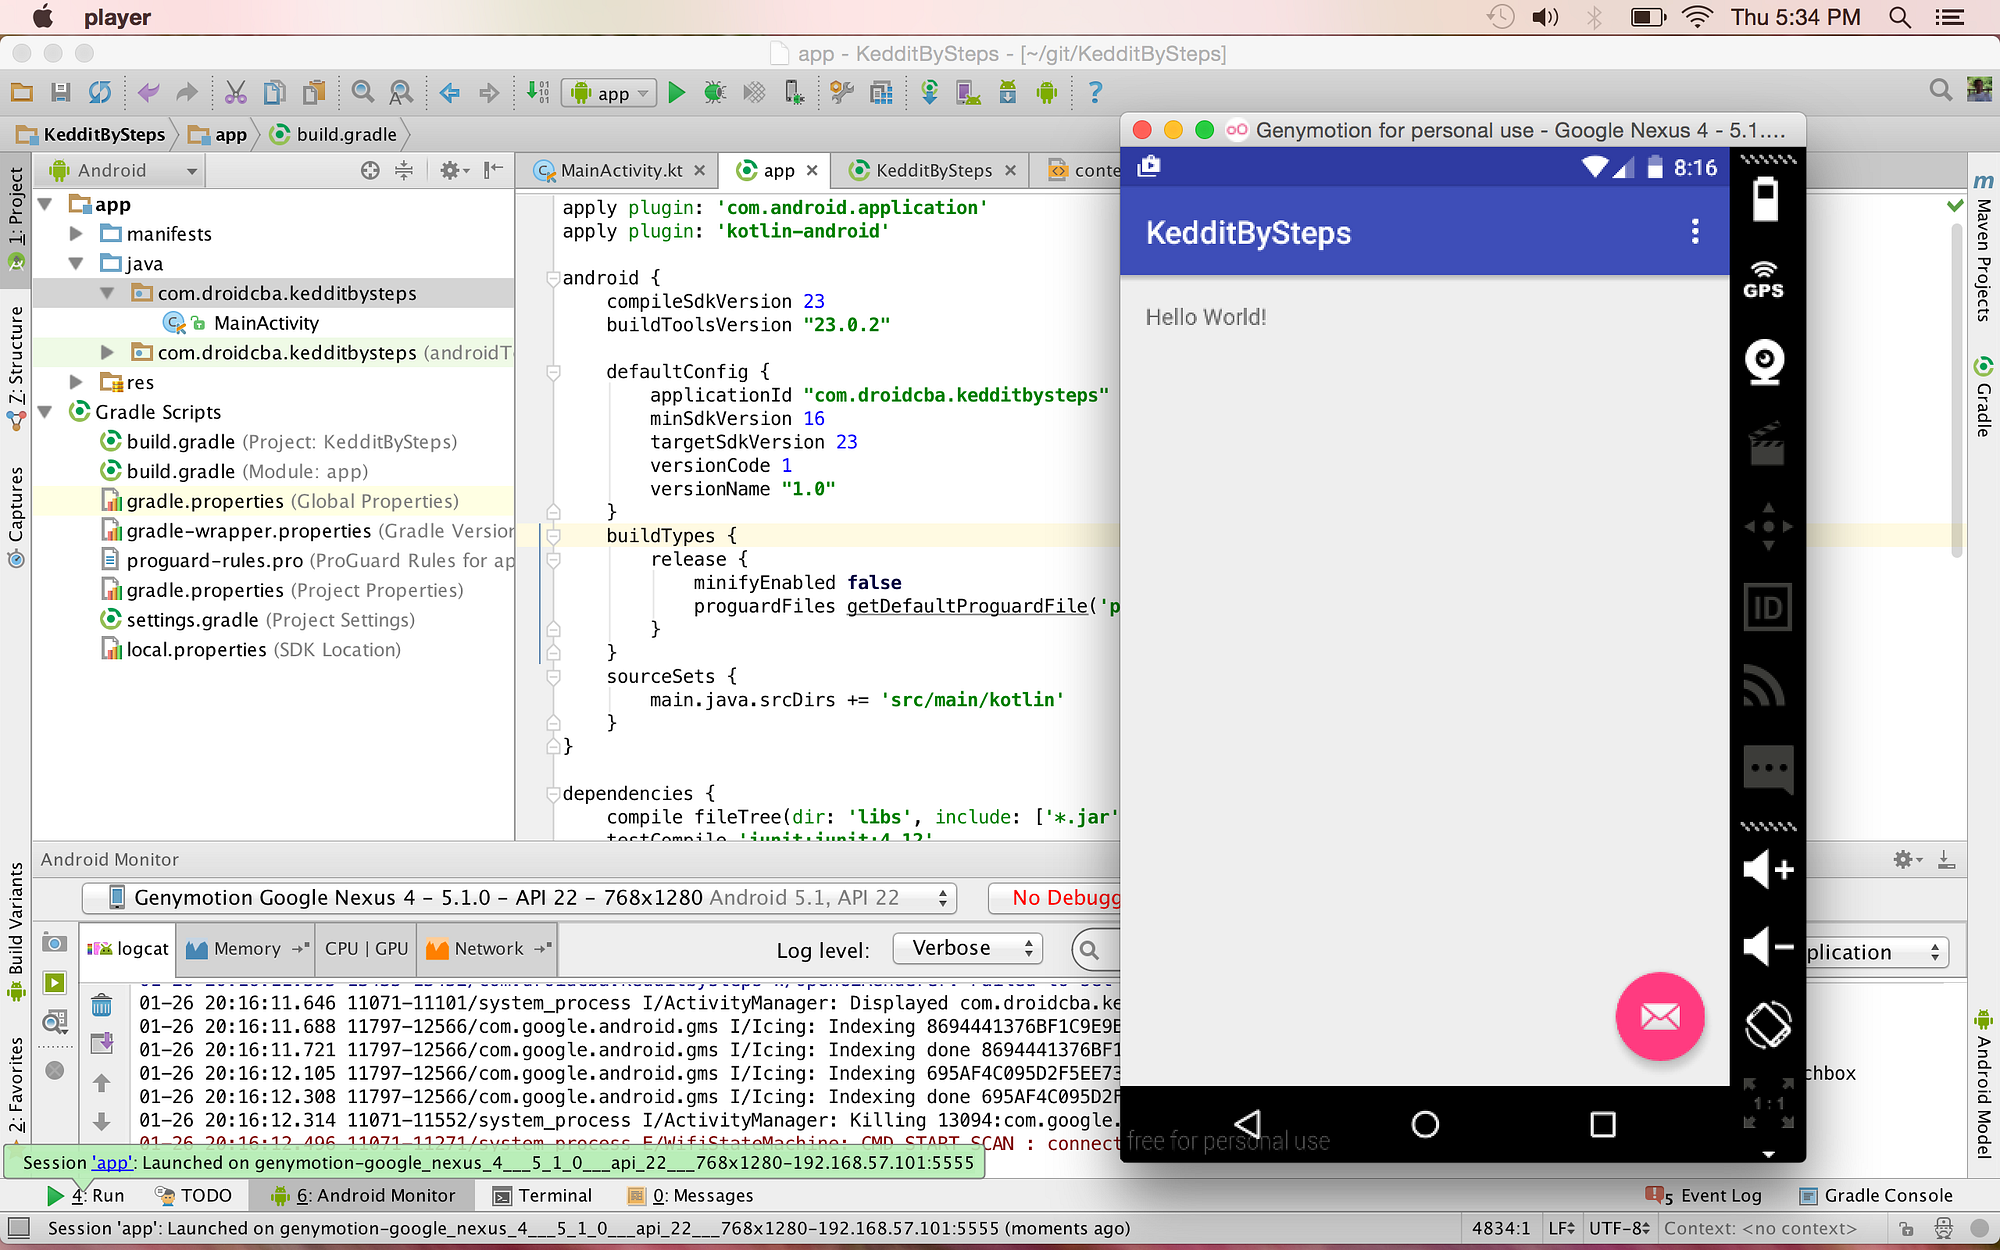
Run, run, run!
Everything is ready to run this App and using our new MainActivity.kt Kotlin file 🙂
Repository
Here you have the code that we developed in this Part, also it was tagged with the tag name “v0.1” which identify the Part1 of this tutorial.
Conclusion
As you can see, it’s really easy to configure an Android Studio project with Kotlin, we only need a Kotlin file in the module in order to configure it with the Plugin.
With this new project we are ready to start developing the Keddit App but most important to start learning some Kotlin concepts.
Please, if you find something to improve or any suggestion, don’t hesitate to contact me, I’ll try to do my best to answer any question or improve this tutorial.
Источник
Working with Kotlin in Android Studio

With the release of M6, we announced support for Android Studio. Let’s take a deeper look at how to get up and running with Android Studio and Kotlin.
Installing the Kotlin Plugin
Much like with IntelliJ IDEA, to install the Kotlin plugin you need to click on Preferences (Settings) and select the Plugins entry. Easiest way is to just start typing plugin as soon as the dialog pops up.
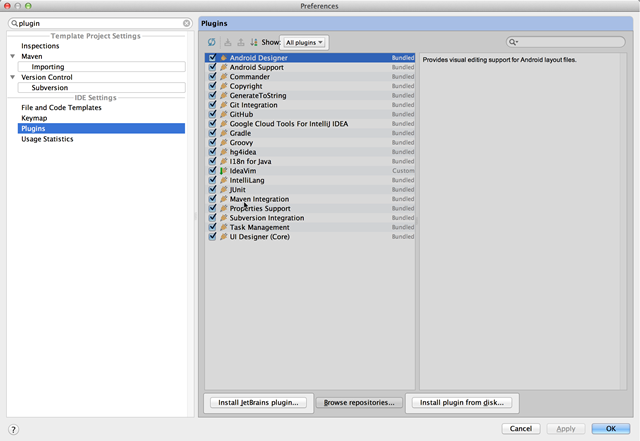
Although we can download the plugin and install from disk, the easiest way is to click on the Install JetBrains plugin… and select Kotlin from the list. Right-click and choose Download and Install
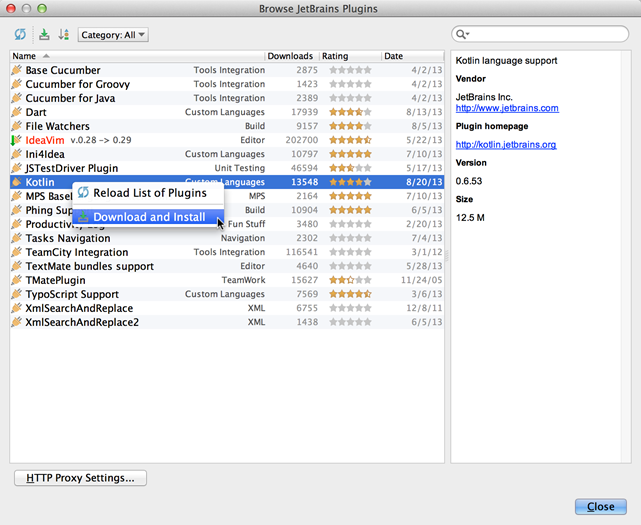
Follow the instructions to restart the IDE.
Setting up the Project
Android Studio uses Gradle as its build system and part of the effort involved in supporting this environment was adding Gradle support for Kotlin.
Adding Source folder for Kotlin
A typical Android Project has the following layout
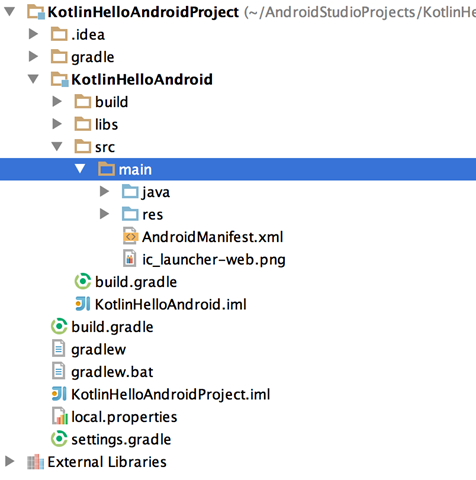
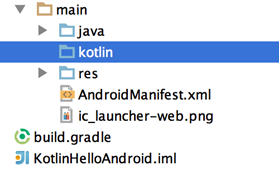
where the source code for the project is located under the folder main/java. Since we want to use Kotlin (we can mix and match both Java and Kotlin the same project), we need to create a new folder under main, named kotlin. In the Gradle script we’ll later define this folder as a source root.
Configuring Gradle
We need to set up some dependencies and source folders in the Gradle configuration. Open the build.gradle file and copy the following
Update: Replace “0.6.+” with the version of Kotlin plugin you have installed.
The parts relative to Kotlin are highlighted in bold:
- Select the Kotlin plugin for Gradle and the version we’re using. The M6 release corresponds to 0.6.69.
- Apply the kotlin-android plugin
- Import the Kotlin’s standard library
- Specifiy where the source code files are located
Specifying the sourceSet will automatically mark the folder we created previously (main/kotlin) as a Source Root in Android Studio.
Once we have the Gradle file updated, we should be able to successfully build Android project written in Kotlin.
Hello World with Kotlin
The easiest way to try out Kotlin with Android is to create a default Android project and convert the code to Kotlin, which the IDE can do for us.
- Create a new Android Project (we’ll omit the steps for creating new Android projects).
Add the kotlin folder and update the Gradle file as indicated above.
Select the MainActivity file and from the Code menu select Convert Java File to Kotlin File. We can omit creating a backup.
As soon as we do this, Android Studio automatically detects that this is a Kotlin file and asks us if we want to move it to the kotlin folder. We do so.
Once the project is built we should now be able to run it.
Most likely going to be asked questions
Can I combine Java and Kotlin in the same Android Project?
Absolutely. In fact, check out our GitHub repository for some samples.
Can I use nightly builds of Kotlin?
Yes you can. Just update the Gradle project to point to the snapshots and add the corresponding repository.
Are there any more goodies you forgot to mention?
Now that you ask, we also have some External Annotations for the Android JDK. Android Studio will automatically prompt you to add these to the project.
Although we’ve been using Android Studio in this post, please note that doing Android development with Kotlin is also possible with IntelliJ IDEA and has been available for quite some time. As always, we appreciate any and all feedback.
19 Responses to Working with Kotlin in Android Studio
Martin Krischik says:
What is the overhead? Compile Time, APK size, with or without proguard.
Note that with Scala the cumbersome part is not the language itself but scala-library.jar. Which is why I ask for proguard.
Hadi Hariri says:
We’ve not run specific tests yet for Android, but, unlike Scala, our runtime is small and the code performs as fast as Java on most benchmarks.
fanchao says:
I had an investigation on the potential performance impacts on Android today. What I did is decompiling the .class file generated by Kotlin and some interesting facts I concerned most compared to other framework/language:
Inline functions (lambda expressions) are inlining wherever possible.
For example, no penalty for using forEach expression, it’s just like hand writing a Java loop, no extra inner classes, no extra object allocated. But what I know for Java 8 or similar things that support streaming API will create an anonymous inner class instance and invoke the method each time for a value, which seems to be a unnecessary performance hole on Android.
Of course, if you assign a lambda as Java interface, a new inner class will be generated, it’s not winning over Java but at least it’s not losing (Java will generate one, too).
Auto boxing/unboxing taken care of.
Primitive types will be used wherever possible. Arrays and it’s family seem to be generic (which produces boxing/unboxing) but you always have the choice to use IntArray or sort of things, where it will try to use primitive arrays and values directly.
Optional getter/setters.
Unlike some other JVM languages that generate getter/setter for property, Kotlin can make use of field access if a backing field is declared by ‘private’, no getter/setters will be generated. Android performance guide outlines getter/setters issues, basically the idea is redundant methods or calls should be avoided.
Code generation for extension is clean and direct
For extensions, just an extra static method that takes the injected class’ instance as the first argument will be generated for you, it’s like just writing a Utility method.
As a neat freak of generated codes, anything that is more than plain Java looks scare to me. A good compiler should not compromise performance and expressiveness . I think from what I observed, one can expect a same performance level with Java, even you use the Kotlin specified idioms (lambda, , not a Kotlin version of Java code.
evilbloodydemon says:
Why app and kotlin library sources is placed to resulting .apk?
Stuart Rackham says:
I also had to set the kotlin folder as belonging to project sources otherwise you’ll get a “default activity not found” error message (I’m using Studio 0.2.8 with Kotlin plugin 0.6.350 on Linux), the plugin did not do this automatically as the article suggests. Right-click on the kotlin directory (in the Project Tool window) and select the ‘Mark Directory As->Sources Root’ menu command (you can also manage this from the ‘Project Structure’ dialog.
Stuart Rackham says:
Mark the kotlin folder as a source root at step 2 (in ‘Hello World with Kotlin’ above) to ensure you get automatically prompted to move the converted Kotlin file to the kotlin folder.
Marcin Koziński says:
Wouldn’t it be possible for kotlin-android plugin to add src/main/kotlin to sourceSets?
I was thinking of writing a gradle code snippet to add kotlin source set for each java source set. It seems to be possible. And the best place for such code would inside the first party plugin 🙂
Natalia Ukhorskaya says:
kotlin-android plugin already add src/main/kotlin to sourceSets. The only reason why you need to do this is to make IDE know that src/main/kotlin is a source directory. And we are going to fix it.
Lemuel Adane says:
I just update my Android Studio, and for the first time install the latest Kotlin plugin, and followed what the article said on my Mac. After several wasted hours of figuring out, I still had 3 errors, Its saying that ‘it was compiled with incompatible version of Koltlin.’ and ABI was this version but expected was this version. Wow! I don’t even have an older version of Kotlin. And what’s ABI? Are they talking to themselves? Im sorry but I got disapointed.
Andrey Breslav says:
I am sorry you got disappointed. What class was the error reported on?
Igor says:
I’v hat this error when syncing hradle project:
What it is and what I need to do?
Natalia Ukhorskaya says:
You are using SNAPSHOT version of kotlin. Have you added http://oss.sonatype.org/content/repositories/snapshots url to your repositories list? If yes, could you report us an issue with your build.gradle file attached? Thanks!
Igor says:
Thank you so much, It works but I’v take new error:
Natalia Ukhorskaya says:
Could you provide you build.gradle file please?
Igor says:
buildscript <
ext.kotlin_version = ‘0.11.91’
repositories <
mavenCentral()
maven <
url ‘http://oss.sonatype.org/content/repositories/snapshots’
>
>
dependencies <
classpath ‘org.jetbrains.kotlin:kotlin-gradle-plugin:0.6.+’
classpath ‘com.android.tools.build:gradle:1.0.+’
classpath “org.jetbrains.kotlin:kotlin-gradle-plugin:$kotlin_version”
>
>
apply plugin: ‘kotlin-android’
dependencies <
compile ‘org.jetbrains.kotlin:kotlin-stdlib:0.6.+’
compile “org.jetbrains.kotlin:kotlin-stdlib:$kotlin_version”
>
android <
compileSdkVersion 17
buildToolsVersion “17.0.0”
Igor says:
Thank you, It worked but now I’v take new error:
Natalia Ukhorskaya says:
Looks like you forgot to apply android plugin.
apply plugin: ‘com.android.application’
Andrew says:
Well, it took me for good 1 hours to fix this error, i thought it was some bug. I really hope you guys can create forum for this. Thanks
Andrey Breslav says:
Discover more
Gradle Kotlin DSL 1.0
This is a guest blog post from Paul Merlin software engineer for Gradle The recently released Gradle 5.0 includes the Gradle Kotlin DSL v1.0 which is now ready for widespread use. We want you to enjoy a build authoring experience with the benefits provided by Kotlin’s static type system in Intellij IDEA and Android Studio: auto-completion, smart content assist, quick access to documentation,
Kotlin 1.3 Released with Coroutines, Kotlin/Native Beta, and more
You can read this blog post in other languages: Today we are releasing Kotlin 1.3 together with a set of accompanying libraries, build tools, and learning materials! We develop Kotlin to be a good tool for all application developers, at all scales and on all platforms. In Kotlin 1.3 coroutines graduated to stable, making non-blocking code easy to read and write. Scalability ha
KotlinConf 2018 Announcements
In today’s keynote at KotlinConf 2018 we made a series of announcements around releases, resources, and other things we’ve made available. For your convenience below is a brief summary of the announcements with the corresponding links for more information. Kotlin 1.3 hits RC Version 1.3 hits RC and brings a ton of new features and functionality. Coroutines Kotlin Coroutines are no longer ex
Kotlin/Native 0.8.2 Released
We are happy to announce the 0.8.2 release of Kotlin/Native. In addition to the bug fixes and improvements, we have introduced support for Kotlin/Native Gradle projects directly in CLion! (more…)
Источник


