- Optimizing the Performance of Vector Drawables
- Understanding The Internals Of VectorDrawables
- Multiple Sizes, Multiple Renderings
- Maximum VectorDrawable Size Recommended
- Do You Really Need a VectorDrawable?
- How We Tested
- 1. Using System.nanoTime()
- 2. Using TraceView
- Conclusion
- “Very Long Vector Path” issues… and where to find them.
- The first approach, Vector Drawable optimiser.
- The second approach, SVG Optimiser
- The third approach, What about precision?
- The forth approach, Understand how far do I need to go optimising it? And why is that long?
- Conclusion
Optimizing the Performance of Vector Drawables
While some mobile platforms have been supporting vector graphics for a while, Android only began doing this natively starting with API Level 21 and with the help of the Support Library 23.2.0 for pre-Lollipop devices. By replacing you PNG image resources with VectorDrawables, your APK size decreases considerably and most of all, your images look good, independent of the used device resolution.
The system will try to redraw your Activity every 16ms so it can reach the 60fps target. So this means that the duration of every onDraw method is extremely important.
When used incorrectly, VectorDrawables can affect the performance of your app, because the drawing can take a long time. Here is how VectorDrawables work to ensure that you are really improving the performance of your app, with the help of VectorDrawables.
Understanding The Internals Of VectorDrawables
Vector graphics use geometrical shapes to describe graphical elements. The vector graphics are rendered at runtime. The automatic rendering at pixel density gives smoothness to the graphics, regardless of the device capabilities. So your images won’t be downscaled or upscaled, looking stretched or pixelated but they will be always perfectly drawn for your screen size.
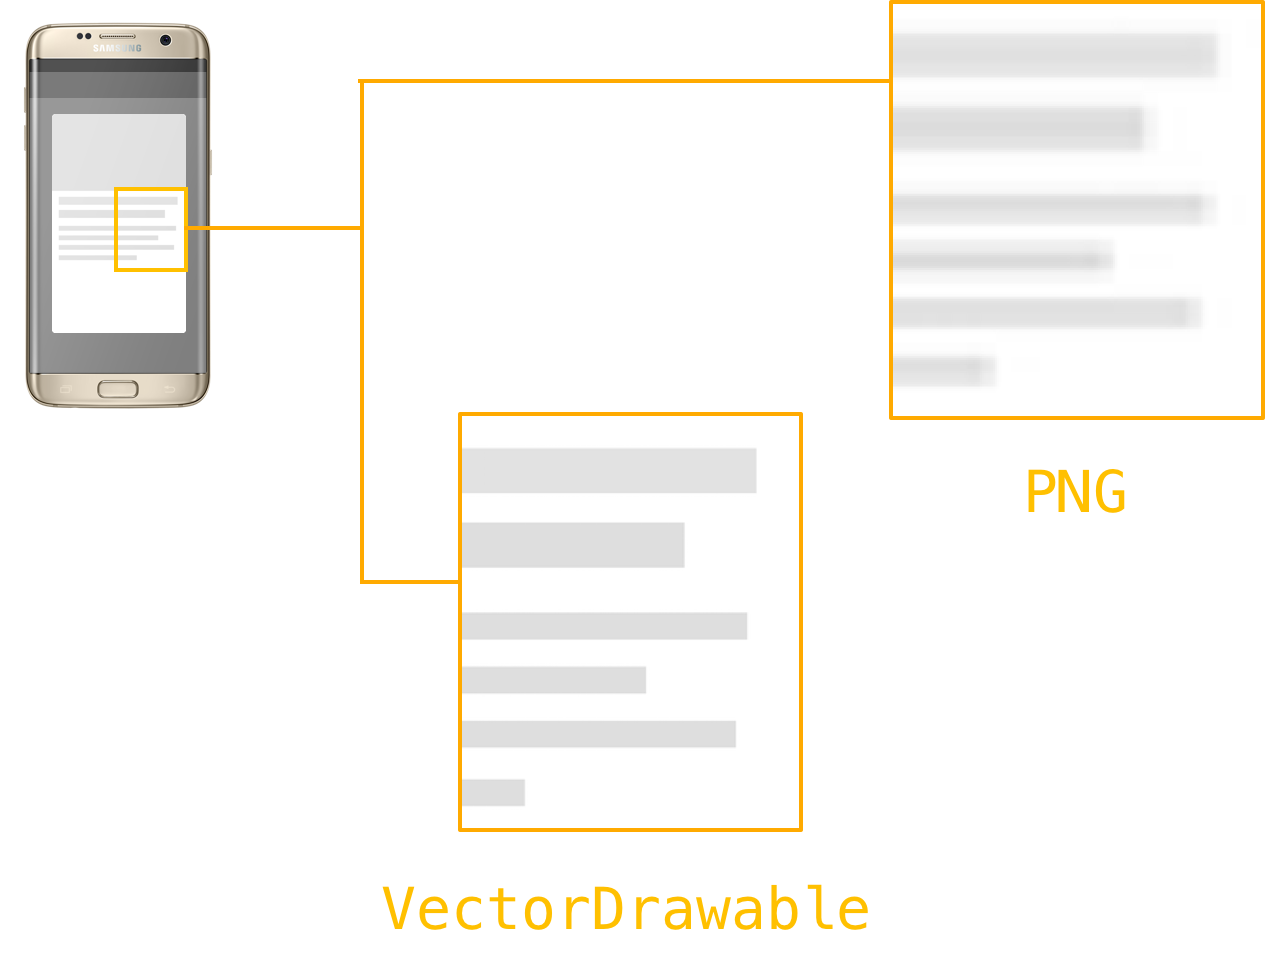 Using a VectorDrawable vs using a small PNG image
Vector drawables allow the representation of images (e.g. icons, UI elements) based on XML vector graphics. Using vector data instead of raster image data, the number and the size of resources added to the project decreases, since now only one resource per resolution is needed, and therefore also the APK size.
Although the XML file containing the vector drawable is usually smaller than the PNG version, the vector drawables come with a computational overhead at runtime, which may be an issue for more complex graphical elements. When vector drawables are drawn for the first time, a cached bitmap is created in order to optimize the re-drawing performance. This cache is re-used as long as the width and the height of the image that needs to be drawn is the same. If a VectorDrawable is used for multiple sizes, a new Bitmap will be created every time.
Compared to raster images, drawing VectorDrawables will take more time for the first rendering. But then, as long as the size of the image doesn’t change, the next drawings of VectorDrawables will take a similar amount of time to drawing raster images.
Multiple Sizes, Multiple Renderings
Let’s say that you need to display an image that needs to fill the height of the screen but keep the aspect ratio when rotating the device from portrait to landscape. So the size of the image is different from portrait to landscape.

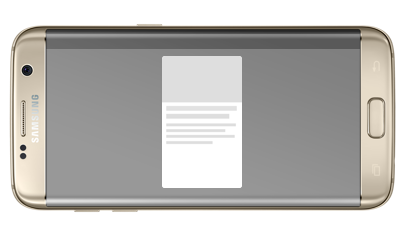 Changing the size of the image on orientation
VectorDrawables use a Bitmap cache that gets recreated when the size changes, so in our case, when you rotate your device from portrait to landscape. After the first rendering, the cached bitmap will be used. This means that you end up spending a lot of time on the first rendering of the VectorDrawable, at every rotation of the screen. But, if the image that you are drawing is the same size, both in portrait and in landscape, then the bitmap cache will not be invalidated and it will be reused.
Let’s test this!
Test 1: The size of the view changes when changing the orientation from 1440x2240px in portrait to 2560x1152px in landscape. When rotating the device, drawing the vector drawable takes, in average, 15.50ms in portrait and 7.80ms in landscape, where the view is smaller.
Test 2: The image size doesn’t change with rotation, it’s always 800x800px. We can see that drawing the vector drawable takes 7.50ms the first time — afterwards, drawing time is reduced to 0.15ms.
Test 3: Using two different resources for portrait and for landscape, even if they are the same size. The images will take longer to render every time you rotate the device.
Maximum VectorDrawable Size Recommended
Since the vector graphics are rendered at runtime, on the CPU, the initial loading and drawing of a VectorDrawable will be slower. This is why Google recommends using them for images of maximum 200 x 200 dp.
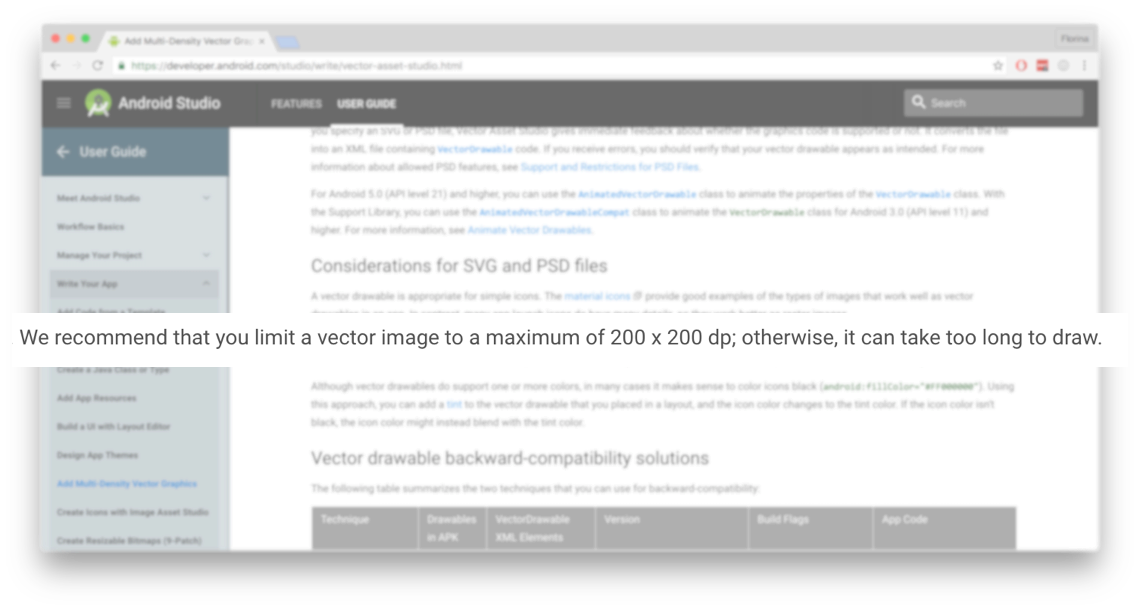 Android documentation says max 200 x 200 dp
Test 1: We set the image to match the size of the screen: 1440x1960px. The vector drawable took, in average, 16.60ms to draw, the PNG 0.180ms.
Test 2: We set the image to the maximum recommended: 200x200dp so, 800x800px. The vector drawable took 3.40ms to draw, the PNG 0.060ms.
The difference in rendering time is considerable.
Do You Really Need a VectorDrawable?
The VectorDrawable rendering duration is influenced by the size of the image, and by its complexity. If the drawable contains complicated paths then it will take longer to draw. So, before you import a new SVG in Android Studio keep in mind the following things:
- Can you replace the vector graphic with a shape? Shapes are rendered much faster than VectorDrawables and raster images.
- Can you simplify the image? Does that image that you’re about to import contains a path just for the background, for example? Then maybe you can just set a background color to the ImageView that will contain the VectorDrawable. Can you split the image into smaller parts and maybe replace some of those parts with shapes?
- Is your VectorDrawable really complex, big, and with complicated paths? Then it’s just better to use a raster image. The size of the APK will grow, but the performance of your app won’t be decreased by the VectorDrawable render time. Instead of using PNG files, start using WebP images. The quality is similar to the PNGs but the size of the image is reduced.
How We Tested
To measure the rendering performance, we created a MeasurableImageView class that extends ImageView . We’ve overrode the onDraw() method to compute how long the super.onDraw() takes. We used a Samsung Galaxy S7 as a test device. We ran the app several times, computing an average of the values for different scenarios.
1. Using System.nanoTime()
Before and after the ImageView.onDraw method call, we got the system time. Then, we just deducted the start time from the end time, to get the duration.
2. Using TraceView
Hoping to get clearer results, we decided to use TraceView. We called Debug.startMethodTracing before the super.onDraw and stopped the tracing with Debug.stopMethodTracing immediately after.
Then we analyzed the generated traces, looking at the execution time of VectorDrawable.draw and BitmapDrawable.draw methods.

 Screenshot from TraceView results when using a PNG image and a VectorDrawable
Note: keep in mind that you won’t get exactly the same values, every time when your image is rendered. You should use these numbers just as general reference points. If you’re close to 16ms, then it’s really necessary to optimize the performance! The rendering duration depends also on the power of your CPU, so make sure you check the mostly used devices by your users.
Conclusion
Check out the project used for testing VectorDrawables in this GitHub repo.
If you want to learn more about VectorDrawables, here are some interesting resources:

Written by Florina Muntenescu
Florina passionately works at upday as a Senior Android Developer.
Источник
“Very Long Vector Path” issues… and where to find them.

Claudia Luque Fernández
Dec 15, 2020 · 5 min read
A few weeks ago I was working on the Android app we have at M-KOPA Solar and I experienced this frustrating situation where easy things suddenly get complicated >_
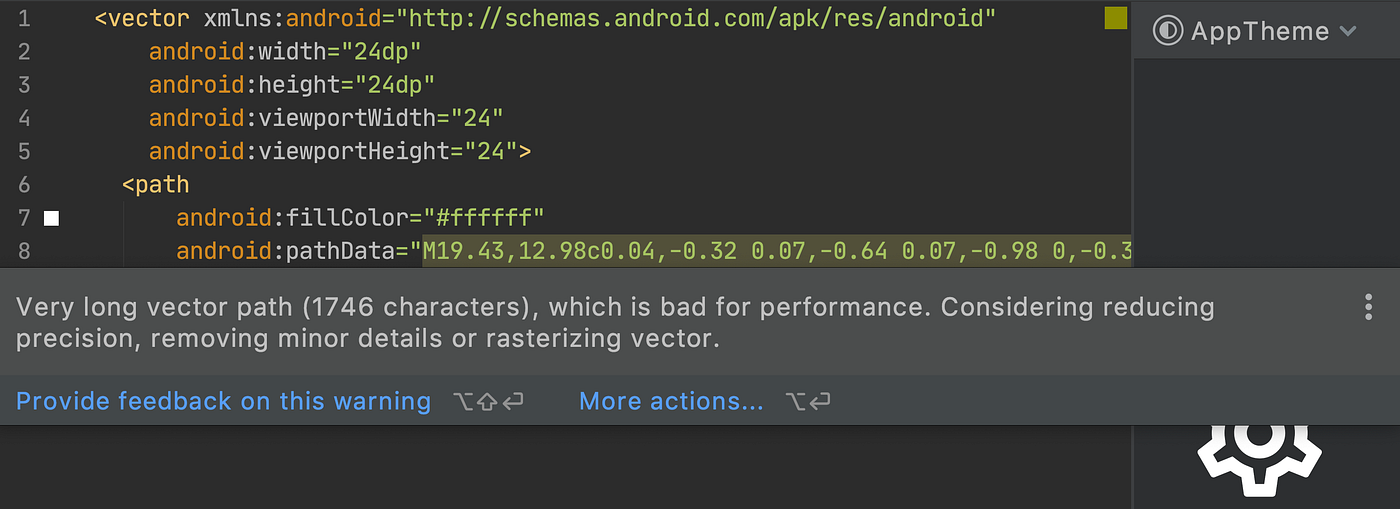
Well, that was not it. By the time I opened my Pull Request and our automated Static Analysis task finished running one of our tools, Sonar, left a comment on one of the vector Drawables lines… Android Lint was saying the path of the icon was too long 🙁
At that point, my first thought was: ”That’s unfortunate, I just downloaded the icon from the official website, I thought they are optimised already :(”.
My second thought was: “I will check with my team, probably it is not the first time this happens”.
The first approach, Vector Drawable optimiser.
After checking and running a few searches on StackOverflow I found a Vector Drawable optimiser called Avocado which was used quite heavily for optimising the Vector Drawable so I decided to go for it.
$ avocado ic_settings.xml -o ic_settings.xml
Great! It did optimise it, How long is it now?

We went down from 1746 chars to 1589… that’s a good improvement, but it seems it is not enough.
The second approach, SVG Optimiser
My assumption that the SVG was optimised already had to be wrong. So I decided to try another option a team member shared, SVGO the SVG optimiser.
$ svgo settings-24px.svg -o settings-24px.svg
settings-24px.svg:
Done in 16 ms!
1.409 KiB — 5.4% = 1.333 KiB
Run avocado again:
$ avocado ic_settings.xml -o ic_settings.xml
ic_settings.xml:
Done in 16 ms!
1.881 Kb — 8.9% = 1.714 Kb
Import it to Android Studio:
The size of the Vector Drawable went down a bit… is that enough? F**** I’m getting a bit hopeless here and I start to blame the Material icon I downloaded again… why couldn’t it be optimised already? U_U

The third approach, What about precision?
Again during our endless chat about this in the team, the point about “tweaking precision” on the SVG optimiser comes up. Hum… that’s interesting. Let me try and see what’s the result.
I use this time and online SVG Optimiser using svgo underneath and the result looks quite promising. If I tweak the precision to 1, the file size reduction is 61%, down it to 886 bytes.

And If I optimise it with Avocado (will skip showing the output this time) and import it to Android Studio…

Damn it! Still not enough… why?
The forth approach, Understand how far do I need to go optimising it? And why is that long?
I like to believe it is never too late to do something… but this probably should have been the first approach of all… however I didn’t think of it cause I was too optimistic thinking the tools would solve the problem quickly for me 😀
One of my teammates (thanks Paul Blundell) mentioned that it would be nice to understand what’s the max length that LINT allows (Why didn’t I think of that myself? :/)… that and also suggested inspecting visually the vector points, to identify any redundant bits we can reduce using a Vector Path editor.
First question, how long is an acceptable vector path for LINT?
This one was easy to answer. According to the VectorPathDetector declared inside Lint (thanks Xavi Rigau for giving us a talk about custom Lint rules a few days before this), the max length should be 800 chars. Great, last optimisation showed a length of 926…
Second question, can I reduce the Vector path points to achieve 800 chars?
I copy-pasted the vector path from Android Studio to the Vector Path Editor I started to look at it in detail…

As you can see there are some weird points not aligned properly, and I also noticed some corners with redundant points placed together. Those seemed not necessary so I decided to remove those. Good.
I realised that the inner line of the dents, had super subtle curved lines with 4 points each and I changed it by straight lines instead. Great.
I spent like 1h to apply manual tweaks while I was squeezing my eyes super hard to avoid messing up with the icon appearance or miss a potential improvement.

And after removing points placed together, removing middle points in “almost” straight lines and … I ended up having a quite optimised icon path and I decided to stop there.
When I pasted the Vector path to the Vector Drawable xml on Android Studio, I ran avocado and wait for LINT to complain again…

Wait… what? No complaints? Yay! I checked the path length and it was 786 chars, just below the 800 chars threshold. So happy 😀
Conclusion
In the end, the icon was optimised and it didn’t compromise the appearance… but it took more than I ever expected it would.
So… lesson learnt, my takeaways from that day (which I hope to remember more often from now on with the help of this article) are:
- This worked this time because of the nature and size of the icon and the screen where it is displayed. The icon and the screen is small enough to not compromise the appearance, however, this might be quite difficult to achieve with a more detailed icon or a bigger icon.
- If you are breaking a rule (In this case Lint rule), understand why first, check the source code.
- Don’t rely on your assumptions straight away, at least double-check what you are looking it and make sure what you think is right.
- You can double-check your assumptions, using data and visual aids which are always helpful to look under the hood of things. Just use them… I never heard any saying “I regret understanding what this method does”, or “I regret using the Layout Inspector” :P.
Источник


