- AndroidCompile
- Contents
- Android Studio, SDK and NDK installation
- Requirements
- Example on Ubuntu
- SDK & Android Studio
- Android NDK
- Environment setup
- Building
- Get VLC Source
- Setup Gradle build system
- Devices
- Compile
- Build LibVLC
- Gradle tweaks
- Troubleshooting
- Compilation error on Dependencies
- Debugging
- Native debugging
- Troubleshooting
- Outdated Awk
- Can’t find Ant
- Outdated autotools-dev
- autoreconf: automake failed with exit status: 1
- autoreconf: automake failed with exit status: 1
- Can’t run aapt or adb on Linux 64-bit
- Android studio vlc example
- Android Player Intents
- Contents
- Open a media with VLC Player
- action
- Package name
- Extras (optional)
- Sample code
- Get result code from VLC
- Стрим видео с Android устройства по UDP в JAVA приложение
- Инсталляция пакета VLCJ
- Надо разобраться
- Казалось бы победа?
AndroidCompile
This page is an introduction to the compilation of VLC for Android on Linux.
Contents
Android Studio, SDK and NDK installation
Requirements
- You MUST build on Linux (or OSX if you know what you are doing).
- The following packages MUST must be installed:
- the GNU autotools: autoconf, libtool, automake and make (a.k.a. gmake)
- . and their dependencies: m4 and gawk, mawk or nawk,
- the GNU C and C++ compilers a.k.a. gcc and g++,
- some GNU build utilities: pkg-config and patch,
- the following other build utilities: Apache Ant (or Ant), cmake, protobuf, ragel,
- the Subversion and Git version control systems
- unzip and either curl or wget for retreiving sources.
- Very recent versions of some of those tools may be required. At the time of writing, notably gettext 0.19.3 or later is required.
- If any of the above is missing, expect the build to fail at some point.
- If targeting an Android-x86 device, yasm must be installed too.
Precise lists of tools dependencies is listed here.
64-bit users : You must install these 32-bit libs as specified here: #Can.27t_run_aapt_or_adb_on_Linux_64-bit
Example on Ubuntu
Install the packages as follow:
SDK & Android Studio
- Go to Android SDK/IDE page.
- Android Studio is recommended, but not mandatory!
Android NDK
- Check that the SDK installation is correct.
- Go to the Android NDK page and download the NDK r21 for Linux.
- Decompress it to install
Environment setup
Set $ANDROID_SDK to point to your Android SDK directory
Set $ANDROID_NDK to point to your Android NDK directory
Add some useful binaries to your $PATH
Building
Get VLC Source
Clone the source from the VLC git!
In your android source folder, run:
Setup Gradle build system
Before using Android studio to compile the app, you must run compile.sh once to set up gradle build system.
It should automatically populate mandatory local.properties and gradle.properties files with:
This sets up gradle to build with correct SDK/NDK.
Once this first compilation has succeeded, you can build from Android Studio with the Run command.
Devices
Find the ABI for the target device.
- For a normal (2012-2015 consumer phone or tablet) device (e.g. Cortex-A8 or Cortex-A9)
- For a Tegra2 device (no NEON)
- For an ARMv6 device
- For an ARMv6 device that does not support FPU
- For an ARMv5 device or the Android Emulator
- For a x86 device (e.g. Android-x86, Google TV, Logitech TV, Android x86 smartphones, etc)
- For a MIPS device (i.e. Ainol Novo tablets):
This value must be passed to the compile.sh script
Compile
Read compile.sh first, as it contains some very useful and important information. Then run it:
Note: At this point, you will get an auto-generated debug APK in the vlc-android/build/outputs/apk folder, signed with a debug key.
In order to build a non-debug (release, and unsigned) package:
Note: At this point, you will get an release APK in the same folder.
Build LibVLC
To build LibVLC, simply pass the -l option:
.aar archive will be located in libvlc/build/outputs/aar/
Gradle tweaks
To improve gradle execution time, try these options by writing this in gradle.properties in vlc android project. Or directly in your
Run it and enjoy!
Troubleshooting
Compilation error on Dependencies
Sometimes, especially when gradle dependencies have been upgraded, the compile.sh will fail to refetch dependencies. Just close Android Studio and re-run the script to fix this issue.
Debugging
Here are some helpful links if you wish to debug VLC on Android:
Native debugging
If you run VLC Android and you get a crash that looks something like this:
You have a native crash. To debug it, you need to have compiled VLC as above and installed it on your device. Once your compiled VLC build is on your device, you can find the backtrace as follows:
- Make sure you are in the directory that you checked out VLC-Android in.
- Migrate the libvlc folders. (Do this every time the code is recompiled)
- cp -r libvlc/jni vlc-android
- cp -r libvlc/libs vlc-android
- cp -r libvlc/obj vlc-android
- (This is because the libvlc and VLC for Android folders were split yet the debugger needs the object files from both.)
- cd vlc-android
- $ANDROID_NDK/ndk-gdb —verbose —force —start
At this point, lots of stuff will appear:
- At this point, type in «continue» and press Enter.
- Perform the actions you did to make it crash. It will spit out something like this:
- Now, just type in «bt full» (excluding the quotation marks) and press Enter. That is your backtrace that you should give to the developers when they ask for it (possibly on a pastebin, too).
Troubleshooting
Outdated Awk
If you receive the error message while building:
The prebuilt version of Awk that comes with the Android NDK is outdated. Defining HOST_AWK in your environment does nothing as the system still tries to just the one that comes with the Android NDK. To get around this issue, simply rename or delete the Awk binary that comes with the Android NDK. For example to move it:
Can’t find Ant
If you’re new to Ant, please be aware that some Linux distributions don’t install it in the usual spot as with other programs. Try checking to see if the directory /usr/share/java/apache-ant/bin exists and add it to your path.
Outdated autotools-dev
If you get the following error message you may have have an outdated version of autotools-dev:
You may first want to check if your distribution has any available updates for this package. Alternatively, you can manually update your config.guess and config.sub files from here: [1]. These files are typically located in /usr/share/misc on Debian based distributions.
autoreconf: automake failed with exit status: 1
If you are using Automake 1.13 or higher, you must remove -Werror from vlc/contrib/android/gnutls/configure.ac to continue. (First reported in [2])
autoreconf: automake failed with exit status: 1
This error may occur when compiling with an older Linux distribution, such as Ubuntu 12.04, that doesn’t meet bootstrap prerequisites. As of 2014-08-09, the master branch for vlc-ports/android.git [3] lacks patch 5199 [4]. Without the patch, compile.sh builds out dated automake and autoconf that may not access libtool despite presence of a current libtool binary amongst supporting tools and a similar or more recent binary present as part of the OS.
To work around this error, patch the master branch or update the prerequisites. For Ubuntu 12.04, upgrade autoconf, automake, and cmake as dictated by vlc/extras/tools/bootstrap.
Can’t run aapt or adb on Linux 64-bit
You must install the 32-bit libraries of the following libraries, as the precompiled Google binaries depend on them: libc6, libstdc++6, and zlib.
New versions of Debian and/or Ubuntu require you to install i386 versions of packages:
If you are under old versions of Ubuntu, install ia32-libs can help you solve this issue.
Источник
Android studio vlc example
LibVLC on Android demo
This is a sample application demonstrating the use of libVLC on Android.
This repository contains only sample code, and the libVLC on Android sdk (the LibVLC AAR) must be built and placed into the root project folder.
- An up-to-date Linux distribution.
- This is because VLC (and VLC for Android) uses autotools and make in order to be portable on so many diverse platforms.
- VirtualBox is always an option if Linux is not available natively on the computer.
- Android NDK r10e
- Android SDK
- Android Studio
- Other software listed in the compile guide.
- First build VLC for Android, by following AndroidCompile.
- Copy libvlc/build/outputs/aar/libvlc-3.0.0.aar to the same directory as this README and rename it to libvlc.aar .
- Either build in Android Studio, or from the command line with Gradle: ./gradlew assembleDebug
The APK build output can be found under build/outputs/apk/ .
See build.gradle for build-related details.
Having problems making some media play?
Use adb logcat to read the debug logs. This is analogous to Tools → Messages (verbosity 2) in desktop VLC.
In addition, try different configurations of hardware acceleration, chroma, and deblocking. Android devices vary greatly in their capabilities.
Источник
Android Player Intents
Contents
Open a media with VLC Player
To play a media with VLC player, use an intent with the following settings
action
Package name
- video/*
- audio/*
- */rmvb
- */avi
- */mkv
- application/3gpp*
- application/mp4
- application/mpeg*
- application/ogg
- application/sdp
- application/vnd.3gp*
- application/vnd.apple.mpegurl
- application/vnd.dvd*
- application/vnd.dolby*
- application/vnd.rn-realmedia*
- application/x-iso9660-image
- application/x-extension-mp4
- application/x-flac
- application/x-matroska
- application/x-mpegURL
- application/x-ogg
- application/x-quicktimeplayer
- application/x-shockwave-flash
- application/xspf+xml
- misc/ultravox
Extras (optional)
| Value | Type | Description |
|---|---|---|
| «subtitles_location» | String | Path of a subtitles file |
| «title» | String | Title you want to display |
| «from_start» | boolean | Force playback from the beginning |
| «position» | int/long | Set position to start playback, in milliseconds |
| «extra_duration» | long | Media duration |
Sample code
For a simple media playback:
If you specifically want start VideoPlayerActivity, you can set
Get result code from VLC
Since version 1.4.1, Android VLC application returns an intent when closing.
Источник
Стрим видео с Android устройства по UDP в JAVA приложение
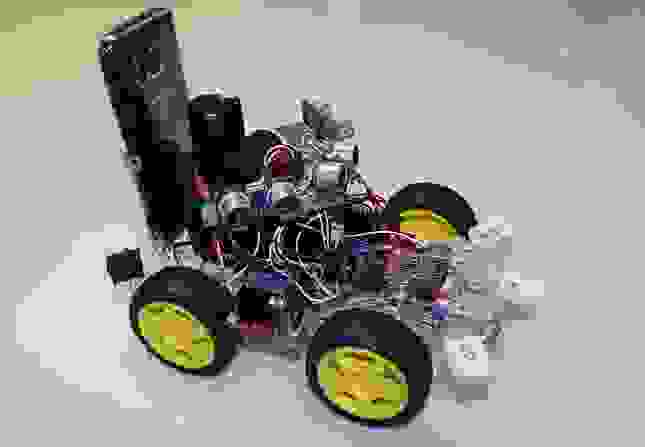
Итак, выходим на финишную прямую. Стримить видео с андроида на VLC плеер мы уже научились, теперь осталось только интегрировать окошко с видео в JAVA приложение и начать рулить роботелегой.
В этом нам очень сильно поможет проект с открытым исходным кодом VLCJ CAPRICA.
The vlcj project provides a Java framework to allow an instance of a native VLC media player to be embedded in a Java application.
Идея у ребят простая, но гениальная (реально перцовая). Вместо мучений с библиотеками FFmpeg и прочим, надо сразу вызывать специалиста ядро нормального, функционального и профессионального медиаплеера VLC. И вызвать его прямо из JAVA приложения.
Кому интересно, просим под кат.
Поскольку, в этом вояже хватает подводных камней, то начнём, как водится, с очень простого и лишь затем перейдём к тривиальному.
Инсталляция пакета VLCJ
Первым делом проверьте установленную у вас версию медиапроигрывателя VLC. Свежая версия нам не нужна, там выпилено то, что требуется для udp стрима. Об этом уже говорилось в предыдущем посту. Поэтому качаем версию 2.2.6 Umbrella и заодно тщательно проверяем свой JAVA пакет. Они должны совпадать по разрядности. Если плеер использует 64-разрядную архитектуру, то и JDK обязан быть таким же. А то не взлетит.
После этого уже можно скачать сам пакет библиотек VLCJ

Обратите внимание, что нам нужен пакет vlcj-3.12.1 distribution (zip). Именно он работает с плеерами версий VLC 2.2.x. Разархивировать его можно куда угодно, главное, что не в папку самого VLC, ибо там по именам совпадают два файла. И если вы их перезапишите, кончится всё это полным провалом.
Далее, создаем проект в IDE IntelliJ IDEA (если у вас другое IDE, то ничем помочь не могу) и прописываем необходимые зависимости для интеграции библиотек VLCJ.
Делаем именно так для файлов:
Затем создаем единственный класс и пишем в нём следующую малюсенькую программку.
Да, пока мы пытаемся проигрывать просто файл (как видно из кода). С udp лучше не начинать — не заработает. А файл проигрывается вполне, если вы, конечно, не забыли его с соответствующим именем разместить заранее там, где надо. Думаю, что даже для самого начинающего джависта не составит труда разобраться в вышеприведенном коде.
и создание самого инстанса медиаплеера
А потом мы просто его добавляем в нужную графическую панель:
И всё, файл будет проигрываться именно в этом окошке.
А теперь попробуйте заменить
как мы спокойно делали в прошлом посте для стриминга видео через udp соединение.
Здесь такой номер не пройдёт. Окошко, конечно откроется, но покажет фигу, в смысле темный экран. Хотя никаких логов с ошибкой не будет. Просто не будет ничего.
Надо разобраться
Может быть не хватает кодека H264, который мы выбрали в настройках? Стоп, а как тогда только что проигрывался файл ttt.mp4? Он же не может проигрываться при такой настройке, он же — mp4.
Немедленно приходит понимание того, что библиотека VLCJ запускает только само ядро плеера. А какие там были предварительные настройки она не знает и знать не хочет. То есть, нам надо каким-то образом при запуске JAVA приложения, как-то передать VLC плееру, что мы хотим явно использовать кодек H264 или, допустим, хотим повернуть изображение или что-то ещё.
Оказывается, сделать это можно, используя класс MediaPlayerFactory. Только мы его запускали без аргументов, а можно даже с ними. На stackoverflow.com я тут же нашел простой пример, связанный с поворачиванием изображения:
То есть, чего-то там передаем строчным массивом в медиафабрику и оно там сохраняется для используемого медиаресурса.
Я попробовал этот способ для проигрывания файла и как водится, ничего не заработало. Оказывается, забыли две черточки добавить и разнесли по всему интернету. Пришлось догадываться, используя похожий метод transform.
Короче говоря, должно быть:
Теперь наш эталонный файл перекривило как надо!
Дальше будет уже совсем просто:
Для определения кодека, согласно командной строке VLC мы добавляем в строковый массив строку:
Снова пробуем udp канал
И в этот раз всё работает, обозначая победу человеческого разума. Теперь это окошко с видео или несколько таких окошек вы сможете беспрепятственно портировать в графический интерфейс вашего JAVA приложения.
Казалось бы победа?
Не совсем. Легкое недоумение у меня вызвали временные задержки или по научному, лаги. Сначала они более менее приёмлимые, но если у вас хватит терпения просмотреть видео до конца, то вы увидите, что лаг к концу первой минуты трансляции достигает аж пяти секунд. У меня терпения хватило на 10 минут съемки, но, как ни странно, задержка больше не увеличивалась, а так и осталась в тех же пределах.
Конечно, для просмотра видео с камеры такое сгодится, но для управления роботележкой едва ли. Даже луноход реагировал быстрее в два раза!
Подозрения сразу пали на процессы кэширования и они (подозрения )оказались верными.
Самым наглым оказался:
Он как раз и отжирает по умолчанию практически всё, если ему вовремя не дать по рукам.
Может устроить лаг и:
Поэтому во избежание многосекундных задержек рекомендуется добавить во всё тот же строковый массив через запятую следующие строчки:
Параметры там задаются в миллисекундах и поэтому каждый желающий может подобрать их под себя.
Ещё можно использовать ключ:
Тогда медиаплеер будет стараться оптимизировать джитер — подергивание экрана. Но там, чем больше установлено время, тем лучше оптимизируется и это понятно почему. Так что здесь остается лишь искать консенсус и видеть иногда в логах такое безобразие:
Вот хотел он, понимаешь, джиттер исправить, а ты временной промежуток слишком маленький поставил. Теперь сам виноват.
Теперь вроде бы все как надо. Задержку удалось сократить меньше, чем до одной секунды (правда, чуть-чуть меньше).
В итоге, получился совсем крохотный рабочий код
Теперь можно интегрировать видео трансляцию в мою программулину по управлению роботележкой, где раньше я передавал видео по кускам. И надо сказать код весьма упростился, а качество на порядок улучшилось. Плюс ко всему к видео потоку мы можем передать показания
акселерометров
гироскопов
уровня освещения
давления воздуха
показаний компаса
температуры
и даже влажности
При условии, конечно, что все эти сенсоры у вашего смартфона имеются.
И даже включить фару! Автоматически! Если уровень освещения упадёт.
Вряд ли кому особо интересно, но на случай ссылки на гитхаб:
Источник


