- WebSocket on Android
- Kevin Hoyt
- Handshake
- Android
- Next Steps
- Sign up for more like this.
- Functions, Storage, Watson . Oh, My!
- IBM and the Open Organization
- Learn to use WebSockets on Android with OkHttp
- Android studio websocket client
- Java WebSocket Programming with Android and Spring Boot
- Android WebSocket Client
- Connect the Client to the Server
- Send Messages to the Server
- Spring Boot WebSocket Server
- Handle the WebSocket Messages
- Configure the WebSocket Request Handling
- Send Data between Server and Client
- Update the Android Client to Pub/Sub
- Modify the Android Client
- Send Data Between Clients
WebSocket on Android

Kevin Hoyt

In a previous post, I talked about hosting a WebSocket server on IBM Bluemix. With the help of a little Node.js on the server, and a browser in hand, we were able to create a functional chat program. Since WebSocket is an open standard however, we can talk to more than just the browser (despite the name). In this post, I will show you how to create a native Android application that uses the same WebSocket server to participate in a chat with the browser.
Handshake
WebSocket is an interesting topic not only because of the real-time capabilities is can bring to your application, but also because of how it functions. When opening a WebSocket from the browser, the initial contact with the server is an HTTP request . Assuming the web server knows what to do with that request, it is then «upgraded» to a WebSocket. This is called the «handshake».
At that point, the WebSocket connection stays open (as opposed to a traditional HTTP request that is closed after the response). WebSocket can handle not only textual content , but also binary content . One could effectively build a telnet client using WebSocket, if the target server knew WebSocket.
An interesting aspect of this is that since WebSocket is a standard , there is nothing prohibiting a server from implementing that handshake. In fact, many server applications do (message brokers for example), and more regularly add support. But this does not have to happen just at the server, it can also happen from other clients that implement WebSocket.
Android
Clearly, Android is capable of speaking raw sockets, HTTP, and much more. It is then certainly capable of speaking WebSocket. Indeed, a company called Tavendo, which focuses on real-time data, has an open source framework, called Autobahn, which implements WebSocket on Android (and many others). It is tested, reliable, and fast.
As much as Gradle has changed my Android development workflow (specifically, the integration with Android Studio), I am an old school Java guy at heart, and still very much enjoy a good old fashioned JAR to deploy into my project — and that is exactly what Autobahn provides. You will first need to download that library , and add it to your Android project.
The declaration of the WebSocket client is declared «final» to avoid memory leaks . After that, you can call the «connect()» method and pass it a «WebSocketHandler» instance to get going. You can override those events you are interested in hearing about.
Since the WebSocket chat client (and server) I demonstrated earlier is JSON-based , we are going to be interested in textual content . Since we already have that infrastructure in place, let us start there in inserting the rest of our Android chat client.
Because the WebSocket client communication is not happening on the UI thread (a good thing), we need to send a message to interested «Handler» implementations. This is how Android communicates across threads, and it is very reminiscent of the publish-subscribe pattern found in message brokers. To do this we will simply take the unparsed JSON string, put it into a «Bundle» instance, place that in a «Message» instance, and send it along.
In an earlier post I mentioned how to use the WeakHandler library from Badoo to avoid memory leaks in your Android applications.
When the data arrives at the «Handler» instance, it is then parsed from JSON into a «JSONObject» and then marshaled into a Java object meant to hold chat details (POJO). Once the chat object has been populated, it is placed into an «ArrayList» instance, which is in turn the source for a «ListView». To make sure the new chat shows up on the screen, we notify the adapter of the changes. Finally, we scroll the to bottom of the «ListView» to show the recent addition.
To send a message we will capture the «return» key on the Android keyboard. I put all the pertinent data into an object reflecting the chat message — the same object I used to marshal incoming data. I added to this object a «ChatMessage.toJSON()» method that serializes the data into a JSON string .
It should be mentioned that there are many other great ways to marshal data between Java objects and JSON strings. I use a manual approach to keep dependencies in my demos to a minimum.
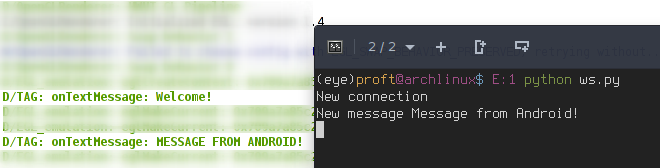
The actual sending of the message happens with a call to » socket.sendTextMessage() «. From there the message field is cleared. At this point, the Android client we just built, and the Web client from my previous posts will receive and render the message. The user interface may look similar, but one is Web and the other native Android.

Next Steps
Modernization always calls the enterprise developer. Open standards , regardless of the stack in which they evolve, are immensely helpful in that process. If your stack needs real-time data communication, then you can certainly look to the WebSocket standard to help. Do not let the term «web» confuse you about the possibilities and/or options.
You may have noticed that I use a key in the chat object called » action «. In the code above there is no obvious use. The action is used in the broader example (which you can find on my GitHub repository), to differentiate what it is the client wants . For example, the server, running on IBM Bluemix, stores chat history in IBM Compose. A command issued over the WebSocket can invoke getting the chat history, but needs some key to differentiate it between creating a new chat message.
Sign up for more like this.

Functions, Storage, Watson . Oh, My!
I have a love-hate relationship with serverless. My style of development definitely trends towards dropping a function in the cloud and calling it done. But the tooling, integration, and best practices are still maturing. It is however, fun to watch the technology evolve. Recently Apache OpenWhisk (IBM Cloud Functions) released

IBM and the Open Organization
On October 28, 2018, IBM announced plans to acquire Red Hat. The CEO of Red Hat is Jim Whitehurst, and Mr. Whitehurst released a book titled «The Open Organization» in 2015. The book details a management philosophy Mr. Whitehurst acquired when he joined Red Hat in 2007. The book is
Источник
Learn to use WebSockets on Android with OkHttp

Feb 14, 2017 · 3 min read
Like you should know, WebSocket is a computer communications protocol, providing full-duplex communication channels over a single TCP connection. It is supported in HTML 5. Since the version 3.5 of the OkHttp library, you can also use WebSockets connection in your Android applications. In this tutorial, you are going to learn how to create a simple chat application with the Echo WebSocket Server which is available at the following address : http://www.websocket.org/echo.html .
Note that you can also discover this tutorial in video on Youtube :
First step is to add the OkHttp dependency in your Gradle build file
D o n’t forget to add the Internet permission in your Android manifest since the application will use the network to create a WebSocket connection to the Echo WebSocket server. For this tutorial, we will need a simple layout with a Button to start the connection and the exchange with the server and a TextView which will be used as a console output for the messages received from the server :
Then, we can write the Java code of the application. The main part will be the method used to create the connection to the WebSocket connection and the WebSocketListener object used to exchange with the server :
We send messages to the server in the onOpen method. The messages received from the Echo WebSocket server are displayed inside the onMessage method. Note that you can send text or hexadecimal messages. Lastly, we close the connection by using the close method of the WebSocket object. To create the WebSocket connection with OkHttp, we need to build a Request object with the URL of the Echo WebSocket server in parameter, then calling the newWebSocket method of the OkHttpClient object.
The code will have the following form :
Finally, you have just to run your application and enjoy the result :
Источник
Android studio websocket client
WebSockets are an alternative to HTTP communication in Web Applications. They offer a long lived, bidirectional communication channel between client and server. Once established, the channel is kept open, offering a very fast connection with low latency and overhead.
HTTP is a very different protocol, and also a different way of communicate. HTTP is a request/response protocol: the server returns some data when the client requests it.
- the server can send a message to the client without the client explicitly requesting something
- the client and the server can talk to each other simultaneously
- very little data overhead needs to be exchanged to send messages. This means a low latency communication.
WebSockets are great for real-time and long-lived communications. HTTP is great for occasional data exchange and interactions initiated by the client.
Always use the secure, encrypted protocol for WebSockets, wss:// . ws:// refers to the unsafe WebSockets version (the http:// of WebSockets), and should be avoided for obvious reasons.
Let’s use Tornado as Server and nv-websocket-client as WebSocket client for Android.
We are going to update the AndroidManifest.xml file by adding the following user permissions
Add nv-websocket-client dependencies to your project dependencies by adding the following lines in your build.gradle and syncing the project:
Following is a example of WebSocket client for Android.
Socket.IO-client Java is the Socket.IO v1.x Client Library for Java, which is simply ported from the JavaScript client.
Create server as described here.
We are going to update the AndroidManifest.xml file by adding the following user permissions
Add socket.io-client dependencies to your project dependencies by adding the following lines in your build.gradle and syncing the project:
Following is a example of Socket.IO client for Android.
- Socket class implements client sockets
- ServerSocket class implements server sockets. A server socket waits for requests to come in over the network.
- Autobahn|Java is a client library providing WAMP on Java 8 (Netty) and Android, plus (secure) WebSocket for Android.
Источник
Java WebSocket Programming with Android and Spring Boot

Free up to 1MM monthly messages. No credit card required.
The WebSocket protocol provides an always-on connection between a client and a server for bi-directional communication. This is great for applications that require a real-time connection, such as multiplayer games, internet of things applications, and chat apps. In this tutorial, we are going to set up a simple Android client that will connect to a WebSocket server using Spring Boot.

Android WebSocket Client
For the Android client, we are going to make a simple demo app that contains four image buttons of cute animals. To get started, initialize a new project on Android Studio, with a Basic Activity, called JavaWebSocketClient. We are going to use a lightweight WebSocket client library for the app, which can be found in this repo. In order to use this library, we have to add it to the build.gradle file in the app directory. Add the following to the dependencies and sync the project:
Make sure to include the internet access permission in the manifest file:
Connect the Client to the Server
Go to MainActivity.java, import the following packages and set up onCreate():
Next, create a new method createWebSocketClient():
This may look like a lot, but really, we are doing four key things in this method:
- Starting a new connection to the localhost “ws://10.0.2.2:8080/websocket”.
- Sending a message to the server once a connection is opened.
- Displaying the messages sent from the server on the app.
- Setting timeouts and automatic reconnection.
Now that we connected the client to the server, let’s set up the method to send messages to the server.
Send Messages to the Server
In MainActivity.java, add the following to sendMessage():
When a button is pressed, the button id is sent to the server. This method is called from the file animal_sounds.xml, which you can get from my Java WebSocket Programming Repo. Make sure to modify the file strings.xml under the values directory so you won’t get any errors in the XML file.
The last thing to do on the client-side is to add the images for the animals in the drawable directory. The images are made by Freepik from www.flaticon.com.
Run the Android app in your emulator:
Nothing happens right now because the server is not set up. Let’s do that right now!
Spring Boot WebSocket Server
For our server, we will use Spring Boot which makes it easy to create production-grade Spring applications with minimum configurations. To quickly bootstrap our project, we will use Spring Initializr. We will generate a Gradle project, but you can also generate a Maven project if you prefer. Configure the Initializr like the screenshot below and make sure to add WebSocket as a dependency:
Generate the project to download a zip file. Once you unzip the file, go to the src directory and keep on clicking the subdirectories until you get to the JavaWebSocketServerApplication.java file.
Add two files to the directory: WebSocketHandler.java and WebSocketConfiguration.java.
Handle the WebSocket Messages
We have to handle the incoming messages that arrive in the server. To do so, in WebSocketHandler.java inherit the class to implement the method handleTextMessage(). Add the following code to the file:
Inside the method, we simply get the string value of the message payload and do a switch expression to check the value of the message with the value of each case. A unique message with the animal sound is sent to the client.
Configure the WebSocket Request Handling
In WebSocketConfiguration.java, implement the interface WebSocketConfigurer and add the following code to the file:
We set up the method registerWebSocketHandlers to configure the WebSocketHandler to the path “/websocket“.
That is all for the server-side. Now that we have everything set up, let’s start the WebSocket server and run the app!
Send Data between Server and Client
In the terminal, go to the root directory of your Spring Boot project and run the following command to start the server:
Next, run the Android client in Android Studio and once the app loads, click any of the four buttons.
Play around with the Android app and see how messages are sent from client-to-server with WebSockets!
Update the Android Client to Pub/Sub
Sending data client-to-server or server-to-client is not difficult and can be done pretty fast. But what if you want to send data client-to-client? You can’t directly connect clients without implementing some routing and broker logic on the server.
There are several tools we can use to make this task less time-consuming. One such tool is Socket.IO, which sets up a real-time, bidirectional connection between clients. This is a great open-source tool to use, but we still need to set up a server and connect the client to the server. Is there an easier way to securely and reliably send data between clients without manually setting up a server? With PubNub, we can.
PubNub provides the real-time infrastructure to power any device that speaks TCP. We can stream data from client-to-client, client-to-server or server-to-client using PubNub’s Global Data Stream Network in under 100 ms! With PubNub, an always-on connection is made between the devices connected to the channel, similar to WebSockets. The best part is that you don’t have to worry about setting up a server and maintaining the server because PubNub is serverless and is infinitely scalable.
To see how PubNub simplifies the process of sending data from client-to-client, we will modify the Android app we built earlier. But first, sign up for a free PubNub account to get your free Pub/Sub API keys. Sign up and log in using the form below:
Modify the Android Client
To differentiate the updated app from the old app, create a new Android project called PubNubJavaClient. In order to use PubNub’s Android SDK, add the following to the build.gradle file in the app directory and sync the project:
Include the following permissions to the manifest file:
Everything else, except MainActivity.java, is the same. From the previous app, add the following files to the updated app: animal_sounds.xml, strings.xml and the images from the drawable directory. Once you finish this, go to MainActivity.java to add the new code. Import the following packages and set up onCreate():
Make a call to initPubNub() to initialize PubNub:
We do three key things in this method:
- Initialize the PubNub client API. Make sure to replace “ENTER_YOUR_PUB_KEY” and “ENTER_YOUR_SUB_KEY” with your Pub/Sub keys.
- Set up a listener to get notified of messages that arrive on the channel. As we did earlier, display the message on the app for the client to see.
- Subscribe to the global channel where messages will be published.
When the user presses a button, the method sendMessage() is called:
This method is similar to what we did earlier, except now we publish the actual message, the animal sound, to the global channel and not the server. We use publishMessage() as a helper function to publish the message.
That is all we need to get the app up-and-running!
Send Data Between Clients
Run the Android app in two emulators to see messages appear in real time.
Источник


