- Pinch to Zoom Android ImageView Tutorial
- Android studio zoom imageview
- Android studio zoom imageview
- About
- Android studio zoom imageview
- ImageView
- Общая информация
- Метод setImageResource()
- Метод setImageBitmap()
- Метод setImageDrawable()
- Метод setImageURI()
- Другие методы
- Масштабирование через свойство Scale Type
- Атрибут android:adjustViewBounds=»true»
- Загрузка изображения из галереи
- Получить размеры ImageView — будьте осторожны
- Копирование изображений между ImageView
- Примеры
Pinch to Zoom Android ImageView Tutorial
Hi and welcome to another tutorial from Codingdemos, today you will learn how to build pinch to zoom Android function on an ImageView using 3rd party library called PhotoView. The experience will be a lot similar to what you see today in social media apps.
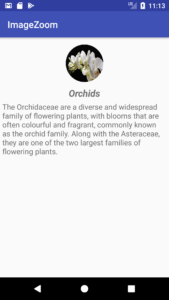
You will be building an app that have an Android ImageView and a TextView, when you tap on the ImageView an Android Alertdialog will appear on the screen showing you the image in full size where you can pinch and zoom on the image itself.
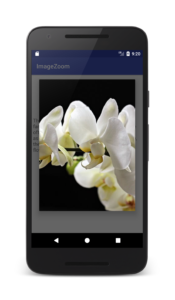
By the end of this tutorial, you will have an app that looks like this. (Large preview)
In this tutorial we will be using the following:
- – Android studio version 3.0
– Android emulator Nexus 5 with API 26
– Minimum SDK API 16
– PhotoView 3rd party library
1- Open up Android Studio and create a new project and give it a name, in our case we’ve named it (ImageZoom), choose API 16 as the minimum SDK, then choose a blank activity, click “Finish” and wait for Android Studio to build your project.
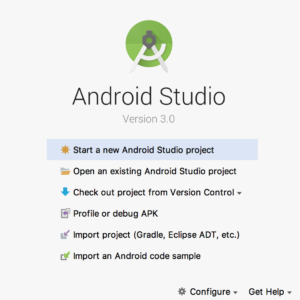
Create new Android Studio project. (Large preview)
2- Open up build.gradle (Module:app) and add PhotoView library.
3- Now you need to open up build.gradle (Project) and you need to add this line maven < url "https://jitpack.io" >inside (allprojects) tag.
4- Sync the project by clicking on (Sync Now).
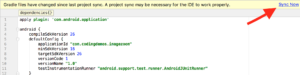
Android studio sync gradle file. (Large preview)
5- Open activity_main.xml file, here you will add 3 views:
– Android ImageView that will hold the picture.
– Android TextView for the image title and description.
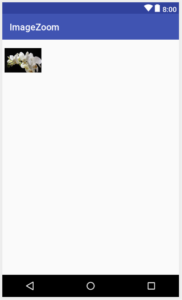
6- Add Android ImageView and make sure that you have added the image that you want to use for the ImageView inside the project drawable folder.
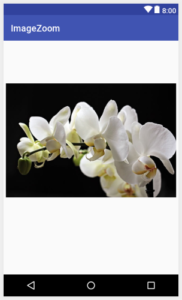
Android ImageView with image. (Large preview)
7- Reduce the size of the ImageView by adjusting android:layout_width and android:layout_height
Adjust width and height of Android ImageView. (Large preview)
8- Add some margin above the ImageView and place it in the center.
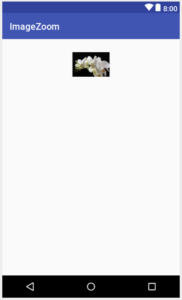
Android ImageView placed in the center with margin. (Large preview)
9- When you tap on the ImageView inside Android Studio preview window, you will see an empty space from top and bottom of the ImageView. You can fix that by using android:scaleType=»centerCrop» which allow the image to fill the remaining space.
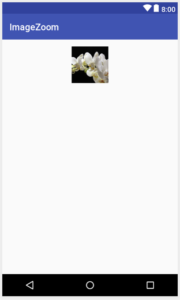
Android ImageView with scaletype. (Large preview)
10- Add Android TextView which will hold the name of the picture, this TextView will be placed below ImageView (ivIcon) in the center, add some margin from the top, try to increase text size to (20sp) and change text style to (italic and bold).
11- Now you add the final TextView for this layout which will hold the description about the picture, this TextView will be placed below (tvName), try to increase text size to (16sp) and don’t forget to add some margin from the top so that it doesn’t appear to close with (tvName) TextView.
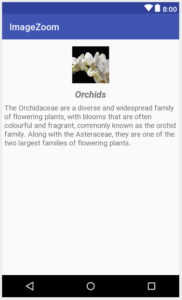
Flower title and description. (Large preview)
12- Now you are done working on activity_main.xml file, next you need to open up MainActivity.java file and initialize Android ImageView and Android AlertDialog.
13- Initialize ImageView (ivIcon).
14- Next you need to change the shape of ImageView (ivIcon) to circle using RoundedBitmapDrawable and Bitmap .
15- Build and run the app to see the progress.
Changed the shape of ImageView (ivIcon) to circle. (Large preview)
16- Now you need to work on Android AlertDialog, the AlertDialog will appear on the screen when you try to tap on ImageView (ivIcon). Before you start that, you first need to create another layout file that you will use it later for AlertDialog.
17- Create a new layout file and name it (dialog_custom_layout.xml), this file will have a PhotoView that will match the width and height of the screen.
18- Now go back to MainActivity.java file, to be able to tap on the ImageView you will need to use setOnClickListener and inside onClick is where you will create AlertDialog.
19- Build and run the app to test out Android pinch and zoom function.
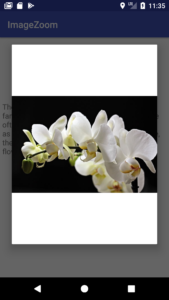
PhotoView image doesn’t completely fill out AlertDialog. (Large preview)
20- Hmm it seems that the image doesn’t fill the entire AlertDialog! You can actually fix it by using android:scaleType=»centerCrop» .
21- Build and run the app to see the result.
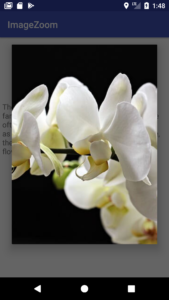
PhotoView image appears inside AlertDialog. (Large preview)
22- Great now you have a fully working app with pinch to zoom Android function 🙂
The source code for this tutorial is available on GitHub, I hope you find this tutorial helpful and if you have any question please post them in the comment below.
Источник
Android studio zoom imageview


![]()
A simple pinch-to-zoom ImageView library for Android with an emphasis on a smooth and natural feel.
Simply add a ZoomageView as you would any typical ImageView in Android. The scaleType that you set on your ZoomageView will determine the starting size and position of your ZoomageView’s image. This is the inherited ImageView.ScaleType from Android. With a ZoomageView, the fitCenter or centerInside scale types usually make the most sense to use, fitCenter being Android’s default scale type.
If using a ZoomageView with a view pager, it is recommended that ViewPager2 is used.
Restricts the bounds of the image so it does not wander outside the border of the ImageView when it’s smaller than the frame size, and restricts the bounds to stop at the edges of the ImageView when the image is larger than the frame size. Default value is false.
Image will animate back to its starting size whenever it is reset if true, and will snap back to its starting size when false. Default value is true.
Determines at what times the image will reset to its starting size. Note that UNDER, OVER, and ALWAYS all have the effect of resetting the image to its starting position if its size has not changed. Default value is UNDER.
This will cause the image to pull itself into view on-screen if it is partially off-screen. Default value is true.
The minimum allowed scale for the image. Ideally this should be less than 1, must be greater than 0, and must be less than maxScale. Default value is 0.6.
The maximum allowed scale for the image. Ideally this should be greater than 1, must be greater than 0, and must be greater than minScale. Default value is 8.
Sets whether zooming is allowed. Default value is true.
Sets whether translation is allowed. Default value is true.
Sets whether double tap to zoom functionality is enabled. Default is true.
Sets the scale factor for double tap to zoom functionality. Default is 3.
Special thanks to @mchowning for all his help
Источник
Android studio zoom imageview
PhotoView aims to help produce an easily usable implementation of a zooming Android ImageView.

Add this in your root build.gradle file (not your module build.gradle file):
Then, add the library to your module build.gradle
- Out of the box zooming, using multi-touch and double-tap.
- Scrolling, with smooth scrolling fling.
- Works perfectly when used in a scrolling parent (such as ViewPager).
- Allows the application to be notified when the displayed Matrix has changed. Useful for when you need to update your UI based on the current zoom/scroll position.
- Allows the application to be notified when the user taps on the Photo.
There is a sample provided which shows how to use the library in a more advanced way, but for completeness, here is all that is required to get PhotoView working:
Issues With ViewGroups
There are some ViewGroups (ones that utilize onInterceptTouchEvent) that throw exceptions when a PhotoView is placed within them, most notably ViewPager and DrawerLayout. This is a framework issue that has not been resolved. In order to prevent this exception (which typically occurs when you zoom out), take a look at HackyDrawerLayout and you can see the solution is to simply catch the exception. Any ViewGroup which uses onInterceptTouchEvent will also need to be extended and exceptions caught. Use the HackyDrawerLayout as a template of how to do so. The basic implementation is:
Usage with Fresco
Due to the complex nature of Fresco, this library does not currently support Fresco. See this project as an alternative solution.
This library aims to keep the zooming implementation simple. If you are looking for an implementation that supports subsampling, check out this project
About
Implementation of ImageView for Android that supports zooming, by various touch gestures.
Источник
Android studio zoom imageview
This is a great tutorial
I am using this code in fragments but
java.lang.NullPointerException: Attempt to invoke virtual method ‘void android.widget.ZoomControls.setOnZoomInClickListener(android.view.View$OnClickListener)’
import android.os.Bundle;
import android.support.v4.app.Fragment;
import android.view.LayoutInflater;
import android.view.MotionEvent;
import android.view.View;
import android.view.ViewGroup;
import android.widget.ImageView;
import android.widget.TextView;
import android.widget.Toast;
import android.widget.ZoomControls;
import abdulrehman.islamictasawwufsilsalanaqshbandiyaowaisia.R;
import uk.co.senab.photoview.PhotoView;
import uk.co.senab.photoview.PhotoViewAttacher;
/**
* A simple <@link Fragment>subclass.
*/
public class HomeFragment extends Fragment <
TextView textView;
ImageView imageView;
ZoomControls simpleZoomControls;
public HomeFragment() <
// Required empty public constructor
>
@Override
public View onCreateView(LayoutInflater inflater, ViewGroup container,
Bundle savedInstanceState) <
View view =inflater.inflate(R.layout.fragment_home, container, false);
final ImageView imageView = view.findViewById(R.id.HazratJeeIntro1);
ImageView imageView1 = view.findViewById(R.id.hazrajee1);
PhotoViewAttacher photoView2 = new PhotoViewAttacher(imageView1);
photoView2.update();
final TextView textView = view.findViewById(R.id.HazratJeeDescEng);
imageView.setOnTouchListener(new View.OnTouchListener() <
@Override
public boolean onTouch(View v, MotionEvent event) <
simpleZoomControls.show();
return false;
>
>);
// perform setOnZoomInClickListener event on ZoomControls
simpleZoomControls.setOnZoomInClickListener(new View.OnClickListener() <
@Override
public void onClick(View v) <
// calculate current scale x and y value of ImageView
float x = imageView.getScaleX();
float y = imageView.getScaleY();
// set increased value of scale x and y to perform zoom in functionality
imageView.setScaleX((float) (x + 1));
imageView.setScaleY((float) (y + 1));
// display a toast to show Zoom In Message on Screen
Toast.makeText(getContext(),”Zoom In”,Toast.LENGTH_SHORT).show();
// hide the ZoomControls from the screen
simpleZoomControls.hide();
>
>);
// perform setOnZoomOutClickListener event on ZoomControls
simpleZoomControls.setOnZoomOutClickListener(new View.OnClickListener() <
@Override
public void onClick(View v) <
// calculate current scale x and y value of ImageView
float x = imageView.getScaleX();
float y = imageView.getScaleY();
// set decreased value of scale x and y to perform zoom out functionality
imageView.setScaleX((float) (x – 1));
imageView.setScaleY((float) (y – 1));
// display a toast to show Zoom Out Message on Screen
Toast.makeText(getContext(),”Zoom Out”,Toast.LENGTH_SHORT).show();
// hide the ZoomControls from the screen
simpleZoomControls.hide();
>
>);
return view;
>
>
sir how i can implement these zoom controls in textview. /
Источник
ImageView
Общая информация
Компонент ImageView предназначен для отображения изображений. Находится в разделе Widgets.
Для загрузки изображения в XML-файле используется атрибут android:src, в последнее время чаще используется атрибут app:srcCompat.
ImageView является базовым элементом-контейнером для использования графики. Можно загружать изображения из разных источников, например, из ресурсов программы, контент-провайдеров. В классе ImageView существует несколько методов для загрузки изображений:
- setImageResource(int resId) — загружает изображение по идентификатору ресурса
- setImageBitmap(Bitmap bitmap) — загружает растровое изображение
- setImageDrawable(Drawable drawable) — загружает готовое изображение
- setImageURI(Uri uri) — загружает изображение по его URI
Метод setImageResource()
Сначала нужно получить ссылку на ImageView, а затем используется идентификатор изображения из ресурсов:
Метод setImageBitmap()
Используется класс BitmapFactory для чтения ресурса изображения в объект Bitmap, а затем в ImageView указывается полученный Bitmap. Могут быть и другие варианты.
Метод setImageDrawable()
Если у вас есть готовое изображение, например, на SD-карте, то его можно использовать в качестве объекта Drawable.
Drawable можно получить и из ресурсов, хотя такой код выглядит избыточным, если можно сразу вызвать setImageResource().
Метод setImageURI()
Берётся URI файла изображения и используется в качестве источника изображения. Этот способ годится для работы с локальными изображениями.
Загружаем Drawable через URI.
Другие методы
Также вам часто придется использовать методы, связанные с размерами и масштабированием: setMaxHeight(), setMaxWidth(), getMinimunHeight(), getMinimunWidth(), getScaleType(), setScaleType().
Масштабирование через свойство Scale Type
Для масштабирования картинки в ImageView есть свойство Scale Type и соответствующий ему атрибут android:scaleType и перечисление ImageView.ScaleType.
- CENTER
- CENTER_CROP
- CENTER_INSIDE
- FIT_CENTER
- FIT_START
- FIT_END
- FIT_XY
- MATRIX
Чтобы увидеть разницу между разными режимами, желательно использовать большую картинку, превосходящую по ширине экрана устройства. Допустим, у нас есть простенькая разметка:
Для наглядности я задал красный цвет для фона ImageView.
Режим android:scaleType=»center» выводит картинку в центре без масштабирования. Если у вас будет картинка большего размера, то края могут быть обрезаны.

Режим android:scaleType=»centerCrop» также размещает картинку в центре, но учитывает ширину или высоту контейнера. Режим попытается сделать так, чтобы ширина (или высота) картинки совпала с шириной (или высотой) контейнера, а остальное обрезается.

Режим android:scaleType=»centerInside» масштабирует картинку, сохраняя пропорции. Можно увидеть задний фон контейнера, если его размеры отличаются от размера картинки.

Режим android:scaleType=»fitCenter» (по умолчанию) похож на предыдущий, но может не сохранять пропорции.
Если выбрать режим android:scaleType=»fitStart», то картинка прижимается к левому верхнему углу и таким образом заполняет верхнюю половину контейнера.

Значение android:scaleType=»fitEnd» сместит картинку в нижнюю часть контейнера.
Режим android:scaleType=»fitXY» растягивает/сжимает картинку, чтобы подогнать её к контейнеру. Может получиться вытянутая картинка, поэтому будьте осторожны.
Последний атрибут android:scaleType=»matrix» вывел картинку без изменений в левом верхнем углу с обрезанными краями.
Атрибут android:adjustViewBounds=»true»
При использовании атрибута scaleType=»fitCenter» из предыдущего примера Android вычисляет размеры самой картинки, игнорируя размеры ImageView. В этом случае ваша разметка может «поехать». Атрибут adjustViewBounds заставляет картинку подчиниться размеру компонента-контейнера. В некоторых случаях это может не сработать, например, если у ImageView установлен атрибут layout_width=»0dip». В таком случае поместите ImageView в RelativeLayout или FrameLayout и используйте значение 0dip для этих контейнеров.
Загрузка изображения из галереи
Предположим, у вас есть на экране компонент ImageView, и вы хотите загрузить в него какое-нибудь изображение из галереи по нажатию кнопки:
Намерение ACTION_PICK вызывает отображение галереи всех изображений, хранящихся на телефоне, позволяя выбрать одно изображение. При этом возвращается адрес URI, определяющий местоположение выбранного изображения. Для его получения используется метод getData(). Далее для преобразования URI-адреса в соответствующий экземпляр класса Bitmap используется специальный метод Media.getBitmap(). И у нас появляется возможность установить изображение в ImageView при помощи setImageBitmap().
На самом деле можно поступить ещё проще и использовать метод setImageURI.
Сравните с предыдущим примером — чувствуете разницу? Тем не менее, приходится часто наблюдать подобный избыточный код во многих проектах. Это связано с тем, что метод порой кэширует адрес и не происходит изменений. Рекомендуется использовать инструкцию setImageURI(null) для сброса кэша и повторный вызов метода с нужным Uri.
В последних версиях системных эмуляторов два примера не работают. Проверяйте на реальных устройствах.
Получить размеры ImageView — будьте осторожны
У элемента ImageView есть два метода getWidth() и getHeight(), позволяющие получить его ширину и высоту. Но если вы попробуете вызвать указанные методы сразу в методе onCreate(), то они возвратят нулевые значения. Можно добавить кнопку и вызвать данные методы через нажатие, тогда будут получены правильные результаты. Либо использовать другой метод активности, который наступает позже.
Копирование изображений между ImageView
Если вам надо скопировать изображение из одного ImageView в другой, то можно получить объект Drawable через метод getDrawable() и присвоить ему второму компоненту.
Примеры
В моих статьях можно найти примеры использования ImageView.
Источник


