- SwipeRefreshLayout
- Пример на Kotlin
- Устаревший пример для Java
- Обновляем список
- Adding Swipe To Refresh to Flutter app
- Implementing Pull to Refresh Guide
- Android Swipe Down to Refresh a ListView
- activity_main.xml
- activity_listview.xml
- Main Activity
- Android Swipe Down to Refresh ListView Tutorial
- 1. Android SwipeRefreshLayout
- 2. Example JSON
- 3. Creating Android Project
- 4. PHP Class to Generate JSON
SwipeRefreshLayout
В марте 2014 года был представлен новый компонент android.support.v4.widget.SwipeRefreshLayout, который входил в состав библиотеки Support Library v4. Сейчас это отдельная библиотека в составе AndroidX.
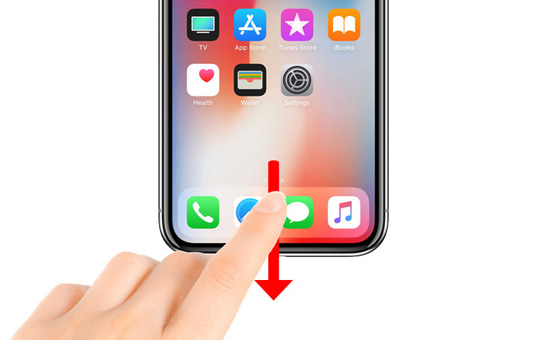
Компонент позволяет отказаться от сторонних библиотек и собственных велосипедов для реализации шаблона «Pull to Refresh», когда пользователь сдвигает экран, чтобы обновить данные. Подобное поведение можно увидеть в клиентах для Твиттера, чтобы получить новую порцию твитов, не дожидаясь, когда список сообщений обновится самостоятельно.
Пример на Kotlin
В марте 2020 года обзавелась стабильной версией.
В методах setColorSchemeColors() или setColorSchemeResources() следует указать используемые цвета.
Компонент достаточно интересный с занимательной анимацией. Вначале анимация представляла собой цветные полоски под заголовком программы. Позже анимацию заменили в стиле Material Design, теперь это маленький кружочек, внутри которого крутятся цветные линии (или чёрная линия, если не использовать метод setColorSchemeResources() со цветами).
Запустите пример и потяните экран сверх вниз, чтобы увидеть эффект обновления данных.
Устаревший пример для Java
Обернём компоненты родительским элементом SwipeRefreshLayout. На панели инструментов данного компонента нет, поэтому придётся писать код вручную.
В примере реализуется интерфейс OnRefreshListener с методом onRefresh(), в котором следует обновить поступающие данные. В нашем случае просто генерируются случайные числа.
При первом появлении библиотеки использовался метод setColorScheme(), который объявлен устаревшим. Вместо него появились два новых метода setColorSchemeColors() и setColorSchemeResources(). Принцип остался тот же, вам нужно указать четыре цвета по константам Color.XXX или из ресурсов. Вы можете не использовать вызов метода с цветными линиями, тогда будет выводиться только чёрная линия по умолчанию.
Компонент достаточно интересный с занимательной анимацией. Вначале анимация представляла собой цветные полоски под заголовком программы, как представлено на видео.
Позже анимацию заменили в стиле Material Design, теперь это маленький кружочек, внутри которого крутятся цветные линии (или чёрная линия, если не использовать метод setColorSchemeResources() со цветами).
Обновляем список
По такому же принципу обновляем данные в списке.
При каждой попытке обновить список будет добавляться текущая дата и время.
Не забывайте, что обновление может занимать длительное время и использовать сеть для получения данных. Поэтому следует позаботиться о выполнении в другом потоке.
Источник
Adding Swipe To Refresh to Flutter app

Aug 16, 2018 · 3 min read
In Android app you can implement swipe to refresh by wrapping your ListView(or GridView) inside SwipeRefreshLayout, while in iOS UIRefreshControl is used for same.
For Flutter there is RefreshIndicator
A widget that supports the Material “swipe to refresh” idiom.
When child of RefreshIndicator is over scrolled , an animated circular progress indicator is displayed & onRefresh callback is called. Callback returns a future, after complete of which UI is updated & refresh indicator disappears.
In this example we will load random user profile using free API RandomUser, which provides random user on each refresh.
First things first , lets create a StatefulWidget & State for that widget.
Now lets create User model & network call to fetch user
Now lets create default user data & implement build method(of State).
At this moment if we start SwipeToRefreshExample widget output will be default user with placeholder image.
Things to remember while implementing RefreshIndicator is
- RefreshIndicator requires key to implement state.
- onRefresh(RefreshCallback) method required completable future.
- child is typically ListView or CustomScrollView.
Add RefreshIndicatorState inside our state class
Update body of build inside state : Wrap code we wrote above inside build to ListView & then RefreshIndicator.
_refresh() method : this method call getUser() which returns User on future. When user is returned by getUser(), our user(of state) is updated & setState is called for rebuild.
Done our SwipeToRefresh is ready.
One thing missing here is user needs to swipe to see data at start, we can make data load automatically at start by updating indicator state inside initState once widget is build.
Now if you want to add a refresh button on toolbar which acts same as swipe. Update AppBar, add actions as
Full code for this example is available here
Источник
Implementing Pull to Refresh Guide
In Android, the common «pull to refresh» UX concept is not built in to a ListView/RecyclerView. However, many Android applications would like to make use of this concept for their feeds. This is useful for all sorts of feeds such as a Twitter timeline. This effect can be achieved using the SwipeRefreshLayout class


SwipeRefreshLayout is a ViewGroup that can hold only one scrollable view as a child. This can be either a ScrollView or an AdapterView such as a ListView or a RecyclerView .
Edit your app/build.gradle file to include a library:
Make sure your libraries is up to date by adding to your root gradle.file :
Just like the previous section, wrap the scrollable view, in this case a RecyclerView with a SwipeRefreshLayout in the XML layout:
Make sure to have helper methods in your RecyclerView adapter to clear items from the underlying dataset or add items to it.
Next, we need to configure the SwipeRefreshLayout during view initialization in the activity. The activity that instantiates SwipeRefreshLayout should add an OnRefreshListener to be notified whenever the swipe to refresh gesture is completed.
The SwipeRefreshLayout will notify the listener each and every time the gesture is completed again; the listener is responsible for correctly determining when to actually initiate a refresh of its content.
Next, we need to configure the SwipeRefreshLayout during view initialization in the activity:
Note that upon successful reload, we must also signal that the refresh has completed by calling setRefreshing(false) . Also note that you should clear out old items before appending the new ones during a refresh.
If you are using SwipeRefreshLayout with Android’s new Paging Library, the data sources used to provide data to the RecyclerView need to be invalidated. Review this guide for more information.
Note: ListView is an old UI component that is no longer used in modern Android applications. Only refer this guide if you intend to update some old code that still relies on ListView.
Set SwipeRefreshLayout at the Layout you want the SwipeRefresh functionality
activity_main.xml
activity_main.xml
You could use a ScrollView instead a ListView
In the activity who points to activity_main.xml, which is main_activity(in this example), this code should be enough
main_activity.java
Now just run your application!
You could check this example on GitHub.
If you aren’t able to get the swipe to refresh working, check the following tips:
Did you accidentally call setContentView twice? Ensure that inside your activity, you’ve only called setContentView once as the 2nd line of your onCreate method.
Did you invoke setRefreshing(false) after data finished loading? With the swipe to refresh control, you are responsible for notifying the system once the new data has been loaded into the list. You must make sure to invoke setRefreshing only after the data has come back and not before. This means if you are loading data from the network, calling this within the onSuccess method.
Did you clear out the old items before updating the list? Make sure that in order for the new items to be displayed that you clear the list of any old items if needed. In other words, if you are replacing items in the list with new versions, be sure to remove the old versions from the adapter first with adapter.clear();
Are you using CoordinatorLayout? If you are using a CoordinatorLayout to manage scrolling, be sure to move the app:layout_behavior=»@string/appbar_scrolling_view_behavior» property to the SwipeRefreshLayout rather than the child RecyclerView or ListView .
Источник
Android Swipe Down to Refresh a ListView
This Android tutorial is about refreshing a ListView by swiping down. It will enable the user to refresh the Android ListView in an Android application by providing a good user experience.
Earlier I published a tutorial to build a Todo list APP in Android and this kind of swipe to refresh feature will be comfortable for the user to refresh the listed items. This feature can also be used in the Android cards listview.
activity_main.xml
For swipe down refresh first you need to put your ListView inside layout. It will link the Swipe down refresh function to ListView .
activity_listview.xml
Make a layout file activity_listview.xml inside your “main/res/layout” folder and put a TextView inside it. This layout will be used in the ArrayAdapter . This is how your single list item will look like.This layout will use again and again by the adapter to show all list items in the ListView .
Main Activity
Then in your main Android activity file just make an object of SwipeRefreshLayout, ArrayAdapter and ListView corresponding to their id’s and for ArrayAdapter use the constructor ArrayAdapter(Context context, int resource, T[] objects) .
- context: The current context.
- resource: The resource ID for a layout file containing a layout to use when instantiating views.
addContent() is a custom method, this is used to to create a new ArrayList() and to pre add some items in the ListView . Adding items in ArrayList() is done by YourArrayListName.add(«Item to add») function so it will add the item to the array then we pass this array to the ArrayAdapter to make a list of it’s content .Then set the adapter to the ListView by setAdapter() . Then put a listener OnRefreshListener on SwipeRefreshLayout object. onRefresh() is the function of the listener OnRefreshListener it will get trigger when user refreshes the layout(i.e On swipe down). Now, we have to tell the onRefresh() function what it has to do after it has refreshed the ListView once.
We are using the function notifyDataSetChanged() of the class adapter to notify the adapter that data has been change and using the function setRefreshing() of class SwipeRefreshLayout which takes true or false as an argument. We are passing false as the argument because we need to stop the refresh after one successful refresh.
Источник
Android Swipe Down to Refresh ListView Tutorial
You might have noticed that lot of android apps like Twitter, Google+ provides an option to swipe / pull down to refresh it’s content. Whenever user swipes down from top, a loader will be shown and will disappear once the new content is loaded. In this tutorial we are going to learn how to provide the same option to your apps too.
Previously we used to implement a custom swipe view to detect the swipe down. But android made our day easier by introducing SwipeRefreshLayout in android.support.v4 to detect the vertical swipe on any view.

VIDEO DEMO
1. Android SwipeRefreshLayout
Implementing SwipeRefreshLayout is very easy. Whenever you want to detect the swipe down on any view, just the wrap the view around SwipeRefreshLayout element. In our case, we are going to use it with ListView. And implement your activity class from SwipeRefreshLayout.OnRefreshListener. When user swipes down the view, onRefresh() method will be triggered. In you need to take appropriate action in that function like making an http call and fetch the latest data.
2. Example JSON
To demonstrate this tutorial, I am showing IMDB top 250 movies in a List View. For this I have created a json service which gives 20 movies in each request. You need to pass offset param to get the next set of results. Initially offset value should be 0, whenever the list is swiped down, we make an http call to get the next 20 movies and will update the ListView.
3. Creating Android Project
1. In Android Studio, create a new project by navigating to File ⇒ New Project and fill all the required details. When it prompts to select a default activity, select Blank Activity and proceed.
2. Open build.gradle located under app folder and add volley library dependency. We are going to use volley to make HTTP calls to fetch the json.
3. Open colors.xml under res ⇒ values and add below color resources. If you don’t find colors.xml, create a new file with the name. The color resources added below are used to set background color for movies rank in list view.
3. Now under your project’s package, create three packages named app, activity and helper.
4. Under app package, create a class named MyApplication.java and add below code. This is a singleton Application class which initiates volley core objects on app launch.
5. Open AndroidManifest.xml and add MyApplication.java class to tag. Also you need to add INTERNET permission as we need to make http calls.
6. Now let’s create a custom adapter class for our list view. Under res ⇒ layout folder, create an xml layout named list_row.xml. This xml renders single list row in the ListView.
7. Under helper package, create a java class named Movie.java and add below code. This is a model class required to create movie objects to provide data to the List View
8. Under helper package, create another class named SwipeListAdapter.java. This class is a custom adapter class which inflates the list_row.xml by applying proper data.
10. Now we have all the required files in place, let’s start implementing the actual swipe refresh view. Open the layout file of your main activity (activity_main.xml) and modify the layout as shown below. I have added a ListView to show list of movies and wrapped it around SwipeRefreshLayout to get the swipe to refresh.
11. Finally open MainActivity.java and do the below changes to achieve the swipe refresh list view.
> Implement the activity from SwipeRefreshLayout.OnRefreshListener and override the onRefresh() method.
> Call fetchMovies() which is a volley’s json array call to fetch the json and update the list view.
> onRefresh() is triggered whenever user swipes down the view. So call fetchMovies() inside this method to get the next set of movies response.
Run the project and test it. You should able see the swipe refresh animation on app launch and list view updated each time you swipe down it.

4. PHP Class to Generate JSON
As lot of people are requesting me to provide the PHP code to generate the json, I am giving the code to generate the json used in this article. You can run this code using WAMP or XAMP softwares. Checkout Video 1 and Video 2 for installation and running PHP project in WAMP.
Hi there! I am Founder at androidhive and programming enthusiast. My skills includes Android, iOS, PHP, Ruby on Rails and lot more. If you have any idea that you would want me to develop? Let’s talk: [email protected]
Источник


