- Полный список
- Выпадающий список
- Мобильные паттерны навигации
- Как делать правильно и удобно
- Какие паттерны бывают?
- Иерархия
- How to Code a Bottom Navigation Bar for an Android App
- Getting Started
- Add Project Dependencies
- Create a Navigation Graph
- Add Destinations to the Navigation Graph
- Add a Nav Host Fragment and Bottom Navigation View
- Add Menu Items
- Add Vector Assets to Menu Items
- Add Menu Item to Bottom Navigation View
- About the Nav Controller
- Final App
- Bonus: Using Android Studio Templates
- Top Android App Templates From CodeCanyon
- 1. Android App Builder: WooCommerce, WebView, WordPress and Much More
- 2. RocketWeb: Configurable Android WebView App Template
- 3. Dating App for Web, iOS and Android
- 4. AdForest: Classified Native Android App
- 5. MaterialX: Android Material Design UI Components
- Find More Android App Templates From Envato Tuts+
- Conclusion
Полный список
— используем навигацию в ActionBar
На прошлом уроке мы рассмотрели добавление элементов ActionBar. Пользователю эти элементы удобно использовать для совершения каких-либо операций в приложении. Например, в почтовой программе это может быть удаление письма, пересылка, ответ и т.д.
Теперь рассмотрим, как добавить элементы для навигации по приложению. Есть два типа элементов для навигации: табы и выпадающий список. Создадим простое приложение и реализуем в нем сначала один, затем второй способ.
Project name: P1081_ActionBarNavigation
Build Target: Android 4.1
Application name: ActionBarItems
Package name: ru.startandroid.develop.p1081actionbarnavigation
Create Activity: MainActivity
Никакие строки не добавляем, основной layout не трогаем.
Смотрим, что нам нужно, чтобы включить табы.
В onCreate мы получаем доступ к ActionBar и устанавливаем для него режим навигации в NAVIGATION_MODE_TABS. Далее идет добавление табов. Тут все несложно – создаем, пишем текст, присваиваем обработчика, добавляем в ActionBar.
Обработчиком для табов мы сделали MainActivity, оно реализует методы интерфейса ActionBar.TabListener:
onTabReselected – выбран уже выбранный таб
В эти методы поместим запись в лог и посмотрим, как оно все там работает.
Все сохраняем и запускаем приложение.
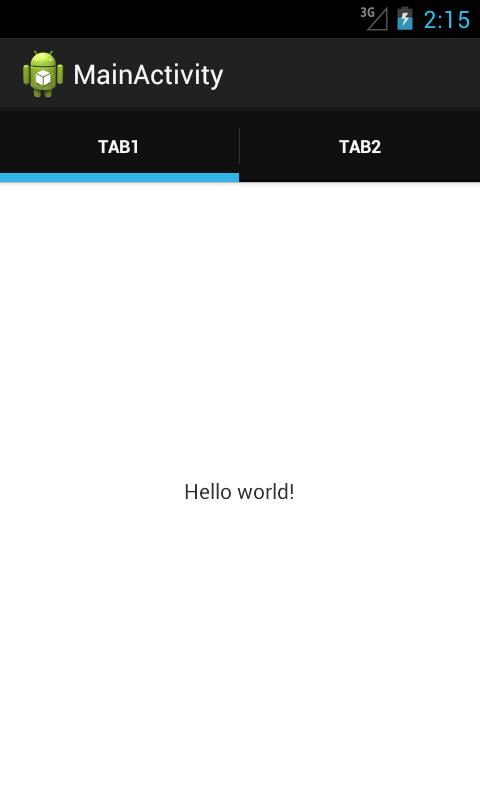
Сейчас выбран первый таб и лог сразу об этом сообщает:
selected tab: tab1
Нажмем на второй таб,
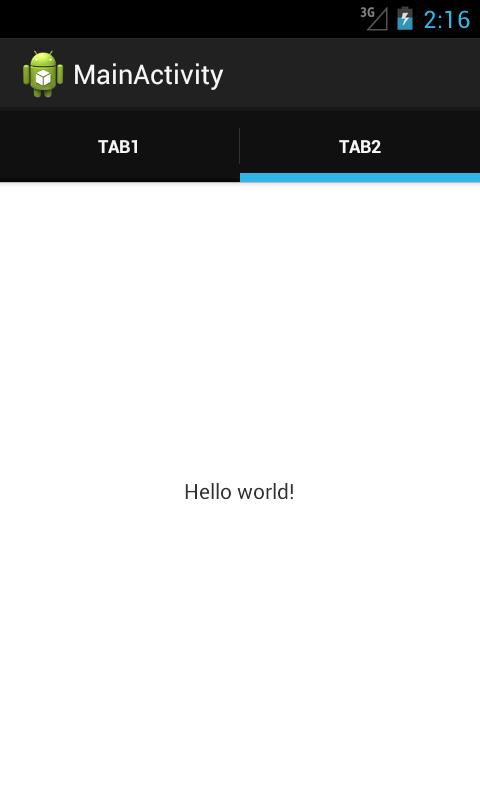
unselected tab: tab1
selected tab: tab2
Первый таб «развыбран», а второй выбран.
Еще раз нажмем на второй таб:
reselected tab: tab2
Второй таб перевыбран. Все логично и понятно.
Я, чтобы не перегружать урок, не стал реализовывать какие-либо операции по навигации в приложении. А, вообще, подразумевается, что в методах обработчика мы кодим операции с фрагментами. Нам даже любезно предоставляют объект FragmentTransaction для этих целей. При этом хелп предупреждает, что в этих методах нам не надо самим вызывать метод commit, а также мы не можем добавлять транзакцию в BackStack.
Выпадающий список
Теперь посмотрим, как работает навигация с выпадающим списком.
В onCreate получаем ActionBar и включаем ему режим навигации NAVIGATION_MODE_LIST. Для выпадающего списка необходимо создать адаптер, реализующий SpinnerAdapter. Пусть это будет ArrayAdapter. При создании используем массив из трех строк. Далее вызываем метод setListNavigationCallbacks, в который передаем адаптер и обработчик.
Обработчиком у нас снова является Activity, реализует метод onNavigationItemSelected интерфейса ActionBar.OnNavigationListener. Этот метод дает нам позицию и id выбранного из списка элемента. Выводим в лог эту инфу и соответствующий элемент массива.
В манифесте я прописал для MainActivity атрибут темы: android:theme=»@android:style/Theme.Holo.Light». Иначе был темный текст на темном фоне.
Все сохраняем и запускаем.

Первый элемент сразу выбран. В логах видим:
selected: position = 0, one
Выберем какой-нить другой элемент из списка

selected: position = 2, three
Снова все логично и понятно.
Для обоих видов навигации мы всегда можем получить текущий выбранный элемент с помощью метода getSelectedNavigationIndex. А для навигации с табами есть также метод getSelectedTab, возвращающий текущий выбранный таб.
Разумеется, что вместе с навигацией мы можем добавлять в ActionBar и обычные элементы, которые были рассмотрены на прошлом уроке.

При этом, если места будет недостаточно, то ActionBar разделит все свои элементы на две полосы.

Начиная с четвертой версии Андроид, можно использовать атрибут uiOptions для Activity или Application в манифесте. Если присвоить ему значение splitActionBarWhenNarrow, то результат при нехватке места получится такой:
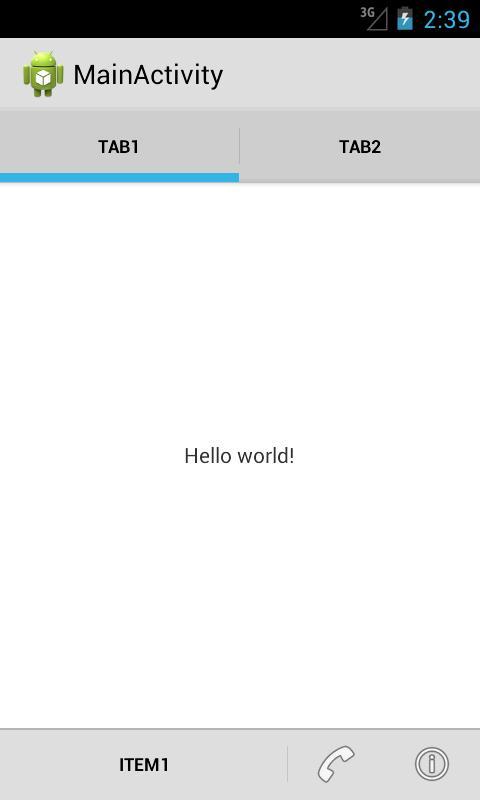
Элементы ушли вниз. Правда, при этом почему-то перестает работать withText в showAsAction.
На следующем уроке:
— работаем с ListFragment
Присоединяйтесь к нам в Telegram:
— в канале StartAndroid публикуются ссылки на новые статьи с сайта startandroid.ru и интересные материалы с хабра, medium.com и т.п.
— в чатах решаем возникающие вопросы и проблемы по различным темам: Android, Kotlin, RxJava, Dagger, Тестирование
— ну и если просто хочется поговорить с коллегами по разработке, то есть чат Флудильня
— новый чат Performance для обсуждения проблем производительности и для ваших пожеланий по содержанию курса по этой теме
Источник
Мобильные паттерны навигации
Как делать правильно и удобно


Подумал я о следующем: на чем же больше всего народу ломается в попытке сделать что-то хорошее? Вариантов, конечно же, тонна и маленькая тележка, но один из них самый страшный и ужасный — Навигация.
Начинающие свой путь в гуях и уиксах дизайнеры натыкаются на нее родимую сразу, а читать гайдлайны (где тоже про навигацию отведено где-то около 1/50 всего объема) никогда не было модно. Как и инструкцию от бытовой техники… Ну да Бог с ними, с гайдами, все равно потом прочтете и не один раз.
Какие паттерны бывают?
Как таковых, паттернов навигации не то чтобы вон как много. Давайте их перечислим:
- Drawer — он же гамбургер меню.
- Tab bar
- Modal view
- Wizard
- Breadcrumbs— редчайший представитель навигации в мобилках.
Но прежде чем рассмотреть каждый из них, давайте разберемся с понятием “Погружение”.
Иерархия
Пользователь путешествует по аппу при помощи погружения внутрь (вниз по иерархии). Также этот термин зовут Pushin, drill down. Суть название не меняет ибо в 99.9% случаев в мобильных аппах навигация погружная.
На практике погружение означает следующее: Вася ткнул палец в какую-то ячейку (строчку, кнопку, иконку, картинку), и вдруг он буквально проваливается внутрь этого объекта и оказывается на другой экран. Этот другой экран обычно хранит информацию о верхнем объекте в развернутом виде.
- Открыл, значит, Вася приложеньку и оказался на Главной странице. Далее в верхних табах выбрал он “Контрагентов”. Затем он тапнул на имя контрагента “ООО “Рога и копыта” и “провалился” на →
- → страницу с информацией о компании. Решил он посмотреть кто там работает, ткнул в “Сотрудники компании” и “провалился” на →
- → страницу со “Списоком контактов” этой компании. И тут Вася увидел нужного ему человека, Остапа, и ткнул кривым пальцем прямо в его имя. “Провалился” Василий на →
- → страницу “Профиль” Остапа! Ура, Василий оказался на третьем уровень вложенности приложеньки! 🚀
Схематично выглядит это примерно так:

А теперь обратите внимание: слева на страницах “ООО “Рога и копыта” и “Профиль” есть стрелочка-кнопочка “Назад”! Тапнув по ней наш герой “поднимается” на уровень выше.
И самое главное! Кто заметил, что на главной странице “Контрагенты” нет кнопочки-стрелочки “Назад”?
Молодец, дорогой читатель, ее там просто НЕ МОЖЕТ БЫТЬ потому что подняться на уровень выше мы не сможем ибо некуда уже.
Это было просто. Но не все это понимают, к сожалению. Кстати, уровней иерархии может быть бесконечно много, но все же стоит спроектировать систему так, чтобы пользователь не мог гулять на 20 уровней иерархии вглубь аппа. 5–6 уровней вложенности будет за глаза иначе пользователь в какой-то момент гарантированно потеряется и будет страдать.
Источник
How to Code a Bottom Navigation Bar for an Android App
The material design team at Google defines the functionality of bottom navigation bars in Android as follows:
Bottom navigation bars make it easy to explore and switch between top-level views in a single tap.
Tapping on a bottom navigation icon takes you directly to the associated view or refreshes the currently active view.
According to the official Material Design guidelines for the Android bottom navigation bar, it should be used when your app has:
- three to five top-level destinations
- destinations requiring direct access
An example of a popular app that implements the bottom navigation bar is the Google Discover Android app from Google, which uses it to navigate to different destinations of the app. You can see this yourself by downloading the Google Discover app from the Google Play Store (if you don’t already have it on your device). The following screenshot is from the Google Discover app displaying an Android bottom navigation bar.


In this post, you’ll learn how to display menu items inside a bottom navigation bar in Android. You will use AndroidX navigation, which is part of the Jetpack suite of libraries. Jetpack is a suite of libraries to help developers write code that works consistently across Android versions and devices. As a bonus, you’ll also learn how to use Android Studio templates to bootstrap your project with a bottom navigation bar quickly.
Getting Started
Open Android Studio, create a new project, and select a Blank Activity template, as shown below. Select the Kotlin language from the drop-down menu and click Finish. Wait for Android Studio to finish creating the project resources.


Add Project Dependencies
The first thing before we get started is to add the project dependencies. Open the app’s build.gradle file and add the following dependencies.
Create a Navigation Graph
A navigation graph is an XML resource file that contains all of your application destinations and actions. Right-click on the res directory and select New > Android Resource File. Provide a name and select Navigation as the resource type, and click OK. The navigation graph gets placed in the navigation folder, as shown in the structure below.


Add Destinations to the Navigation Graph
The navigation file will contain all the destinations of our application. To add a destination, click on the plus (+) sign at the top of the design tab or choose an existing destination if you have already created the fragments.


Our application will have three screens, namely:
- Home page
- Profile page
- Settings page
Therefore, we will add three destinations to the navigation XML file. To add a new destination, click the plus (+) sign and select the Create new destination option. On the next screen, select a blank fragment and provide the details as shown below.


Repeat the same steps and create two additional fragments for the Profile and Settings screens. The final navigation graph XML now looks like this.


Each fragment has its layout, which you can customize as you wish. Below is how each fragment looks after adding a text view at the center of each fragment.


Add a Nav Host Fragment and Bottom Navigation View
Next, define a host fragment in the main layout (main_activity.xml). A nav host fragment is an empty container where destinations are swapped in and out as a user navigates through your app. We will also add the BottomNavigationView in the main layout, as shown below.
Add Menu Items
The next step is to add menu items for the bottom navigation view. Right-click on the res directory, select New > Android Resource File and select menu, provide a name and click OK.


Open the menu XML file and add three menu items, as shown below.
Add Vector Assets to Menu Items
A vector asset is an XML file that defines a virtual image in its file. Vector assets guarantee sharp images which can be resized to any screen size without losing their quality. To add a vector asset, right-click on Drawable > New > Create Vector Asset and choose a home icon for the home menu as shown below.


Repeat the same steps and create vector assets for the rest of the menu items. Add the vector assets to the respective menu items as shown below.
The next step is to add id attributes to each menu item. The menu item’s id should be the same as the id of the navigation graph destinations in order to allow navigation throughout the fragments.
Add Menu Item to Bottom Navigation View
The last step is to add the menu to the bottom navigation view. Open main_activity.xml and add the app:menu=»@menu/bottom_nav» attribute to the BottomNvigationView .
About the Nav Controller
The NavController is an object that manages app navigation within a NavHost . It coordinates the swapping of fragments as users move through your app. In the main activity class, call setupWithNavController() from your main activity’s onCreate() method, as shown below.
Final App
The final app should now look like this:


Bonus: Using Android Studio Templates
Now that you’ve learnt about the APIs involved to create a bottom navigation bar from scratch in Android, I’ll show you a shortcut that will make it faster next time. You can simply use a template instead of coding a navigation bar from scratch.
Android Studio provides code templates that follow the Android design and development best practices. These existing code templates (available in Java and Kotlin) can help you quickly kick-start your project. One such template can be used to create a bottom navigation bar.
To use this handy feature for a new project, first fire up Android Studio.


Enter the application name and click the Next button. You can leave the defaults as they are in the Target Android Devices dialog.
Click the Next button again.
In the Add an Activity to Mobile dialog, select Bottom Navigation Activity. Click the Next button again after that.


In the last dialog, you can rename the Activity, or change its layout name or title if you want. Finally, click the Finish button to accept all configurations.
Android Studio has now helped us to create a project with a bottom navigation activity. Really cool! You’re strongly advised to explore the code generated.
In an existing Android Studio project, to use this template, simply go to File > New > Activity > Bottom Navigation Activity.


Top Android App Templates From CodeCanyon
Note that the templates that come included with Android Studio are good for simple layouts and making basic apps, but if you want to really kick-start your app, you might consider some of the app templates available from Envato Market.
They’re a huge time-saver for experienced developers, helping them to cut through the slog of creating an app from scratch and focus their talents instead on the unique and customised parts of creating a new app.
Let’s look at a few cool templates that will let you put your new Android bottom navigation bar coding skills to good use.
1. Android App Builder: WooCommerce, WebView, WordPress and Much More
Creating native Android apps couldn’t get simpler. The Android App builder template lets you turn your online presence into easy-to-use mobile experiences. Turn your WooCommerce shop, WordPress blog, or HTML5 website into an app, with no coding experience necessary. Use the included tutorial to learn how to complete your app project.
2. RocketWeb: Configurable Android WebView App Template
Looking to create a stylish Android WebView app? Save yourself some time and hassle by using the RocketWeb template. You won’t need any programming skills to get the most from this download. Just open it in Android Studio and start customising. Tweak the Kotlin bottom navigation bar for Android, the colours, and a whole lot more with RocketWeb.


3. Dating App for Web, iOS and Android
Connections are in the air with the Dating App template. It was built in Android Studio and Xcode with Swift, so you can have both an Android and an iOS app. On top of the modern bottom navigation bar for Android and iOS, Dating App also features:
- simple image gallery
- Facebook signup
- upgrades, AdMob banner, and in-app purchases
- messaging and friends system
4. AdForest: Classified Native Android App
Let users take the classified section on the go with AdForest. Users will be able to quickly sign up and verify their accounts with their mobile numbers. Once in, they can search for products, find nearby listings, message vendors for more information, and a whole lot more. It’s as easy to set up as it is to navigate.


5. MaterialX: Android Material Design UI Components
This Android app template is the perfect bundle for developers. It features all types of useful UI design elements to complete your projects. There are more than 315 unique layouts that come in more than 31 categories. Some of the included components are:
- Android bottom navigation bars
- buttons, chips, and cards
- dialog boxes
- grids and lists
- navigation drawer menus


Find More Android App Templates From Envato Tuts+
The above templates are great premium options in their own right. But they’re far from the only ones available to you! Our instructors have rounded up some of the best Android app templates from CodeCanyon that you should check out. No matter the niche, you can find a nice Android template that suits your needs from Envato Tuts+:


Conclusion
In this tutorial, you learned how to create a bottom navigation bar in Android from scratch, using Jetpack navigation. We also explored how to easily and quickly use the Android Studio templates to create a bottom navigation activity.
I highly recommend checking out the official material design guidelines for bottom navigation bars to learn more about how to properly design and use the bottom navigation bar in Android.
To learn more about coding for Android, check out some of our other courses and tutorials here on Envato Tuts+!
This post has been updated with contributions from Nathan Umoh and Esther Vaati. Nathan is a staff writer for Envato Tuts+. Esther is a software developer and writer for Envato Tuts+.
Источник


