- Как подключить Android планшет к Mac через USB.
- В пасти врага: запускаем Android на Mac
- Установка Android
- Установка магазина Play Market
- 6 Ways to Back Up Android Tablet to PC or Google [New Approaches]
- Part 1. How to Back Up Android Tablet in One Click via Coolmuster Android Backup Manager
- Part 2. How to Back Up Android Tablet to PC Selectively with Coolmuster Android Assistant
- Part 3. How to Back Up Android Tablet to Google Drive
- Part 4. How Do I Back Up Data on My Tablet via Local Backup App
- Part 5. How Do I Back Up My Android Tablet to Computer via USB Cable
- Part 6. How to Back Up Photos and Videos on My Tablet to Google Photos
- Conclusion
Как подключить Android планшет к Mac через USB.
Как подключить Android планшет или телефон к Windows компьютеру через USB знают все. Как получить доступ к файлам Android устройства через WiFi из любой (Android, iOS, Windows и пр.) операционной системы, мы рассказали в этой статье. Сегодня мы расскажем вам, как подключить Android планшет к Mac компьютеру с помощью USB кабеля.
Для того, чтобы иметь возможность на Macintosh видеть и копировать файлы c Android устройства нам, прежде всего, потребуется скачать и установить на Macintosh приложение Android File Transfer.
1. Скачать приложение можно отсюда:![]()
(для скачивания, в открывшемся окне нажмите кнопку «Download Now»)
2. Когда файл androidfiletransfer.dmg скачается полностью, дважды кликните по нему для запуска.
3. В окне Инсталлятора перетащите Android File Transfer в Приложения.
Использование Android File Transfer
1. Подключите ваше Android устройство к Mac.
2. Дважды кликните по Android File Transfer, чтобы запустить его в первый раз (в дальнейшем приложение будет автоматически запускаться при подключении Android устройства к Mac).
3. Откроется окно браузера файлов, в котором вы можете выбирать файлы и папки, создавать папки, копировать файлы (размером до 4 GB), удалять, переименовывать файлы и прочее.![]() Приложение Android File Transfer является официальным Android приложением, оно предназначено для подключения Android планшетов и телефонов к компьютерам Mac (с Macintosh).
Приложение Android File Transfer является официальным Android приложением, оно предназначено для подключения Android планшетов и телефонов к компьютерам Mac (с Macintosh).
Приложение работает в операционной системе Mac OS X 10.5 и выше, и поддерживает Android устройства с операционной системой Google Android 3.0 и выше.
Похожие материалы:
Источник
В пасти врага: запускаем Android на Mac
Первый и главный вопрос – для чего это нужно? Во-первых, вы получаете доступ ко всем мобильным приложениям, запуск которых теоретически невозможен на Mac. Во-вторых, возможность играть в любимые онлайн-игры, не отрываясь от компьютера. В-третьих, если вы разработчик – вы можете увидеть как работает ваше приложение на платформе Android. Наконец, если вы связаны с Mac не только просмотром видео и прослушиванием музыки… В общем, вы меня понимаете:)
Очень долго операционная система Android находилась под гнетом. В ее перспективность верили немногие, а основатель Apple Стив Джобс обещал развязать настоящую термоядерную войну против зеленого робота. Времена переменились и сегодня Android – самодостаточная ОС с внушительной долей рынка в 35%. Около 10 лет назад Google сделала одно из главных судьбоносных приобретений – покупку неизвестной Android Inc.
Главным преимуществом Android (да простят меня поклонники iOS) является возможность гибкой настройки и изменения «под себя». В сегодняшней статье мы вернемся к вопросу двухгодичной давности – установке Android на Mac.
Установка Android
Перед началом установки потребуется загрузить несколько программ и патчей.
1. Скачиваем и устанавливаем последнюю версию виртуальной машины VirtualBox.

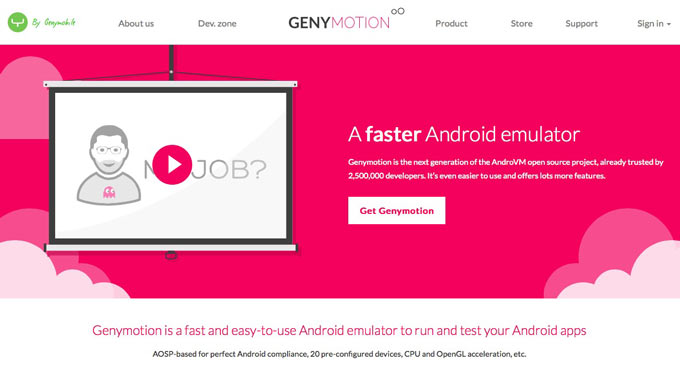
2. Переходим на сайт Genymotion. Выбираем Get Genymotion. Нас интересует версия Free. Нажимаем Download и проходим простую процедуру регистрации. После окончания регистрации начнется скачивание виртуальной среды Genymotion.
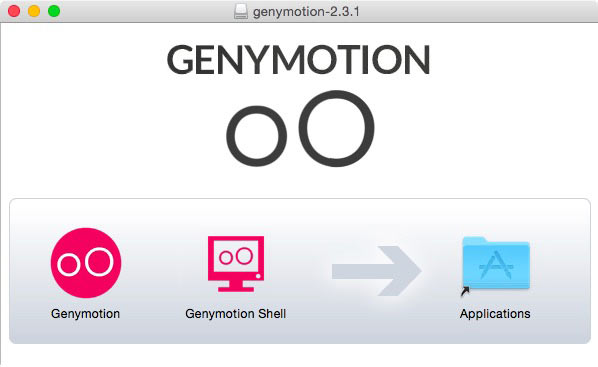
3. Устанавливаем Genymotion и Genymotion Shell в папку приложений.
4. Запускаем Genymotion. Теперь наша задача – установить виртуальную машину-эмулятор платформы Android.

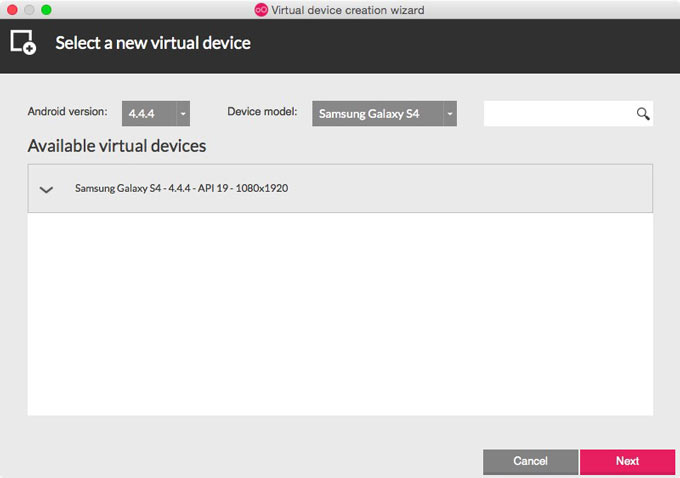
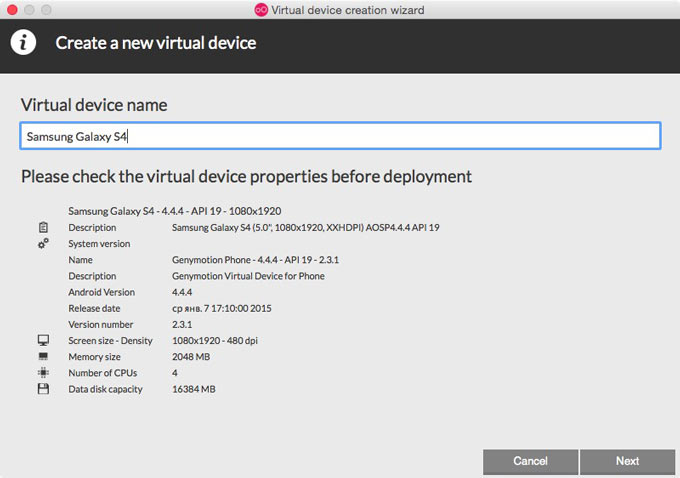
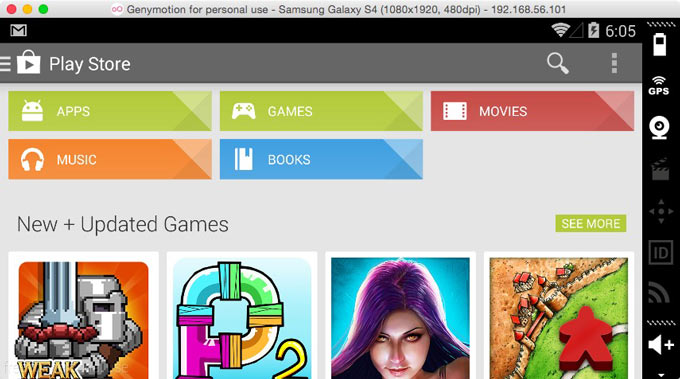
5. Нажимаем клавишу +Add. Из предложенного списка выбираем версию Android и устройство, на котором будет работать эмулятор. Несмотря на наличие версии Android 5.0 и устройств с внушительным разрешением, рекомендую остановится на более скромных настройках. Android 5.0 еще весьма нестабилен, а слишком большое разрешение экрана нагрузит процессор MacBook по-полной. Одним из лучших вариантов устройств является Samsung Galaxy S4 и операционная система Android 4.4.4 при разрешении 1080 на 1920 пикселей.
6. Выбрав платформу и устройство, переходим к следующему этапу. Genymotion автоматически загрузит требуемый образ системы из интернета.

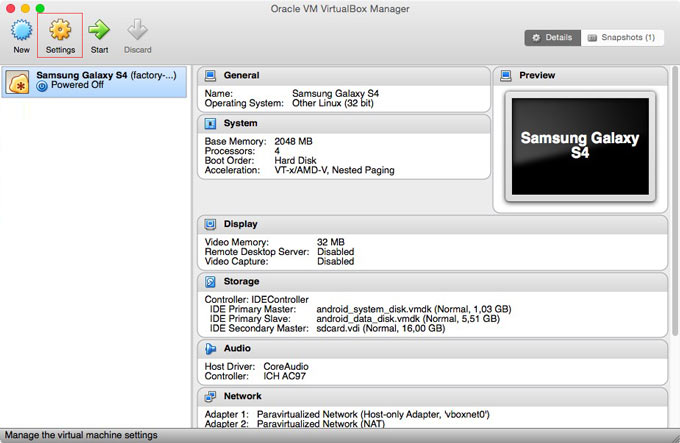
7. После окончания загрузки, Android тут же будет установлен. Не торопитесь запускать систему. Откроем VirtualBox и в списке виртуальных машин увидим только что установленный Samsung Galaxy S4. Выберите систему и нажмите на клавишу Settings (Настройки).
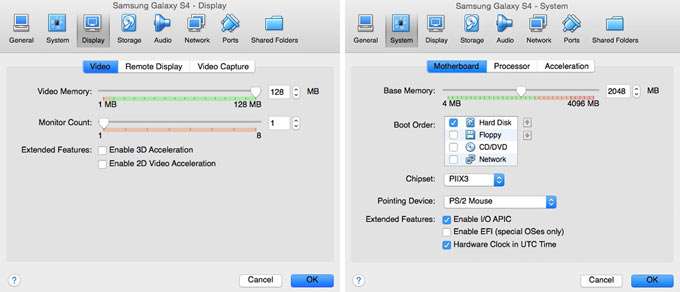
8. В появившемся окне на вкладке System установите выделяемый объем оперативной памяти, равный примерно 1/2 общей памяти вашего Mac. На вкладке Display перетяните ползунок на 128 МБ.
9. После настройки VirtualBox, приложение можно закрывать. Вновь переходим к Genymotion. Выберите установленную систему и нажмите на Start. Спустя несколько секунд перед вами покажется полноценная версия работающей операционной системы Android:
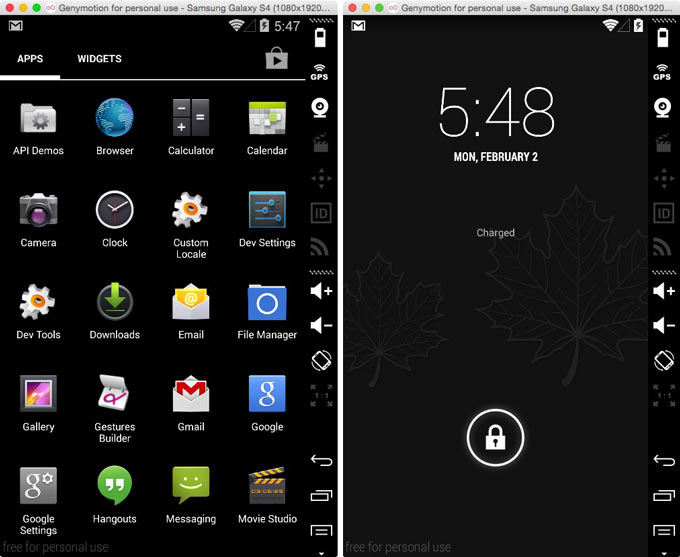
Увы, в представленных Genymotion сборках Android нет предустановленного магазина приложений Play Market. Нам потребуется установить его самостоятельно.
Установка магазина Play Market
1. Скачайте следующие файл ArmTransv1-GA4.4.4.zip.
Внимание! При загрузке используйте браузер Chrome или Firefox. Браузер Safari автоматически раскрывает архив, делая невозможной дальнейшую установку. Для использования Safari, перейдите в Настройки браузера – Вкладка Основные и уберите галочку «Открывать безопасные файлы после загрузки».
Файл ArmTransv1.zip подойдет для любой версии Android. Установочный архив магазина приложений Play Market, отличный от версии Android 4.4.4 можете скачать тут.
В скачанном архиве вы найдете две папки GenyMotionArmTrans1 и GoogleApps4.4.4. С помощью Genymotion запустите установленную виртуальную машину и разблокируйте экран на устройстве.
Содержащийся в папке GenyMotionArmTrans1 архив (!), перетяните на окно с запущенным Android. Согласитесь с всплывающими окнами, а после завершения установки выключите виртуальную машину.
![]()
2. Повторите копирование для архива GoogleApps4.4.4.zip.
3. После повторного включения виртуальной машины среди приложений появится установленный Play Market.
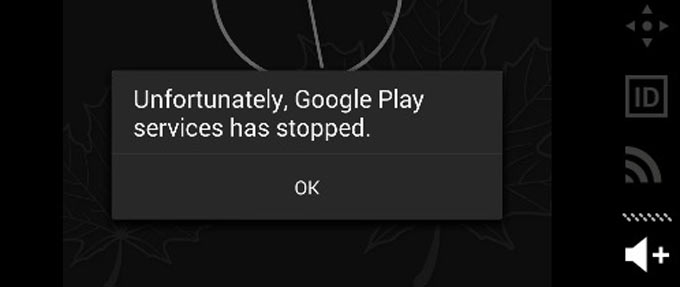
Для того, чтобы избавиться от периодически всплывающей ошибки перезагрузите виртуальную машину.
Запустите Google Play Market и пройдите привычную для пользователей Android процедуру авторизации. После этого можете смело скачивать требуемые приложения и игры. Настройки и добавление русского языка, а также полная навигация по виртуальной машине осуществляется как на стандартной версии Android.
Источник
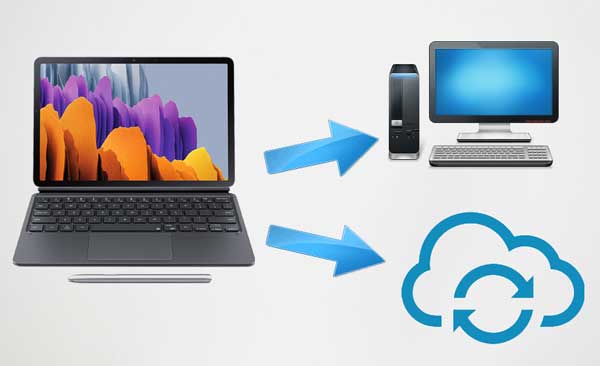
6 Ways to Back Up Android Tablet to PC or Google [New Approaches]

Have numerous data on your Android tablet and are afraid of losing them forever? Backup is the ultimate way to preserve those significant passwords, settings, photos, and other files from sudden loss. However, the divergent Android brands and operating systems also determine the slight difference in backup methods.
Therefore, how to back up your Android tablet? This guide will cover six practical solutions for Android tablet backup.
Part 1. How to Back Up Android Tablet in One Click via Coolmuster Android Backup Manager
To back up everything on your Android tablet in a one-click and classified way, Coolmuster Android Backup Manager is the optimal choice. With this tablet backup app, you can back up contacts, call logs, messages, media files, and other data to a computer and restore the backups to a new Android device.
What to back up with Coolmuster Android Backup Manager?
* Back up all Android data on a PC or Mac in one click by category, including contacts, apps, documents, messages, photos, call logs, videos, and music.
* Restore the computer backup to an Android device quickly.
* Support USB and Wi-Fi connection.
* Remain the original data quality and format without damages.
* Widely compatible with almost all Android tablets and phones, such as Samsung Galaxy Note 20 Ultra/Note 20/10+/10/9/8, Huawei MatePad Pro/MatePad 11/MatePad/MatePad T 10s/MatePad T10/MediaPad M6, etc.


How do I back up my Android tablet to my computer in one click?
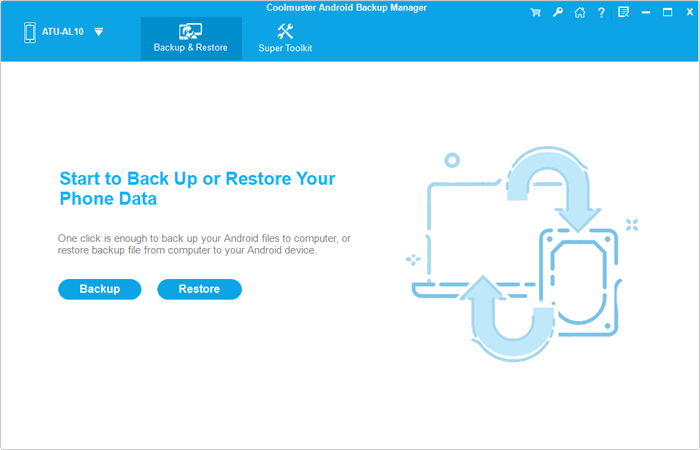
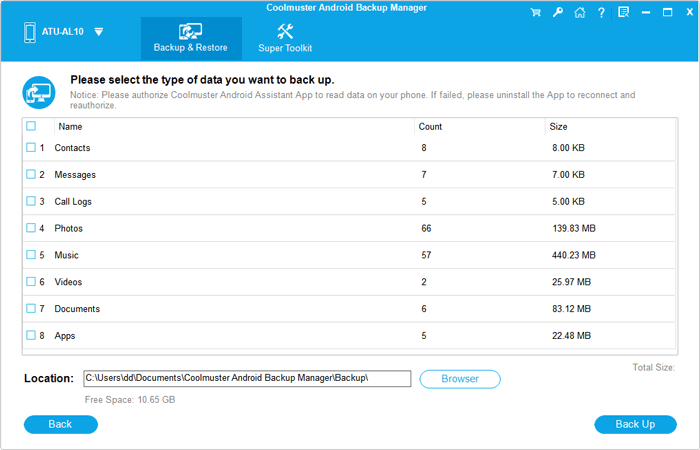
1. Install the program on your computer. Then launch it and enter the Android Backup & Restore module from the initial interface.
2. Connect your Android tablet to the computer with a USB cable and enable the USB debugging with the on-screen prompts. When connected, you will see the following interface.
3. Tap the Backup button > check the data types you wish to back up > click Browser to decide a storage location on your computer. Finally, hit the Back Up button to start backing the Android tablet to your PC or Mac.
Further reading:
Part 2. How to Back Up Android Tablet to PC Selectively with Coolmuster Android Assistant
Suppose that you wish to preview and selectively back up Android tablet data to a computer. In that case, Coolmuster Android Assistant stands out among all tablet backup apps with the privilege for you to view all tablet content and choose the wanted items to back up. Besides, you can also manage the Android files and restore the backups with this software.
The highlights of Coolmuster Android Assistant:
* Back up Android tablet to PC and restore backups to Android in one click.
* Selectively transfer photos, videos, contacts, SMS, music, call history, etc., between the PC and your Android device.
* Manage Android data on the computer easily: Send and reply to text messages, install and uninstall apps, export Android contacts to Outlook, import Outlook contacts to Android, etc.
* Support Android 4.0 and up, including Samsung, Lenovo, Xiaomi, HTC, Huawei, and many other Android tablet brands.
How do I back up my Samsung tablet selectively?
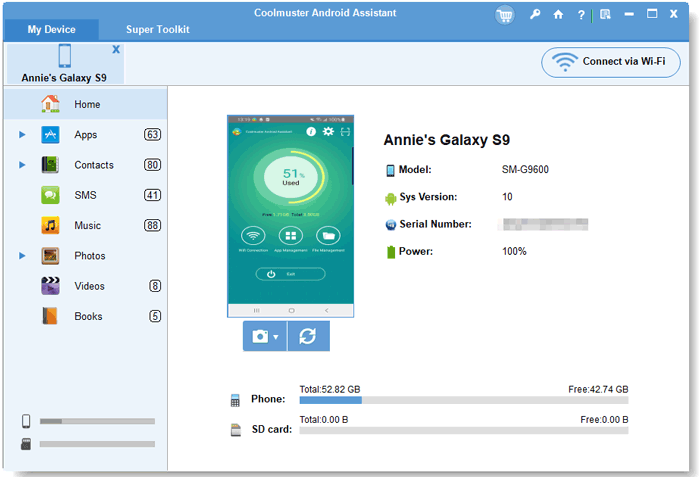
1. Install and open Coolmuster Android Assistant on your computer first. Next, access the Android Assistant module from the toolbox.
2. Plug your Samsung tablet into the computer. Once detected, you will see all Samsung content displayed on the left panel of the interface and the device info on the right window.
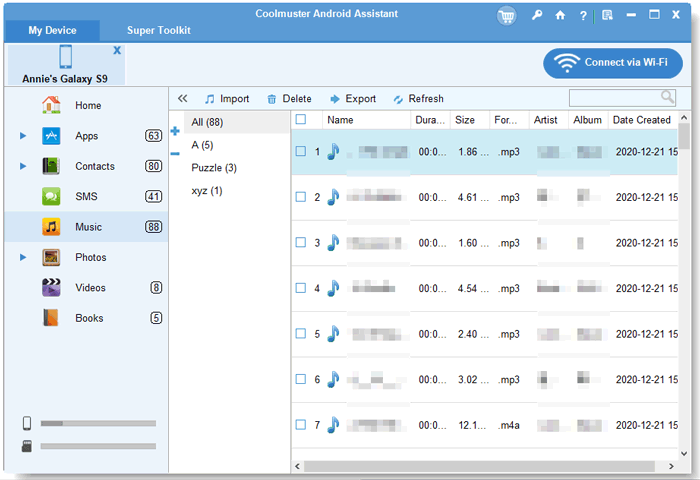
3. Pick one data type on the left side, preview and tick off the items you want to back up, and tap the Export button on the top menu to back up your tablet to the computer.
You may like:
Part 3. How to Back Up Android Tablet to Google Drive
Every Android tablet comes with Google service. Suppose you have activated Google service on your Android device. In that case, you can back up an Android tablet with your Google account to Google Drive. And here is how:
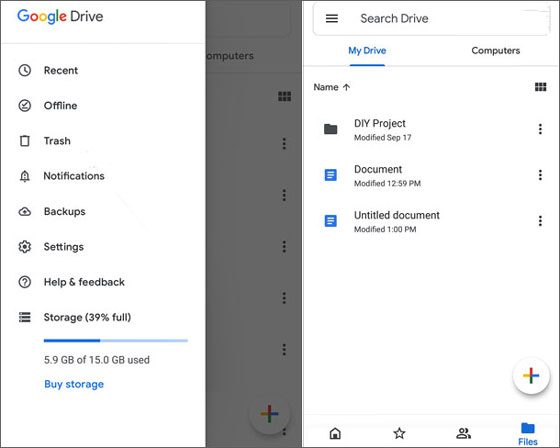
1. Open the Google Drive app on your Android tablet. If there isn’t one, install it from Google Play Store.
2. After signing in with your Gmail account, click the Add button (or the + icon) at the lower-right corner and select the Upload option.
3. Choose the files you wish to back up and hit the Upload button.
Part 4. How Do I Back Up Data on My Tablet via Local Backup App
Also, most modern Android tablets provide the local backup option for users to store Android data in the Cloud. If your device supports the local backup feature, you can start backing up your Android tablet with the following steps.
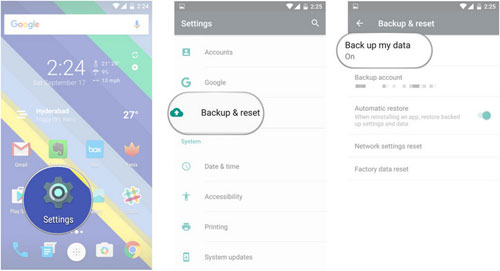
1. Go to the device’s Settings and scroll down to select the Backup & reset tab. On some devices, it may be Backup.
2. Toggle on the Back up my data option and then Auto back up. If your device doesn’t have this option, you can manually back up your Android tablet with these steps: Tap Back up now > choose the wanted backup files > hit Backup.
Part 5. How Do I Back Up My Android Tablet to Computer via USB Cable
Suppose you only need to back up DRM-free media files and documents. In that case, you can connect your Android device to a computer and manually copy them to your PC.
To back up Android tablet to PC via a USB cable:
1. Connect your Android device to the computer via a USB cable.
2. Pull down the drop-down screen on your Android device, tap the Notification bar, and choose the MTP (Transfer files) option in the Use USB for window.
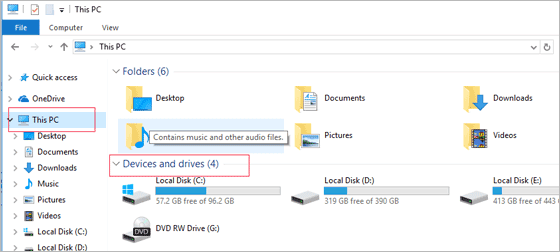
3. When the computer recognizes your device, go to This PC, and select your Android tablet under the Devices and drives section > Internal Storage. Then copy and paste the selected files to the computer.
Part 6. How to Back Up Photos and Videos on My Tablet to Google Photos
Google Photos is a cloud storage service that helps you store the device’s photos and videos with high-definition quality. Assume that you want to back up photos and videos on the tablet. You can follow the instructions below.
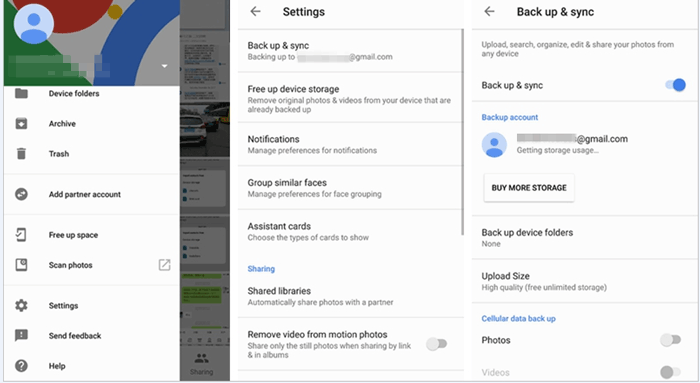
1. Run Google Photos on your Android tablet and sign in with your Google account.
2. Click the three-line icon at the top-left corner and choose Settings > Backup & sync > turn on the Backup & sync button. It will automatically back up the tablet photos and videos to Google cloud.
Conclusion
As demonstrated, all six methods can back up Android tablets. If you only need to back up part of the device data, you can choose the way based on your needs. However, if you hope to back up everything to a computer in one click or selectively, I recommend you try Coolmuster Android Backup Manager or Coolmuster Android Assistant.
Compared with other methods, they are easy, fast, and secure. In contrast, the other four ways will only back up less data on your tablet. Thus, don’t hesitate! Back up Android tablet with the best way now!
Источник


