- Using Kotlin in Android Tests
- Alex Ilyenko
- Why Kotlin?
- Android Studio Setup
- Project Setup
- Adding Kotlin Gradle Plugin
- Adding Kotlin dependency
- Changing source folder (optional)
- Test Example
- Converting Java to Kotlin
- Staying up-to-date with Kotlin version
- Using Kotlin For Tests in Android
- Using Kotlin For Tests in Android
- Project setup
- Example
- Conclusion
- Android Testing with Kotlin.
- Introduction
- Kotlin Programming Language
- Why Kotlin in Tests?
- Getting our hands dirty
- JUnit Tests
- Robolectric (Integration?) Tests
- Espresso Acceptance (UI?) Tests
- Running our test battery
- Wrapping up
- Code Repository
- Further Reading
- Resources and References
- About
- Related Posts
- Architecting Android. Reloaded.
- Smooth your Android migration to Kotlin.
- Random Posts
Using Kotlin in Android Tests
Setting up your environment for Instrumentation test development
![]()
Alex Ilyenko
Software Engineer in Test
Why Kotlin?
If you follow the latest trends in Android world or development in general, you’ve likely already heard about Kotlin. It’s a programming language, developed by JetBrains company, creator of Android Studio. Among its numerous advantages one can find proper functions, less of boilerplate code, no-overhead null-safety, smart casts and stream-like arrays. If you’re wondering what other pros and cons Kotlin has in comparison to Java, check out official documentation.
Besides that during the last Google I/O conference Android team officially announced support for Kotlin in Android projects. Obviously from now on language development will become more robust and largely scaled, allowing more and more Kotlin initiatives to appear in the nearest future. Meanwhile we, as Test Developers, can adopt this modern and powerful language in our day-to-day projects. Sounds sweet, right? Let’s start then!
Note: if you haven’t chosen the tool for your Android UI tests yet, I recommend to check out my post on UiAutomator and its essentials.
Android Studio Setup
Android Studio 3.0 ships with Kotlin bundled in, which means you will no longer need to worry about compatibility issues and installation of any extras. But since most of us is still using the second version of the popular IDE, we have go through some additional steps. No worries, it wont’ take long.
First of all, we’ll need to install Kotlin plugin. This can be done by navigating to Preferences > Plugins > Browse Repositories and searching for Kotlin keyword there. After that just click on the Install button like it’s shown in the figure
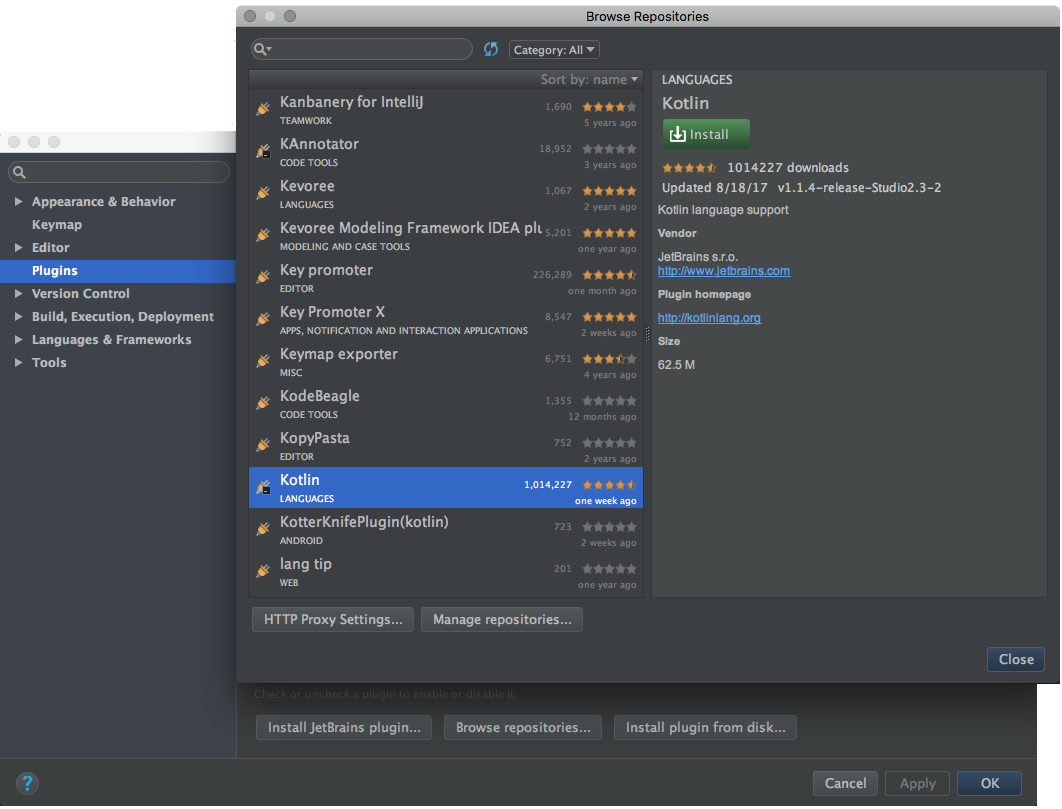 Select Kotlin and click on the Install button
After this has been done you’ll have to restart your Android Studio in order for plugin to work.
Note: in case you’re using IntelliJ Idea, you won’t need to worry about any installations, since IDE ships with Kotlin support enabled by default.
Project Setup
Next thing to do would be applying Kotlin plugin to both of your build.gralde files.
Adding Kotlin Gradle Plugin
To set up Gradle plugin we’ll need to modify buildScript , adding Kotlin plugin dependency, repository and version to it. After those manipulations our top-level build.gradle should look like this:
Adding Kotlin dependency
To be able to use Kotlin in our Instrumentation tests we’ll have to apply Kotlin plugin and add its dependency as androidTestCompile value to our app build.gradle file. Here is what should be set there:
Changing source folder (optional)
Default Android project structure is well-known to all mobile developers. Let’s take a look at it.
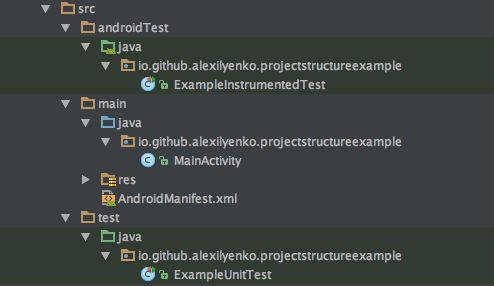 Default Android project structure
But since we’re going to use Kotlin instead of Java in our Instrumentation tests, won’t it have more sense to have source folder name to reflect that? This can be done by adding following line to your app build.grale :
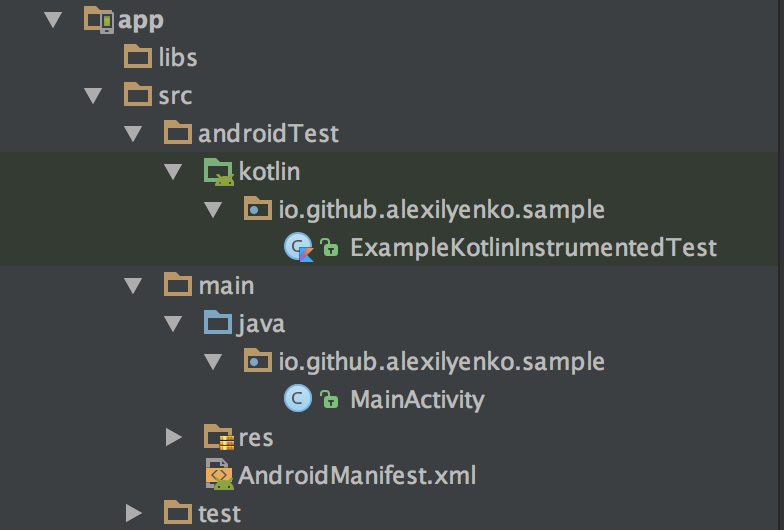
Finally our project overall structure will look like this
Test Example
Let’s create our first Kotlin test. Kotlin files have .kt extension and can be easily created in your project folder. Following simple example would be enough to ensure that everything set up correctly and Kotlin can be successfully leveraged in the further development.
Converting Java to Kotlin
If you happen to have some tests already written in Java and you want to migrate them to Kotlin, I have good news! Kotlin Plugin also includes tool for easy converting sources from one language to another. It can be found by navigating to Code > Convert Java File to Kotlin File menu.
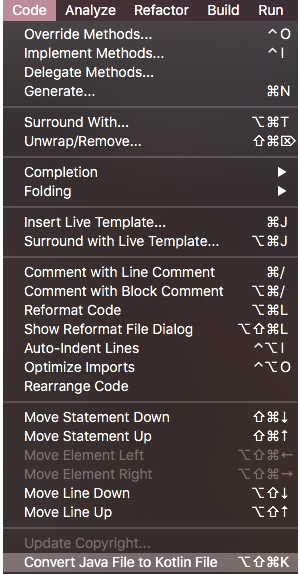 Converting Java to Kotlin
There could be some warnings after converting. But overall the tool does surprisingly great job and you may rely on it in your development.
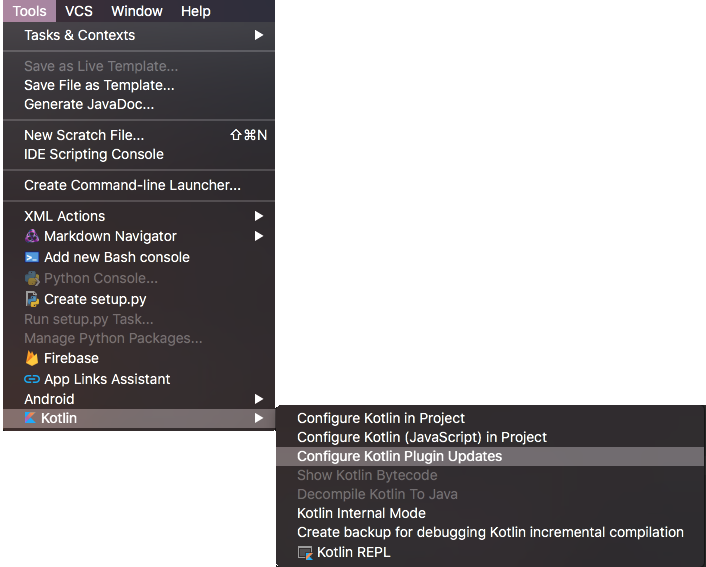
Staying up-to-date with Kotlin version
In spite of all its advantages Kotlin is still young language, that’s being constantly developed and changed. JetBrains team suggests everyone to stay up-to-date with new features and fixes. Android Studio plugin turns that into a no-brainer with simple channel switching under the Tools > Kotlin > Configure Kotlin Plugin Updates menu. You could choose one of the three channels available — Stable , Preview or Early Access .
 Configuring Kotlin Updates in Android Studio
At this point you should be able to start developing your Instrumentation tests in Kotlin. I’m sure you’ll love this powerful language and it’ll become your favorite tool for solving everyday problems. Happy coding!
Источник
Using Kotlin For Tests in Android
Using Kotlin For Tests in Android
Many developers are quite optimistic about Kotlin future for Android. It sounds so sweet: less verbose, more type-safety, zero-overhead null-safety, Java interop. But not everyone is ready to take a risk and start writing production code using new programming language. Indeed, it could be not mature enough and will add dependencies which increase method count of APK for more than 6.5K. But what if we’ll use Kotlin only for tests?
Project setup
So we can setup Kotlin plugin and related libraries to be only in testCompile dependencies scope. Here is what we should set in build.gradle:
Another improtant detail in build.gradle is setting proper source sets to make Kotlin tests folders visible to compiler and IDE. Also we should make sure that Kotlin won’t be used in the production code:
Example
Let’s create a tiny Android app which will convert temperature from Celsius to Kelvin and Fahrenheit. Here I create ThermoConverter.java utility class which is quite easy to make unittestable.
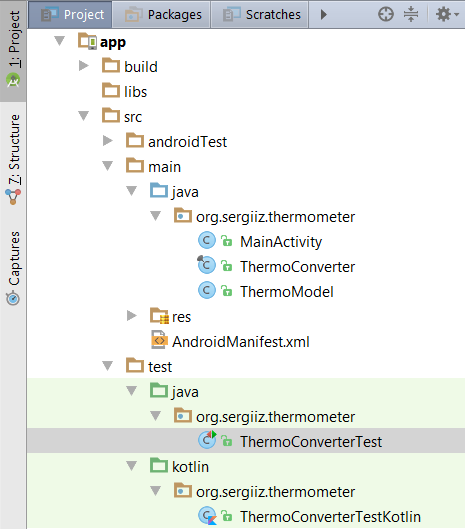
Then we can add simple unit tests for the same functionality in java and kotlin source folders written in Java and Kotlin respectively. Android Studio will mark both test/java and test/kotlin folders with the proper color to indicate them as test packages.
Kotlin example unit test code could be as simple as the follows — it will be enough for our demo purposes.
And here is the overall project structure:
What do we have now? With testCompile dependencies scope we’ve defined that dependencies won’t be included to the main APK file but will be used only for compilation tests sources. We are adding Kotlin source set to the default one used by java code so we can use the same package structure and can have the same package visibility.
Here is how tests result looks in Android Studio for both Java and Kotlin tests executed together:

You can note that on this screenshot the execution time of tests with the same logic in Java and Kotlin is different —the second one seems to be slower. I did several experiments and it seems that this slowdown happens only at the first time JVM loads required by Kotlin dependencies, so it won’t bring any significant performance lag at least for the small amount of code.
Conclusion
Now you know the one more way how to try Kotlin in your Android project without production dependencies overhead and with lower maintenance risks. You can find full project example on GitHub.
Thanks to Antonio Gutierrez for the original idea about possible Kotlin use-case for testing.
Update. Gradle configuration improved to make sure that Kotlin won’t be used in the production code. Thanks to Dale King.
Источник
Android Testing with Kotlin.

In this post we will walk through how we can take advantage of the Kotlin Programming Language by introducing it in our codebase without affecting production code, in this case testing. This should be a good starting point towards a full migration.
Introduction
This is not a new topic actually, especially since Kotlin is gaining terrain in the world of programming languages in general, and especially on Android. Also, I’m not going to get into details on what Kotlin offers since there is people out there doing a great job (especial mention to my friend Antonio Leiva).
Kotlin Programming Language
Before starting I will just mention and give a quick summary of the main benefits of this “young?” and modern programming language:
- Kotlin is concise. The less code you write, the fewer mistakes you make.
- Kotlin is expressive. You can express whatever you want in a shorter way (Java is verbose).
- Kotlin is pragmatic. Straight to the point without a lot of wiring.
- Kotlin is android-friendly. As we can see in this article ;).
- Kotlin is type-safe. Remember the billion dollars mistake?.
- Kotlin is functional. Functions and properties are first-class citizens.
- Kotlin is friendly. Interoperability between Kotlin and Java works almost perfect.
Why Kotlin in Tests?
We have an android codebase in our old and lovely(?) Java, and we would love to introduce this awesome language gradually, so why not starting with tests?
This way, we can give it a try without affecting our main application under any circumstances, and at the same time we get the excitement of a modern and already mature language, plus some training for us and our team in preparation for the big change.
Sounds good right? Let’s write some code then…
Getting our hands dirty
Basically, the idea is to showcase how we can test our android applications using Kotlin, so as a first step we need to setup and prepare our environment by adding Kotlin dependencies in our build.gradle file:
Now we need to set the dedicated directories for tests written in Kotlin, this is done in our sourceSets section:
And as a third step we want to make sure, we do not allow accidentally (for now ;)) any Kotlin code in production by also adding this defensive lines:
The entire file can be seen in the sample project on Github. And now we are able to write tests in the same way as we would do in Java.
JUnit Tests
What I only need here is JUnit, Mockito-kotlin and Kluent (a library with really cool assertion semantics).
Let’s see a simple test case for a class called GetUserDetails.java which is a UseCase (from my Android Architecture approach):
Something to pay attention is that when we need to construct our subject under test (in the setup method), we must declare it “lateinit“, otherwise the compiler will complain, since properties must be initialized or be abstract.
Here is another test example for a Serializer.java class in the project, where you can see the assertions mentioned above:
Robolectric (Integration?) Tests
I created a test parent class (used for each test case) in order to encapsulate everything Robolectic related, thus, my tests do not depend directly on this framework.
The idea is that any functionality or helper method is wrapped here (this is a lesson learned from the past where I polluted all my code with Robolectric classes, so the process of migrating to a non-backward compatible newer version was very painful).
And here is an example of an integration test that interacts with the android framework through our AndroidTest.kt class:
Espresso Acceptance (UI?) Tests
My choice here is Espresso since it is backed by Google and from my perspective the most stable integration test framework nowadays.
The same as with Robolectric, I decided to create a little framework on top of it, let’s see how it works.
All my tests depend on an AcceptanceTest.kt class:
Things to keep an eye on here:
- A test rule is needed within Espresso (from the documentation): This rule provides functional testing of a single activity. The activity under test will be launched before each test annotated with @Test and before methods annotated with @Before . It will be terminated after the test is completed and methods annotated with @After are finished. During the duration of the test you will be able to manipulate your Activity directly.
- We must annotate our “testRule” field with @JvmField: this is necessary to turn this Kotlin property into a JVM field that JUnit can interpret.
- Matchers class: A wrapper around Espresso checks.
- Events class: Another wrapper encapsulating Espresso events.
Last but not least, an example of the main activity of the project, which displays a view and also opens another activity when clicking on a button.
The code is pretty simple but if you need a better understanding, you can browse the sample code on Github.
Running our test battery
There are neither problems nor especial configuration to run our tests from Android Studio/Intellij. I also added a couple of Gradle tasks in my root build.gradle file:
Just type this from the command line:
Wrapping up
If at some point you were considering Kotlin, there are no longer excuses to use it in production. Tests are a good starting point to introduce it, plus this will help you to have a taste of what this language has to offer.
Of course as an extra ball you get all the benefits mentioned in this article and a nice training that will prepare you and your team for the big change.
Code Repository
Further Reading
Resources and References

About
Fernando works as Head of Engineering at @Tignum. Part of his past includes: Director of Mobile at @Wire, Core Engineering at @SoundCloud, Developer Relationships at @IBM and different roles in the start-up scene.
He describes himself as a curious learner, FOSS Advocate and a nerdy geek. Hobbies and Passions? Leadership, Software Engineering, Quantum Computing and Science. Other things? Amateur (frustrated) cyclist.
Related Posts

Architecting Android. Reloaded.
Android Architecture has been evolving over the years and we need to adapt to the current times. Here we will dive into Functional Programming, OOP, Error Handling, Modularization and Patterns for the Android Platform, and everything written in Kotlin. Continue reading Architecting Android. Reloaded.

Smooth your Android migration to Kotlin.
Migrating from one technology is challenging and many times necessary and highly desirable. Here I will share how we can smoothly migrate our existing android java codebase to kotlin. These principles and ideas also apply to any other technology. Continue reading Smooth your Android migration to Kotlin.
Random Posts
© 2021 Fernando Cejas. All rights reserved.
Источник


