- Trusted Web Activities for Android developers
- The current state of web content in native apps
- So what’s new with TWA and why is it useful?
- Show me the code
- Get the TWA Support Library
- Launch the Trusted Web Activity from an existing Activity
- Remove the URL bar
- How does it look?
- What’s next?
- Quick Start Guide
- # Install and configure Bubblewrap
- # Setting up the Environment
- # Initialize and build project
- # Graphical User Interface (GUI) alternatives for Bubblewrap
- # A note on signing keys
- # Setting up your asset link file
- # Checking your browser
- # Next Steps
Trusted Web Activities for Android developers

Feb 19, 2019 · 6 min read
Google recently released Chrome on Android version 72, enabling Trusted Web Activities (TWAs). It was mainly reported as a way for web developers to publish PWAs to the Play Store (by Xda and this excellent article from Maximiliano Firtman).
What about native App developers? I think it’s an interesting new option to extend your native app with Web content.
Unfortunately, Google didn’t document this approach yet. You can find Chromium Blog and Web Developers site posts but nothing on Android Developers Blog.
In this post, I wi l l share how I managed to extend a native app with a PWA resulting in a (mostly) seamless user experience.
The current state of web content in native apps
Before digging into the technical details, a quick recap of the two options we have as Android developers to expose web content into our apps:
- Webview: This is the most widely used component and offers a lot of flexibility. You can embed it into native views, inject cookies and bind Javascript code to Android code. On the downside, performances vary depending on Android OS version (TLDR: from Android 5.0 Lollipop it’s mostly okay) and it is not sharing state with your browser.
- Chrome Custom Tabs(CCT): introduced with Chrome 45, CCT offers the performances and shared cookie jar of Chrome into your app. Instead of jumping from your app to the browser, the user will see a new activity with a custom toolbar. But this customization is limited and the user will always see the URL of the content. Finally, your app doesn’t have access to any of the web state (content, cookie, storage..) displayed in a CCT.
So what’s new with TWA and why is it useful?
Where does the Trust Web Activity position itself compared to Webview and Chrome Custom Tabs? Clearly, it is an extension of the later. The main difference is TWAs run full screen, no browser UI visible. No more URL bar like with the CCT.
This can be helpful for a variety of scenarios where CCT are currently used: displaying Terms and Service, Privacy Policy and other static contents that needs to be updated across all versions of your app and available offline.
This last point is important: remember TWAs were introduced as a way to publish PWAs to the Play Store. ServiceWorkers will work as expected and the app will be able to display web content while offline.
Chromium Blog suggests another interesting use case:
An example of this is an e-commerce site where product pages are implemented in native views but the checkout flow takes place on the website.
This is a common scenario as checkout flows can be very complex, change frequently and keeping feature parity between your website and native apps can be challenge.
For this scenario to be really frictionless, you need to ensure your browser and app states are in sync: remember your native app doesn’t have any access to the web state of the content displayed in the TWA. It means you should probably use your web app for login in the first place (following good practices promoted by AppAuth SDK) or you will need to display a form to authenticate again in the TWA. To help your users login more smoothly, Chrome form autofill will be available in the TWA (one of the features not available in the WebView).
Even for a simple feature extending the capabilities of your native app, it may be a challenge to pass parameters to the web content and receiving results from the TWA. The only option so far is to use query parameters and intent URIs respectively. I’ll show a basic example of using App Links later in this article.
Show me the code
So far, Google only documented the LauncherActivity method to wrap an existing PWA and display it on app launch. It doesn’t involve much code and all the configuration is done using metadata in the manifest.
We’ll follow the same steps as in the Using Trusted Web Activities post but I’ll assume you already have a native app and you want to extend it with a TWA. Let’s get into the code.
Get the TWA Support Library
As the support library for TWA is still in development, we’ll need Jitpack for now. Add the following to you project level build.gradle:
Add the TWA Support library to your project by pointing to the latest commit, at the time of writing (2/19/2019) I got the following:
Launch the Trusted Web Activity from an existing Activity
Google documented the TrustedWebUtils class and its only public method launchAsTrustedWebActivity .
It takes 3 parameters:
- The context (your current activity),
- A CustomTabsIntent instance (see below)
- The URI of the PWA you want to launch as a Trusted Web Activity.
About the second parameter, the documentation states:
The given CustomTabsIntent should have a valid CustomTabsSession associated with it during construction.
It means the following simple initialization that you could use for CustomTabs will not work (I tried), it will launch as a classic CustomTab with the URL bar:
The LauncherActivity source provides a good reference implementation for the code to retrieve the required CustomTabSession instance.
First, we need to provide an implementation for the CustomTabsServiceConnection :
Next, in your activity onCreate method let’s bind this custom tabs service:
Finally, we’ll just launch the Trusted Web Activity in an onClick listener:
Check the complete activity source code below or in the sample project on Github:
This is a very minimal implementation, in a production scenario you would want to check if Chrome is installed, updated and provide fallbacks scenarios if any of the criteria is not met.
Remove the URL bar
When running the project at this stage, the URL Bar from Custom Tabs will still show on the top of the screen. To remove it you need to associate your app and the PWA using Digital Asset Links.
You can follow the instruction from the Google Web Developers post to achieve this: https://developers.google.com/web/updates/2019/02/using-twa#remove_the_url_bar
Note: if you don’t want to use the keytool CLI, the App Link Assistant Tool in Android Studio can generate the Digital Asset Links file for you. https://developer.android.com/studio/write/app-link-indexing#associatesite
For testing purpose, I created a simple PWA with a functional ServiceWorker and published it using Firebase Hosting (thanks MPyK from Onsen UI & Monaca Team for the sample code https://medium.com/the-web-tub/build-a-pwa-using-workbox-2eda1ef51d88).
You can see the Digital Asset Links file with the fingerprint of my release certificate: https://twa-demo.firebaseapp.com/.well-known/assetlinks.json
How does it look?
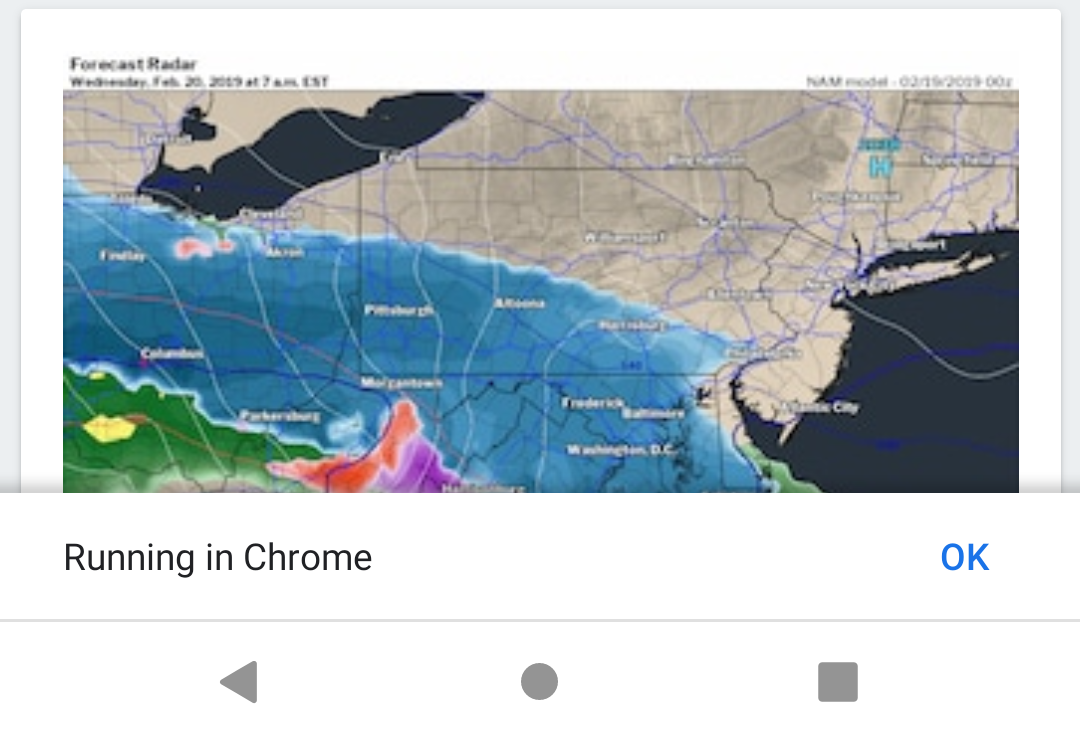
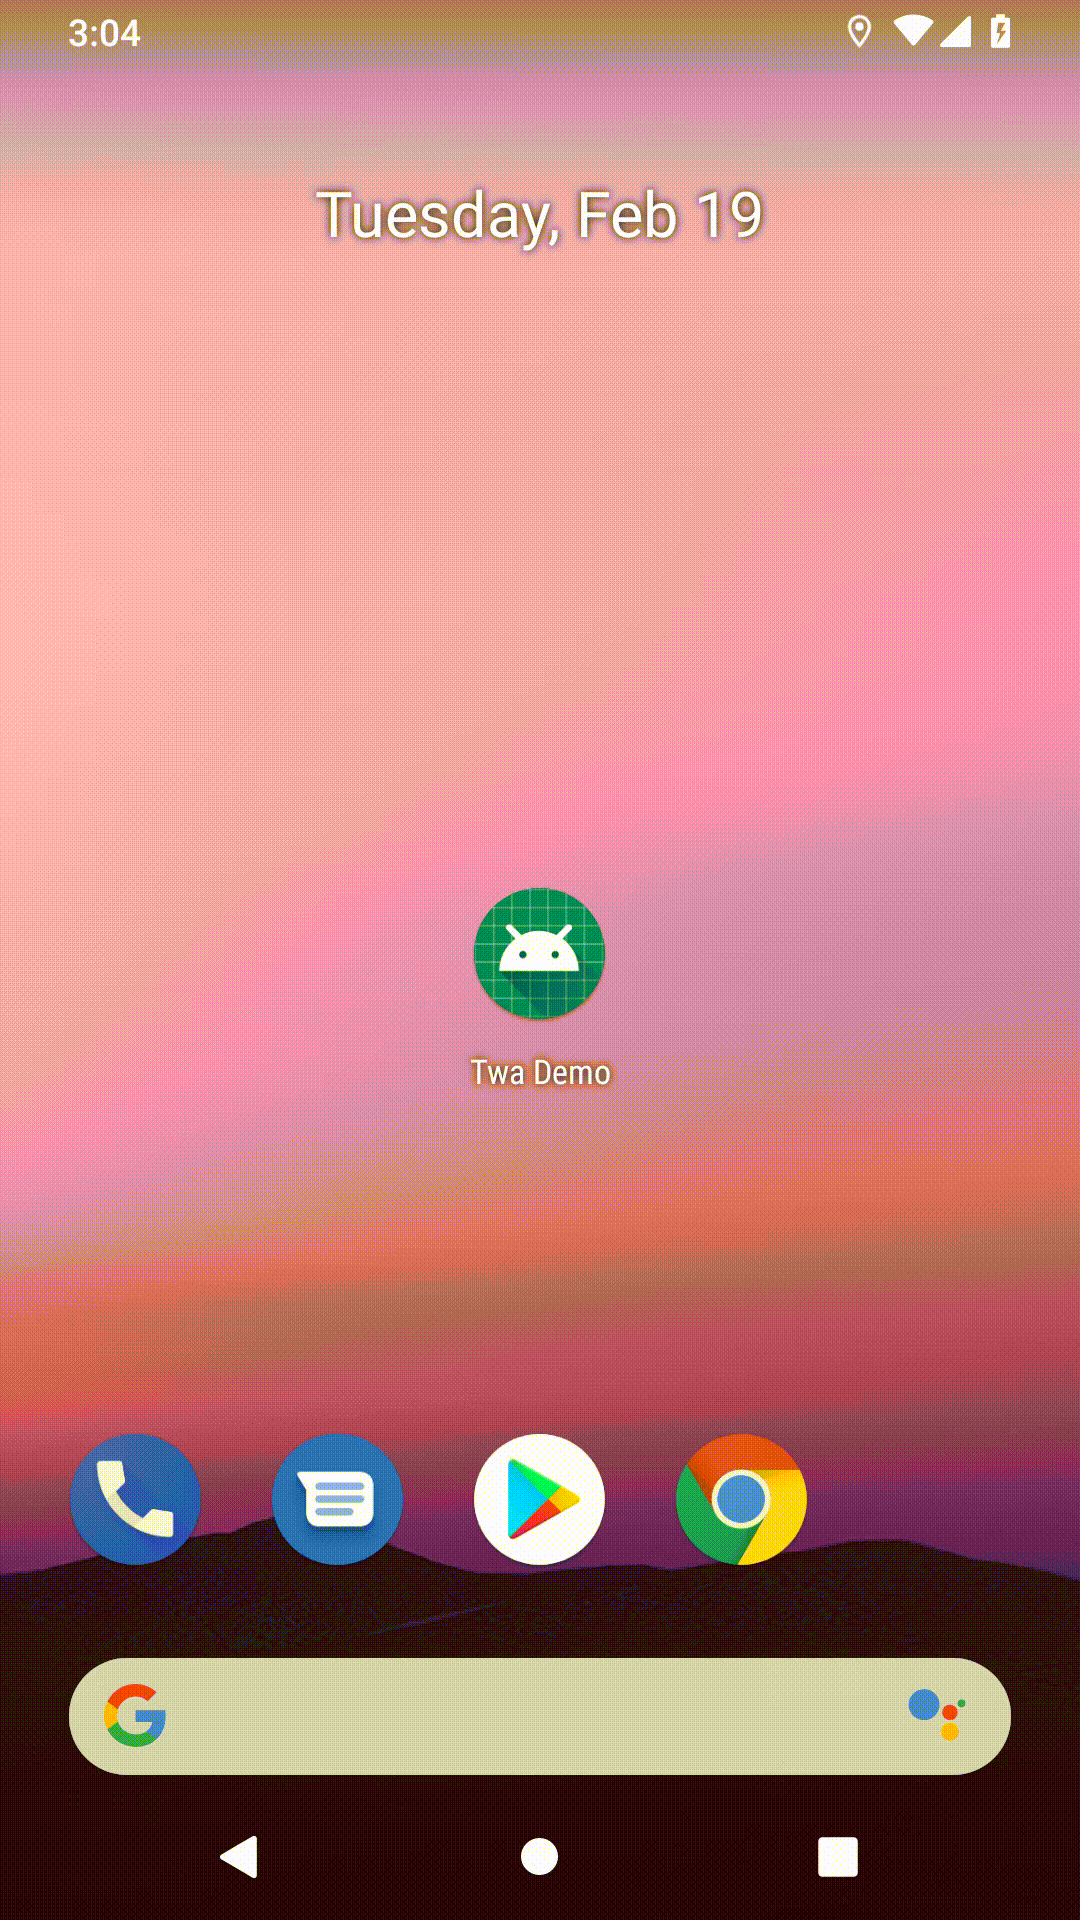
You can see the result below. The native part displays a red status bar whereas the PWA is white with a blue back button.
The only way the user will notice it’s running in Chrome is the one-time pop-up message “Running in chrome”.

To navigate back from the Trusted Web Activity to the native activity, the user can hit the android back button on the bottom-left. Another option is to use an intent URI and more specifically an App Links. This is what I implemented in the top-left back button. You could use this mechanism to pass parameters back to the native activity.
Another potentially confusing user experience is when you uninstall the app:

This gives you the option to clear Chrome’s cache. If you select “Keep Data”, the website cache and permissions (including push permissions) will remain available if your user launches the PWA from the browser.
What’s next?
It’s an interesting addition to the Custom Chrome Tabs feature and I’m curious to see what developers will do with it. Even if Google documents the App/PWA relationship as one-to-one, in practice nothing stops you from linking your app with many PWA domains. You could imagine an app leveraging this to add small features or implement some kind of mini-app store within an app.
Another point I didn’t touch yet is the TrustedWebActivityService. According to the source code:
The TrustedWebActivityService lives in a client app and serves requests from a Trusted Web Activity provider (such as Google Chrome). At present it only serves requests to display notifications.
That could allow deeper integration between your native code and the TWA. I’ll make sure to update this post if I manage to get the TrustedWebActivityService to work in my sample.
Источник
Quick Start Guide
Published on Wednesday, August 28, 2019 • Updated on Tuesday, December 8, 2020

I’m a Software Engineer working on the Web Platform at Google London.
Trusted Web Activities can be a bit tricky to set up, especially if all you want to do is display your website. This guide will take you through creating a basic project that uses Trusted Web Activities, covering all the gotchas.
By the end of this guide, you will:
- Have used Bubblewrap to build an application that uses a Trusted Web Activity and passes verification.
- Understand when your signing keys are used.
- Be able to determine the signature your Android Application is being built with.
- Know how to create a basic Digital Asset Links file.
To follow this guide you’ll need:
- Node.js 10 or above installed on the development computer.
- An Android phone or emulator connected and set up for development (Enable USB debugging if you’re using a physical phone).
- A browser that supports Trusted Web Activity on your development phone. Chrome 72 or later will work. Support in other browsers is on its way.
- A website you’d like to view in the Trusted Web Activity.
A Trusted Web Activity lets your Android App launch a full screen Browser Tab without any browser UI. This capability is restricted to websites that you own, and you prove this by setting up Digital Asset Links. We’ll talk more about them later.
When you launch a Trusted Web Activity, the browser will check that the Digital Asset Links check out, this is called verification. If verification fails, the browser will fall back to displaying your website as a Custom Tab.
# Install and configure Bubblewrap
Bubblewrap is a set of libraries and a command line tool (CLI) for Node.js that helps developers generate, build and run Progressive Web Apps inside Android applications, using Trusted Web Activity.
The CLI can be installed with the following command:
# Setting up the Environment
When running Bubblewrap for the first time, it will offer to automatically download and install the required external dependencies. We recommend allowing the tool do do this, as it guarantees that the dependencies are configured correctly. Check the Bubblewrap documentation to use an existing Java Development Kit (JDK) or Android command line tools installation.
# Initialize and build project
Initializing an Android project that wraps a PWA is done by running the init command:
Bubblewrap will read the Web Manifest, ask developers to confirm values to be used in the Android project, and generate the project using those values. Once the project has been generated, generate an APK by running:
The build step will output a file called app-release-signed.apk . This file can be installed on a development device for testing or uploaded to the Play Store for release.
Bubblewrap provides a command to install and test the application on a local device. With the development device connected to the computer run:
Alternatively, the adb tool can be used.
Note: the adb command-line tool is located inside the Android command-line tools in android_sdk/platform-tools/ .
The application should now be available on the device launcher. When opening the application you’ll notice that your website is launched as a Custom Tab, not a Trusted Web Activity, this is because we haven’t set up our Digital Asset Links validation yet, but first.
# Graphical User Interface (GUI) alternatives for Bubblewrap
PWA Builder provides a GUI interface that uses the Bubblewrap library to power the generation of Trusted Web Activity projects. Find more instructions on how to use PWA Builder to create an Android App that opens your PWA in this blogpost.
# A note on signing keys
Digital Asset Links take into account the key that an APK has been signed with and a common cause for verification failing is to use the wrong signature. (Remember, failing verification means you’ll launch your website as a Custom Tab with browser UI at the top of the page.) When Bubblewrap builds the application, an APK will be created with a key setup during the init step. However, when you publish your app in Google Play, another key may be created for you, depending on how you choose to handle signing keys. Learn more on signing keys and how they relate to Bubblewrap and Google Play.
# Setting up your asset link file
Digital Asset Links consist essentially of a file on your website that points to your app and some metadata in your app that points to your website.
After creating your assetlinks.json file, upload it to your website at .well-known/assetlinks.json relative to the root) so that your app can be verified properly by the browser. Check out a deep dive on Digital Asset Links for more information on how it relates to your signing key.
# Checking your browser
A Trusted Web Activity will try to adhere to the user’s default choice of browser. If the user’s default browser supports Trusted Web Activities, it will be launched. Failing that, if any installed browser supports Trusted Web Activities, it will be chosen. Finally, the default behavior is to fall back to a Custom Tabs mode.
This means that if you’re debugging something to do with Trusted Web Activities, you should make sure you’re using the browser you think that you are. You can use the following command to check which browser is being used:
# Next Steps
Hopefully, if you’ve followed this guide, you’ll have a working Trusted Web Activity and have enough knowledge to debug what’s going on when verification fails. If not, have a look at more Android concepts for web developers or file a GitHub issue against these docs.
For your next steps, I’d recommend you start off by creating an icon for your app. With that done, you can consider deploying your app to the Play Store.
Last updated: Tuesday, December 8, 2020 Improve article
Источник


