- What Is the Android SDK and How to Start Using It
- What Is the Android SDK?
- How to Install the Android SDK
- What Is the SDK Manager?
- What Are the Components of the Android SDK?
- Android SDK Tools
- SDK Build Tools
- SDK Platform-Tools
- SDK Platform
- Google APIs
- Android Emulator
- Conclusion
- Premium Android App Templates From CodeCanyon
- App Center Distribute – Android In-app updates
- Add in-app updates to your app
- 1. Add the App Center Distribute module
- 2. Start App Center Distribute
- Prepare your Google Play build
- Use private distribution group
- Disable Automatic Check for Update
- Manually Check for Update
- Customize or localize the in-app update dialog
- 1. Customize or localize text
- 2. Customize the update dialog
- Enable or disable App Center Distribute at runtime
- Check if App Center Distribute is enabled
- Enable in-app updates for debug builds
- How do in-app updates work?
- How do I test in-app updates?
What Is the Android SDK and How to Start Using It
Android SDK is a software development kit developed by Google for the Android platform. The Android SDK allows you to create Android apps, and you don’t need to be an expert to use it. In this tutorial, I’ll explain what the Android SDK is and how to get started with it.
Android SDK comes bundled with Android Studio, Google’s official integrated development environment (IDE) for the Android operating system. You can learn about Android Studio and the Android App Development Kit in another of my articles.


In this post, we’ll look at:
- What is the Android SDK?
- How to install the Android SDK
- What is the Android SDK Manager?
- What are the components of the Android SDK?
What Is the Android SDK?


The Android SDK is a collection of software development tools and libraries required to develop Android applications. Every time Google releases a new version of Android or an update, a corresponding SDK is also released which developers must download and install. It is worth noting that you can also download and use the Android SDK independently of Android Studio, but typically you’ll be working through Android Studio for any Android development.
The Android SDK comprises all the tools necessary to code programs from scratch and even test them. These tools provide a smooth flow of the development process from developing and debugging, through to packaging.
The Android SDK is compatible with Windows, macOS, and Linux, so you can develop on any of those platforms.
How to Install the Android SDK
The Android SDK is optimized for Android Studio, and hence to effectively reap its benefits, you will need to install Android Studio. Having the Android SDK managed from within Android Studio is easier since support for languages like Java, Kotlin, and C++ is handled automatically. Not only that, but updates to the Android SDK are handled automatically by Android Studio.
To install the Android SDK from within Android Studio, first start Android Studio.
- From the Android Studio start page, select Configure > SDK Manager.


- If you already have Android Studio open, the SDK Manager icon is found on the top right corner, as shown below.


Install the required Android SDK platform packages and developer tools. A good start is to install:
- Android SDK Build-Tools
- Android Emulator
- Android SDK Platform-Tools
- Android SDK Tools
- Documentation for Android SDK


Click Apply, and Android Studio will install the selected tools and packages.
What Is the SDK Manager?
The Android SDK is composed of modular packages that you can download, install, and update separately using the Android SDK Manager. The SDK Manager helps to update new SDK releases and updates whenever a new Android platform is released. The SDK manager can be found in the top-right corner of the Android Studio screen, as shown below.
All that is required to follow the instructions provided, and the updates will be immediately downloaded to your environment.
What Are the Components of the Android SDK?
The Android SDK consists of an emulator, development tools, sample projects with source code, and the required libraries to build Android applications. Let’s look at the key components one by one.
Android SDK Tools
Android SDK Tools is a component of the Android SDK. It includes a complete set of development and debugging tools for Android, and is included with Android Studio. The SDK Tools also consist of testing tools and other utilities required to develop an app.
SDK Build Tools
Build tools are required for building components for building the actual binaries for your Android app. Always ensure your build tools component is up to date by downloading the latest version in the Android SDK Manager.
SDK Platform-Tools
Android Platform-Tools are used to support the features for the current Android platform and are necessary for Android app development. These tools interface with the Android platform on the device you use for testing. They include:
- Android Debug Bridge (adb): This is a handy command-line tool that lets you communicate with a device. The adb command allows you to perform device actions, such as installing and debugging apps. It also provides access to a Unix shell that you can use to run a variety of commands on a device.
- fastboot: This lets you flash a device with a new system image.
- systrace: This tool helps collect and inspect timing information across all processes running on your device at the system level. It’s crucial for debugging app performance.
SDK Platform-Tools are backward compatible, so you need only one version of the SDK Platform-Tools.
SDK Platform
For each version of Android, there’s one SDK Platform available. These are numbered according to the Android version (e.g. Android 7 Nougat) and an API version (e.g. API Level 24). Before you build an Android app, you must specify an SDK Platform as your build target. Newer SDK Platform versions have more features for developers, but older devices may not be compatible with the newer platform versions.
Google APIs
Google provides a number of exclusive Google APIs to make developing your app easier. They also offer a system image for the emulator so you can test your app using the Google APIs.
Android Emulator
The Android Emulator is a QEMU-based device-emulation tool that simulates Android devices on your computer, allowing developers to test applications on different devices and Android API levels, without needing to have physical devices for each. The emulator comes with configurations for various Android phones, tablets, Wear OS, and Android TV devices.
The Android emulator provides almost all of the capabilities of a real Android device. You can perform the following activities:
- simulate phone calls and text messages
- simulate different network speeds
- specify the location of the device
- simulate hardware sensors such as rotation
- access Google Play Store and much more
Often it is faster and easier to test your app with an emulator instead of using a physical device.
Conclusion
In this post, we looked at some of the basics of the Android SDK. The Android SDK is the only way to develop for Android devices. Fortunately, it contains extensive documentation, tutorials, samples, best practice guidance, and an array of tools for many different development tasks.
Premium Android App Templates From CodeCanyon
Android Studio comes with some default templates to help start an app, but these are very basic and provide minimal, generic functionality.
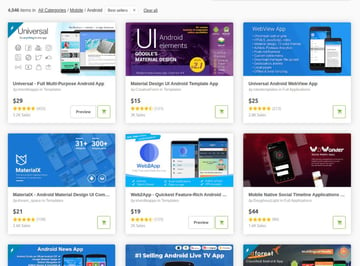
CodeCanyon is an online marketplace that has hundreds of additional templates, which are way more feature-rich and domain-specific too. You can save days, even months, of effort by using one of them.


An Android app template is a great way to jump-start your app project or to learn some new skills by exploring the source code of a professionally made app.
Take a look at some of our roundups of the best Android app templates:
Источник
App Center Distribute – Android In-app updates
App Center Distribute will let your users install a new version of the app when you distribute it via App Center. With a new version of the app available, the SDK will present an update dialog to the users to either download or postpone the new version. Once they choose to update, the SDK will start to update your application.
Google Play considers the in-app update code as malicious behavior even if it isn’t used at runtime. Use a variant of the Distribute SDK as directed in this section or completely remove the Distribute SDK that contains in-app update code before submitting your app to Google Play. Failure to do so can lead to noncompliance and removal of the app from Google Play.
If you’re running automated UI tests, enabled in-app updates will block your automated UI tests as they’ll try to authenticate against the App Center backend. We recommend to not enable App Center Distribute for your UI tests.
Add in-app updates to your app
Follow the Get started section if you haven’t set up and started the SDK in your application, yet.
1. Add the App Center Distribute module
The App Center SDK is designed with a modular approach – a developer only needs to integrate the modules of the services that they’re interested in.
Open the project’s app level build.gradle file ( app/build.gradle ) and add the following lines after apply plugin .
If the version of your Android Gradle plugin is lower than 3.0.0, you need to replace the implementation with compile.
Save your build.gradle file and make sure to trigger a Gradle sync in Android Studio.
DownloadManager is used to download updates. The App Center SDK enforces TLS 1.2 to improve security.
2. Start App Center Distribute
To use App Center, opt in to the module(s) that you want to use. By default no modules are started and you must explicitly call each of them when starting the SDK.
Add the Distribute class to your AppCenter.start() method to start App Center Distribute service.
Make sure you’ve replaced
Prepare your Google Play build
Google Play considers the in-app update code as malicious behavior even if it isn’t used at runtime. Use a variant of the Distribute SDK as directed in this section or completely remove the Distribute SDK that contains in-app update code before submitting your app to Google Play. Failure to do so can lead to noncompliance and removal of the app from Google Play. To make it easier, we provide the version of App Center Distribute SDK with stubbed APIs, so the only change for you is a dependency swap.
Open the project’s app level build.gradle file ( app/build.gradle ).
Configure build variants by adding product flavors:
Modify dependencies block to consume different dependencies based on the product flavor:
Save your build.gradle file and make sure to trigger a Gradle sync in Android Studio.
You can change the build variant in Build > Select Build Variant drop down menu or Build Variants in the tool window bar.
You can read more about configuring build variants in the Android documentation.
Use private distribution group
By default, Distribute uses a public distribution group. If you want to use a private distribution group, you’ll need to explicitly set it via setUpdateTrack API.
The default value is UpdateTrack.PUBLIC . This method can only be called before the AppCenter.start method call. Changes to the update track aren’t persisted when the application process restarts, and so if the method isn’t always called before the AppCenter.start call, it will be public, by default.
When the app is in foreground (after Distribute.setUpdateTrack(UpdateTrack.PRIVATE); and AppCenter.start ), a browser window opens to authenticate the user. All the subsequent update checks will get the latest release on the private track.
If a user is on the private track, it means that after the successful authentication, they’ll get the latest release from any private distribution groups they’re a member of. If a user is on the public track, it means that they’ll get the latest release from any public distribution group.
Disable Automatic Check for Update
By default, the SDK automatically checks for new releases:
- When the application starts.
- When the application goes into foreground after going to background.
- When enabling the Distribute module if previously disabled.
If you want to check for new releases manually, you can disable automatic check for update. To do this, call the following method before the SDK start:
This method must be called before the AppCenter.start method call.
Then you can use the checkForUpdate API, which is described in the following section.
Manually Check for Update
This sends a request to App Center and display an update dialog in case there’s a new release available.
A manual check for update call works even when automatic updates are enabled. A manual check for update is ignored if another check is already being done. The manual check for update won’t be processed if the user has postponed updates (unless the latest version is a mandatory update).
Customize or localize the in-app update dialog
1. Customize or localize text
You can easily provide your own resource strings if you want to change or localize the text displayed in the update dialog. Look at the string files in this resource file. Use the same string name/key and specify the localized value to be reflected in the dialog in your own app resource files.
2. Customize the update dialog
You can customize the default update dialog’s appearance by implementing the DistributeListener interface. You need to register the listener before calling AppCenter.start as shown in the following example:
Here is an example of the listener implementation that replaces the SDK dialog with a custom one:
As shown in the example, you must either call Distribute.notifyUpdateAction(UpdateAction.UPDATE); or Distribute.notifyUpdateAction(UpdateAction.POSTPONE); if your listener returns true .
If you don’t call notifyUpdateAction , the callback will repeat on every activity change.
The listener can be called again with the same release if the activity changes before the user action is notified to the SDK.
This behavior is needed to cover the following scenarios:
- Your application is sent to the background (like pressing HOME) then resumed in a different activity.
- Your activity is covered by another one without leaving the application (like clicking on some notifications).
- Other similar scenarios.
In that case, the activity hosting the dialog might be replaced without user interaction. So the SDK calls the listener again so that you can restore the custom dialog.
In cases when the SDK checks for updates and doesn’t find any updates available newer than the one currently used, a onNoReleaseAvailable from DistributeListener interface callback is invoked. This allows you to execute custom code in such scenarios. The example above shows how to display toast message when no updates are found.
Enable or disable App Center Distribute at runtime
You can enable and disable App Center Distribute at runtime. If you disable it, the SDK won’t provide any in-app update functionality but you can still use Distribute service in App Center portal.
To enable App Center Distribute again, use the same API but pass true as a parameter.
The state is persisted in the device’s storage across application launches.
This API is asynchronous, you can read more about that in our App Center Asynchronous APIs guide.
This method must only be used after Distribute has been started.
Check if App Center Distribute is enabled
You can also check if App Center Distribute is enabled or not:
This API is asynchronous, you can read more about that in our App Center Asynchronous APIs guide.
This method must only be used after Distribute has been started, it will always return false before start.
Enable in-app updates for debug builds
By default App Center enables in-app updates only for release builds.
To enable in-app updates in debug builds, call the following method before AppCenter.start :
This method only affects debug builds, and has no impact on release builds. Debug build means that the android:debuggable flag is set to true (which is usually automatically set by gradle predefined debug build variants). Otherwise, this is a release build.
How do in-app updates work?
For in-app updates to work, an app build should be downloaded from the link. It won’t work if installed from an IDE or manually.
The in-app updates feature works as follows:
This feature only works with RELEASE builds (by default) that are distributed using App Center Distribute service.
Once you integrate the SDK, build release version of your app and upload to App Center, users in that distribution group will be notified for the new release via an email.
When each user opens the link in their email, the application will be installed on their device. It’s important that they use the email link to install — we don’t support side-loading. When an application is downloaded from the link, the SDK saves important information from cookies to check for updates later, otherwise the SDK doesn’t have that key information.
If the application sets the track to private, a browser will open to authenticate the user and enable in-app updates. The browser won’t open again as long as the authentication information remains valid even when switching back to the public track and back to private again later. If the browser authentication is successful, the user is redirected back to the application automatically. If the track is public (which is the default), the next step happens directly.
A new release of the app shows the in-app update dialog asking users to update your application if it’s:
- a higher value of versionCode or
- an equal value of versionCode but a different value of versionName .
If you upload the same APK a second time, the dialog will NOT appear as the versions are identical.
How do I test in-app updates?
You need to upload release builds (that use the Distribute module of the App Center SDK) to the App Center Portal to test in-app updates, increasing version numbers every time.
- Create your app in the App Center Portal if you haven’t already.
- Create a new distribution group and name it, so you can recognize that it’s meant for testing the in-app update feature.
- Add yourself (or all people who you want to include on your test of the in-app update feature). Use a new or throw-away email address for this, that wasn’t used for that app on App Center. This ensures that your experience is close to the experience of your real testers.
- Create a new build of your app that includes App Center Distribute and contains the setup logic as described above. If the group is private, don’t forget to set the private in-app update track before start using the setUpdateTrack API.
- Click on the Distribute new release button in the portal and upload your build of the app.
- Once the upload has finished, click Next and select the Distribution group that you created as the Destination of that app distribution.
- Review the Distribution and distribute the build to your in-app testing group.
- People in that group will receive an invite to be testers of the app. Once they accept the invite, they can download the app from the App Center Portal from their mobile device. Once they have in-app updates installed, you’re ready to test in-app updates.
- Bump the versionCode of your app.
- Build the release version of your app and upload a new build of your app like you did in the previous step and distribute this to the Distribution Group you created earlier. Members of the Distribution Group will be prompted for a new version the next time the app starts.
Have a look at the information on how to utilize App Center Distribute for more detailed information about Distribution Groups etc. While it’s possible to use App Center Distribute to distribute a new version of your app without adding any code, adding App Center Distribute to your app’s code will result in a more seamless experience for your testers and users as they get the in-app update experience.
Источник


