- Use 1Password to fill and save in apps and browsers on your Android device
- Set up filling
- Important
- Fill, save, and create passwords
- Fill a login
- Save a login
- Create a new login
- Get help
- Learn more
- Next steps
- Still need help?
- Разработка менеджера паролей под Android
- Подготовка
- О приложении
- Разработка
- [Android][Guide]Hacking And Bypassing Android Password/Pattern/Face/PI
- Breadcrumb
- piraterex
Use 1Password to fill and save in apps and browsers on your Android device
Set up filling
Before you can set up filling, you’ll need to set up 1Password on your device. Then follow these steps:
- Open and unlock 1Password.
- Tap Settings > Autofill.
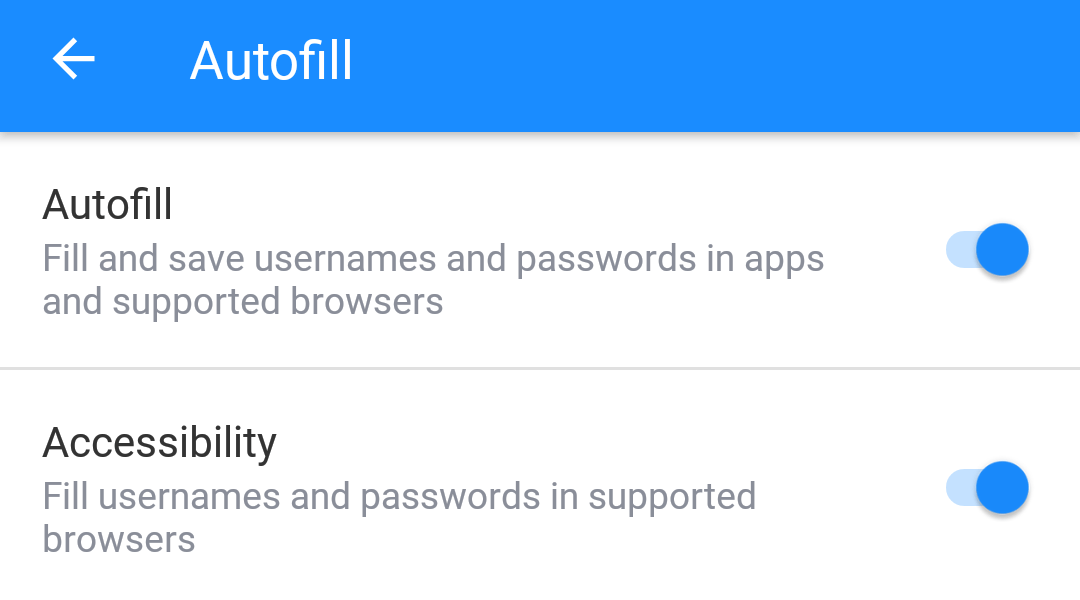
You can create new Login items in apps and browsers on any Android device. Depending on your version of Android, you’ll also see different filling options available:
| Version | Feature | Action |
|---|---|---|
| Android 8 or later | Autofill | Fill and save in apps and supported browsers* |
| Accessibility | Fill in browsers | |
| Android 5-7 | Accessibility | Fill in apps and browsers |
* Supported browsers include DuckDuckGo, Firefox, and Firefox Focus.
To turn on Autofill, tap it. In the list of Autofill services, tap 1Password, then tap OK.
To turn on Accessibility, tap it. In the list of accessibility services, tap Use 1Password and turn it on. Tap Allow, then tap to go back.
Important
If your Android device doesn’t support Direct Boot, turning on any accessibility service will turn off device encryption. To turn on device encryption again, learn how to encrypt your Android device.В
Fill, save, and create passwords
To fill, save, or create a password, visit a website or open an app you want to sign in to, then follow these steps.
Fill a login
With Autofill and Accessibility, you can fill in apps and browsers. To fill a login:
- Tap the username field.
If you see “Autofill with 1Password”, tap it.
Every Android app has a unique application ID. If a Login item doesn’t include an application ID that matches the app where you’re trying to fill it, 1Password will warn you. To create a Login item that includes the application ID, save it using Autofill.
Save a login
With Autofill, you can also save passwords in apps and supported browsers. To save a login:
- Enter your username and password, then sign in.
- Tap Save when you see “Save username and password to 1Password?”
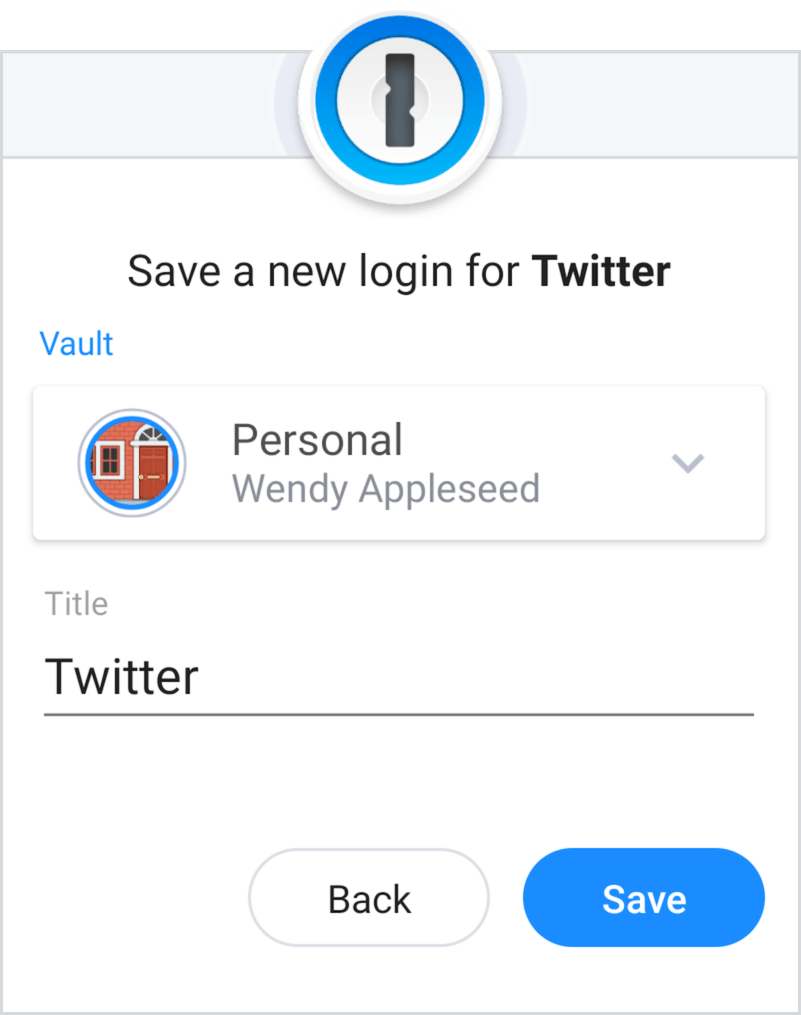
- Enter a title for your Login item, choose the vault where you want to save it, then tap Save.
Create a new login
You can also sign up for new accounts in apps and browsers on any Android device. To create a new login:
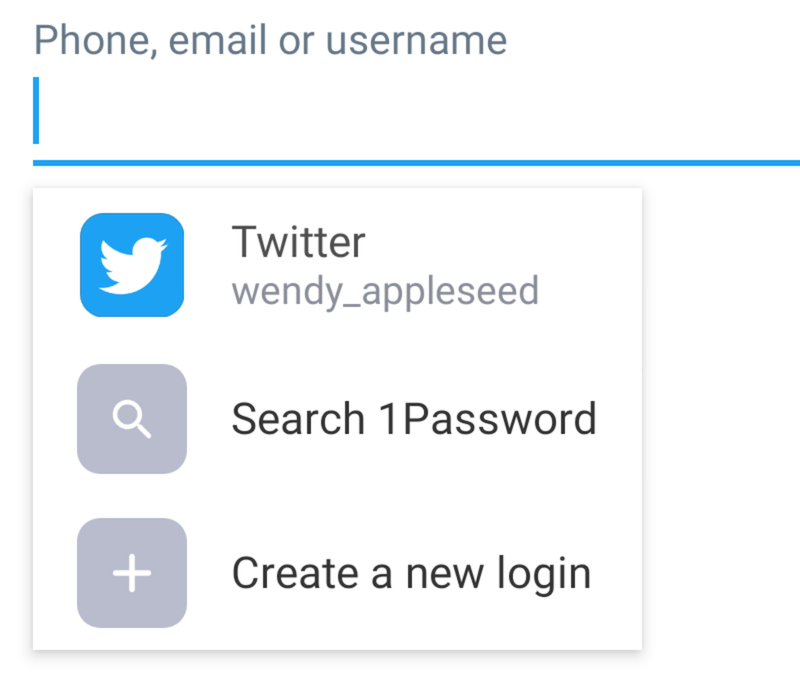
- Tap the username or password field, then tap “Autofill with 1Password”.
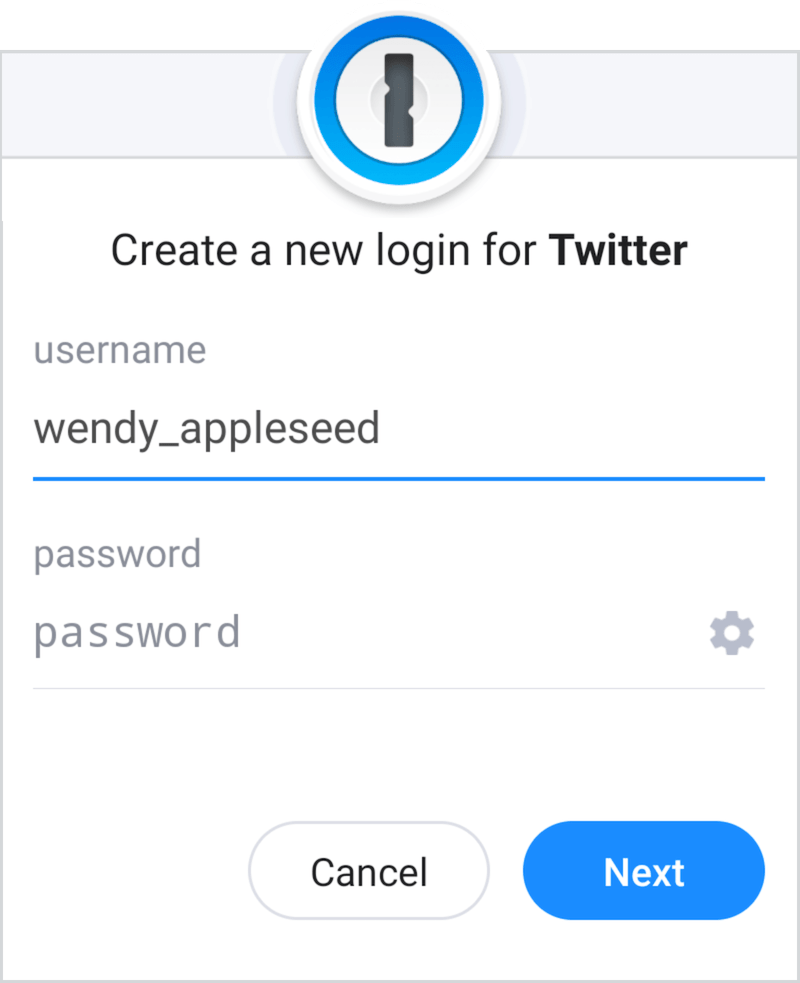
- Tap “Create a new login”, then enter your username.
- Tap next to the password field and adjust the settings for your new password.
- Tap Next when you’re finished, then tap Save and finish signing up for your account.
Get help
If you have an item in 1Password that’s not appearing in your browser, edit the item to make sure its website field matches the site you’re visiting.
If you can’t fill your details for a website or app, you can use split-screen mode to drag and drop your item details instead. Learn how to use split-screen mode with Android 7 or later.В
Learn more
Next steps
You can also fill passwords:
Still need help?
If this article didn’t answer your question, contact 1Password Support.
Источник
Разработка менеджера паролей под Android
Приветствую всех. Хочу рассказать вам историю разработки своего первого мобильного приложения под Android и поделиться различными её деталями. В частности будет рассказано об архитектуре, и используемых инструментах.
Подготовка
Конечно, писать его я начал не сразу, перед этим я несколько месяцев проходил всякие уроки по Android разработке, читал книги, статьи и активно впитывал информацию из других полезных источников. Всех кто собирается (или уже) заняться разработкой под Android хочу обратить внимание на наиболее полезные для меня:
- startandroid.ru
- developer.alexanderklimov.ru
- androidweekly.net
- androiddev.apptractor.ru
- t.me/android_ru
- t.me/Android_Architecture
- github.com/googlesamples
Первые две, вы, скорее всего уже встречали, если интересовались тем, как начать разрабатывать мобильные приложения, тут можно познакомиться с самыми основами разработки под android. Дальше интереснее — androidweekly еженедельная e-mail рассылка с новостями и статьями обо всем интересном, что происходит в мире Android. И далее два очень полезных чата, в первом можно получить ответы на свои вопросы по разработке под android, во втором конкретно про архитектуру. И последняя, но не по важность, ссылка сэмплы от Гугла.
О приложении
Еще задолго до начала разработки я уже определился с тематикой приложения и взял очень насущную для себя проблему хранение большого количества логинов, паролей и тд.
В Play Market’е куча подобных приложений и я выделил для себя основные недостатки, учел их, и составил список основных особенностей, которые хотел реализовать:
- Несколько независимых хранилищ (Аккаунтов). Каждое со своим мастер паролем;
- Возможность создания неограниченного количества своих категорий (папок) для группировки записей;
- Возможность создания неограниченного количества полей (Логин, пароль и т.д) для каждой записи, настройка видимости поля и их произвольной сортировки;
- Большой набор иконок для записей;
- Возможность быстрого создания новой записи и набора полей для нее;
- Не имеет доступа в интернет, все данные хранятся только оффлайн в зашифрованном виде на устройстве. Отсюда вытекает, что и речи не идет о бэкэнде и синхронизации в облаке (что я и так не потяну).
Разработка
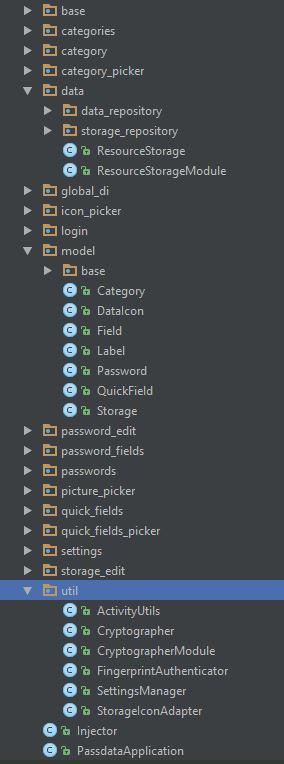
А теперь собственно о моем приложении, чтобы вы могли приблизительно понять уровень приложения, о котором будет идти речь вот структура проекта в Android Studio:
 В качестве архитектуры я выбрал MVP, по моему мнению, сейчас это стандарт в Android разработке. Есть еще Clean Architecture, более гибкая еще больше абстракций, отлично подходит для больших проектов. Но для меня это было уже слишком, так как начал я разработку весь код в Activity/Fragment, и только потом переписал под MVP (благо успел вовремя одуматься).
Есть несколько вариантов разделения проекта по пакетам мне ближе всего деление по экранам (фичам). То есть практически все пакеты содержат классы для реализации одного экрана. За исключением нескольких:
- base — базовые классы для активити, фрагментов, презентеров
- data – классы репозиториев
- global _di – основной ApplicationComponent для инъекций зависимостей, скоупы
- model – pojo классы бизнес-сущностей (Категория, записть, поле и т.д)
- util – ну тут просто вспомогательные классы, которые не вписались в другие пакеты
Ах да забыл перечислить основные инструменты, и подходы которые я использовал при разработке. Уже упомянутый MVP. Dependency Injection (DI), реализованный с помощью Dagger 2 наверно тоже стандарт для Android разработки. Где MVP и DI там, конечно же, и юнит тестирование. Юнит тестами покрыта вся логика в презентерах пакет model и частично data. Система контроля версий (VCS) еще один must have, опять-таки даже pet project’ы я бы не стал разрабатывать без нее. Я использую Git, сначала использовал GitHub но когда пришло время задуматься о приватном репозитории мигрировал на Bitbucket, происходит все в несколько кликов с сохранением истории всех коммитов.
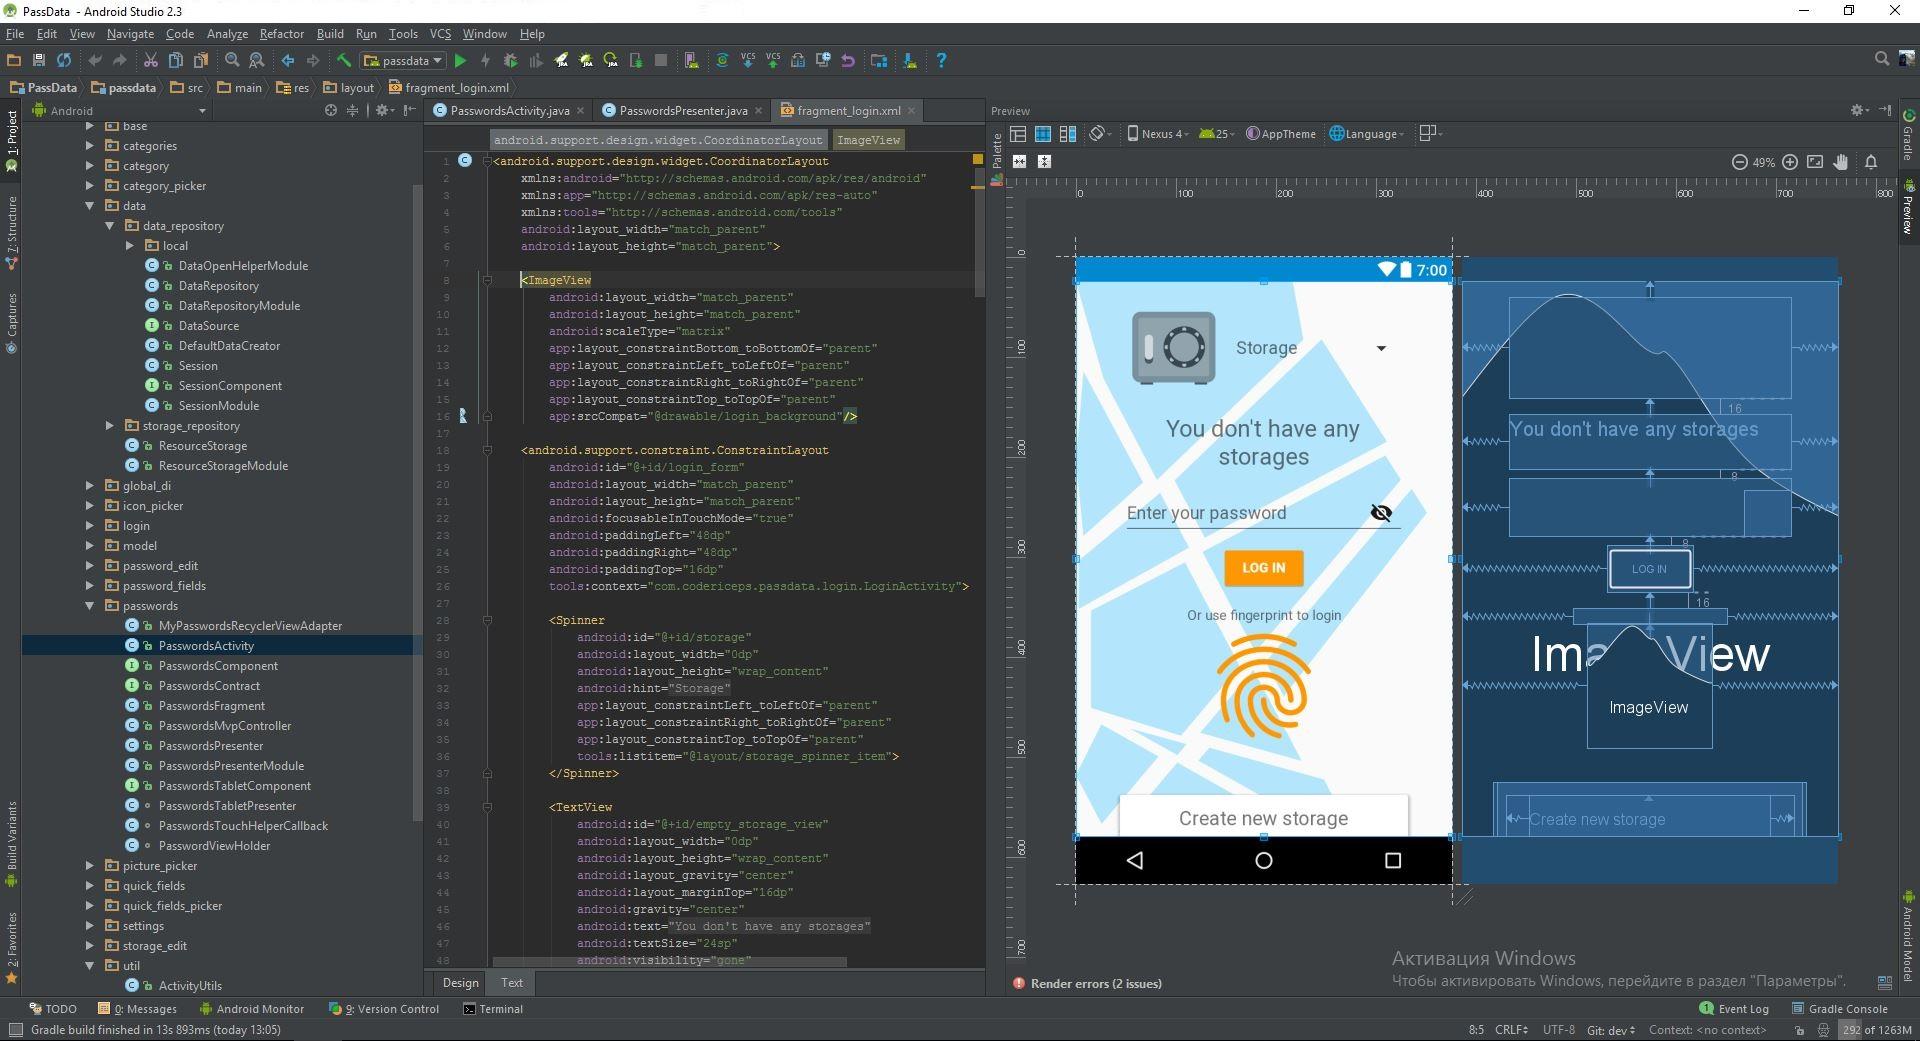
Для тех кто жаждет хоть какого то кода, ниже вкратце о том как реализован экран списка паролей в приложении. Вот как он выглядит в итоге:

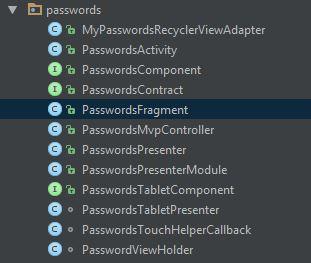
Классы пакета passwords:
В качестве разметки используется практически стандартный scrolling activity который Android Studio создает сама.
На весь размер CollapsingToolbarLayout расположена картинка категории, в которой находится запись, ниже заголовок.
Первой же строкой а onCreate() вызывается метод который в зависимости от пользовательских настроек запрещает или разрешает делать скриншоты экрана.
Через intent получаем id категории, в которой хранится вся информация которую необходимо отобразить на это экране. PasswordMvpController определяет смартфон у нас или планшет и создает соответствующие фрагменты.
В onStop() проверяем, закрывается ли Activity навсегда, и если да то удаляем компонент этого экрана. Еще из интересного callback из фрагмента (о самом фрагменте ниже), в котором устанавливаем картинку и название категории.
В моем случае фрагмент является View и соответственно предоставляет Presenter’у необходимые методы для отображения данных, кроме них во фрагменте ничего интересного нет, да и сами методы достаточно просты.
Список записей реализован с помощью RecyclerView, по статье, которая как раз вовремя появилась в Android Weekly. Благодаря этому подходу адаптер получается очень легким и не перегружен лишней логикой, которая в свою очередь находится в ViewHolder’е.
Теперь о самом интересном – Presenter. В том самом классе PasswordMvpController происходит создание и Inject презентера. Для самого презентара нам нужны: passwordView наш фрагмент, categoryId уникальный идентификатор категории, записи из которой мы хотим показать и dataRepository откуда мы эту категорию по идентификатору и будем получать.
В onResume() фрагмента вызывается метод start() презентера, а уже в нем мы обращаемся к DataRepository и запрашиваем нашу категорию при получении которой говорим view показать ее и записи которые в ней хранятся. В принципе все методы достаточно просты (опять отдадим честь MVP) не вижу смысла их пояснять.
Источник
[Android][Guide]Hacking And Bypassing Android Password/Pattern/Face/PI
Breadcrumb

piraterex
Senior Member
Requirements:
The Device Needs To Have Usb Debugging Enabled
In Case Usb Debugging Isn’t Enabled And You Have Recovery,you Can Run The Same Instructions From Recovery
For Some Methods Root Is Not Required (Though It Will Be Better If Device Is Rooted)
If None Of This Methods Works For You — Unfortunally You Probably Must Full Wipe Your Device
Solution For Everyone With Recovery (Cwm, Twrp, Xrec,Etc. ) Installed:
1. Download this zip Pattern Password Disable (Download from attachments) on to your sdcard (using your PC, as you cant get into your phone, right )
2. Insert the sdcard into your phone
3. Reboot into recovery mode
4. Flash the zip
5. Reboot
6. Done!
Note : If You See The Gesture Pattern Grid Or Password After Restarting, Don’t Worry. Just Try Any Random Pattern Or Password And it Should Unlock.
METHOD 2
Solution For Everyone Without Recovery Installed — ADB :
What You Need:
=>A computer running a Linux distro or Windows+Cygwin
=>USB cable to connect your phone to the PC
=>Adb installed
How to install adb:
1. Open Terminal
2. Type:
Hit [Enter]
3. Follow the instructions until everything is installed.
INSTRUCTIONS:
1. Connect you (turned on) Phone to the Computer via USB.
2. Open a terminal window.
3. Type:
4. Done. Now You Just Have To Reboot.
Note : If You See The Gesture Pattern Grid Or Password After Restarting, Don’t Worry. Just Try Any Random Pattern Or Password And it Should Unlock.
METHOD 3
Solution For Everyone Before Lock Accident :
SMS Bypass — Download Link — Install It On Your Device (Download from attachments)
This App Allows You To Remotely Bypass Your Phone’s Screen Lock By Sending A SMS.
It Removes Your Gesture Pattern Or Password After Receiving A Preset Keyword Along With A Secret Code Via SMS.
SMS Bypass App Requires Root.
INSTRUCTIONS:
1.First, make sure you give permanent root access to the app.
2.Change the secret code to your preferred choice. The default password is : 1234
3.To reset your screen lock, send the following message from another phone:
Note 1 : There is a space between your secret code and reset. Also the secret code is case sensitive.
Note 2 : There is an option available to change the preset keyword. Default is : reset — Your phone will restart and your lock screen will be reset.
Note 3 : If You See The Gesture Pattern Grid Or Password After Restarting, Don’t Worry. Just Try Any Random Pattern Or Password And it Should Unlock.
METHOD 4
Solution For Everyone Via Adb — SQL Command :
INSTRUCTIONS:
=>Type This Commands Separated In Your Terminal (CMD Prompt) :
=>Now You Just Have To Reboot.
Note : If You See The Gesture Pattern Grid Or Password After Restarting, Don’t Worry. Just Try Any Random Pattern Or Password And it Should Unlock.
METHOD 5
Solution For Everyone Via Adb — File Removal :
INSTRUCTIONS:
=>Type This Command In Your Terminal (CMD Prompt) :
Note : If You See The Gesture Pattern Grid Or Password After Restarting, Don’t Worry. Just Try Any Random Pattern Or Password And it Should Unlock.
METHOD 6
Solution For Everyone With USB Debugging Enabled :
Primary Step for all method:
- Download & Extract to anywhere — Bypass Security Hack (Download from attachments)
- Open SQLite Database Browser 2.0.exe in SQLite Database Browser.
- Run pull settings.db.cmd inside By-pass security Hacks folder to pull out the setting file out of your phone.
- Drag settings.db and drop to SQLite Database Browser 2.0.exe program.
- Navigate to Browse data tab, At table there, click to list down the selection & selete secure
Instruction To Remove Pattern Lock:
- Now, find lock_pattern_autolock, Delete Record
- Close & save database
- Run push settings.db.cmd and reboot your phone
Instruction To Remove PIN Lock:
- Now, Find Or Create lockscreen.password_type, double-click & change it’s value to 65536, Apply changes!
- Now, find lock_pattern_autolock, Delete Record, If doesn’t exist, Ignore
- Close & save database
- Run push settings.db.cmd and reboot your phone
Instruction To Remove Password Lock:
- Now, find lockscreen.password_salt, Delete Record
- Now, find lockscreen.password_type, Delete Record
- Close & save database
- Run push settings.db.cmd and reboot your phone
Note : If You See The Gesture Pattern Grid Or Password After Restarting, Don’t Worry. Just Try Any Random Pattern Or Password And it Should Unlock.
METHOD 7
Solution For Everyone With Recovery Installed :
1.Download and Copy Aroma File manager.zip (Download from attachments or http://forum.xda-developers.com/showthread.php?t=1646108) to your memory card.
2. Open your recovery (press volume Down + Power button or it can be different according to the phones. Generally the phones who have press able button on the middle they have to press all three buttons. Google for you pattern there are lots)
3. There’ll b an option in recovery called “mount”. Go in that option and then mount all the cache and everything it is there.
4. Then select “update” and select “apply update from SD/external” and select aroma file manger.zip file that you downloaded using above QR code above.
5. After Flashing or updating, the aroma file manger will open. Use volume keys for up/down and power button 2 select like you use to get into recovery.
6. In aroma File manager , Go to menu , which is located in bottom strip and then select Settings.
7. Go to bottom n select “mount all partition in startup ” then exit from aroma file manger.
8. Now after exit , re-update that aroma file again and it will open again.
9. Go to data >> and then System.
Then find ‘gesture.key’ (for pattern lock) and ’password.key’ (for password lock) then long touch on gesture.key or password.key and sum option will be prompted , choose delete and delete that file and restart.
Note : If You See The Gesture Pattern Grid Or Password After Restarting, Don’t Worry. Just Try Any Random Pattern Or Password And it Should Unlock.
Источник


