- Как работать с ViewPager2
- Новые фичи
- Что изменилось?
- Добавление зависимости
- Настройка
- Вертикальная прокрутка
- Использование FragmentStateAdapter
- Улучшенный OnPageChangeCallback
- Внимание!
- Android working with ViewPager2, TabLayout and Page Transformers
- Whats’s New in ViewPager2
- 1. ViewPager with Static Views
- 2. ViewPager with Tabs & Fragments
- 3. ViewPager2 Orientation
- 4. ViewPager Transformers
- Exploring the View Pager 2
- Exploring the View Pager 2
- It’s likely when working in the Android realm you’ve come across the ViewPager class at some point. This view allows us…
- Under the hood
- Recycler View
- Layout manager
- Page Change Callback
- Adapter
- Pager Snap Helper
- Implementing the View Pager
Как работать с ViewPager2

Прошло не так много времени с тех пор, как 7 февраля 2019 года Google выпустила альфа-версию Android ViewPager2. Более подробную информацию об этом релизе можно найти здесь. А сейчас давайте посмотрим, что из себя представляет ViewPager2.
Новые фичи
Что изменилось?
ViewPager2 выпущен для Android X, поэтому, если вы хотите его использовать, ваш проект должен использовать Android X. Давайте посмотрим, как мы можем использовать этот новый ViewPager2.
Добавление зависимости
Добавьте следующую зависимость в файл build.gradle на уровне приложения:
После этого синхронизируйте свой проект.
Настройка
Добавьте виджет ViewPager2 в вашу Activity или фрагмент:
Давайте создадим layout для страницы, которая будет отображаться во ViewPager2:
Далее нам нужно создать Adapter для ViewPager2. Это самая интересное. Для этого мы можем использовать RecyclerView.Adapter . Разве это не круто?
Это такой же адаптер, который мы используем для обычного RecyclerView, и с ViewPager2 он работает так же хорошо.
Последний шаг, установим адаптер для ViewPager2:
Вот и всё! Получаем тот же результат, как и при использовании старого ViewPager с PagerAdapter:

Вертикальная прокрутка
Раньше нужно было использовать сторонние библиотеки для реализации вертикальной прокрутки, т.к. до сих пор Google не предоставляла такой возможности «из коробки». В этом новом ViewPager2 теперь есть поддержка вертикальной прокрутки. Просто измените ориентацию во ViewPager2 и вертикальная прокрутка будет включена. Очень просто!
Вот, что получается в итоге:
Использование FragmentStateAdapter
Вы также можете использовать фрагменты в качестве страниц, как и в старом ViewPager. Для этого есть FragmentStateAdapter. Давайте посмотрим, как мы можем его использовать.
Прежде всего, нам нужно создать фрагмент:
Теперь мы создадим адаптер для ViewPager2. В его конструктор мы передадим FragmentManager, который будет управлять фрагментами:
Теперь установим этот новый адаптер во ViewPager2, и всё готово:
Улучшенный OnPageChangeCallback
В старом ViewPager интерфейс OnPageChangeListner был предназначен для получения событий изменения/прокрутки страницы. И это была очень неудобно, т.к. нам нужно было переопределять все три метода ( onPageScrollStateChanged , onPageScrolled , onPageSelected ), даже если мы этого не хотели.
Теперь у нас есть OnPageChangeCallback , абстрактный класс с неабстрактными методами. Что буквально означает, что нам не нужно переопределять все эти методы, мы можем просто переопределить те, которые нам нужны или которые мы хотим использовать. Вот так, например, мы можем отслеживать события смены страницы:
Внимание!
Поскольку ViewPager2 находится в альфа-версии, есть некоторые функции старого ViewPager, которые ещё не были реализованы или не работают должным образом в этой версии.
Известные проблемы согласно документации:
- ClipToPadding,
- Отсутствует интеграция с TabLayout,
- Отсутствует контроль за пределами экрана,
- Нельзя установить ширину страницы (100% по умолчанию)
Больше информации об известных проблемах — здесь. Надеюсь, что всё это будет исправлено в ближайших обновлениях. Я с нетерпением жду стабильной версии этого нового ViewPager2. А до тех пор, хорошего всем кода!
Источник
Android working with ViewPager2, TabLayout and Page Transformers
As we all know, the Android team is constantly releasing new updates and improvements to the Android Framework. One of the components that received major updates is ViewPager2. ViewPager2 is the replacement of ViewPager and got few performance improvements and additional functionalities. In order to use ViewPager2, you should consider using androidx artifacts in your project.
In my earlier tutorial, I have explained Building Intro Sliders to your App using ViewPager. In this article, we are going to try the same but using ViewPager2. We’ll also go through the additional interesting functionalities provided by ViewPager2.
DEMO

Whats’s New in ViewPager2
- ViewPager2 is improvised version of ViewPager that provides additional functionalities and addresses common issues faced in ViewPager.
- ViewPager2 is built on top of RecyclerView. So you will have great advantages that a RecyclerView has. For example, you can take advantage of DiffUtils to efficiently calculate the difference between data sets and update the ViewPager with animations.
- ViewPager2 supports vertical orientation. Earlier vertical swiping is done by customizing the ViewPager.
- ViewPager2 has right-to-left(RTL) support and this will be enabled automatically based on app locale.
- When working with a collection of Fragments, calling notifyDatasetChanged() will update the UI properly when an underlying Fragment changes its UI.
- ViewPager2 supports page transformations i.e you can provide animations when switching between pages. You can also write your own custom page transformation.
- PagerAdapter is replaced by RecyclerView.Adapter as its based on RecyclerView.
- FragmentStatePagerAdapter is replaced by FragmentStateAdapter.
To get started with ViewPager2, add the dependency to app/build.gradle.
1. ViewPager with Static Views
Usually, ViewPager is used to achieve a tabbed view by combining the TabLayout and collection of Fragments. But if you want to have static views without the Fragment class, you can do it using RecyclerView adapter class.
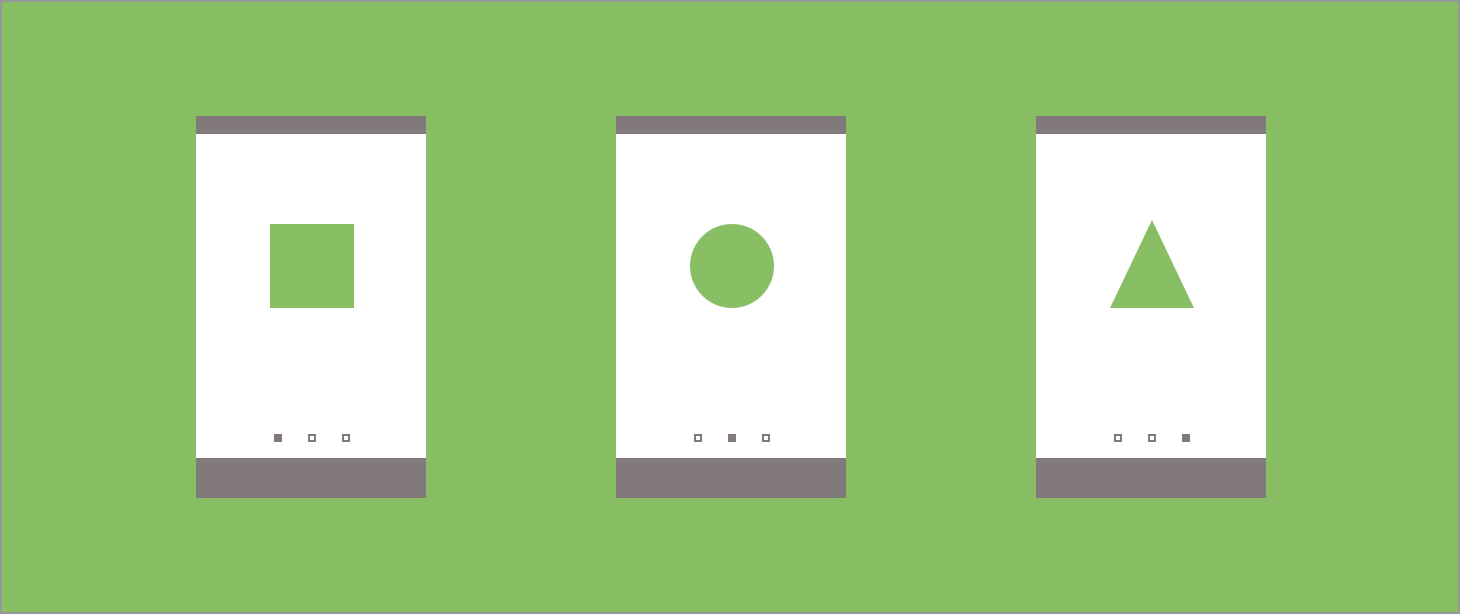
Below is an example of implementing Intro Slides using ViewPager2. The designs are taken from my older example How to Build Intro Slider for your App but the implementation part varies due to changes in ViewPager2 and in adapter class.
Add the ViewPager2 to your layout file. You can see namespace is uses androidx package androidx.viewpager2.widget.ViewPager2.
This creates horizontally swipeable views that are created using static XML layouts. The full code of this example can be found here.

2. ViewPager with Tabs & Fragments
If you want to create swipeable views with Tabs, you can combine ViewPager2, TabLayout and Fragments.
To use TabLayout, add Material Components to your package. This makes the material TabLayout available in your project.
Add TabLayout and ViewPage2 to your layout.
Create required test Fragment classes MoviesFragment, EventsFragment and TicketsFragment.
Finally, create an adapter class that provides Fragments to ViewPager. Here we can see ViewPagerFragmentAdapter extends FragmentStateAdapter.

3. ViewPager2 Orientation
In a few scenarios, you might want to provide vertical swiping instead of traditional horizontal swiping. To enable vertical swiping, add android:orientation to ViewPager2 element.
Vertical orientation can also be enabled programmatically by calling setOrientation() method.
4. ViewPager Transformers
Another great feature of ViewPager2 is, page transformations i.e the page transition animation from one page to another. Traditionally, we see a sliding animation between two screens. This animation can be customized by providing page transformers to ViewPage2.
To set a custom transformation, use setPageTransformer() method. Below example creates Flip animation between pages.
This creates beautiful vertical flip animation when swiping the pages.
![]()
Below are a set of ViewPager transitions that I have collected from different sources (All the credits goes to original authors).
Hi there! I am Founder at androidhive and programming enthusiast. My skills includes Android, iOS, PHP, Ruby on Rails and lot more. If you have any idea that you would want me to develop? Let’s talk: [email protected]
Источник
Exploring the View Pager 2

This was originally posted on joebirch.co
Exploring the View Pager 2
It’s likely when working in the Android realm you’ve come across the ViewPager class at some point. This view allows us…
It’s likely when working in the Android realm you’ve come across the ViewPager class at some point. This view allows us display a collection of fragments or views to display to the user in a swipe-able format — especially popular within on-boarding and content display screens. This component has been with us in the Android world for some time, it was even ported to the androidx libraries — but now we have a newer version of this component, the View Pager 2, which has recently seen an alpha release go out live. Let’s take a look into exactly what’s so different about this iteration.
In some cases, to the user, each of these view pager components would likely feel the same. A view is showed, another one is swiped in view and so on. But about in cases where we may want to show many instances of the same view within a single view-pager… even though if view instances are used, we’re still going to be hit with some inefficiencies. This is where a key difference of the View Pager 2 comes in — what makes this so different is the utilisation of a RecyclerView. This means that just like how we are already showing streams of content using a Recycler View, having our views recycled as we go now allows us to able to utilise exactly the same behaviour when it comes to the View Pager. This in my opinion is huge news and will not only give our users a smoother experience, but it will also make it easier for us as developers to implement this component.
Other features of the recycler view also become available at this point — if you’ve made use of the DiffUtil functionality then you know just how powerful that can be. Because we’re now making use of the RecyclerView we’ll now be able to perform diffing operations using this class, being more efficient when it comes to handling dynamic or updating content in our view pager component.
We also have other features that are now being introduced with the View Pager 2 — Right-to-Left support and Vertical orientation being two more of them. This gives us the ability to create more inclusive applications as well as utilise this component for specific screen designs.
And don’t worry, just because we’re using a recycler view it doesn’t mean we can’t still use fragments. We can make use of the FragmentStateAdapter to handle our fragments within the view pager 2 — this replaces the FragmentStatePagerAdapter and will make it much clearer how to handle fragments in this component moving forward.
And as a side note, it’s going to be much easier for the Android team to maintain. Not only is the recycler view now promoting and experiencing re-use, but the View pager class has dropped from 3169 lines of code to 583. If you ever dived into the source of the View Pager then you might remember there being a lot of complexities — edge detection, gesture detections, state persistence, calculations for offsets and positioning, drawing of margins, view drawing and a lot of custom calculations. Removing the need to maintain a class with its own logic for a sole purpose will be a great win for the team.
Under the hood
When working with components, it can often be helpful to have a good understanding of what is going on under the hood. Not only does this help you to understand what the component is capable of, but when it comes to bugs you’ll have better knowledge to address issues which occur. Just like the View Pager, the View Pager 2 extends from the View Group class — from there, things look a little different. With some omissions, this is what the core of the View Pager 2 is made up of:
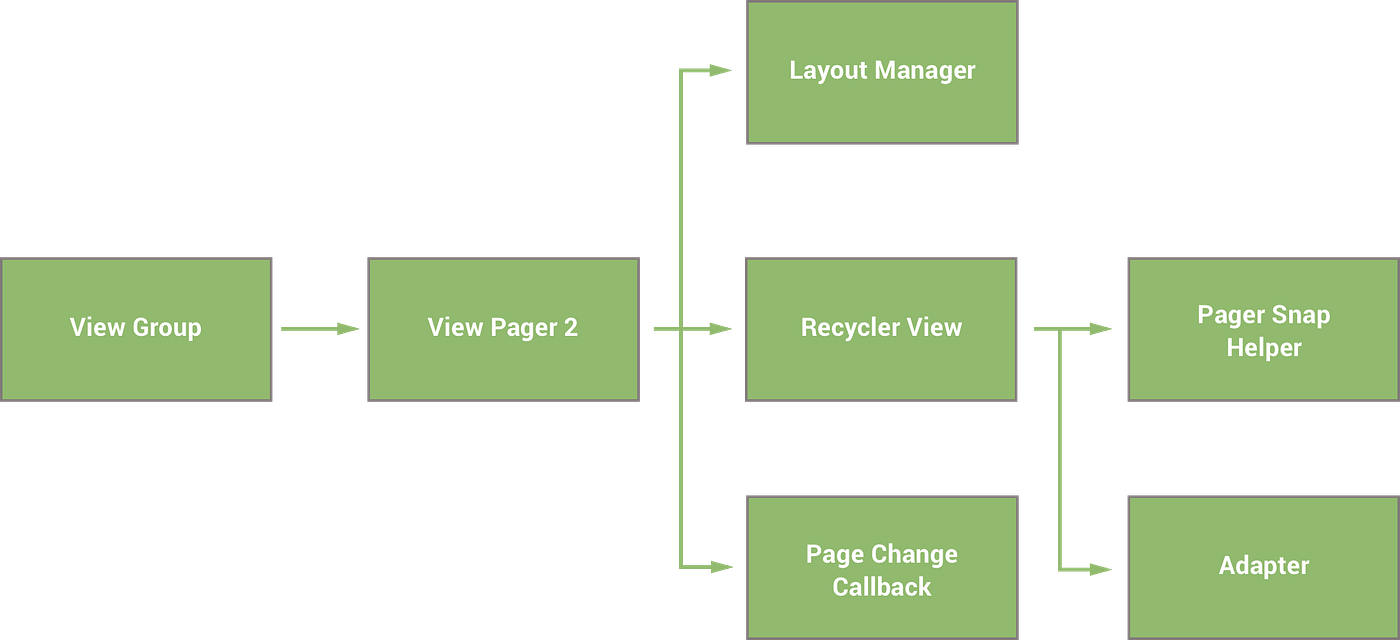
Recycler View
The View Pager 2 uses the RecyclerView component to handle the display of content that you assign to it. This brings us many advantages which I’ve already outlined in this post. — but essentially this now means that we can make use of most of the Recycler View components that we are already familiar with.
Layout manager
This is exactly the same LayoutManager class that you would have previously used with the RecyclerView component in your apps. The layout manager is managed by the View Pager so that the developer has the ability to set the orientation on the component. Whilst you don’t have any control over what layout manager is used (a LinearLayoutManager is what is automatically assigned), you can set the the orientation to be used by the manager. Using the setOrientation()function on our view pager 2, we can pass in an orientation value which will allow us to set the orientation for the layout manager. The original view pager only offered as horizontal orientation, so for apps displaying paged content in a vertical manner will find great use in this.
Page Change Callback
You can register a page change callback (in the form of the OnPageChangeCallback class) on our view pager 2. This will allow you to listen for changes on the selected page. Within this callback we can listen for:
- onPageScrolled() — Triggered when a scroll event occurs for the current page
- onPageSelected() — Triggered when a new page becomes selected
- onPageScrollStateChanged() — Triggered when the scroll state changes
Adapter
Just like we’d set an adapter for our RecyclerView components elsewhere, we now can do the same for the ViewPager. This is no different from how we are used to working with the RecyclerView adapter.
Pager Snap Helper
This isn’t something we can configure — but I wanted to point out its usage as it’s something that differs from the original view pager. Here, the PagerSnapHelper class is used by the ViewPager to simulate snapping to the selected item when the scroll position requirements for that item are met. You may have used this class before in your own RecyclerView, but this shows the reuse of already components to improve something within the framework.
As well as the functions mentioned above, we still have access to other parts that we may be familiar with from the original View Pager. These are things such as:
- setCurrentItem() — Sets the current item that should be shown on the screen
- getCurrentItem() — Get the current item index for the item shown on the screen
- setPageTransformer() -Set a transformer to apply custom transformations when page changes occur
Implementing the View Pager
To add the View Pager 2 into our project we need to begin by adding the required dependency to our build.gradle file:
With that added, we now have access to the View Pager 2 component, which means we can go ahead and add it to our layout file:
Now that we have the View Pager defined in our layout, we need to assign it some data to display on screen to the user by creating an adapter that extends from the RecyclerView.Adapter class. We can then assign this adapter to our view pager instance:
Now that we have content displaying, we may want to tweak the orientation of the view pager. By default, the view pager uses the horizontal orientation:
You won’t need to change anything here if this is the desired orientation. However, if you wish to make use of vertical orientation then you can change this by calling setOrientation() and passing in the ORIENTATION_VERTICAL value:
We can also listen for events from the view pager as we may wish to adapt our UI or data based on the pages that the user selects. Again, here we can observe onPageScrolled(), onPageSelected() and onPageScrollStateChanged():
We can also perform DiffUtil operations on our data to dynamically update the content within our View Pager, this means we don’t need to reload and set the entire data set — only the data that has changed. You can check the documentation for using the DiffUtil here, but as an example lets say we had the content shown in the above GiIFs as our data set. If we then performed a DiffUtil operation with the same data where only the title of the last screen was different, we would be able to make use of the change payload from the diff result to only update that piece of content — which is much more efficient when it comes to dynamic content within view pager components.
I hope this has given you an insight into the new View Pager component and what we are able to achieve as a result of its usage. Whilst it is still in alpha, it promise a more efficient approach to the display and management of our content — which in turn will result in a better experience for our users. Combined with the DiffUtil and other features backed by the recycler view (animations etc), the View Pager 2 promises an improved experienced in both implementation and usage. Are you using the View Pager currently, how will you make use of the View Pager 2? Let me know in the comment section below 🙌
Источник


