- A beginner guide to Android Watch App (From scratch to publish)
- Companion
- Step 1: Add wear Module
- Learning 1: Give same package name as your Phone module.
- Learning 1.2: Sign with the same certificate. The Identity of apps is same when they have identical package name and same signing certificate.
- Step 2: Add a launcher Activity
- Step3 : Finding Your main app
- In Watch
- In Phone
- Step 4 : Communication
- Step 5 : Publishing
- Summary
- Опыт разработки под Android Wear
- Android Wear
- Getting Started
- User Interface
- Platform Features
- Screen Sizes
- Deployment & Testing
- Wear APIs
- Samples
- Wear OS Application Development- Practical Aspects.
- Introduction
- Creating a Module for Smartwatches
- Wear API
- Communication Between the Phone and the Smartwatch
- Capabilities. Pairing Status Check-up.
- Data Exchange Between Devices
- Receipt of Data
- Wearable App Offline Operation
- Layouts for Different Smartwatch Screen Form Factors
- Distributing Builds to the Client
- Releasing the Application Through Google Play
- Conclusion
A beginner guide to Android Watch App (From scratch to publish)


Have you ever struggled with how to develop an Android wear app OR you want to learn basics of Android watch app? In either case, You are at right place.
As usual, whenever Android does something new, it does not do justice to documentation. Recently we released an Android watch companion app for one of our appa and it was not a smooth experience. This article aims to cover the basics you need to know to develop a watch app. At the end of this article, you should be able to write a companion watch app. If you have experience in watch app, feel free to correct mistakes. I would appreciate notes.
Note: Android phone app development knowledge is required for this article.
Companion
I used companion word twice already and this is the third time. What is it? You can divide the Android watch app in 2 categories.
Standalone and Companion app. Former is when your app is a full-fledged app on watch and does not need a supportive app on Phone, an example can be weather app.
Latter is when you need your other app to run on the phone, an example can be smart lights app where all heavy lifting is done at phone and watch app is just to send command. Below is a screenshot for companion watch app for smart lights.

Android wear 2.0 is almost identical to you in terms of development with some restrictions of API’s not available and form factor of watch screen size.
In this article, we will discuss and learn about companion app for your existing Android app. The main app is running on phone and watch app is an add-on. We will discuss A-Z steps from development to publishing.
Step 1: Add wear Module
In Android studio, add a new module. Select the Android wear module.
Learning 1: Give same package name as your Phone module.
This sounds silly but we wasted a good amount of time because of this. Android studio by default neither offers this nor suggests this. For standalone watch apps, it does not matter as they do not depend on phone counterpart. But for a companion app, because it needs to interact with phone module and vice-versa, the identity has to be same on phone and watch. That’s how system offers security for apps to communicate.
Learning 1.2: Sign with the same certificate. The Identity of apps is same when they have identical package name and same signing certificate.
If you have signingConfig blocks in main app build file, you should use same certificates for watch module. I would recommend having identical signing block.
Add minimum target to 25 as Android wear 2.0 is available to watches with minimum Android 7
Step 2: Add a launcher Activity
You can run your watch module (check build file, it has configuration apply plugin: ‘com.android.application’), Android studio will allow you to run and it is exactly same as running an app on phone.
Tip: You can extend WearableActivity which offers utility functions ambient mode entered and exited. Consider ambient mode as a configuration change you handle in phone app (keyboard, orientation). In the watch, ambient mode triggers quite frequently and you should give it a thought whether it makes sense for you to do anything or not.
Add Launcher entry in Manifest and rest everything is same as Phone.
Step3 : Finding Your main app
Now your launcher activity is running, it is time to interact with your main app. I think Android has done a good job in that. As connected devices are increasing in number and form-factor, Android wear considers itself a mesh network of nodes where one Node is your phone. Your phone is no different for wear API.
Instead of finding the connected phone, you should find a node which has the capability of fulfilling your request. It may sound little confusing now but don’t worry, You will find it very easy once you understand.
Assume a user has 2 watches (one sport and one normal), one connected ring, one newly launched watch connected to two phones at a time and some new hardware in Android wear eco-system. Now your main app is running on one of the phone and user installed your wear app on one watch.
Android calls all these devices nodes.
Now Android came up with a decent solution. Instead of you querying all nodes(devices) and finding which has your app installed. Wear API offers a utility to do so.
It means you can expose a string literal which acts as a unique identifier when wear API will find your app in nodes mesh. Simplifying more, your app module on different devices can expose some offerings (capability in Android wear term) for e.g Your phone app module can say I am “watch-server” and watch module can say I am “watch-client”. You can use the same API on both devices, watch and phone. All you need to do is use different capability.
In Watch
Note that: These CAPABILITY_PHONE_APP and CAPABILITY_WATCH_APP are string literal defined by you.
Now question is how your module registers these offerings(capabilities) with system. IMHO they should have done with some Manifest tag pointing to some xml resource. However they chose to do it with only xml resource. You need to add one xml file wear.xml in your values folder. Example:
In Phone
You can choose any literal name which makes sense in your context. Once you have added wear.xml file, used same package name and signed with same certificate. You should be able to find the Node which offers desired capability.
Note that this will work if the user has an old version of your app on any node. Your search will not find the node with the desired capability and you can show an error message to the user to update the app.
Complete search Node code:
Same code in the watch with different literal CAPABILITY_PHONE_APP
Step 4 : Communication
Now you have found nodes, all you need is some sort of communication mechanism. Message Client is perfect API for you. It is very simple:
With this simple API, you can send any message to the node you just discovered in step 3. NodeId you will get from the Node. uniqueIdentifierOfMessage is your defined some string literal you will use to identify what message means. Example:
Data is the raw data you can send both ways. It is in the form of bytes, so you need to convert a string to byte and vice-versa.
We just sent a message, where was it received? By default, It is lost unless you add a listener. So in both apps, you should have the addListener line before anything.
This is where you will get the message you sent in the messageEvent form.
Message event also contains node of the sender so you can respond
Overall it feels like client-server model where both parties act as client and server time to time. I hope it is clear to you how to develop a watch app.
Step 5 : Publishing
This section is for people who have a play-store developer account. Others can skip.
I personally find publishing watch app little confusing. For those who have play store developer account, under release. They have an option of add from the library which did not work for me. I ended up using multi-apk approach. I had to generate watch apk with increased version code over my market app and publish normally.
It seems because of the manifest, Android play store is intelligent to serve APK to watch devices only.
Do not forget to add this in your manifest:
Summary
We saw Android is improving day by day and their decision of not hardcoding watch and considering everything Node is confusing at first but makes a lot of sense once you grasp the concept. There can be many devices/nodes connected at a time, few of them will have your app, few will not. Few will have an old version and few will have version mismatch and so on. To mitigate all this, we used capability client which can be used to search for Nodes who are offering those capabilities. For any node, all they need to add one wear.xml file with string array of `android_wear_capabilities` and system will take care of rest.
Once your node is found, you can interact with nodes using Message client which is very simple API to use. It is similar to a client-server model where each message has path and data associated with it.
Источник
Опыт разработки под Android Wear
Спешу поделиться с коллегами накопленным опытом при разработке для Android Wear.
Все важные моменты проще всего показать на примере приложения, которое показывает уровень заряда батареи на часах и смартфоне.
Загрузим Android Studio.
Создадим новый проект:

Выбираем оба устройства:
Далее все стандартно:
В итоге получим хорошую заготовку для обоих устройств, с пустыми активностями:
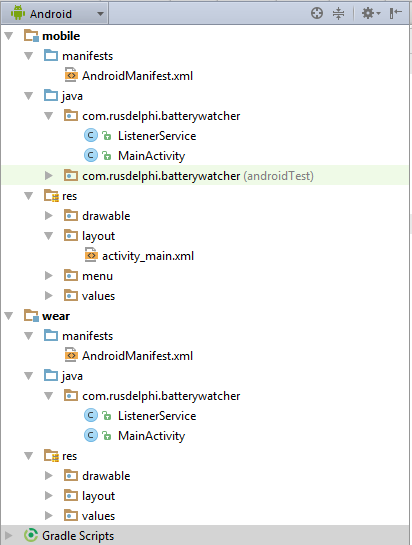
ListenerService сам не появится, ниже расскажу как его добавить.
Чтобы связать наши устройства, был придуман хитрый слой. Приложения могут обмениваться сообщениями через этот слой. Отправка сообщений должна проходить в отдельном потоке. Очень подробно реализация этой задачи описана здесь.
Вы должны подключиться к GoogleApiClient, потом отправить в отдельном потоке сообщение. В примерах это описано подробно, но я решил вынести всю работу с сообщениями в отдельный сервис и получилось довольно компактно.
Вот наш ListenerService, он одинаков для обоих частей проекта.
В оба манифеста нужно его добавить:
Во время создания сервиса, мы собираем GoogleApiClient и подключаемся к слою данных.
Событие onMessageReceived вызывается при получении сообщения. У полученного события (MessageEvent) мы смотрим папку назначения (getPath()). Если это наша папка, получаем данные (messageEvent.getData()). Далее эти данные можно сохранить в настройки, базу данных. В общем, использовать как будет нужно. А мы с помощью LocalBroadcastManager отправим их в нашу основную программу (MainActivity). Но для этого локальный приёмник в ней нужно зарегистрировать. Мы это будем делать при старте, а разрегистрировать будем при выходе.
Для отправки сообщения другому устройству мы будем запускать сервис с нужными данными.
В сервисе может быть уже подключен GoogleApiClient, а может и не быть. Если он ещё не подключен, то нужно запустить blockingConnect, иными словами заставить его подключиться напрямую, блокируя соединение. Делать все это нужно в отдельном потоке, т.к. работает это все асинхронно.
Вот код MainActivity для мобильного устройства:
Тут мы при старте создаем приемник, получающий сообщения о батареи устройства. Как только получили сообщение (onReceive), отправляем его сообщением в слой данных (sendMessage) и обновляем значения переменных (updateUI). Далее регистрируем локальный приемник (MessageReceiver), он при приеме также обновит экран приложения (updateUI).
Вот код MainActivity для wear-устройства, т.е. для часов:
Он, в принципе, похож на старшего брата, но есть отличия в постройке разметки, т.к. устройства могут быть с квадратными и круглыми экранами. Компонент WatchViewStub дает нам возможность упростить выбор разметки, для этого нужно просто спроектировать 2 файла rect_activity_main.xml и round_activity_main.xml.
Вот код первого:
Здесь при создании разметки мы получаем два компонента TextView и обновляем их содержание (updateUI). Остальной код работает так же как и в мобильной версии. Запускаем приложение, получаем текущий уровень батареи, отправляем его соседнему устройству и слушаем его сообщения. Как что-то изменилось -> обновляем показания.
При публикации приложения в гугл маркете у обоих модулей должен быть одинакова версия (versionCode) кода и одинаковое имя пакета. По умолчанию Android Studio эту работу за нас сделает. Когда соберем apk файл для мобильного устройства, внутри него будет находиться apk для wear. Эту работу можно сделать и в Eclipse. В общем, кому как проще. При установке приложения из маркета на мобильное устройство придет толстый apk, который сам установит apk для wear устройства.
Источник
Android Wear
Android Wear is a version of Android that is designed for wearable devices such as smart watches. This section includes instructions on how to install and configure tools required for Wear development, a step-by-step walkthrough for creating your first Wear device, and a list of samples that you can refer to for creating your own Wear apps.
Getting Started
Introduces Android Wear, describes how to install and configure your computer for Wear development, and provides steps to help you create and run your first Android Wear app on an emulator or Wear device.
User Interface
Explains Android Wear-specific controls and provides links to samples that demonstrate how to use these controls.
Platform Features
Documents in this section cover features specific to Android Wear. Here you’ll find a topic that describes how to create a WatchFace.
Screen Sizes
Preview and optimize your user interface for the available screen sizes.
Deployment & Testing
Explains how to deploy your Android Wear app to an Android Wear device or to Android emulator configured for Wear. It also includes debugging tips and information for how to set up a Bluetooth connection between your development computer and an Android device.
Wear APIs
The Android Developer site provides detailed information about key Wear APIs such as Wearable Activity, Intents, Authentication, Complications, Complications Rendering, Notifications, Views, and WatchFace.
Samples
You can find a number of samples using Android Wear (or go directly to github).
Источник
Wear OS Application Development- Practical Aspects.

By Mikhail Mikhailov and Yevgeny Nagibin, Android Developers at Rosberry

Introduction
Most often, developing mobile applications, we build them for only two types of devices — smartphones and tablets. And every time we start a new Android Studio project we come across the proposed templates for other types of devices. Unless necessary, developers wouldn’t use those templates especially if there are no corresponding physical devices at hand. But the situation may change when it is required so by the app development project itself. The time is now to tell about the mobile app project we’ve been busy with at Rosberry.
The app is all about a healthy lifestyle and is a tool for tracking water balance and managing liquid intake based on the environment, user activities and other individual measurements. Using the app daily, one can develop healthy habits replenishing water loss in a timely manner. To make this experience even more friendly we’ve built an app for watches powered by Wear OS by Google.
The actual task was to build a wearable app within a short period of time and make it as simple as possible. So, the basic issues we had to face first were: Wear OS capabilities, the way the Wear OS app would interact with the phone app and the component interdependencies inside the project. In this article we would like to share some development aspects for Wear OS we had to take into consideration down the road.
Creating a Module for Smartwatches
Development of a wearable app suggests that we add a separate module to the existing project.
To do so, we should proceed as follows:
Step 1. Add a new module to an existing project.
- In Android Studio click: File → New Module → Wear OS Module.
- Type all the necessary values, click Finish — now we have another module in the project (named Wear).
Step 2. Add dependencies
In the newly created module named ‘Wear’ we should update the dependencies section to include the following:
This way we’re adding the Wearable Support Library to our watch module.
Step 3. General classes for the phone app and smartwatch app modules
Since we are using one and the same code base between the modules of the phone application and the smartwatch app, we’re adding a common module which is added to the project as a library. To use this module we should declare the following dependencies of the phone and watch app modules:
Step 4. Linking the phone and smartwatch app module
To link the watch module to the existing project we should declare the following dependencies in the build.gradle of the phone app module:
Wear API
To create a wearable application we use the same components as for smartphone apps with only several exceptions: your Activity may extend WearableActivity — a special class which allows for setting the behaviour of the display when idle. The setAmbientEnabled() method, which is called for in the extended Activity when it is created, allows for switching to ambient mode instead of blocking the watch display.
Communication Between the Phone and the Smartwatch
Interaction between devices is ensured by the special component — Wearable Listener Service which has a special priority in the system.
To add the component you should:
- Extend the class by changing necessary data channel callbacks in order to get them (in our case we’ve used the data channel only, so we have overridden the onDataChanged() callback).
- Declare it in the manifest by adding an action that will be processed by this service (DATA_CHANGED), as well as data filters which will be used by the phone application to know what request the smartwatch has sent.
How it actually looks:
When the application is unloaded from memory, the WearableListenerService will continue and will accumulate the data coming to the callback which will be delivered to the destination at the next active state of the application.
In order to get the data in the callbacks one should register as a data client and a capability client in the smartwatch module using the following methods:
and implement the callbacks themselves
Capabilities. Pairing Status Check-up.
To check the status of the smartwatch pairing with the smartphone you’ll need to take a couple of steps.
First up, we shall set the strings with random entries in the the wear.xml file of the phone application module for the smartwatch to be able to check if the device with such Capabilities is paired. Wear content.xml looks like this:
Then in the smartwatch module itself we shall set a string constant with the same entry as in the capability indicated above. With the help of this constant in the callback onCapabilityChanged()of the smartwatch module we will determine if the state we receive relates to the state of our device (connected to our phone app). After verifying that we’ve received the pairing status of the appropriate device, we shall be busy with the following check-up:
The result of this check-up will show whether there is an actual connection with the device. It should be noted that we cannot request the pairing status directly, only through the callback, which implies some delay between the actual disconnection of the device and the callback trigger.
Data Exchange Between Devices
To transfer data from your smartphone to your smartwatch and vice versa you should use the bundle com.google.android.gms.wearable.DataMap which is created simultaneously with the com.google.android.gms.wearable.PutDataMapRequest, calling a static method PutDataMapRequest#create, which should have one of the paths declared in the manifest as an input:
To add all necessary data to the DataMap bundle you can use a range of methods. For example, to send the current timestamp with a query you should call the following method:
Then comes the chain of transformations of our request into a task ( com.google.android.gms.tasks.Task) — the end point before processing of our data by the Google services library.
For our request to be processed and could reach the paired device, it is necessary to:
- present this request as a the PutDataRequest through the simple call val request:
2. get DataClient:
3. pass our request to DataClient and finally get the Task:
4. Task execution is carried out with the await static method of the Tasks class:
The Task execution is blocked until the result is obtained synchronously. This operation must be performed in a separate thread.
Usually the data for the watch is not delivered immediately, in order to optimize the use of resources and save battery life it is time-lagged and the lag as the documents say is 30 minutes. To instantly deliver the data for the watch you must use the setUrgent()method for the PutDataRequest class object which ensures that there is a minimum delay between sending and receiving data.
Receipt of Data
As described above, the data is received through the WearableListenerService#onDataChanged callback which gets the DataEventBuffer object as an input after the execution of each task and which should be parsed using the keys that we have defined in the application manifest. It looks like this:
On receipt of the “/drinkEvent” we parse it using the keys of the dictionary.
Wearable App Offline Operation
The devices pair with each other via Bluetooth, so the offline operation of the smartwatch means that there is no pairing between the smartphone and the watch. If the task is sent to be carried out with no pairing, its execution will not take long when connection is there again. Thus, working with the smartwatch in an offline mode, all scheduled tasks will be performed and the data on both devices will be synchronized.
Layouts for Different Smartwatch Screen Form Factors
Developing applications for smartwatches one should borne in mind that they come in different shapes and sizes with circular and square faces. Moreover certain watches might also have an inset called chin which is usually located at the bottom of the display. To determine the resource only for circular face watches, you should add -round or not-round to those directories that you want to override.
We used BoxInsetLayout to create the screen layouts — it allows to place the content in the center of the display of the circular face watch — the content will be sized to fit into the round display (Fig. 1). This effect is achieved by using the app:boxedEdges=”all” attribute (you can also use left, top, right and bottom values to size to only fit into a specific side).
To support a chinned smartwatch, one should add the fitsSystemWindows=true attribute which will raise the markup above the chin so that it would not be overlapped (Fig.2).


Figure 1 — UI screen for the circular and rectangular face watches

Figure 2-UI for the circular face with an inset (chin)
Distributing Builds to the Client
To hand over the builds to the client we used Beta by Fabric. Unfortunately Beta is available for smartphones only, so it is not possible to install it onto your watch. The only way to get the build on the watch was to directly install it or use Google Play beta testing.
As you see, the situation has not improved in 2019.
Releasing the Application Through Google Play
Our smartwatch app is for Wear OS 1 version.x and 2.x thus, Wearable API lets us exclude the smartwatch APK from the app APK and release two separate APKs to Google Play. One should remember that APK versions should be unique. Google suggests that we follow the the below approach to app versioning:
- The first two digits are reserved for the targetSdkVersion, for example, 28.
- The next three digits represent the version of the application that is visible to the user. For example, the application version is “2.4.3”, so the next three digits are 243.
- The next-two digits specify the build number, for example, 01.
- The last two digits will point to a build variant. For example, the smartphone version will be 00 and the watch version will be 01.
To distribute the app on Google Play, as we know, it is necessary to prepare a signed build of the application. Building the release version of the smartphone APK in our case we should also build the watch APK, which at the end of the process can be found in the directory /build/outputs/apk/ /release in each of the modules both for the smartphone and the watch. These APKs should be included in one and the same release of any of the channels (production, beta, alpha) as if you were downloading multiple APKs for different device configurations (Multi-APK delivery method).
It is worth noting that you can submit your wearable app for review for Google to qualify it as a Wear OS app. To do this in the developer console, you need to:
- Upload the watch APK.
- Upload at least one watch screenshot.
- Click Stage presence → Pricing & Distribution, find the Device categories section, tick Wear OS by Google and click Submit update.
Conclusion
In this article we have tried to cover all the aspects that might turn important to developers of wearable apps, especially to those who are just starting out with Wear OS. We very much hope that the points outlined here will facilitate your acquaintance with this operating system. Our experience has shown that development for Wear OS is not much different from the development of smartphone applications. However, developing Wear OS apps you should remember about the guidelines, since, for example, the navigation inside smartwatch apps is somewhat different from the usual one in the apps for “larger” devices. Check out the following link to learn more about the guidelines — design guidelines.
Источник


